The Hyper-V server role in Windows Server lets you create a virtualized server computing environment where you can create and manage virtual machines. You can run multiple operating systems on one physical computer and isolate the operating systems from each other. Hyper-V is a hybrid hypervisor, which is installed via the Windows wizard “Add Roles and Features.
Why Windows PowerShell?
One of the powerful built-in features of Hyper-V is being able to utilize PowerShell for its management operations. Windows PowerShell is a shell developed by Microsoft for purposes of task automation and configuration management. Microsoft designed Windows PowerShell as a tool that helps you automate and quickly solve a lot of tedious administration tasks. You can perform many things with Windows PowerShell and especially in Hyper-V. The possibilities for automation are endless:
- Create and remove virtual machines
- Configure virtual machines (network, disks, memory, …)
- Configure virtual switch
- Start and stop virtual machines
- Save virtual machines
- …
Review the following resources to learn why you should use Hyper-V:
- Hyper-V overview
- Compare VMware – Why Microsoft
- Learn about the features in Hyper-V
- Building Your Cloud Infrastructure
Now, let’s take a look at some examples of how to automate tasks with PowerShell in Hyper-V.
Hyper-V installation
First, you must install the Hyper-V role on your Windows Server. Remember that it is possible to install Hyper-V not just on a Windows server, but also on Windows 10. Use this command to install it on Windows Server:

Make sure that you include the -IncludeManagementTools parameter. This will install the Hyper-V Manager console and the Windows PowerShell module for Hyper-V.
Use this command to activate the role on Windows 10:

Nested Virtualization
Note that you install Hyper-V inside of a Virtual Machine. It is called “Nested virtualization”. Nested Virtualization is a feature that allows you to run Hyper-V inside of a Hyper-V virtual machine. In other words, with nested virtualization, a Hyper-V host itself can be virtualized. This feature is really awesome to set-up a Hyper-V lab in a virtualized environment, or to test multi-machine scenarios without the need for individual hardware.
There are some prerequisites in order to use Nested Virtualization:
- A Hyper-V host running Windows Server 2016 or Windows 10
- A Hyper-V VM running Windows Server 2016 or Windows 10
- A Hyper-V VM with configuration version 8.0 or greater
- An Intel processor with VT-x and EPT technology
To configure Nested Virtualization, you must power off the Virtual Machine and run the following command on the physical Hyper-V host:

In order to disable the Nested Virtualization, you just need to set the « ExposeVirtualizationExtensions » value to « $false ».
Hyper-V PowerShell Module
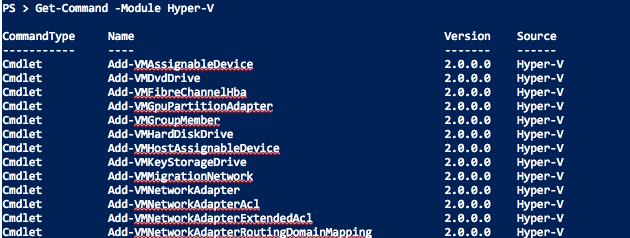
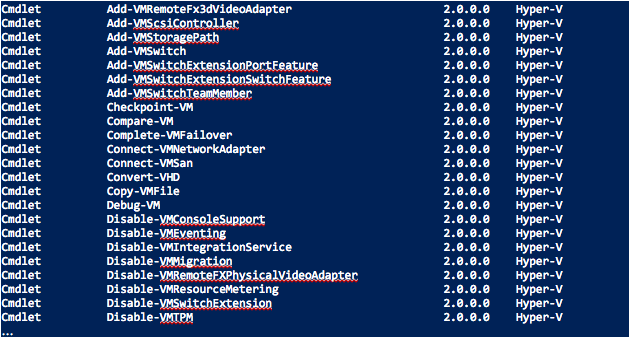
Now you can use the Get-Command cmdlet to check if the PowerShell Hyper-V module is available:


With more than 230 cmdlets at your disposal, there is plenty that you can do with PowerShell and Hyper-V.

Hyper-V cmdlets
Hyper-V cmdlets are designed so that it is easy for IT pros to go from thinking about the task to actually performing the task. The following table from Microsoft, shows the task and the associated cmdlet syntax:
| Task | Windows PowerShell command to perform the task |
| Create a new virtual machine named “test” | New-VM –Name Test |
| Get a list of all virtual machines | Get-VM |
| Create a new virtual hard disk at d:\VHDs\test.vhd | New-VHD –Path D:\VHDs\test.vhd |
| Start all virtual machines whose name begins with “web” | Start-VM –Name web* |
| Connect the virtual network adapter on the “test” virtual machine to the “QA” switch. | Connect-VMNetworkAdapter –VMName test –SwitchName QA |
The nouns of the Hyper-V cmdlets are designed to make it easier for administrators. All cmdlets in the Hyper-V module use one of three following noun prefixes:
| Prefix | Purpose |
| VM | Cmdlets for managing virtual machines |
| VHD | Cmdlets for managing virtual hard disk files |
| VFD | Cmdlets for managing virtual floppy disk files |
Examples
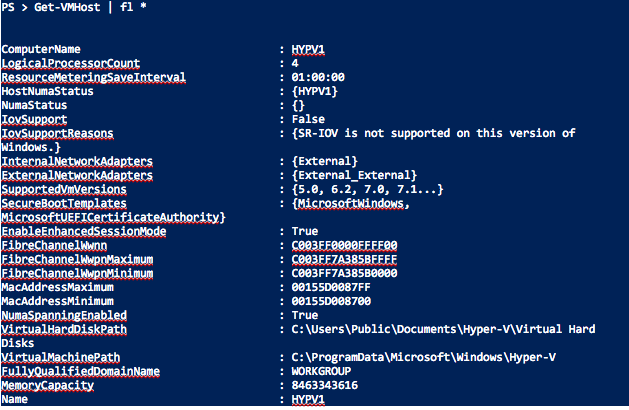
So, let’s start by running the Get-VMHost cmdlet to see more info about our Hyper-V host. So I want to get information from my Virtual Machine Host, it means I need to use the Get-VMHost cmdlet:


You can add some filters using the Select-Object cmdlet:

Ok, now let’s retrieve all the Virtual Machines running on the Hyper-V host. To perform this task, use the Get-VM cmdlet without any parameters:

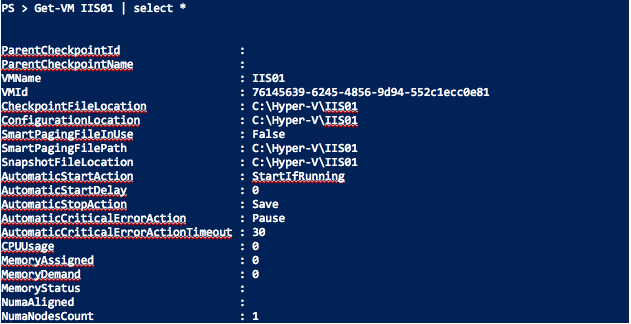
Both VMs are stopped. If we need more information about a VM, we just need to run the same command with the VM name:


Output has been truncated.
The Start-VM cmdlet starts a virtual machine on the Hyper-V host. So I can run the following to start a VM:

I can run this command, to start all virtual machines whose names end with “01”:

You also can increase the number of processors:

Or increase the memory:

To check if previous actions were applied, you can of course use the Hyper-V console or run the Get-VM cmdlet.
To create a checkpoint, select the virtual machine using the Get-VM cmdlet and pipe this to the Checkpoint-VM cmdlet. Use the –SnapshotName parameter to give a name:

Finally, you can of course create a virtual machine:

This example creates a virtual machine named “NEW01” that has 2 GB of memory and that is connected to a new virtual hard disk that uses the VHDX format.
Conclusion
After reviewing your Hyper-V environment using these cmdlets, you can quickly and easily configure your Virtual Machines. I can’t cover all the Hyper-V cmdlets, but the idea of this article was to describe several examples and explain how PowerShell can help you in your day-to-day sysadmin tasks. Thanks to PowerShell, you can now easily automate and manage your Hyper-V hosts.
Thanks for reading!


Leave A Comment