In today’s blog let’s take a look on how to perform an efficient backup and restore for Microsoft Exchange Server 2016. Let’s get started with it. First things first, what is Microsoft Exchange Server? It is a mail and calendaring server developed by Microsoft which runs exclusively on Windows Server operating systems.
Now let’s discuss about the Backup and Restore of Exchange Server 2016 using Vembu BDR Suite and Vembu Network Backup through the following:
- Exchange Server Backup and Restore
- User Mailbox Restoration
Vembu BDR and Vembu Network Backup Client Installer
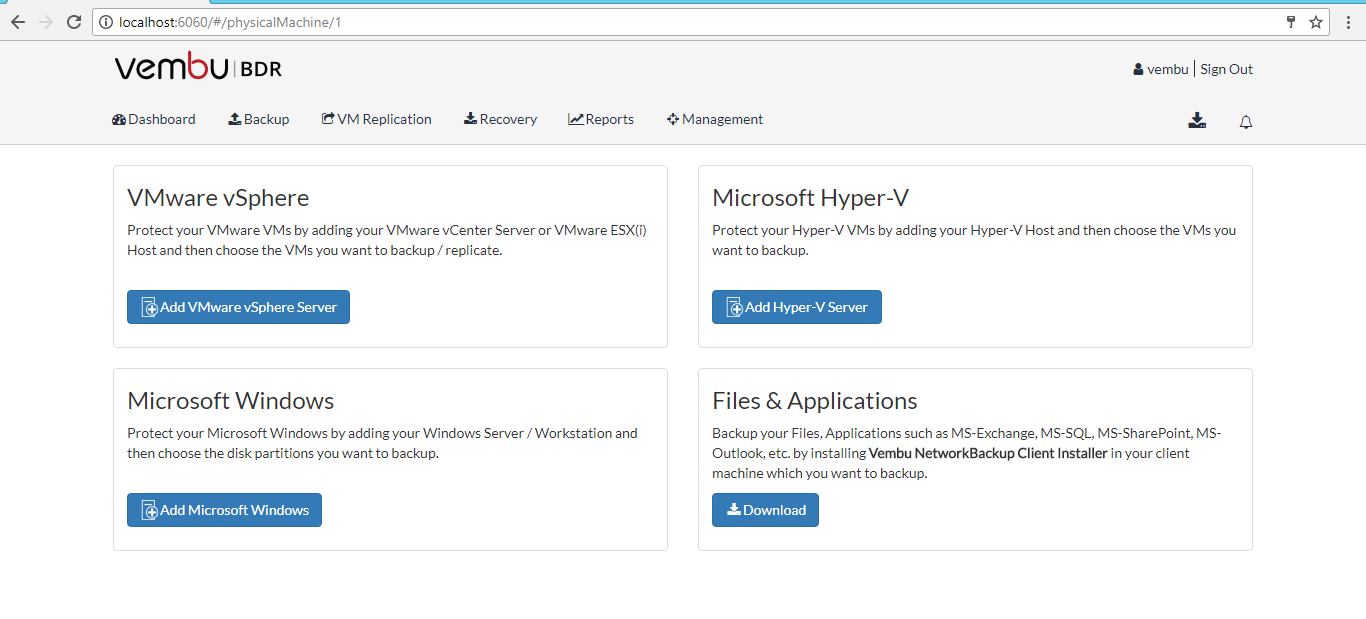
Vembu BDR Backup server is a Windows/Linux based server machine that can be installed as a service and works flawlessly on both (physical and virtual) environments. Backup your Files and Application i.e Exchange server by installing Vembu Network Backup Client Installer on your client machine that has to be backed up.
Vembu NetworkBackup
Vembu Network Backup is crafted with enterprise level functionality to protect data of the businesses across file servers, application servers, workstations and other endpoints.
How to download and install Vembu Network Backup Client Installer?
- Click on the download option under the files & applications menu
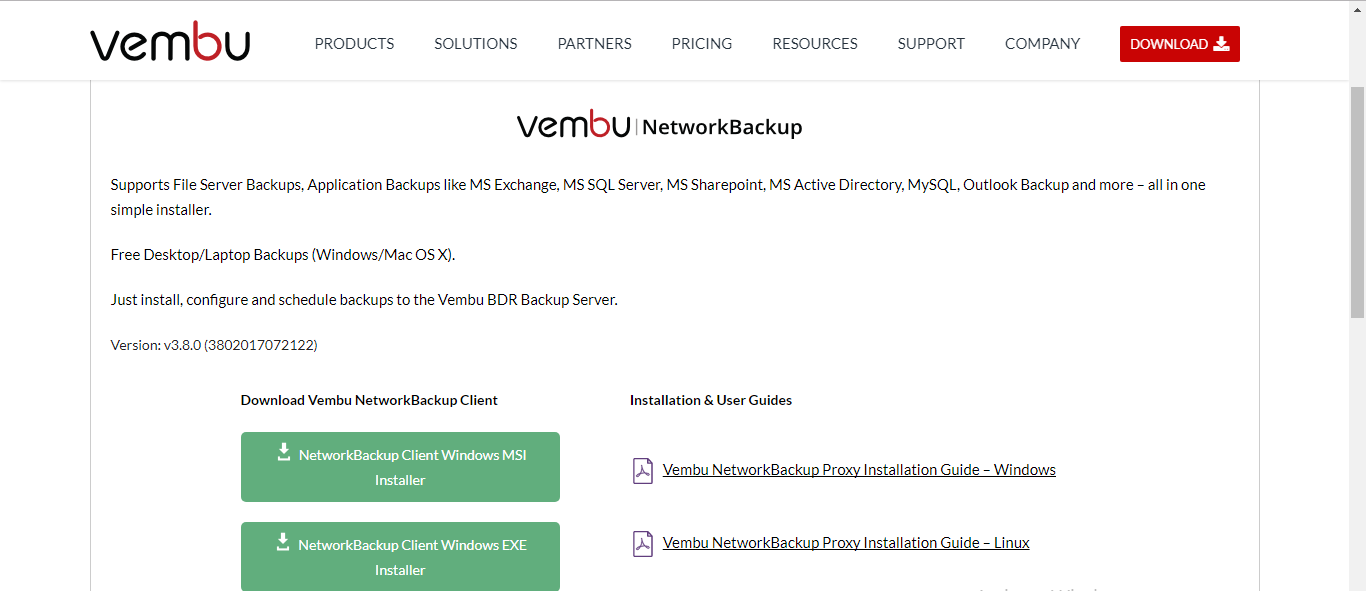
- Now Network Backup Client Windows Installer is initiated for download
- Download and Install it. Follow below link for reference https://www.bdrsuite.com/guide/vembu-networkbackup-user-guide/getting-started.html?MSExchangeServerBackup.html
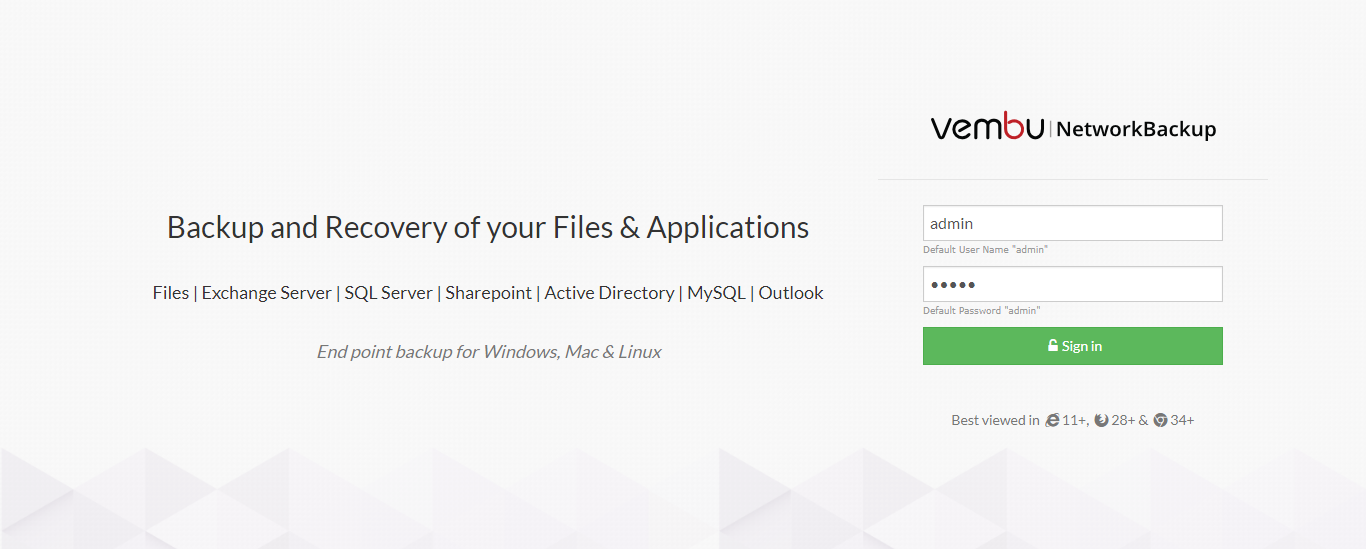
- Login Vembu Network Backup
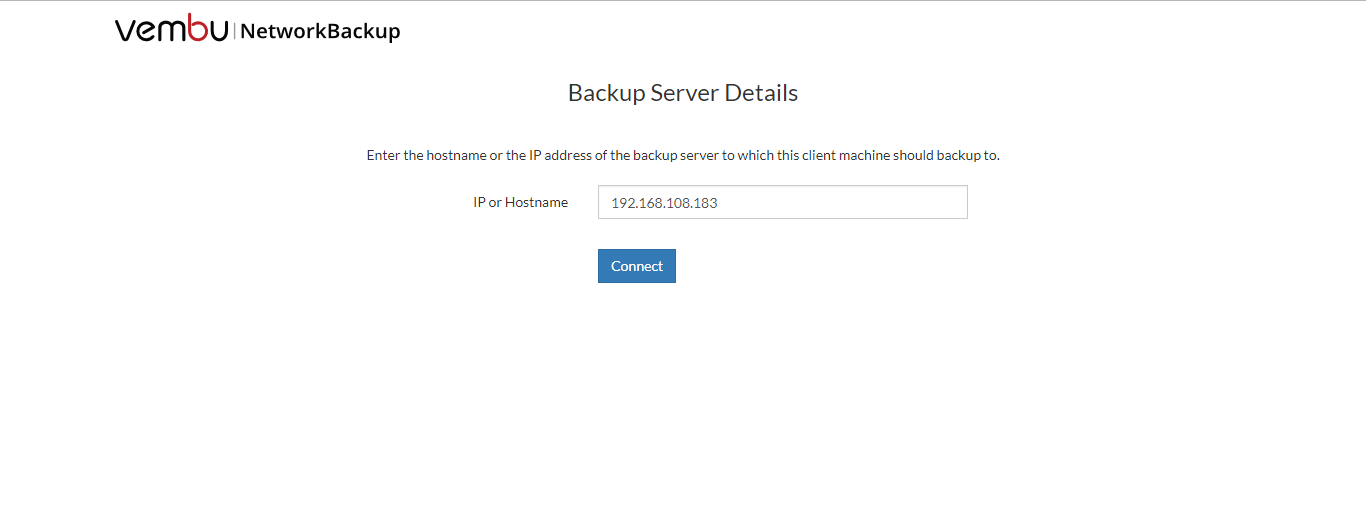
- Enter hostname or IP Address of the backup server to which this client machine should backup
Now let’s begin to configure backup for the Microsoft Exchange Server first. Here we go!
- Clicking on MS Exchange Server option.You will be redirected to Exchange Server Plugin window
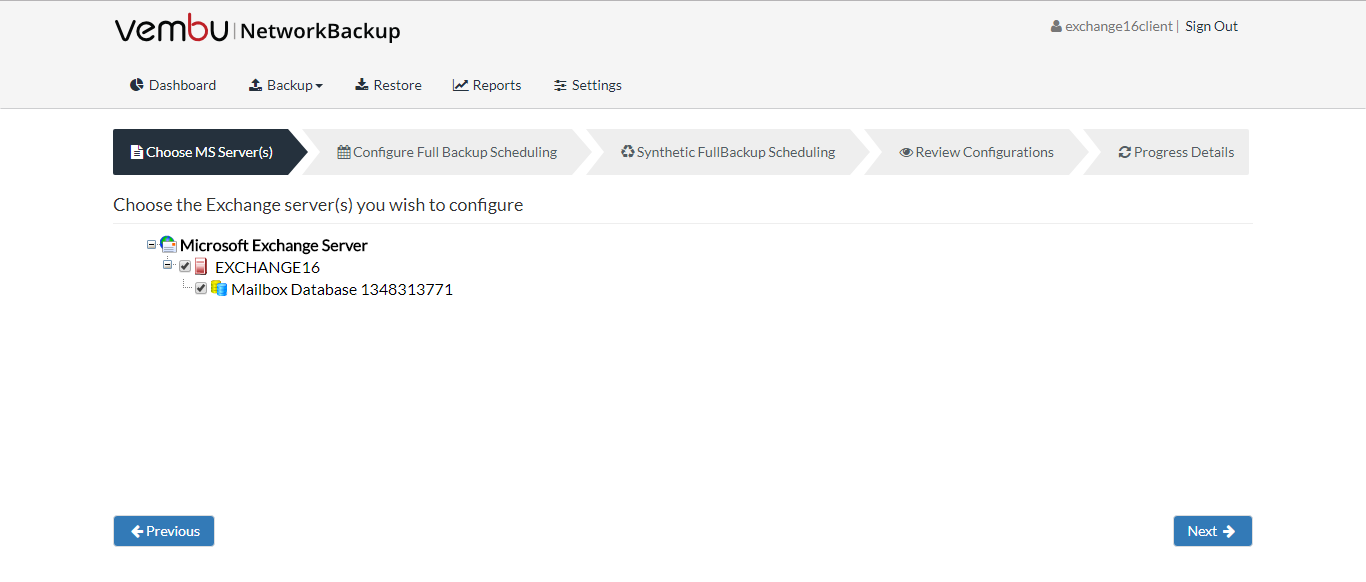
- Choose Exchange server and click next
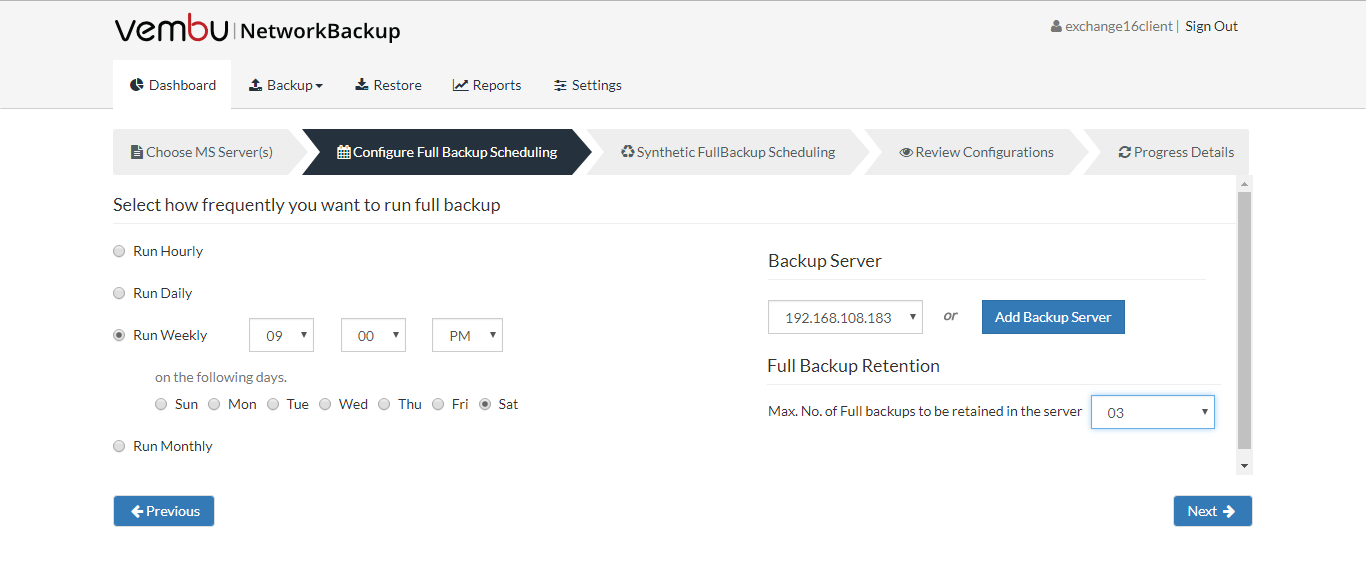
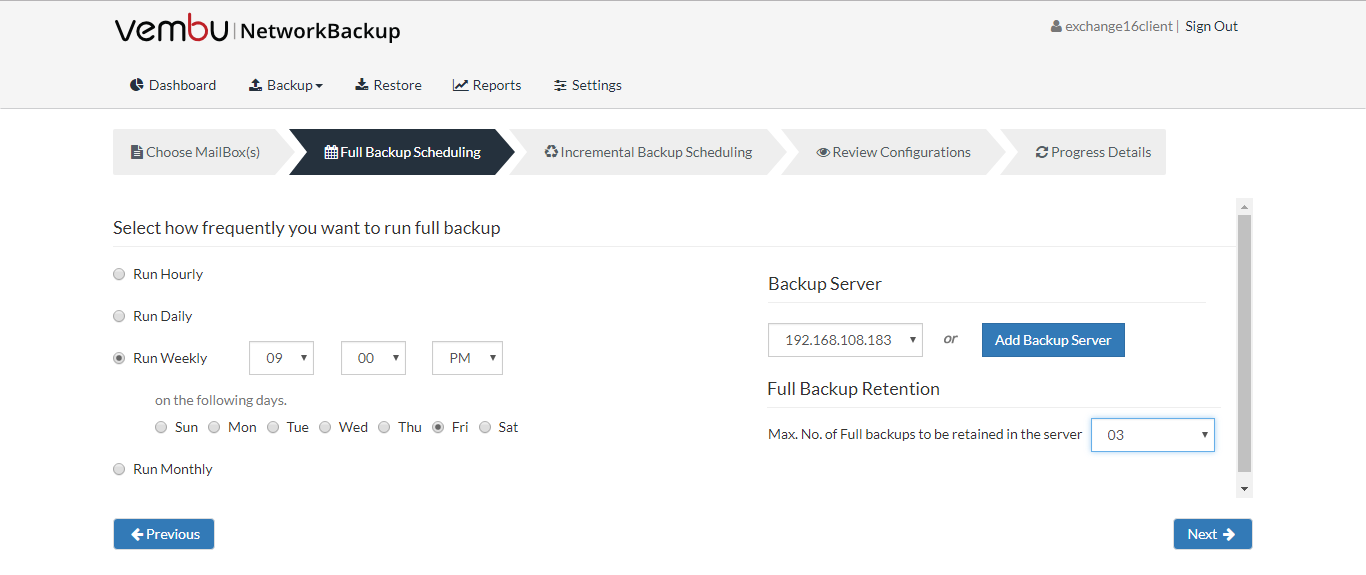
- Users can configure their backup schedules flexibly based on their requirement.They can choose from Hourly/Daily/Weekly options for backup schedules.
Run Hourly – This option will let user run full backup in hourly time intervals.
Run Daily – This option will let user run full backup once a day and user can specify the time at which full backups should run every day.
Run weekly – This option will let user run full backup once in a week and user can specify the day and time of their choice, when to perform full backups in a week.
Run Monthly – This option will let user run full backup once a month and user can specify the day, time and month of their choice for full backup schedules.
Note: Run Monthly is the recommended and default configuration.
Adding Backup Server
If a server you want to schedule backups, is not configured; add the server using the ‘Add Backup Server’ option.
Full Backup retention
We can also specify the maximum number of full backups to be retained. The default value is 2 for full backup retention.
- After scheduling full backup, Click next
Synthetic Full Backup Scheduling
Synthetic full backups consolidate the data from the latest full backup or synthetic full backup and any subsequent incremental backups into one archive file, instead of reading and backing up data directly from the client computer.
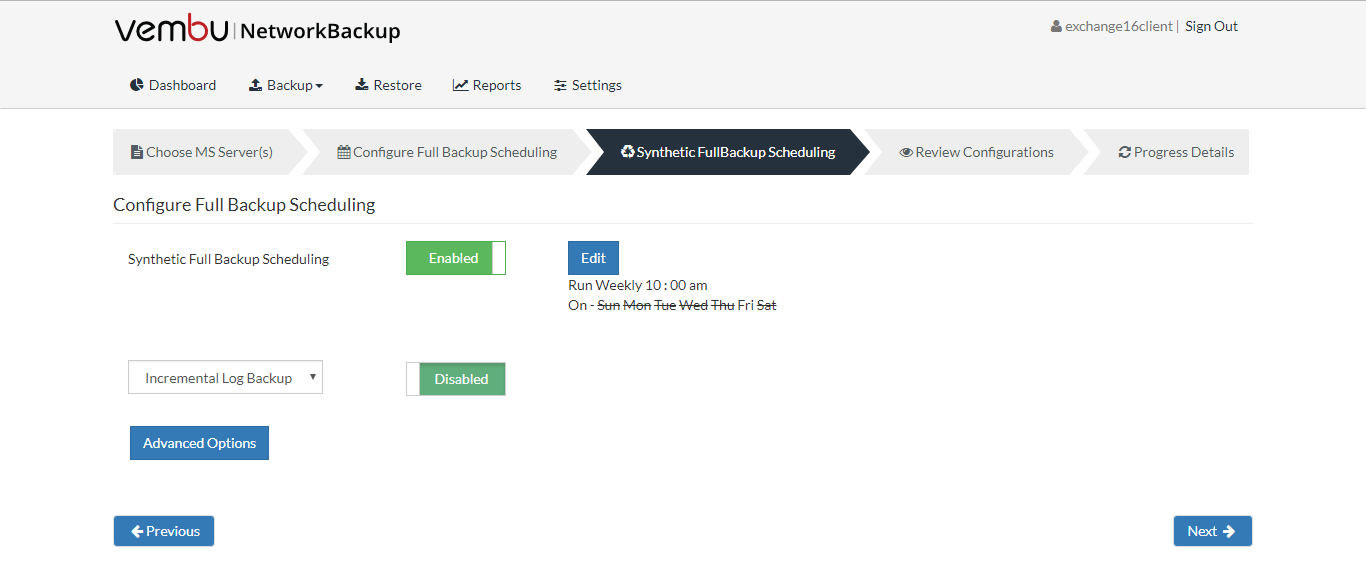
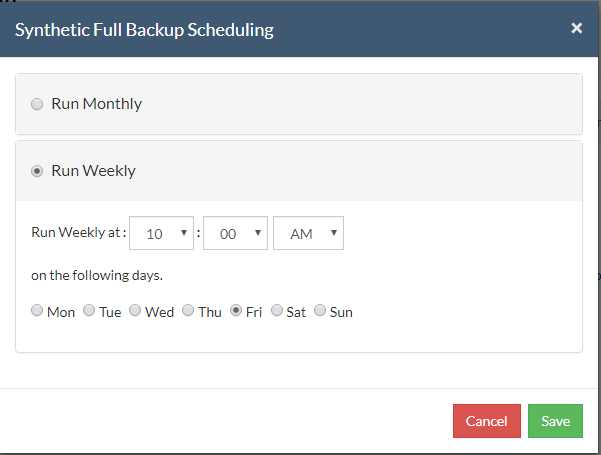
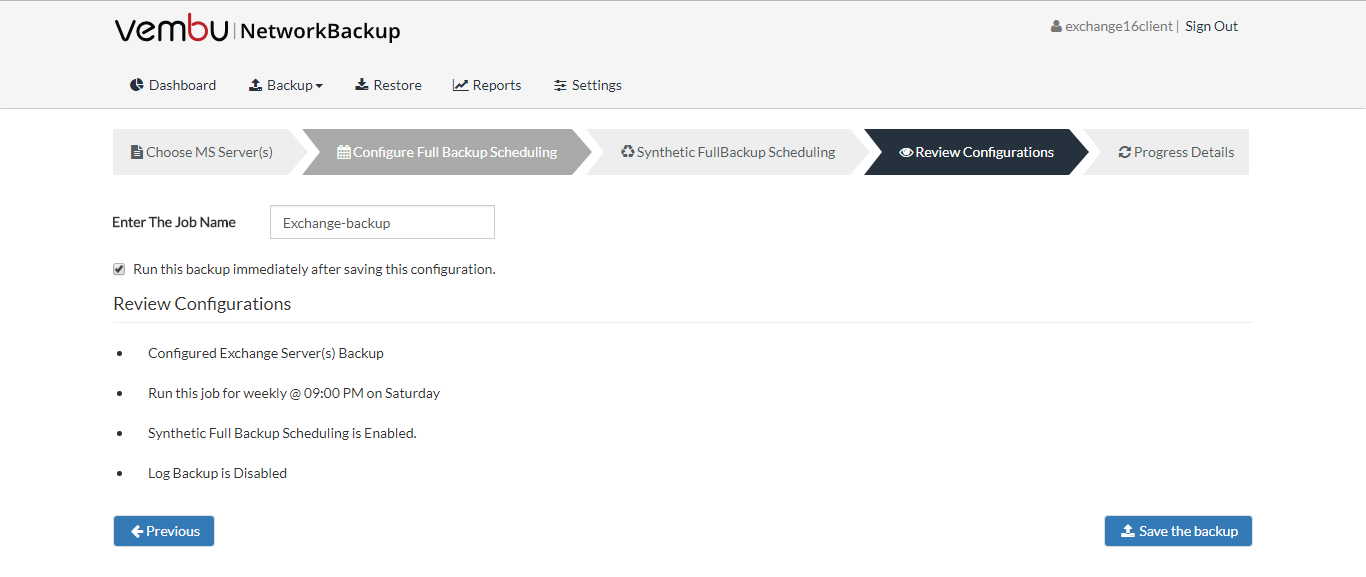
- Configure Synthetic Full backup Scheduling and Save and set the time interval as well
- Enter a job name and review the Exchange server backup configuration and Save the backup
- Exchange server backup is completed
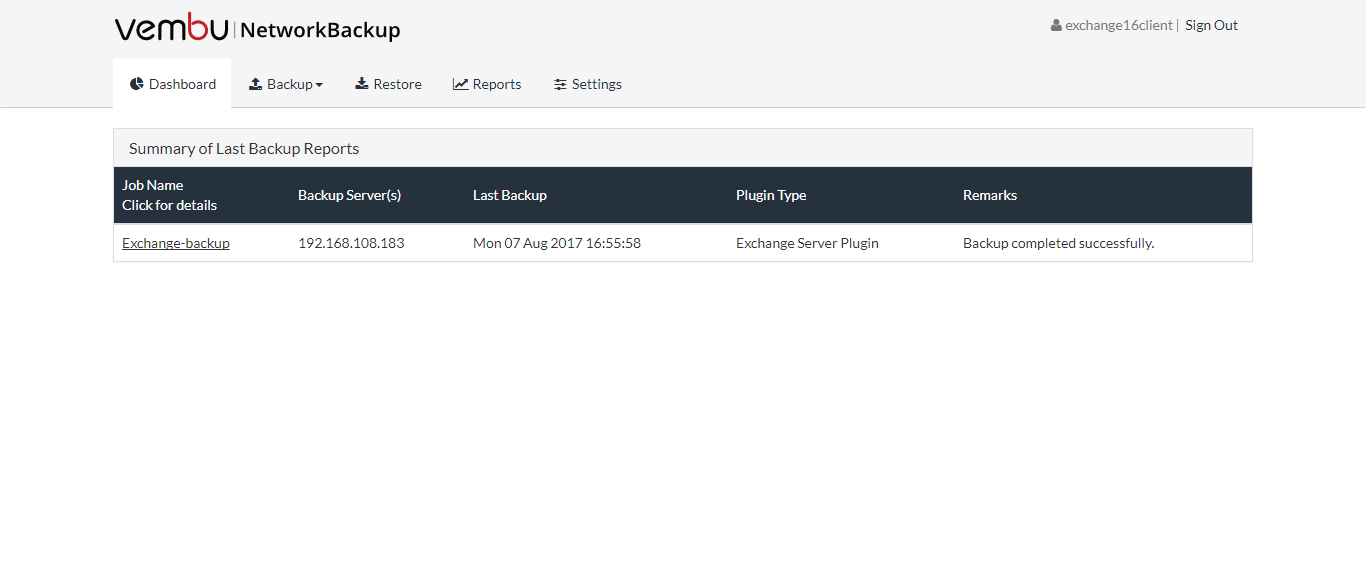
The backup for Exchange Server is initiated successfully.Let’s get to know on how to perform the restore for it.
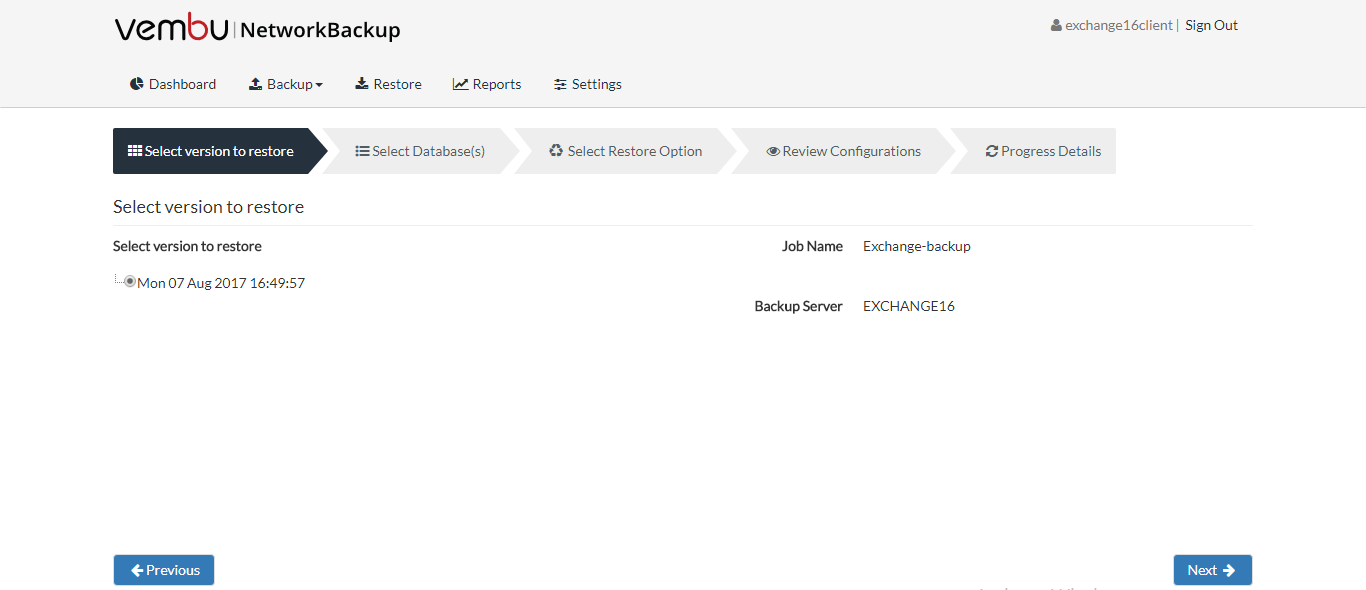
- To Restore Exchange server, Just click Restore button
- Select the restore point and click next
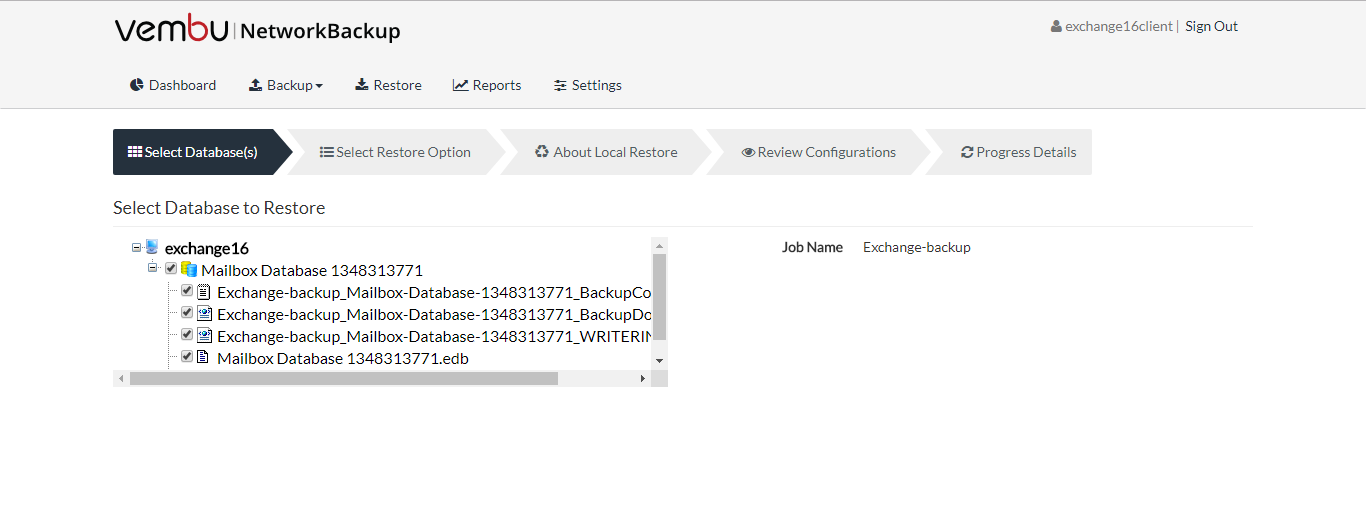
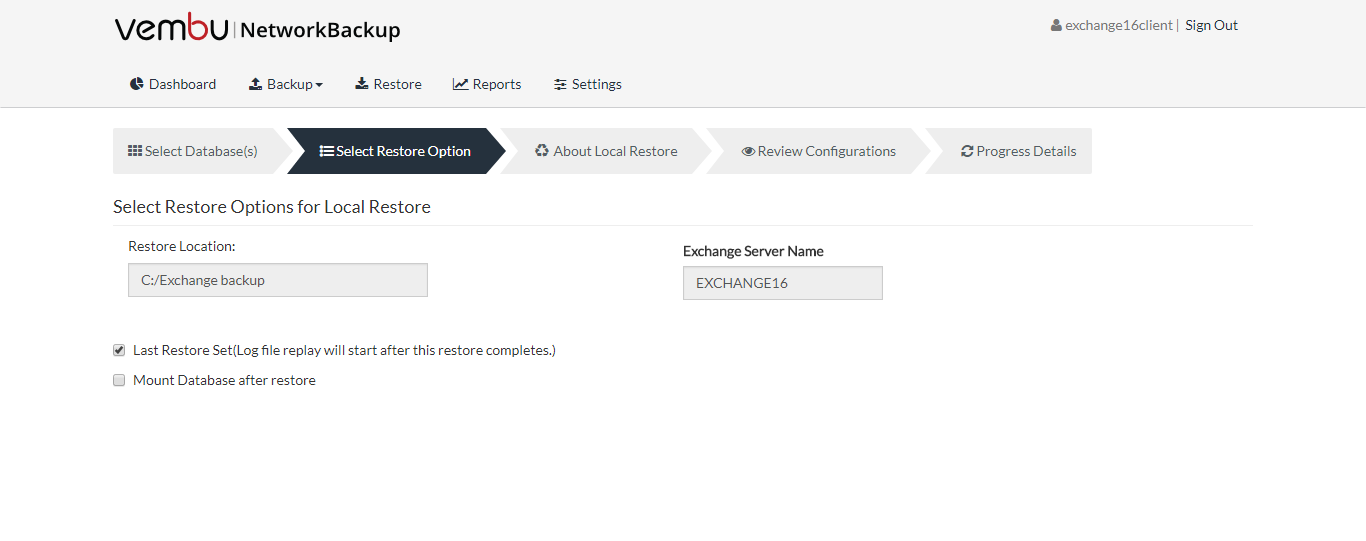
- Select the files to be restored and mention the location as well. Now, click Next.
- Give a name for Exchange server and click next
- Restore progress can be viewed as soon as you initiate the restore process
Backup and Restore of Individual User Mail
MS Exchange Mailbox plugin backup is a folder level backup, where users can either backup a mailbox of a specific user on the whole or can perform backup on a folder and subfolder too.
- In Exchange admin center, we have created 5 new users. Now we will restore that user mailbox using MS Exchange mailbox

Backing up Individual User Mailbox
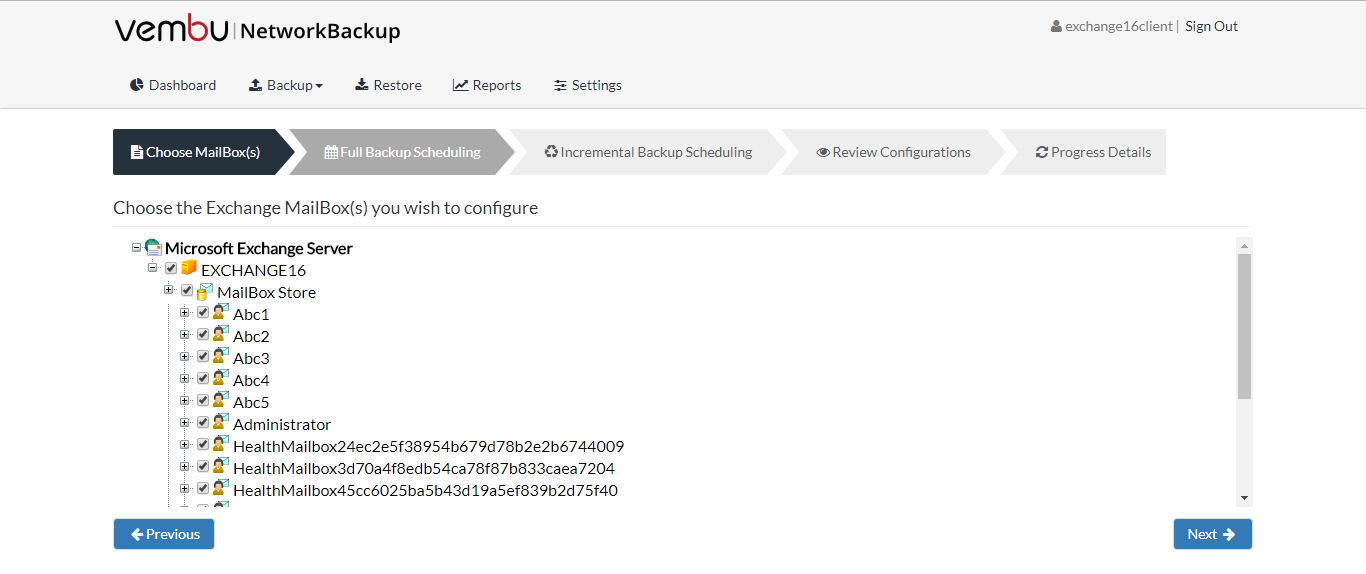
- Choose the Exchange Mailbox which you wish to configure and click next
- Select how frequently you would want to schedule the backup and click next.
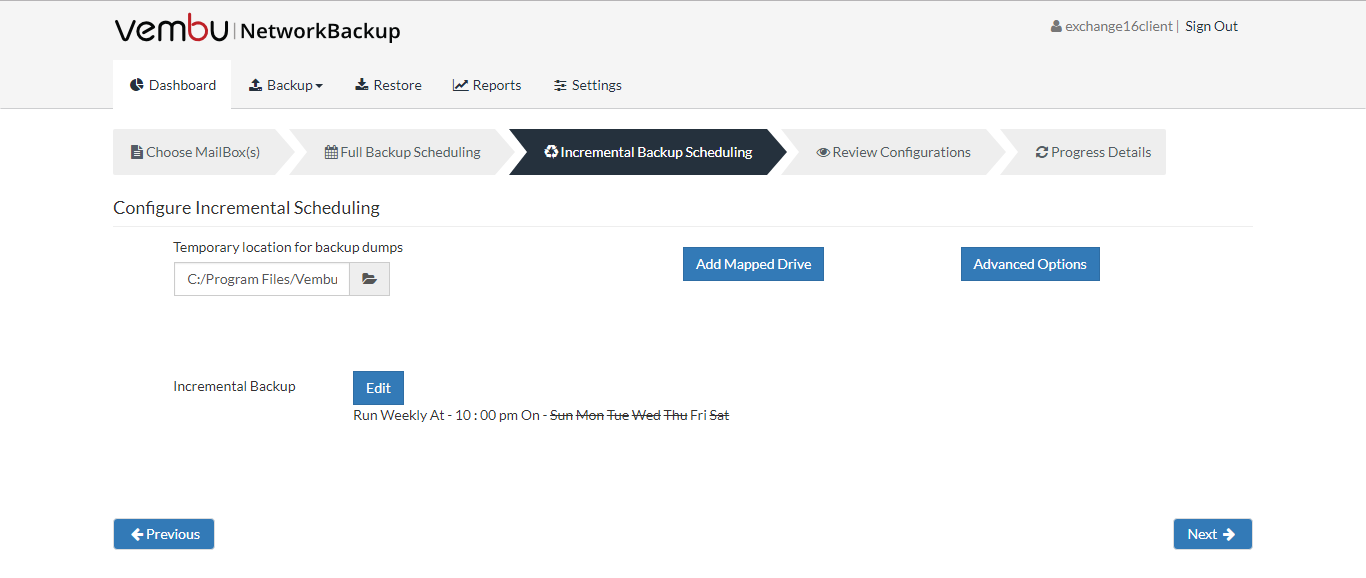
- Configure Incremental Scheduling and click next
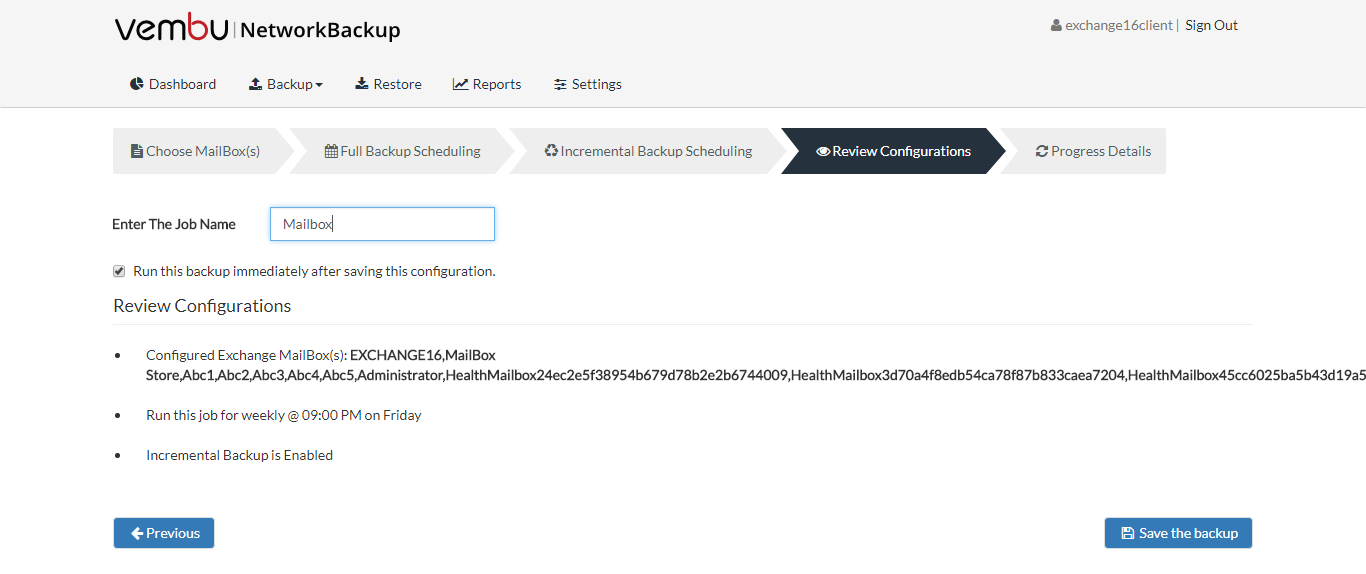
- Enter jobname and save the backup
Restoring Individual User Mailbox
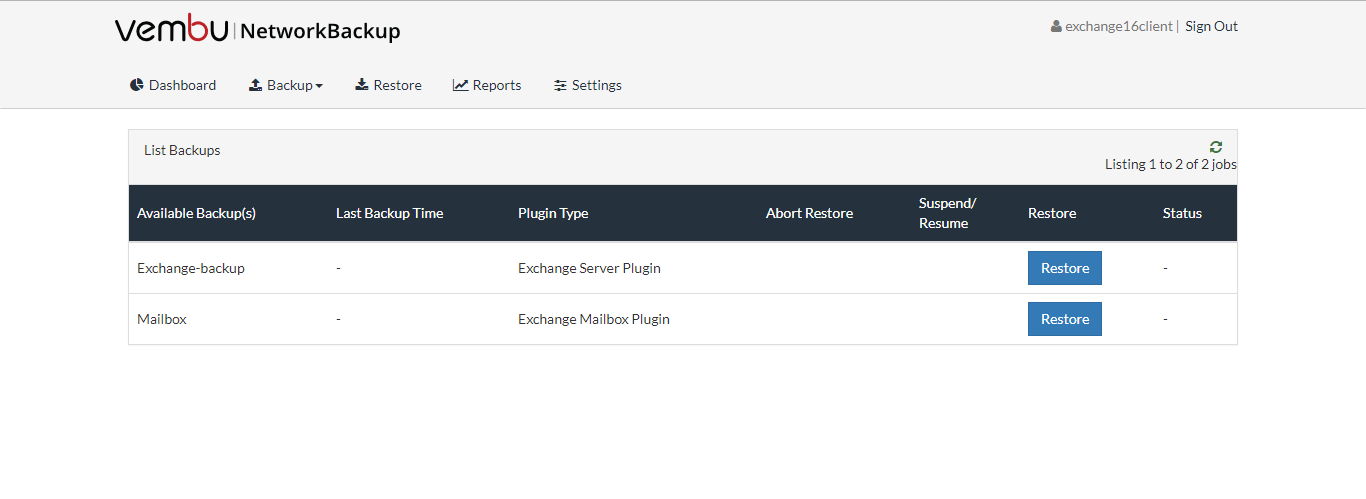
- Choose the mailbox backup which you wish to Restore
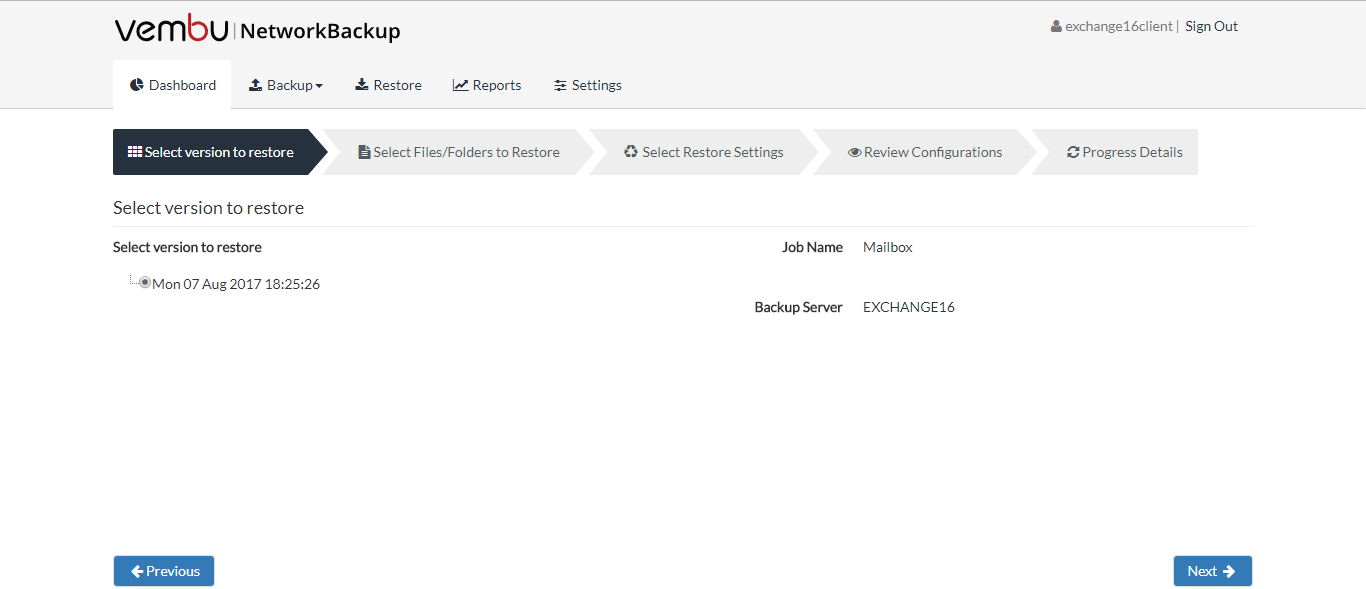
- Select the respective restore point and click next
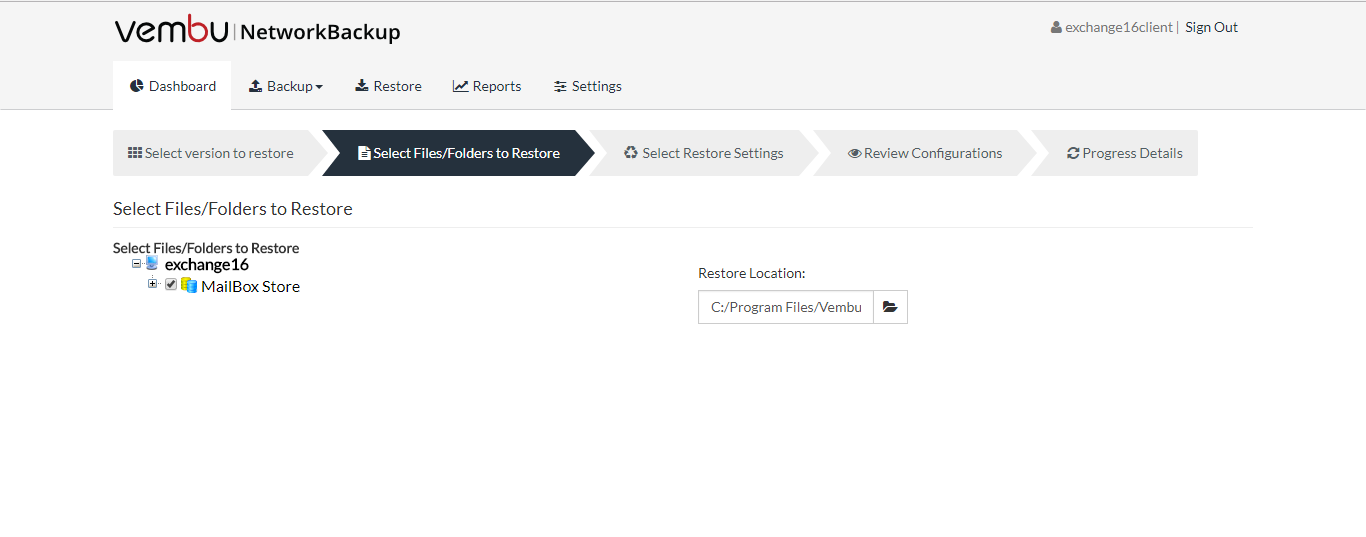
- Choose the data to be restored and click next
- Review the configuration settings that you have made and click Restore
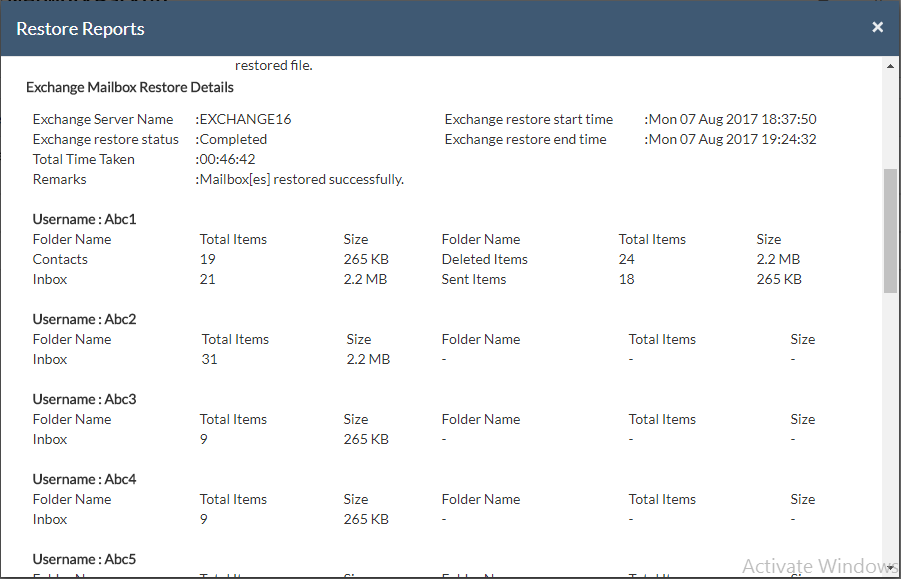
- Proceed further for verifying the Exchange Mailbox Restoration status
Note : To backup Exchange server 2016 data using Exchange Mailbox backup, you need to install Outlook 2013 on the exchange server machine.
Conclusion
Vembu NetworkBackup is crafted with enterprise level functionality to protect data of businesses across file servers, application servers, workstations and other endpoints. Using Vembu Network Backup, IT administrators can protect their Exchange environment and can restore the entire database or even a single email as well.
Follow our Twitter and Facebook feeds for new releases, updates, insightful posts and more.


Leave A Comment