
Introduction
In the world of virtualization, ensuring your VMs can move freely between hosts is crucial for high availability and efficient resource management. This blog post dives into how Proxmox VE, a powerful virtualization platform, can be leveraged with shared storage to achieve just that. We’ll explore the steps involved in deploying Linux VMs on shared storage within Proxmox VE, unlocking the benefits of live migration and simplified VM management across your infrastructure.
Why Shared Storage is Essential for Live Migration in Proxmox VE ?
Live migration, a key feature in Proxmox VE, allows you to seamlessly move running VMs between physical hosts without downtime. But for this magic to happen, shared storage plays a critical role. Here’s why:
The Challenge of Local Storage
Imagine a VM with its virtual disks stored directly on the local storage of a Proxmox VE node. To migrate it live, the entire VM state, including memory and disk images, needs to be transferred to the destination node. This process can be slow and disruptive, potentially causing performance hiccups for the VM during the migration.
Shared Storage to the Rescue
Shared storage acts as a central repository accessible by all Proxmox VE nodes in the cluster. When you deploy a Linux VM with its virtual disks on shared storage, both the source and destination nodes can access the VM’s data simultaneously. During live migration:
- The running VM’s memory state is streamed directly from the source node to the destination node
- The virtual disk images, already residing on the shared storage, are simply pointed to by the destination node, eliminating the need for large data transfers
This significantly reduces downtime and ensures a smoother migration experience for your VMs.

Benefits Beyond Live Migration
Shared storage offers additional advantages:
- High Availability: If a node fails, VMs stored on shared storage can be easily restarted on another available node, minimizing service disruption
- Centralized Management: You can manage all your VM disks from a single location, simplifying storage administration
- Scalability: Adding new nodes to your Proxmox VE cluster becomes easier as VMs can leverage the existing shared storage pool
Steps to create a Linux VM on a shared storage
This blog offers a concise guide to creating Linux VMs on Proxmox VE, leveraging shared storage for maximum agility. Shared storage acts as a central hub for VM configurations and files, enabling seamless live migration between Proxmox nodes without downtime. We’ll delve into the steps involved in deploying these mobile VMs, unlocking the benefits of centralized management and simplified resource utilization within your virtualized environment.
Prerequisites
- A Proxmox VE cluster with one or more cluster nodes
- A shared storage configured on one of the cluster nodes
- A Linux ISO file copied to the Proxmox VE host server’s local storage
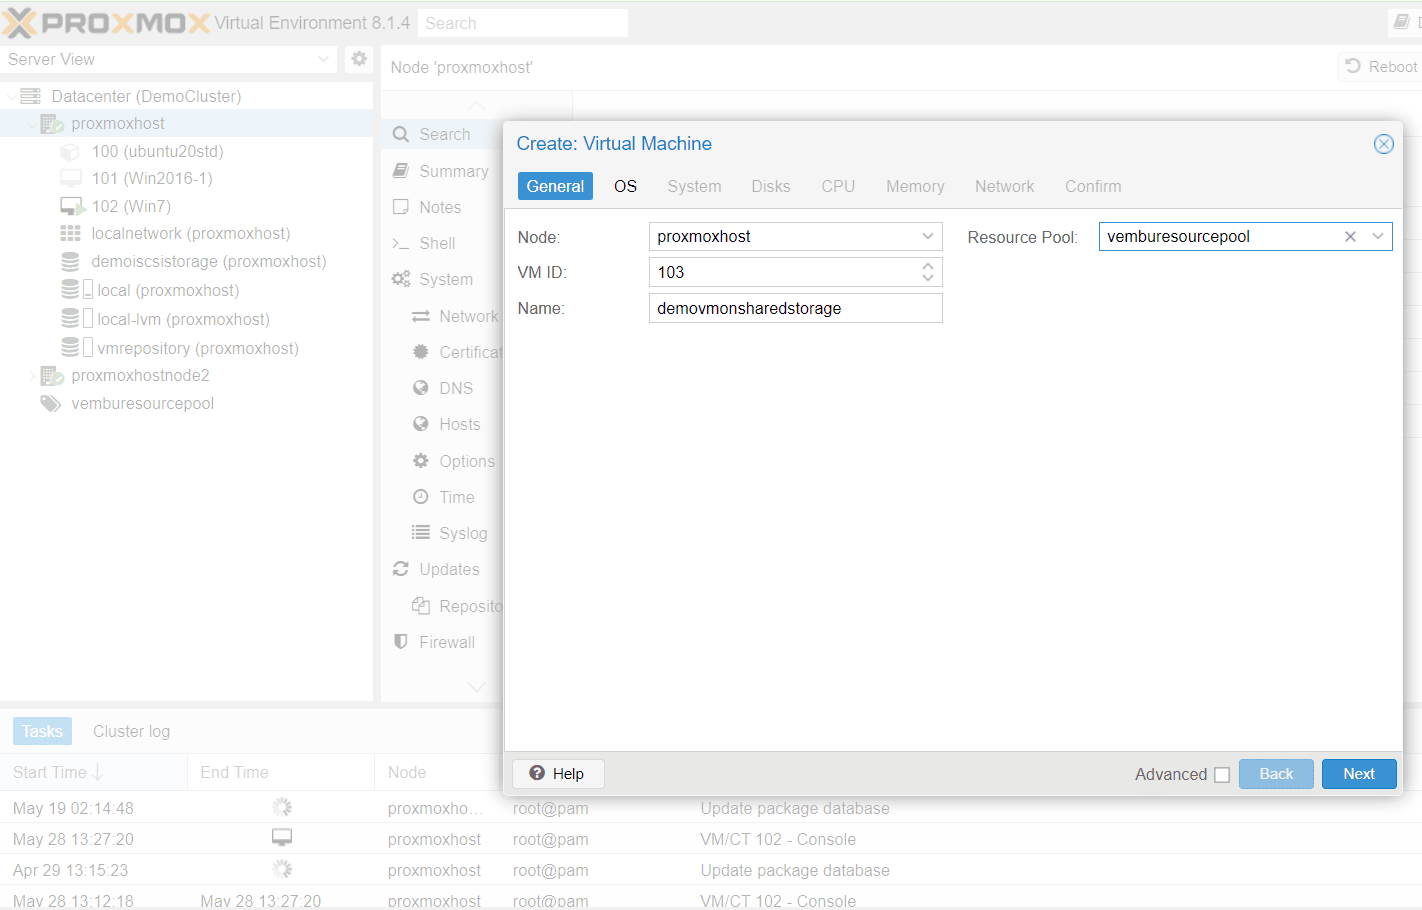
First, login to the Proxmox VE server. Choose the desired host and right-click on it. Select “Create VM” from the context menu. Fill in the details such as the VM name and the resource pool it will utilize.
The below screenshot shows this step under General tab.
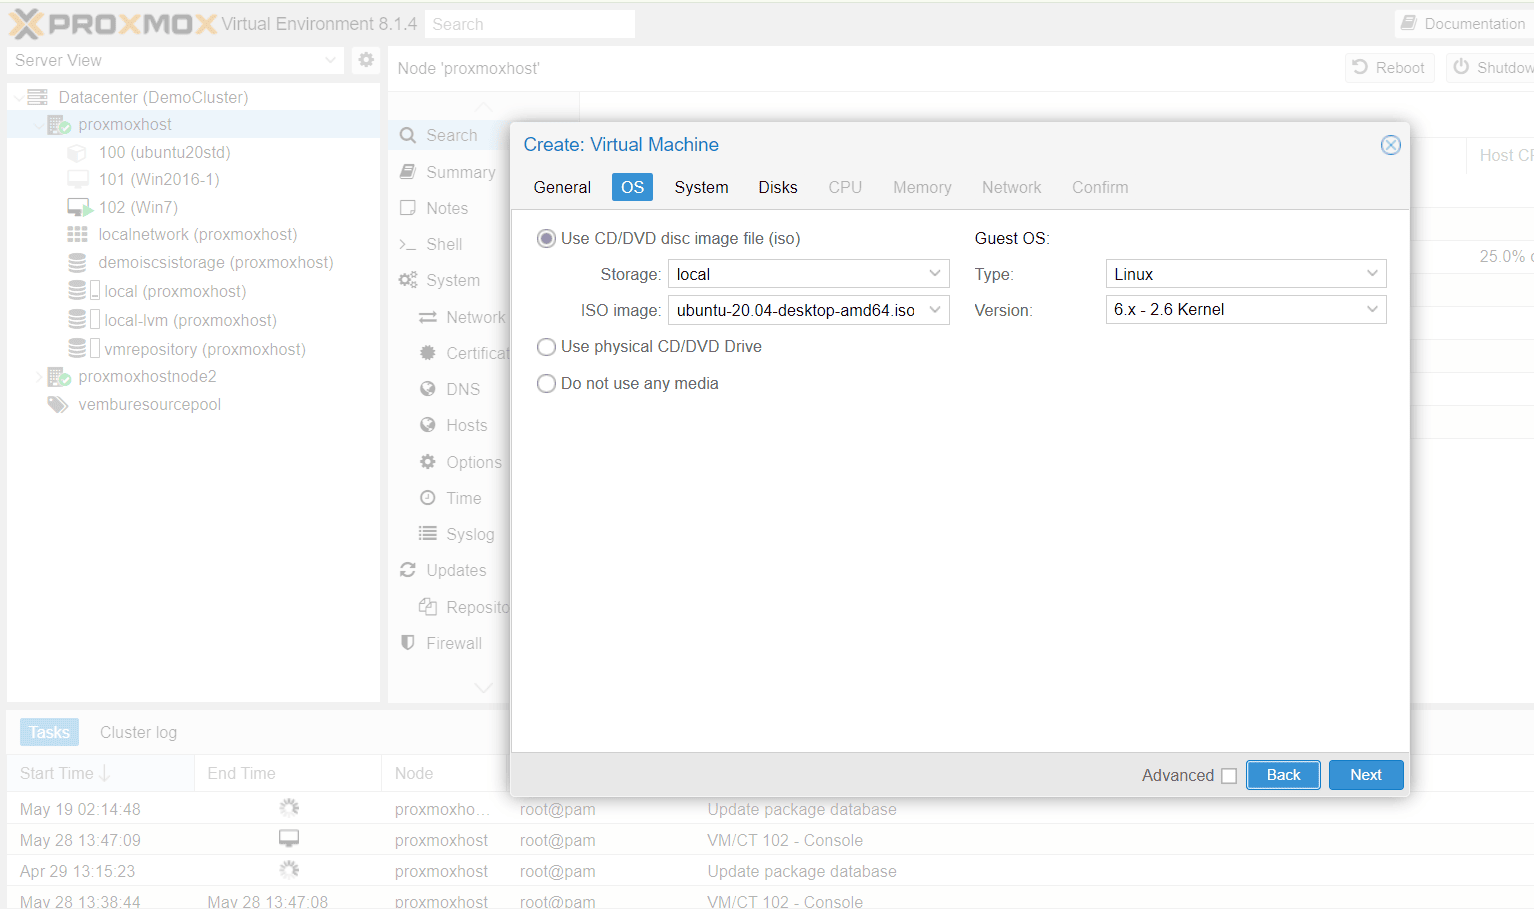
Click “Next” to proceed to the “OS” tab. Here, select the ISO file you previously copied. This ISO file will initiate the installation process. Choose “Linux” as the Guest OS type and select Kernel Version 6.x. Finally, click “Next” again to move on to the “System” tab.
The below screenshot shows this step
The System tab pre-selects default settings for the graphics card, machine firmware, BIOS, and SCSI controller. You can leave these settings unchanged and proceed to the “Disks” tab.
On the “Disks” tab, locate the iSCSI storage you created in the previous blog post. Select it from the list of available storage options. Then, choose the disk image (LUN) attached to this iSCSI storage. You can leave the remaining default settings on this tab, including the Read & Write settings under the “Bandwidth” section.
The below screenshot shows this step

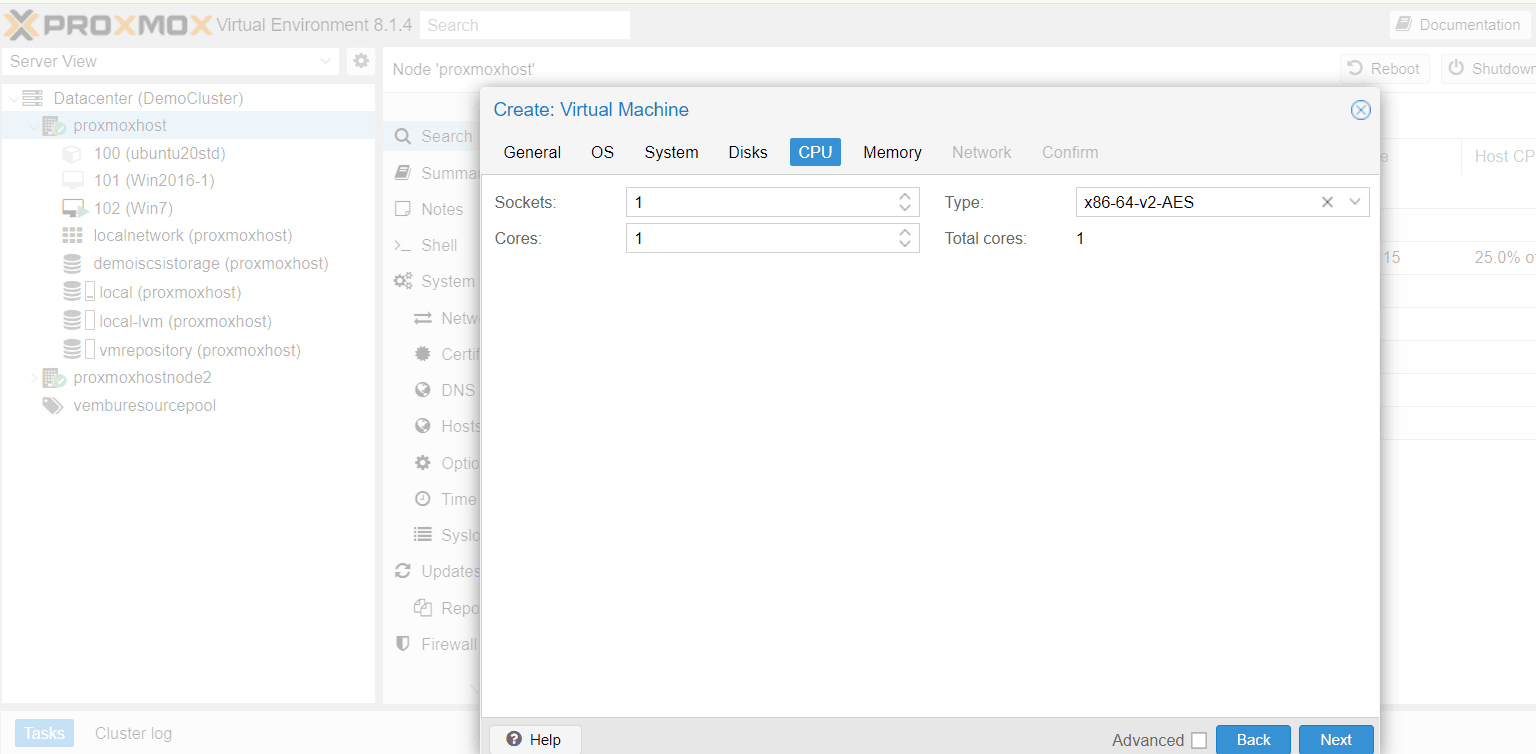
Click Next to CPU tab.
On this screen, you can configure the virtual CPU (vCPU) for your Linux VM. Currently, we’re setting up one socket with one core. This is suitable for basic workloads. If you require more processing power later, you can easily adjust these settings (vCPU cores and sockets) to enhance performance. Click “Next” to proceed to the “Memory” tab.
This section specifies the total memory allocated to your Linux VM. By default, 2 GB of memory is assigned. You have the flexibility to increase or decrease this amount based on your VM’s requirements. Click “Next” to proceed to “Network” tab.
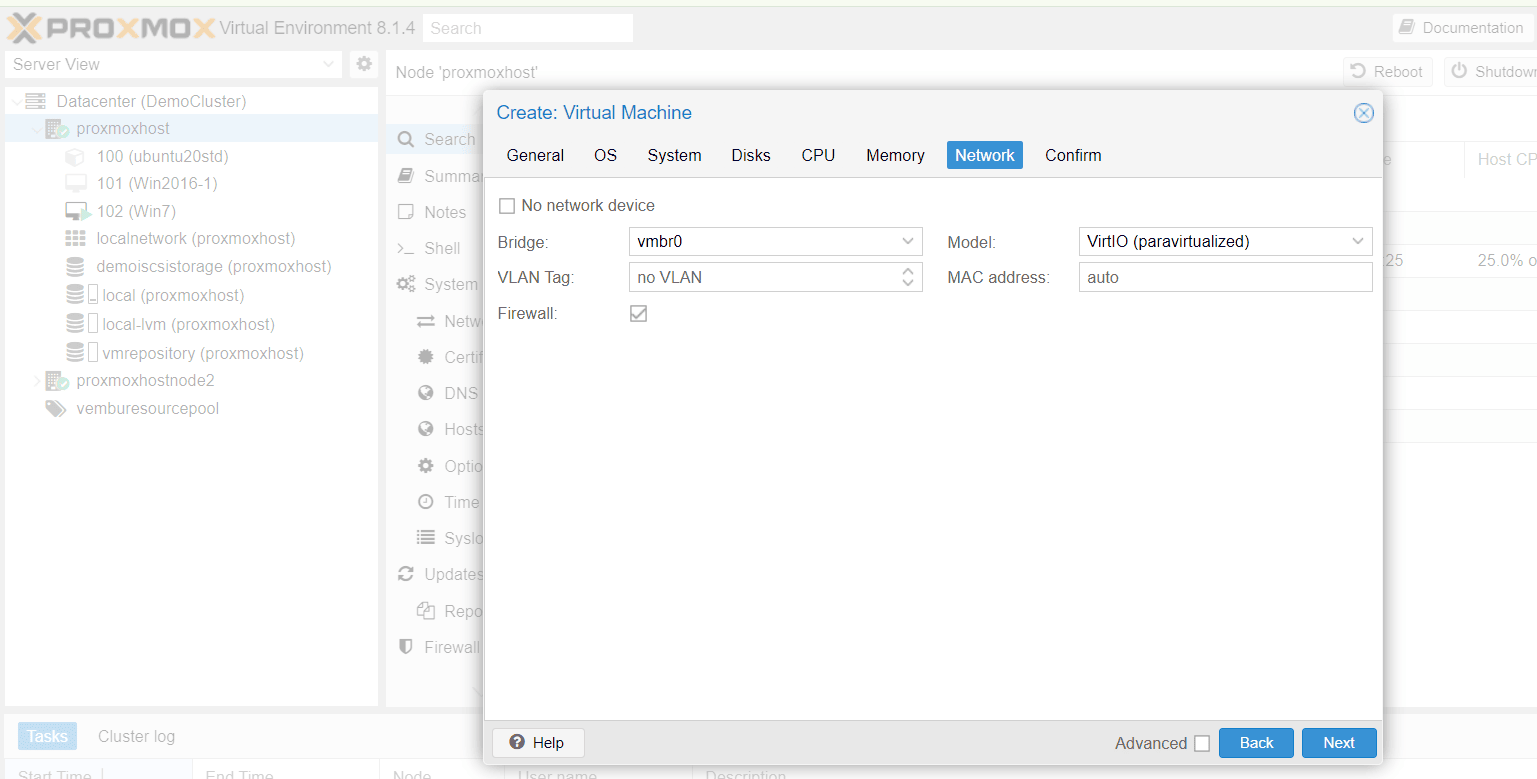
The “Network” tab allows you to configure the network interface card (NIC) for your Linux VM. By default, the high-performance VirtIO NIC type is selected, which is recommended for optimal performance. Additionally, the “vmbr0” bridged mode is chosen, allowing the VM to directly communicate with devices on your physical network.
To avoid conflicts with existing network devices, a random MAC address is automatically generated for the NIC (this is indicated by the “auto” selection). Finally, you have the option to enable or disable the firewall for this specific NIC.
The below screenshot shows this step.
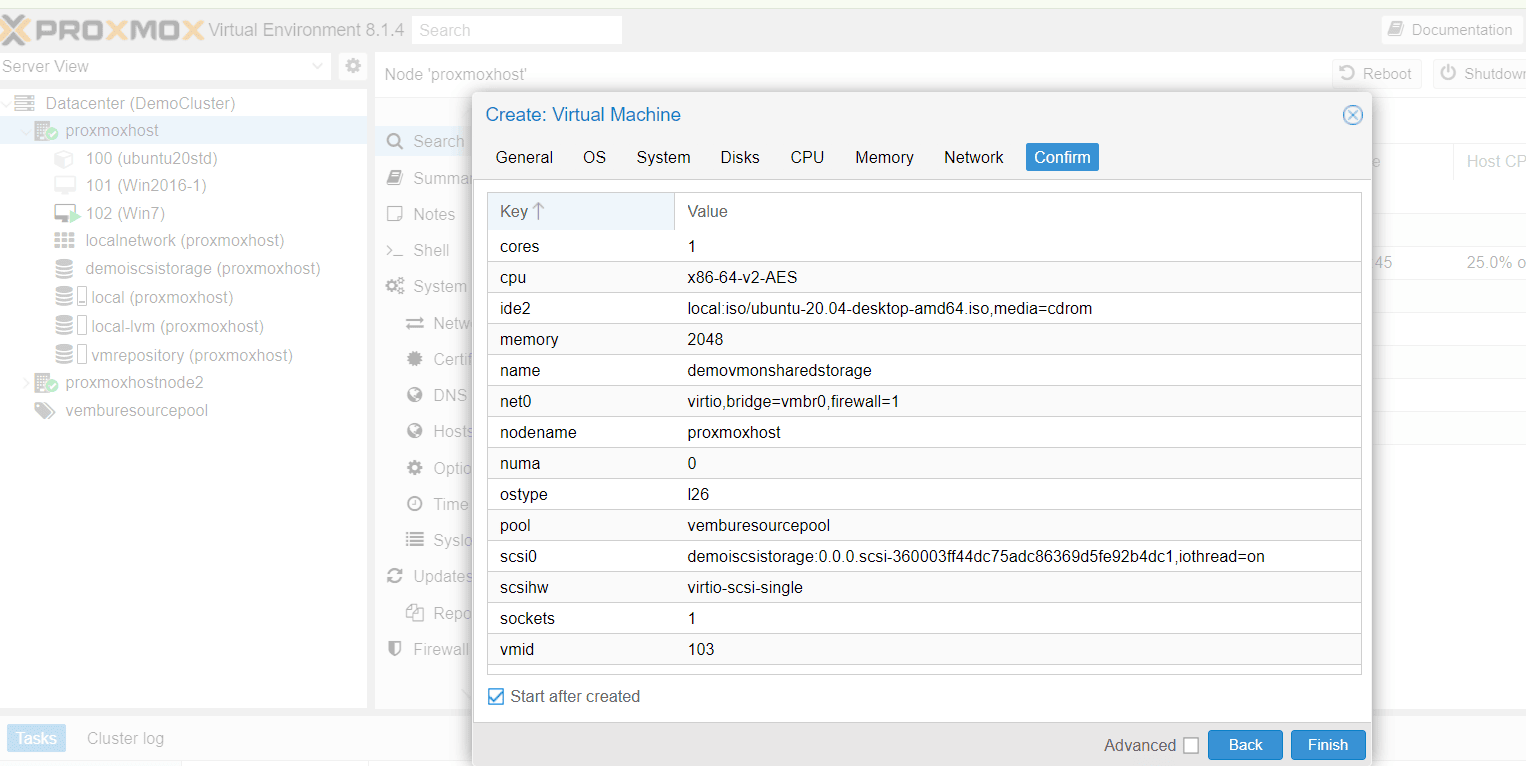
Click Next to “Confirm” tab
This final screen provides a summary of all the configuration details you entered in the previous steps. Once you’ve reviewed the settings, click “Finish” to initiate the VM creation process. You can optionally choose to start the VM automatically after it’s created. The below screenshot shows this step.
Online Migration compatibility check
After a few minutes, your Linux VM will be created and, if you have already chosen the option, will be automatically started. You can then verify the hardware components and devices associated with the VM in the “Hardware” section.
The next step is to confirm whether the newly created VM supports online migration, a key feature of Proxmox VE. Online migration allows you to seamlessly move running VMs between physical hosts without downtime. However, there are specific requirements a VM must meet to be eligible for online migration.
To check compatibility, right-click on the VM and select “Migrate”. If online migration is not supported for your VM, the migration wizard will open with an error message as shown in the screenshot below
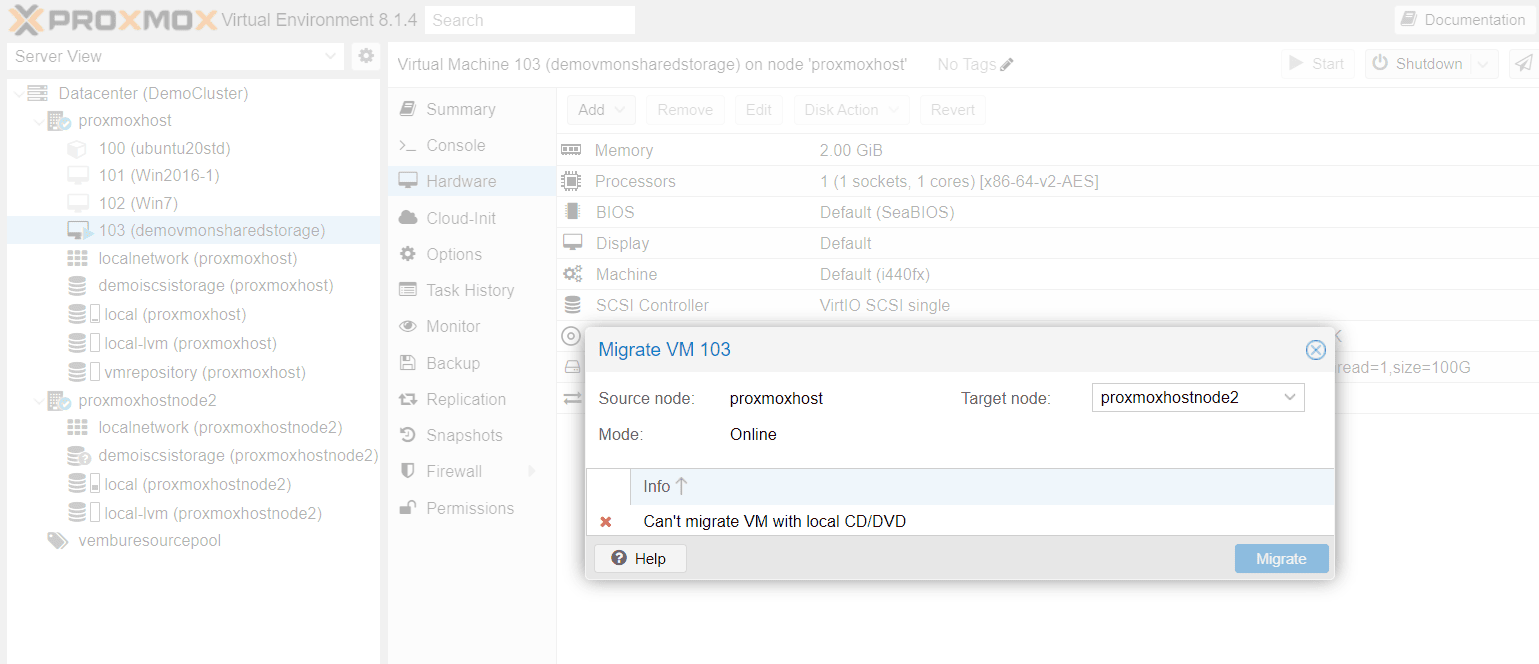
Unfortunately, as you’ll see in the screenshot, attempting to migrate the newly created VM might result in an error message. This indicates that the VM doesn’t currently meet the requirements for online migration in Proxmox VE.
Don’t worry! In our next blog post, we’ll delve deeper into this error message and provide a Proof of Concept (POC) to demonstrate how to successfully enable online migration for your VMs. We’ll guide you through the necessary steps to ensure your VMs are configured for seamless live migration within your Proxmox VE cluster.
Conclusion
This blog post has guided you through the process of creating a Linux VM on shared storage within Proxmox VE. By leveraging shared storage, you’ve unlocked the potential for live migration, empowering you to effortlessly move running VMs between physical hosts without experiencing downtime. This enhanced mobility translates to several benefits:
- Increased Availability: In the event of a hardware failure, VMs stored on shared storage can be swiftly restarted on another available node, minimizing service disruption for your critical applications
- Simplified Management: Shared storage centralizes VM disk management, eliminating the need to configure storage on individual nodes. This simplifies administration and streamlines VM lifecycle management tasks
- Scalability Made Easy: Expanding your Proxmox VE cluster becomes a breeze. New nodes can readily access existing VMs on the shared storage pool, eliminating the need for complex storage reconfiguration
With your Linux VMs deployed on shared storage, you’ve laid the foundation for a highly adaptable and resilient virtualized environment.
The next step, as we’ll explore in our upcoming blog post, is to delve into enabling online migration for these VMs. This will unlock the true power of VM mobility within your Proxmox VE cluster, allowing you to seamlessly migrate running VMs for maintenance, upgrades, or workload balancing without impacting user productivity.
Stay tuned for the next blog in this series, where we’ll troubleshoot the common error encountered when attempting online migration and provide a step-by-step guide to ensure your VMs are migration-ready!
Read More:
Proxmox Virtualization Series: High Availability: Setting Up Shared Storage for Your Proxmox Cluster – Part 10
Follow our Twitter and Facebook feeds for new releases, updates, insightful posts and more.

Leave A Comment