
Introduction
The significance of robust, scalable, and efficient storage solutions has recently sky-rocketed in cloud computing. Among the offerings, Azure Elastic SAN is a compelling solution designed to cater to IO-intensive workloads, ensuring seamless data management and accessibility.
Having introduced the basic concepts of Azure Elastic SAN in a prior post, this guide aims to delve deeper into the practical aspects by offering a step-by-step walkthrough of deploying, configuring, and interfacing this innovative storage solution with a Windows Server. This detailed guide is curated for tech enthusiasts interested in Azure Cloud technology, aiding them in leveraging Azure Elastic SAN to its fullest potential.
Deploying Azure Elastic SAN (Step by Step)
Azure Subscription and Portal Access
An active Azure subscription is the gateway to exploring the myriad services offered by Azure, including the Elastic SAN. If you’re new to Azure, setting up a subscription is a straightforward process that opens doors to many cloud services. Sign in to the Azure Portal with your credentials post subscription, and you’re set to embark on the Elastic SAN deployment journey.
Creating the Elastic SAN
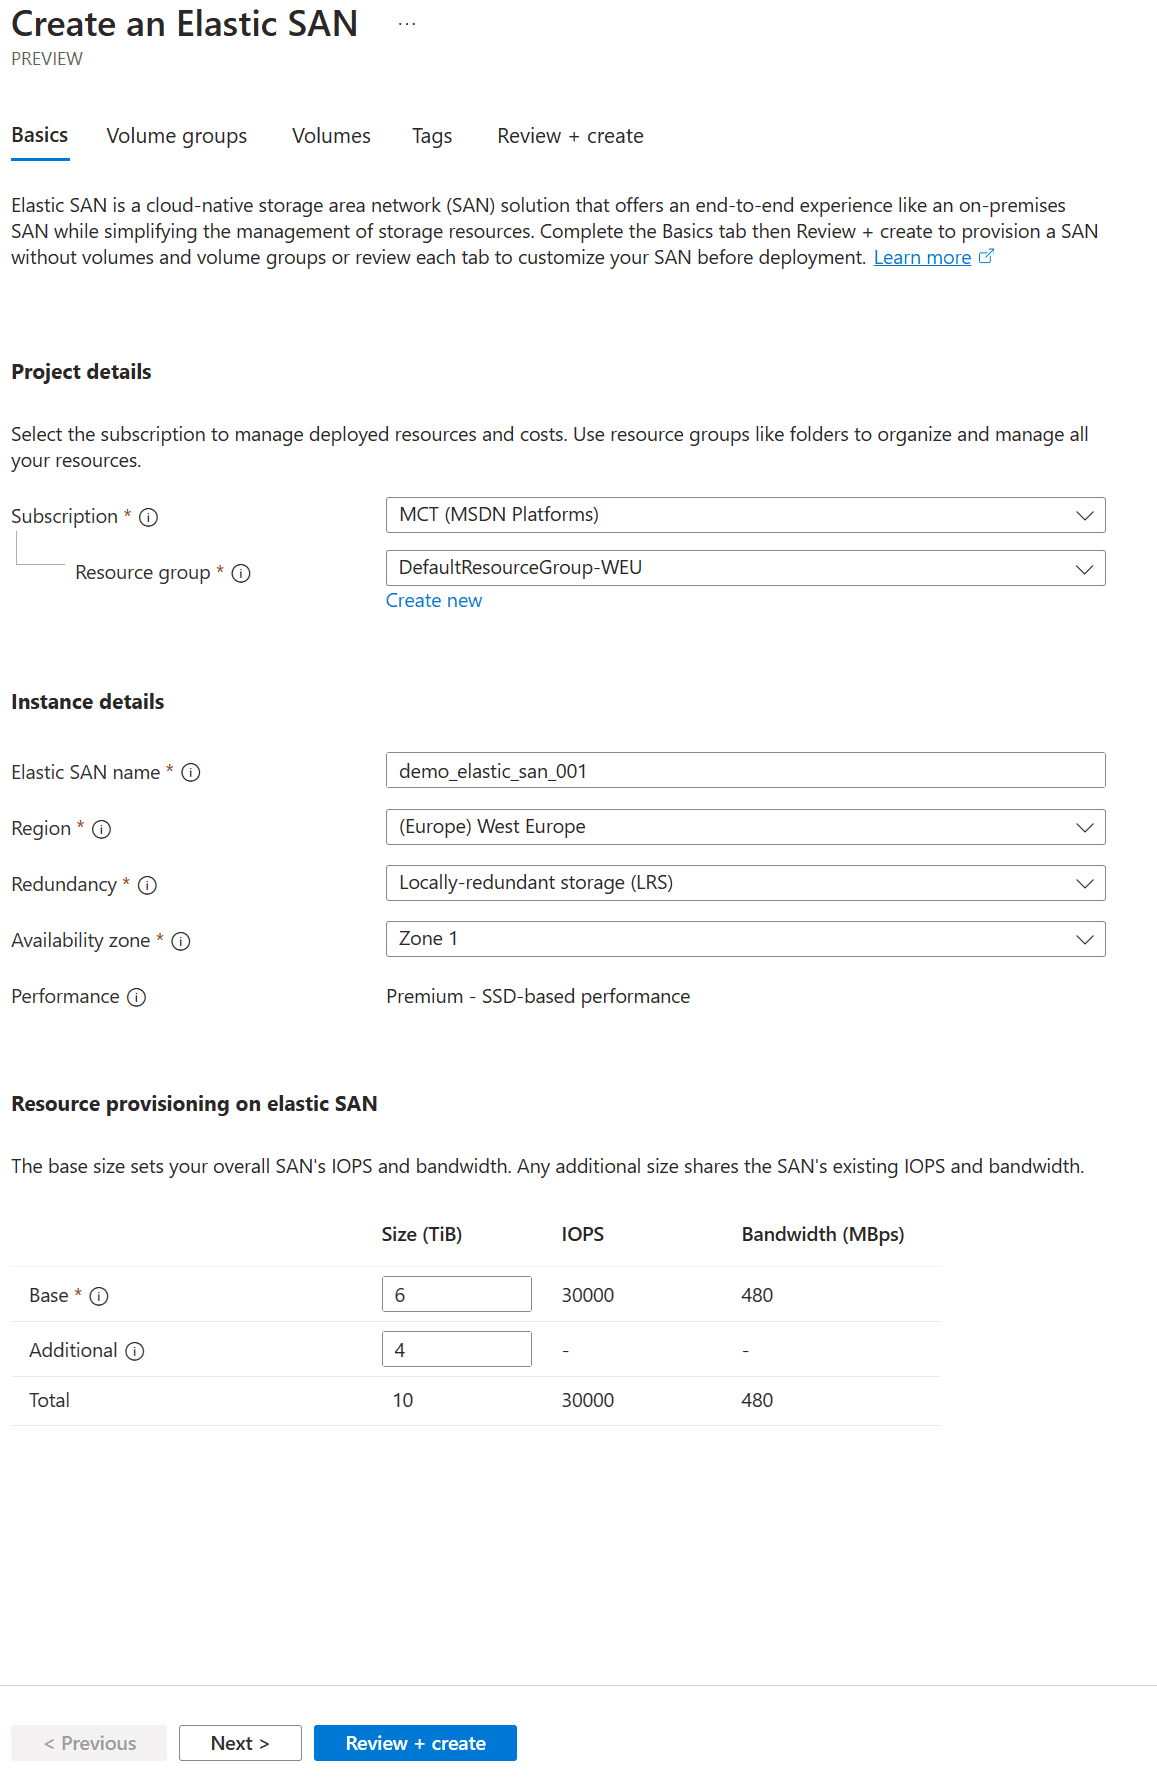
Upon logging into the Azure Portal, navigate to the `Storage` section from the left menu and select `Elastic SAN.` Click on `Create elastic SAN` to initiate the setup. You’ll be prompted to fill in details like the name, region, storage account type, redundancy options, subnet, and Network Security Group (NSG). Each of these fields is crucial as they define the core attributes of your Elastic SAN instance. For instance, selecting the appropriate region ensures lower latency and regional data residency requirements compliance.

Setting up Volume Groups
With the Elastic SAN instance ready, setting up Volume Groups is the following step. These groups act as logical containers for managing Volumes and streamlining storage organization. When creating Volume Groups, planning the structure wisely is pivotal to ensure smooth scalability and management down the line.
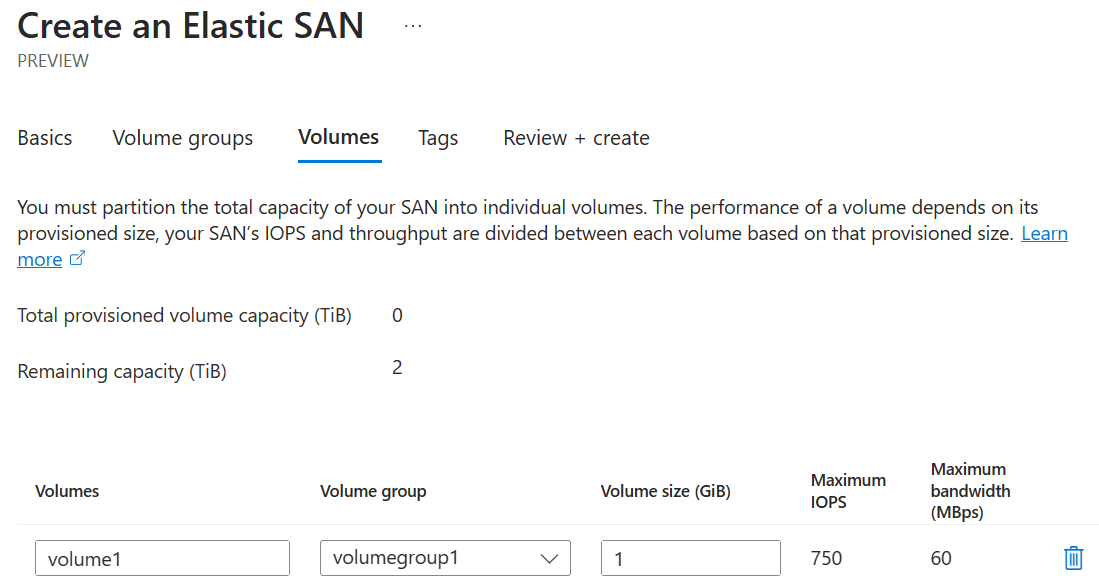
Creating Volumes
Volumes are the actual storage units where data resides. Creating Volumes within a Volume Group is a straightforward task. Post creation, these Volumes are accessible via iSCSI on approved networks, ensuring secure and reliable data access.
Configuring Networking for Azure Elastic SAN (Step by Step)
Accessing Network Settings
Networking is the backbone of any cloud service, and configuring it correctly is imperative for ensuring security and optimal performance. Head back to `Storage,` then `Elastic SAN,` and click on your Elastic SAN name to delve into the networking configurations.
Service Endpoint Creation
Within the Elastic SAN instance, navigate to Volume Groups and kickstart the service endpoint creation process. This step involves selecting a VNET and Subnets, after which saving your configurations will enable subnet access to the Elastic SAN.
Network Security Configurations:
Diving deeper into network security, this segment covers configuring subnets, NSGs, and access rules for your Azure Elastic SAN, ensuring a fortified and secure storage environment.
Connecting a Windows Server to Azure Elastic SAN (Step by Step)
iSCSI Drivers Installation
Preparing your Windows Server for interfacing with Azure Elastic SAN necessitates the installation of iSCSI drivers. This step lays the foundation for a successful connection between the server and the Elastic SAN.
Initiating Connection
With the iSCSI drivers in place, initiating the connection is a breeze. From a Windows Server VM in Azure, navigate to the desired Volume in your Elastic SAN instance and select “Connect” to kickstart the connection process.
Configuring iSCSI Service
Use the following Powershell Commands:
# Start MsiSCSI Service
Start-Service -Name MSiSCSI
# Set MsiSCSI Service to Automatic
Set-Service -Name MSiSCSI -StartupType Automatic
Mounting and Accessing the Volume
After a successful connection, mounting the iSCSI Storage is the final step in the process. Follow the on-screen commands, and the iSCSI Storage will now appear as “MSFT Virtual HD.” Now, your Windows Server is all set to interact with the Azure Elastic SAN, offering many data management and access capabilities.
Conclusion
The journey from deploying to interfacing Azure Elastic SAN with a Windows Server, as delineated above, elucidates the ease and efficiency embedded in this Azure offering. The simplicity in deployment, robust networking configurations, and seamless integration with Windows Servers underpin the transformative essence of Azure Elastic SAN in modern cloud environments. This guide, rich in practical insights, seeks to empower tech specialists in navigating the deployment and configuration of Azure Elastic SAN effortlessly, thereby unlocking a world of enhanced storage management and scalability in Azure Cloud.
Additional Tips
- Embracing zone-redundant storage (ZRS) boosts availability, ensuring your data remains accessible even during unforeseen adversities
- NSG is a powerful tool in your arsenal to barricade your Azure Elastic SAN from unauthorized access, cementing security
- The iSCSI Management Console is a potent tool for managing your Azure Elastic SAN volumes, making volume management straightforward and efficient
Further Resources
- Azure Elastic SAN Documentation (https://learn.microsoft.com/en-us/azure/storage/elastic-san/)
- Azure Networking Best Practices (https://learn.microsoft.com/en-us/azure/virtual-network/concepts-and-best-practices)
- iSCSI Management Console Guide (https://dl.dell.com/manuals/all-products/esuprt_ser_stor_net/esuprt_powervault/powervault-nx3000_deployment%20guide_en-us.pdf)
Follow our Twitter and Facebook feeds for new releases, updates, insightful posts and more.

Leave A Comment