
We are continuing to look into the functionality of Cockpit. We have seen so far how to install cockpit and the virtual machines module to start managing virtual machines. Let’s now take a look at the various functionality you can access when creating, accessing and managing KVM virtual machines in Cockpit. The interface is pleasing to work with and actually provides quite a bit of functionality.
Accessing Cockpit virtual machines configuration
The process to access cockpit virtual machines configuration involves logging into Cockpit and selecting the Virtual Machines menu. To log into Cockpit, browse to the IP or FQDN of your Cockpit server that is managing your KVM host (these may be one in the same) and add port 9090 to the end of the URL.
Creating a new virtual machine configuration
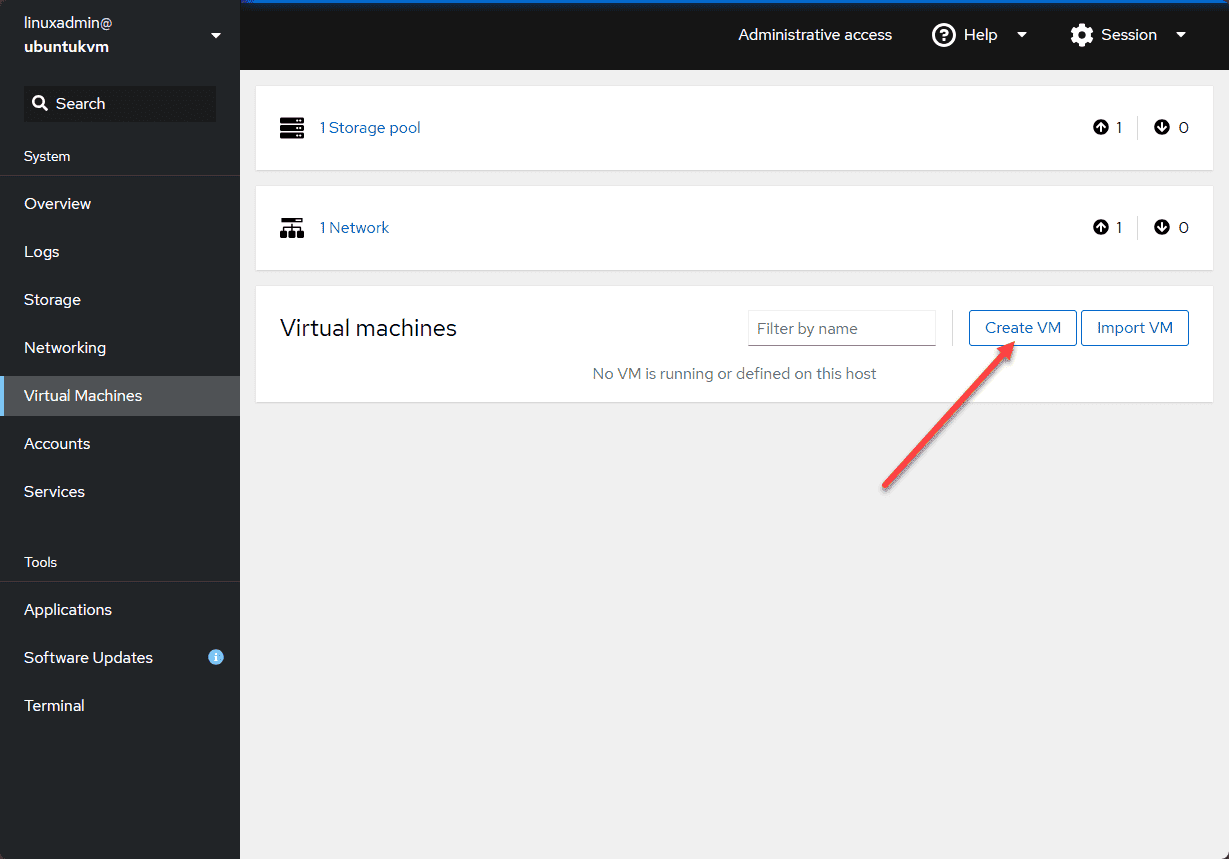
After that, you will have the option to create a VM or import an existing VM. Let’s look at the process to create a new virtual machine configuration.

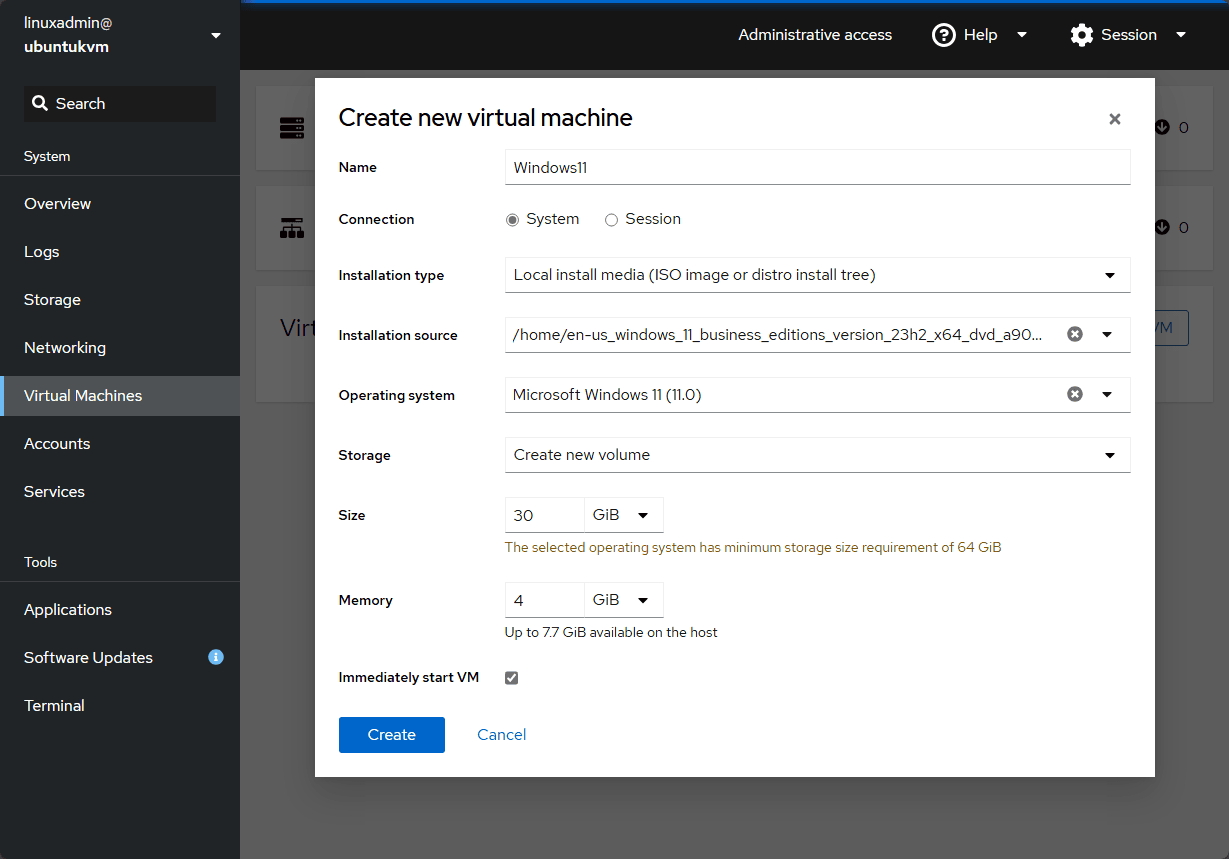
This process will launch the Create new virtual machine dialog box in your Cockpit interface. You will configure the following information:
- Name – Define a name for the KVM virtual machine
- Connection – Define whether it is a system or session configuration (see the section below)
- Installation type – Here you define the type of installation
- Installation source – Define the source of the installation files
- Operating system – Define which operating system will be installed
- Storage – Create the storage configuration for the new virtual machine
- Size – Size of the storage configuration
- Memory – How much memory is allocated to the virtual machine
- Immediately start VM – Check or uncheck the box to decide whether you want to start the new virtual machine immediately after it is created
After configuring the various settings, click the Create button
System vs Session
You may wonder what the difference is between the System vs Session option in creating a new virtual machine configuration. Note the following differences between the two:
System Configuration
Scope and Permissions:
- System-wide Access: In this mode, virtual machines are run as system services. This means that any user with enough permissions can manage these VMs
- Root Permissions Required: Creating and managing system-level VMs require root or administrative privileges
Persistence:
- Persistent Across Reboots: System-configured VMs are persistent. It means they will remain even after a reboot and can be configured to automatically start when the host machine reboots
- Long-term Usage: This type is generally used for production environments or long-term virtual machines
Use Cases:
- Production VMs: Virtual machines that need to run continuously in production and be managed by multiple administrators are run in system mode
- Server VMs: Often used for virtualized server instances, databases, and services
Session Configuration
Scope and Permissions:
- User-specific: Session configuration runs the virtual machines within a specific user’s session. It means that each user can create and manage their own VMs
- User-level Permissions: Creating and managing session-level VMs does not require root permissions
Persistence:
- Not persistent across reboots: Session-configured VMs do not automatically start after a host reboot unless the user logs in and starts them
- Short-term Usage: These are generally used for temporary or testing environments where persistence after reboots is not necessary
Use Cases:
- Development and Testing: Developers and testers who need to spin up VMs for short-term tasks and testing can easily create a session mode VM
- Personal Use: If you need to run personal virtual machines that do not need to be available system wide
Changing the boot order
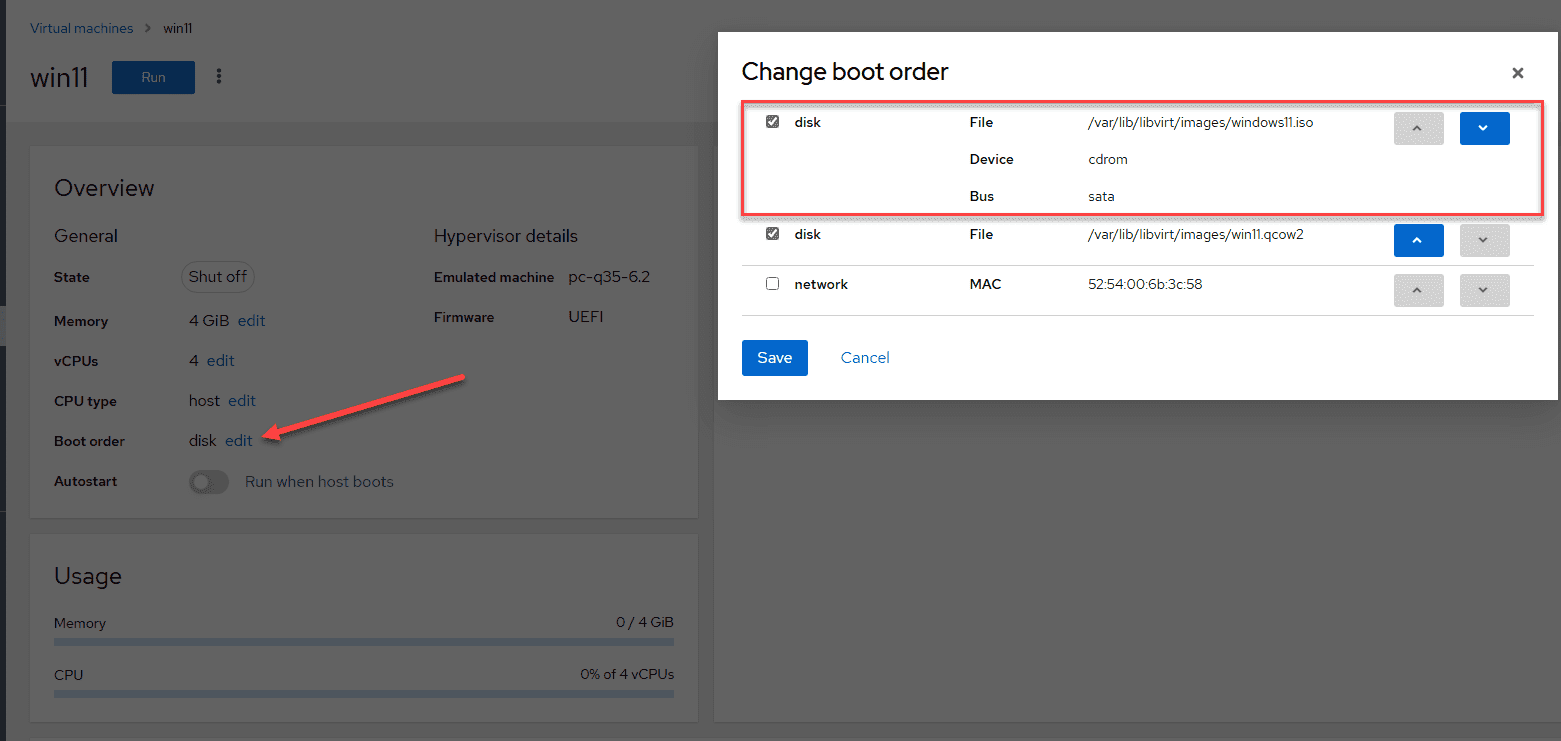
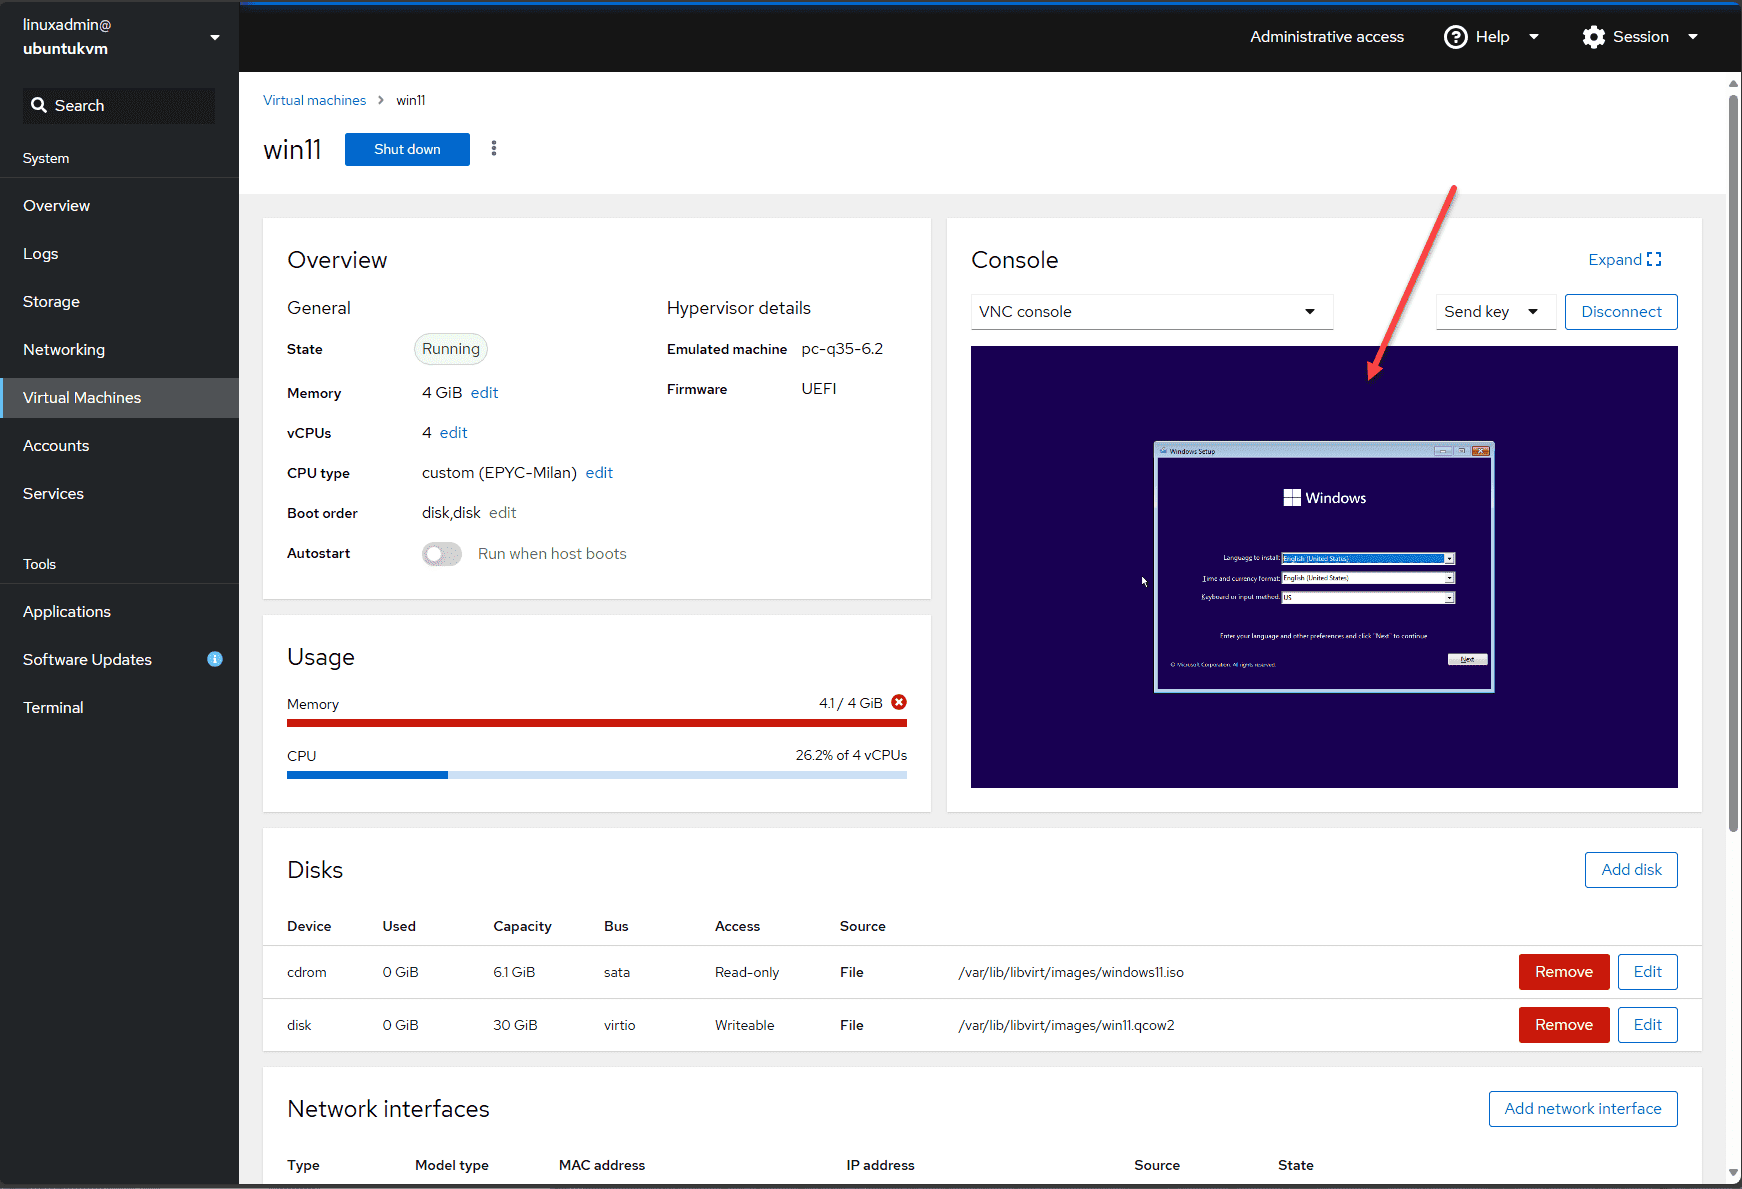
Now that we have created our new virtual machine in Cockpit, we can boot the VM if we haven’t already in the creation process. You will likely find you need to change the boot order of the virtual machine disks. Since we need to install the operating system, we need to change the boot order so the ISO image for Windows is first in order.
When you click on the virtual machine, click the Boot order disk edit menu. Place a check next to your ISO image file and move the order using the arrows.
Once we start the virtual machine after making sure the ISO image is first in the boot order, we should see the Windows installation begin in the Console connection. From this point, we can install Windows as we normally would on bare metal or in another hypervisor.
Additional features and functionality
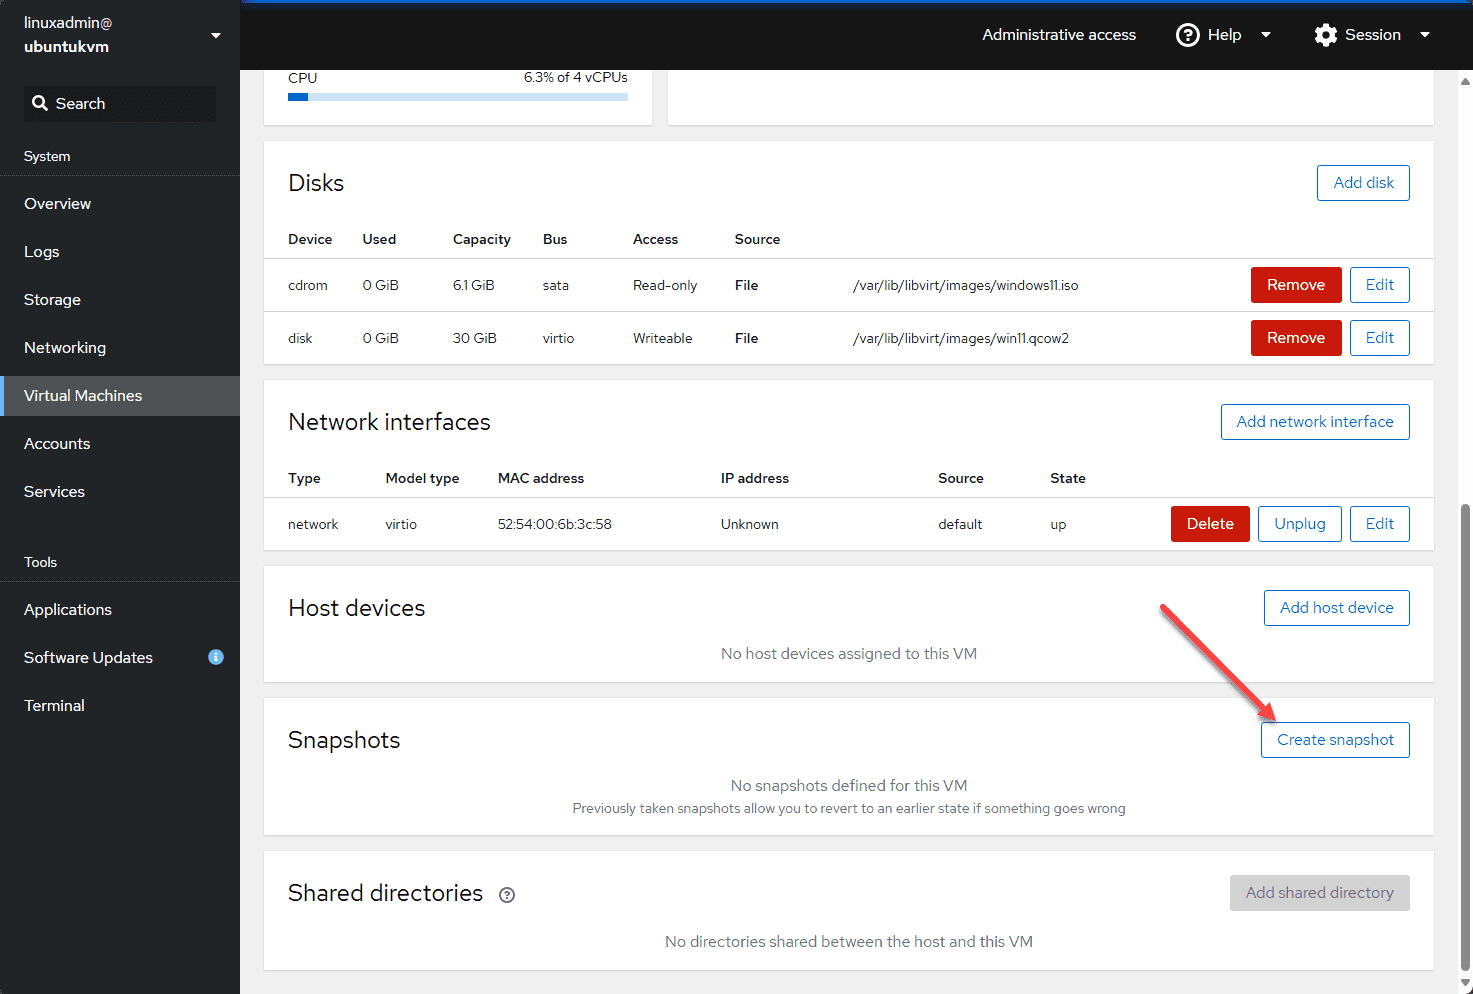
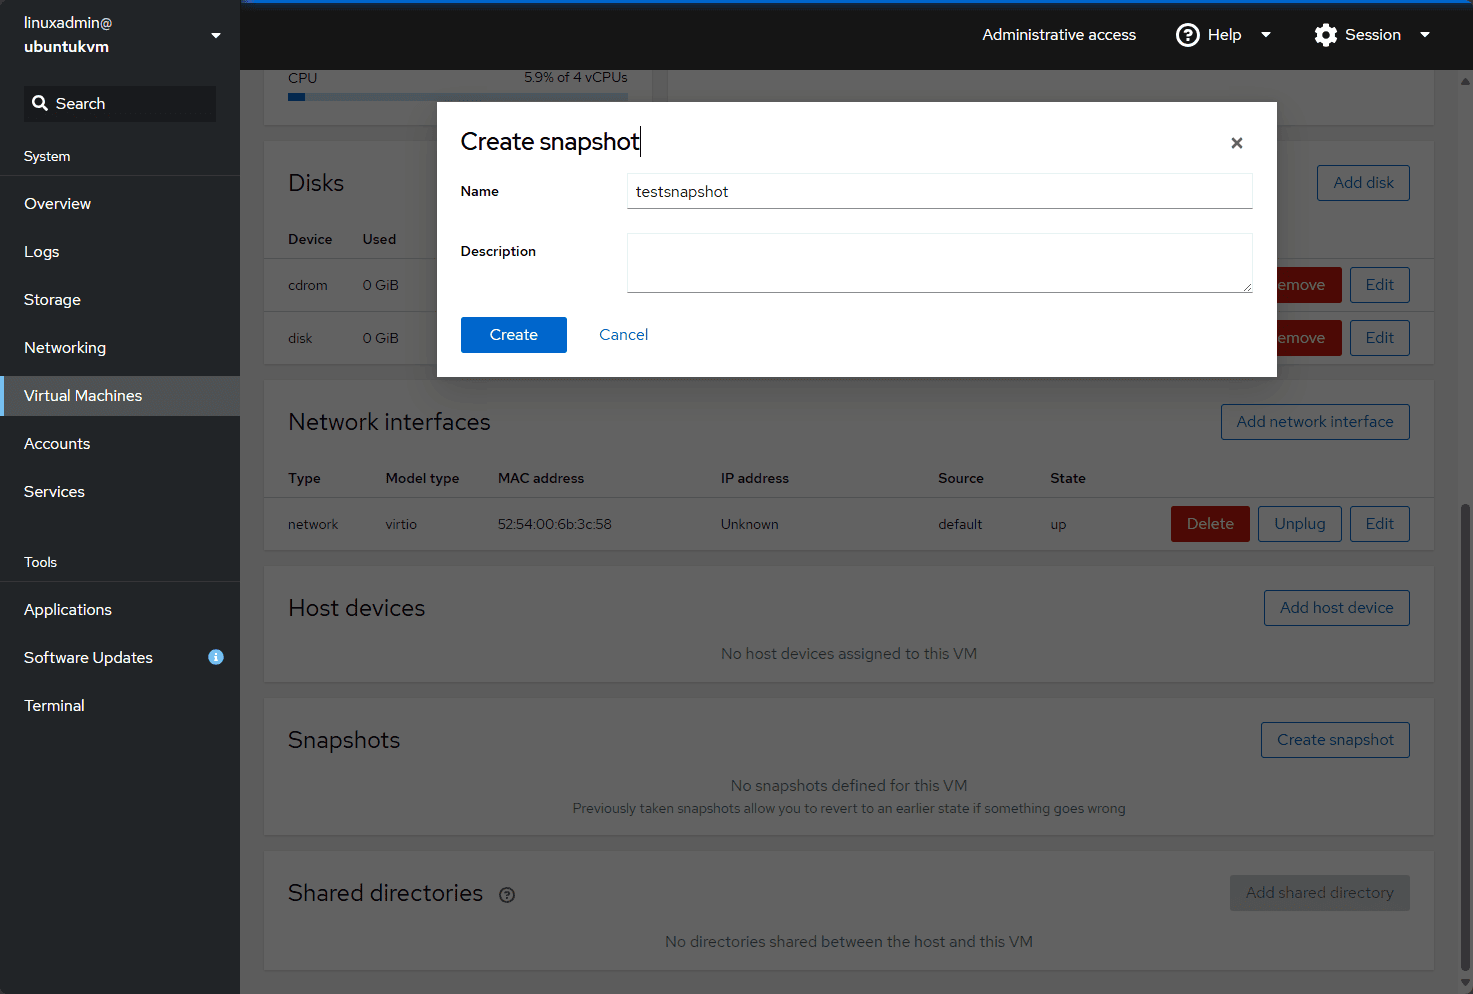
There are other features and functionality that we have access to in Cockpit, such as creating snapshots. Scroll down in the configuration screen for your virtual machine. You will see the Snapshots section of the configuration. Click the Create Snapshot button to create a new snapshot.
Name the snapshot and create a description if desired.
Wrapping up
Cockpit provides great functionality and features in an interface that is easy and intuitive. Even if you have never used Cockpit before, you will find the interface flows and makes sense for most operations. Creating a new virtual machine and loading an operating system is straightforward. Also, it is great to know that you don’t have to install any client software to access the Cockpit interface which is fully web-driven.
Follow our Twitter and Facebook feeds for new releases, updates, insightful posts and more.

Leave A Comment