
KVM is a virtualization platform many are using and used for many other open-source platforms to virtualize their environments for production or other purposes. KVM includes many built-in command line tools that can be used for management, configuration, and even automating your environment using scripts. You can use a tool called virsh to configure VMs, start, stop, and many other actions and tasks. Let’s look at virsh and see how you can use it with your KVM virtual machines.
The virsh command
First of all, let’s discover what the virsh command is and what it is used for. The virsh command is a command-line tool that allows you to use the libvirt management API. We have learned about Libvirt, but it allows managing your virtualization environment using an API. This capability provides programmatic access and allows tools to interact with your KVM environment.
The virsh command also enables features to manage the lifecycle of virtual machines running in the environment. You can use it to create VMs, edit, start, stop, pause, and shut down VMs. You can also use it to manage storage, networking, and other resources.
How is it installed?
Actually, if you have already installed KVM, you will most likely have installed the virsh utility. You can install it using the following command in Debian distributions, like Ubuntu:
sudo apt install libvirt-clients libvirt-daemon-system

Next, you need to make sure that Libvirt is running and set to run at startup. You can do that using the following commands:
sudo systemctl start libvirtd
sudo systemctl enable libvirtd
Now that we have virsh installed, let’s consider several key commands you will want to remember to work with your virtualization environment running on top of Kernel Virtual Machine.
Virsh commands to remember
There are several virsh commands you will want to remember, including commands to do the following for virtual machines:
- Creating
- List
- Edit
- Start
- Shutdown
- Stop
- Undefine
Let’s look at each of these one-by-one and see how you can use the virsh command for these operations.
1. Creating a VM
You create a VM with the virsh command by defining it from an XML configuration file. The syntax to define a virtual machine is the following:
virsh define /path/to/config.xml
What does the XML configuration file look like that you can define? Below is an example configuration file for a Windows 11 VM that is set to load from an ISO file stored locally.
<domain type=’kvm’>
<name>Windows11</name>
<uuid>32af50a8-a5e7-450c-8c5d-76fcee78c5b0</uuid>
<memory unit=’KiB’>4194304</memory>
<currentMemory unit=’KiB’>4194304</currentMemory>
<vcpu placement=’static’>4</vcpu>
<os>
<type arch=’x86_64′ machine=’pc-q35-6.2’>hvm</type>
<loader readonly=’yes’ secure=’yes’ type=’pflash’>/usr/share/OVMF/OVMF_CODE.fd</loader>
<nvram>/var/lib/libvirt/qemu/nvram/win11_VARS.fd</nvram>
<boot dev=’hd’/>
</os>
<features>
<acpi/>
<apic/>
<hyperv mode=’custom’>
<relaxed state=’on’/>
<vapic state=’on’/>
<spinlocks state=’on’ retries=’8191’/>
</hyperv>
<smm state=’on’/>
</features>
<cpu mode=’host-model’ check=’partial’/>
<clock offset=’utc’>
<timer name=’rtc’ tickpolicy=’catchup’/>
<timer name=’pit’ tickpolicy=’delay’/>
<timer name=’hpet’ present=’no’/>
</clock>
<on_poweroff>destroy</on_poweroff>
<on_reboot>restart</on_reboot>
<on_crash>restart</on_crash>
<pm>
<suspend-to-mem enabled=’no’/>
<suspend-to-disk enabled=’no’/>
</pm>
<devices>
<emulator>/usr/bin/qemu-system-x86_64</emulator>
<disk type=’file’ device=’disk’>
<driver name=’qemu’ type=’qcow2’/>
<source file=’/var/lib/libvirt/images/win11.qcow2’/>
<target dev=’vda’ bus=’virtio’/>
<address type=’pci’ domain=’0x0000′ bus=’0x00′ slot=’0x04′ function=’0x0’/>
</disk>
<controller type=’usb’ index=’0′ model=’qemu-xhci’ ports=’15’>
<address type=’pci’ domain=’0x0000′ bus=’0x00′ slot=’0x06′ function=’0x0’/>
</controller>
<controller type=’sata’ index=’0’>
<address type=’pci’ domain=’0x0000′ bus=’0x00′ slot=’0x1f’ function=’0x2’/>
</controller>
<controller type=’pci’ index=’0′ model=’pcie-root’/>
<controller type=’pci’ index=’1′ model=’pcie-root-port’>
<model name=’pcie-root-port’/>
<target chassis=’1′ port=’0x8’/>
<address type=’pci’ domain=’0x0000′ bus=’0x00′ slot=’0x01′ function=’0x0′ multifunction=’on’/>
</controller>
<controller type=’pci’ index=’2′ model=’pcie-root-port’>
<model name=’pcie-root-port’/>
<target chassis=’2′ port=’0x9’/>
<address type=’pci’ domain=’0x0000′ bus=’0x00′ slot=’0x01′ function=’0x1’/>
</controller>
<controller type=’pci’ index=’3′ model=’pcie-root-port’>
<model name=’pcie-root-port’/>
<target chassis=’3′ port=’0xa’/>
<address type=’pci’ domain=’0x0000′ bus=’0x00′ slot=’0x01′ function=’0x2’/>
</controller>
<controller type=’pci’ index=’4′ model=’pcie-to-pci-bridge’>
<model name=’pcie-pci-bridge’/>
<address type=’pci’ domain=’0x0000′ bus=’0x02′ slot=’0x00′ function=’0x0’/>
</controller>
<controller type=’virtio-serial’ index=’0’>
<address type=’pci’ domain=’0x0000′ bus=’0x01′ slot=’0x00′ function=’0x0’/>
</controller>
<controller type=’scsi’ index=’0′ model=’lsilogic’>
<address type=’pci’ domain=’0x0000′ bus=’0x04′ slot=’0x01′ function=’0x0’/>
</controller>
<interface type=’network’>
<mac address=’52:54:00:6b:3c:58’/>
<source network=’default’/>
<model type=’virtio’/>
<address type=’pci’ domain=’0x0000′ bus=’0x00′ slot=’0x03′ function=’0x0’/>
</interface>
<serial type=’pty’>
<target type=’isa-serial’ port=’0’>
<model name=’isa-serial’/>
</target>
</serial>
<console type=’pty’>
<target type=’serial’ port=’0’/>
</console>
<channel type=’unix’>
<target type=’virtio’ name=’org.qemu.guest_agent.0’/>
<address type=’virtio-serial’ controller=’0′ bus=’0′ port=’1’/>
</channel>
<input type=’tablet’ bus=’usb’>
<address type=’usb’ bus=’0′ port=’1’/>
</input>
<input type=’mouse’ bus=’ps2’/>
<input type=’keyboard’ bus=’ps2’/>
<graphics type=’vnc’ port=’-1′ autoport=’yes’>
<listen type=’address’/>
</graphics>
<audio id=’1′ type=’none’/>
<video>
<model type=’virtio’ vram=’16384′ heads=’1′ primary=’yes’/>
<address type=’pci’ domain=’0x0000′ bus=’0x00′ slot=’0x02′ function=’0x0’/>
</video>
<memballoon model=’virtio’>
<address type=’pci’ domain=’0x0000′ bus=’0x00′ slot=’0x07′ function=’0x0’/>
</memballoon>
</devices>
</domain>
If you have a config file that you create on your KVM host, then you can use the virsh define command to point to the file, like above, and it will create a new virtual machine.
2. Listing virtual machines
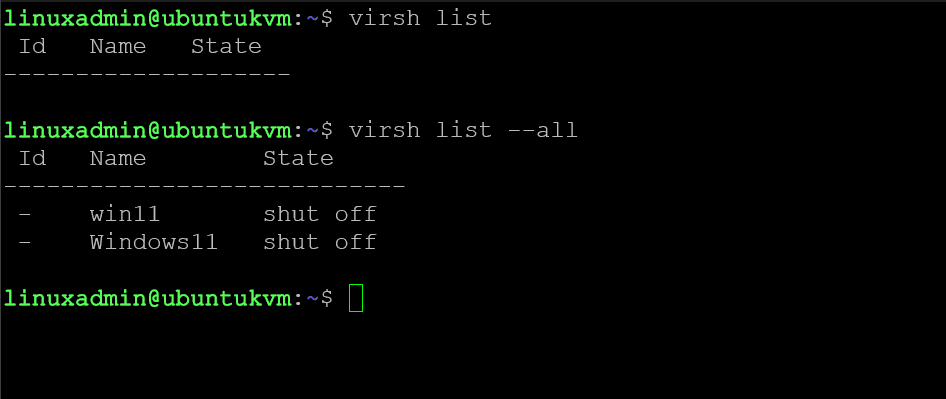
If you have created a few virtual machines and you want to see your KVM virtual machines created and running with the virsh command:
virsh list
If the virtual machines are created but not running, then you can use this command:
virsh list –all
3. Edit an existing virtual machine
Another thing we can do is use virsh and edit an existing virtual machine. The great thing about editing an existing virtual machine is that we don’t have to know where the config file exists, etc. We can just use the virsh edit command and it will edit the currently used XML config file.
virsh edit <virtual machine name>
For example, you could use the command:
virsh edit Windows11
4. Start a virtual machine
We can easily start a virtual machine using the virsh command below:
virsh start <virtual machine name>
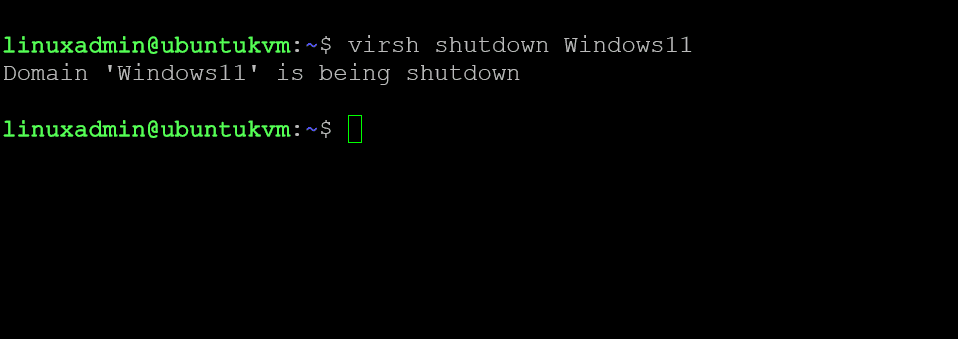
5. Shutdown a virtual machine
Similar to starting a virtual machine, we can stop a virtual machine as well. You use the following command:
virsh shutdown <virtual machine name>
Ironically, stopping a VM uses the shutdown command not a “stop” command. Actually, the stop command isn’t available with virsh.
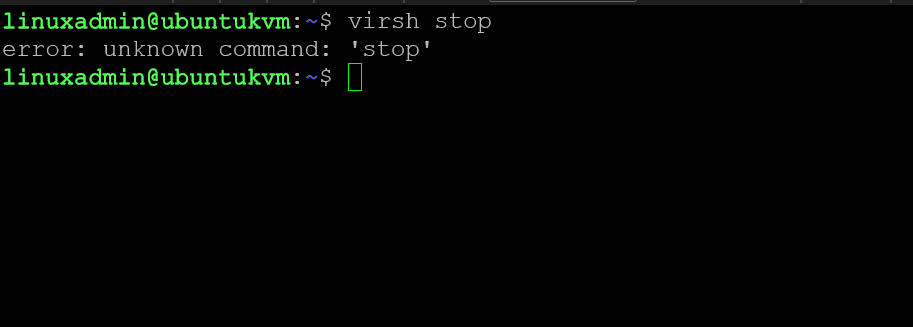
6. Stop a virtual machine
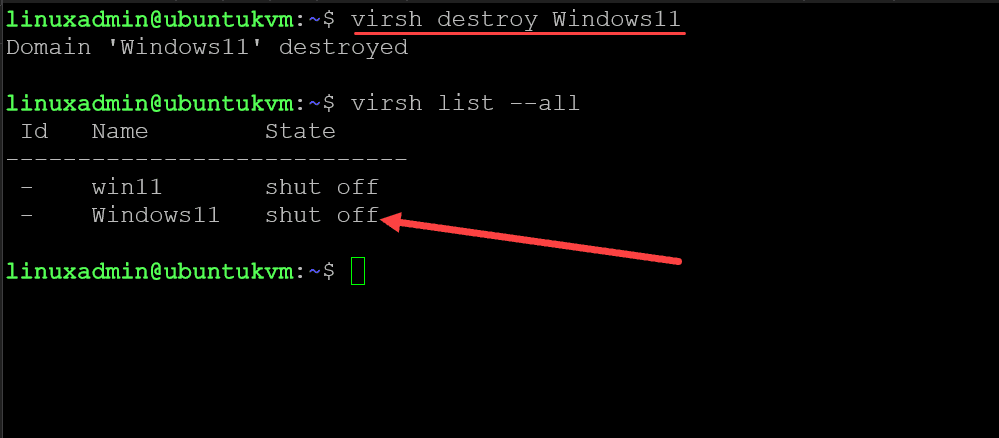
You can also forcibly stop a virtual machine with a non-intuitive command in KVM, using the destroy command. Yes, that is right, the destroy command. This is highly unnerving to do, but if you issue the virsh destroy command, it forcibly powers off the VM and doesn’t delete it.
virsh destroy <vm_name>
As you can see below, after we have “destroyed” the Windows11 VM, we can list the virtual machines and see it is still there.
7. Undefine a virtual machine
The way we can get rid of a virtual machine is by undefining it.
virsh undefine <virtual machine>
After you undefine the virtual machine, you can remove the disk img file to get rid of the disk file.
rm /var/lib/libvirt/images/myvirtualmachine.img
Wrapping up
Managing virtual machines in Kernel Virtual Machine from the command line is a great way to learn command line syntax for virsh and do things without having a GUI to interact with. These commands can also be included in automation scripts for automating tasks and processes. If you are starting your KVM journey it is a great way to get familiar with low-level tasks and processes by using the command line to perform operations.
Read More:
KVM for Beginners – How to Install Virt-Manager and Create a New KVM Virtual Machine – Part 9
Follow our Twitter and Facebook feeds for new releases, updates, insightful posts and more.

Leave A Comment