
Virtual machines are still a crucial part of the overall infrastructure layout for most organizations. Today’s modern cloud infrastructure environments allow running virtual machines. Microsoft Azure can run many types of VMs (OS’es and sizes) in your Azure account.
Microsoft Azure Virtual Machines
Virtual machines are still a good choice to run applications in the enterprise that may be needed for development or production applications. To prepare for the AZ-104 exam, you will need to understand both the the use cases for deploying an Azure VM and the steps. What are some of the use cases first of all? You might choose a VM when testing new applications, hosting legacy software, or if you need to run high-performance computing applications.
Prerequisites for Creating a Virtual Machine
What are some of the prerequisites to creating an Azure virtual machine? Take note of the following:
- Azure Subscription: You will need an Azure subscription of some variety in order to use or play around with Azure virtual machines. You will need to have at least a free subscription (which you can get a limited service free account for 12 months) or you will need a paid subscription
- Resource Group: The Azure Resource group is an object that holds resources. Normally, you group like resources together or that you want to manage together in a resource group. What are some of the resources that are created when you spin up a new Azure virtual machine?
- VM configuration that contains the CPU and memory resources assigned to the virtual machine
- Azure Storage account, which houses the virtual hard disks
- Virtual disks which will hold the OS, applications, & data
- A virtual network (VNet) – The VNet connects the VM to other Azure services or on-premises resources
- A network interface attached to the VM to connect to the VNet
- An optional public IP address if you need to access the VM externally
- Location/Region: One of the nice things about cloud infrastructure is you can choose where in the world the resources needed to be housed. When creating the Azure virtual machine, choose the geographic location where your virtual machine will be hosted. This is important as you may need to consider latency for your applications or there may be reasons why a VM needs housed in a specific region for compliance purposes
- VM Size and Type: You will need to choose the size and type of VM you want to create in Azure. Azure offers a variety of VM types. You can choose sizes and types that are suited for different use cases and have different options for compute, memory, storage, or GPU-intensive tasks
Create an Azure Virtual Machine in the Azure Portal
Let’s look how we can create an Azure VM using the Azure portal.
1. Log in to Azure Portal
Start by logging into the Azure portal at portal.azure.com.

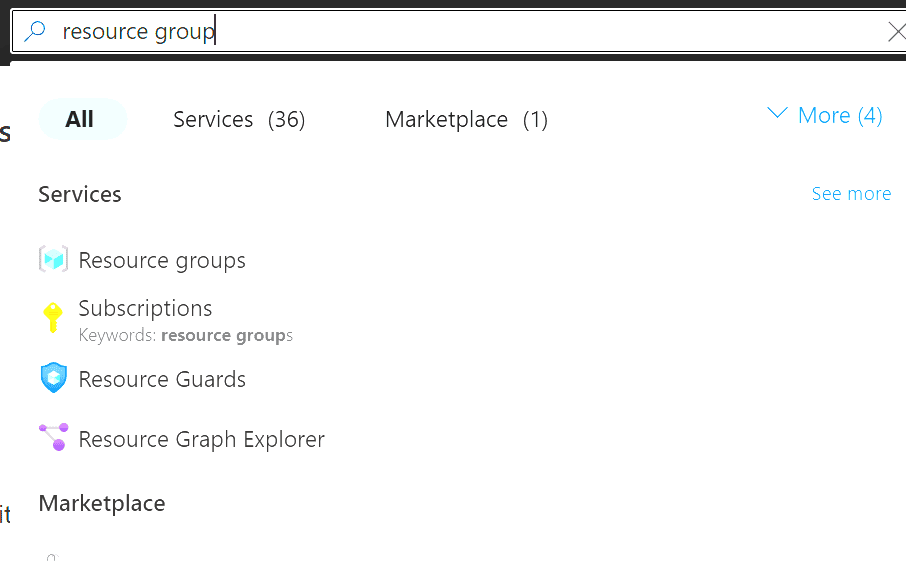
2. Create a New Resource Group (if necessary)
On the home page, select “Resource groups” then “Add” to create a new one if you haven’t already prepared one.
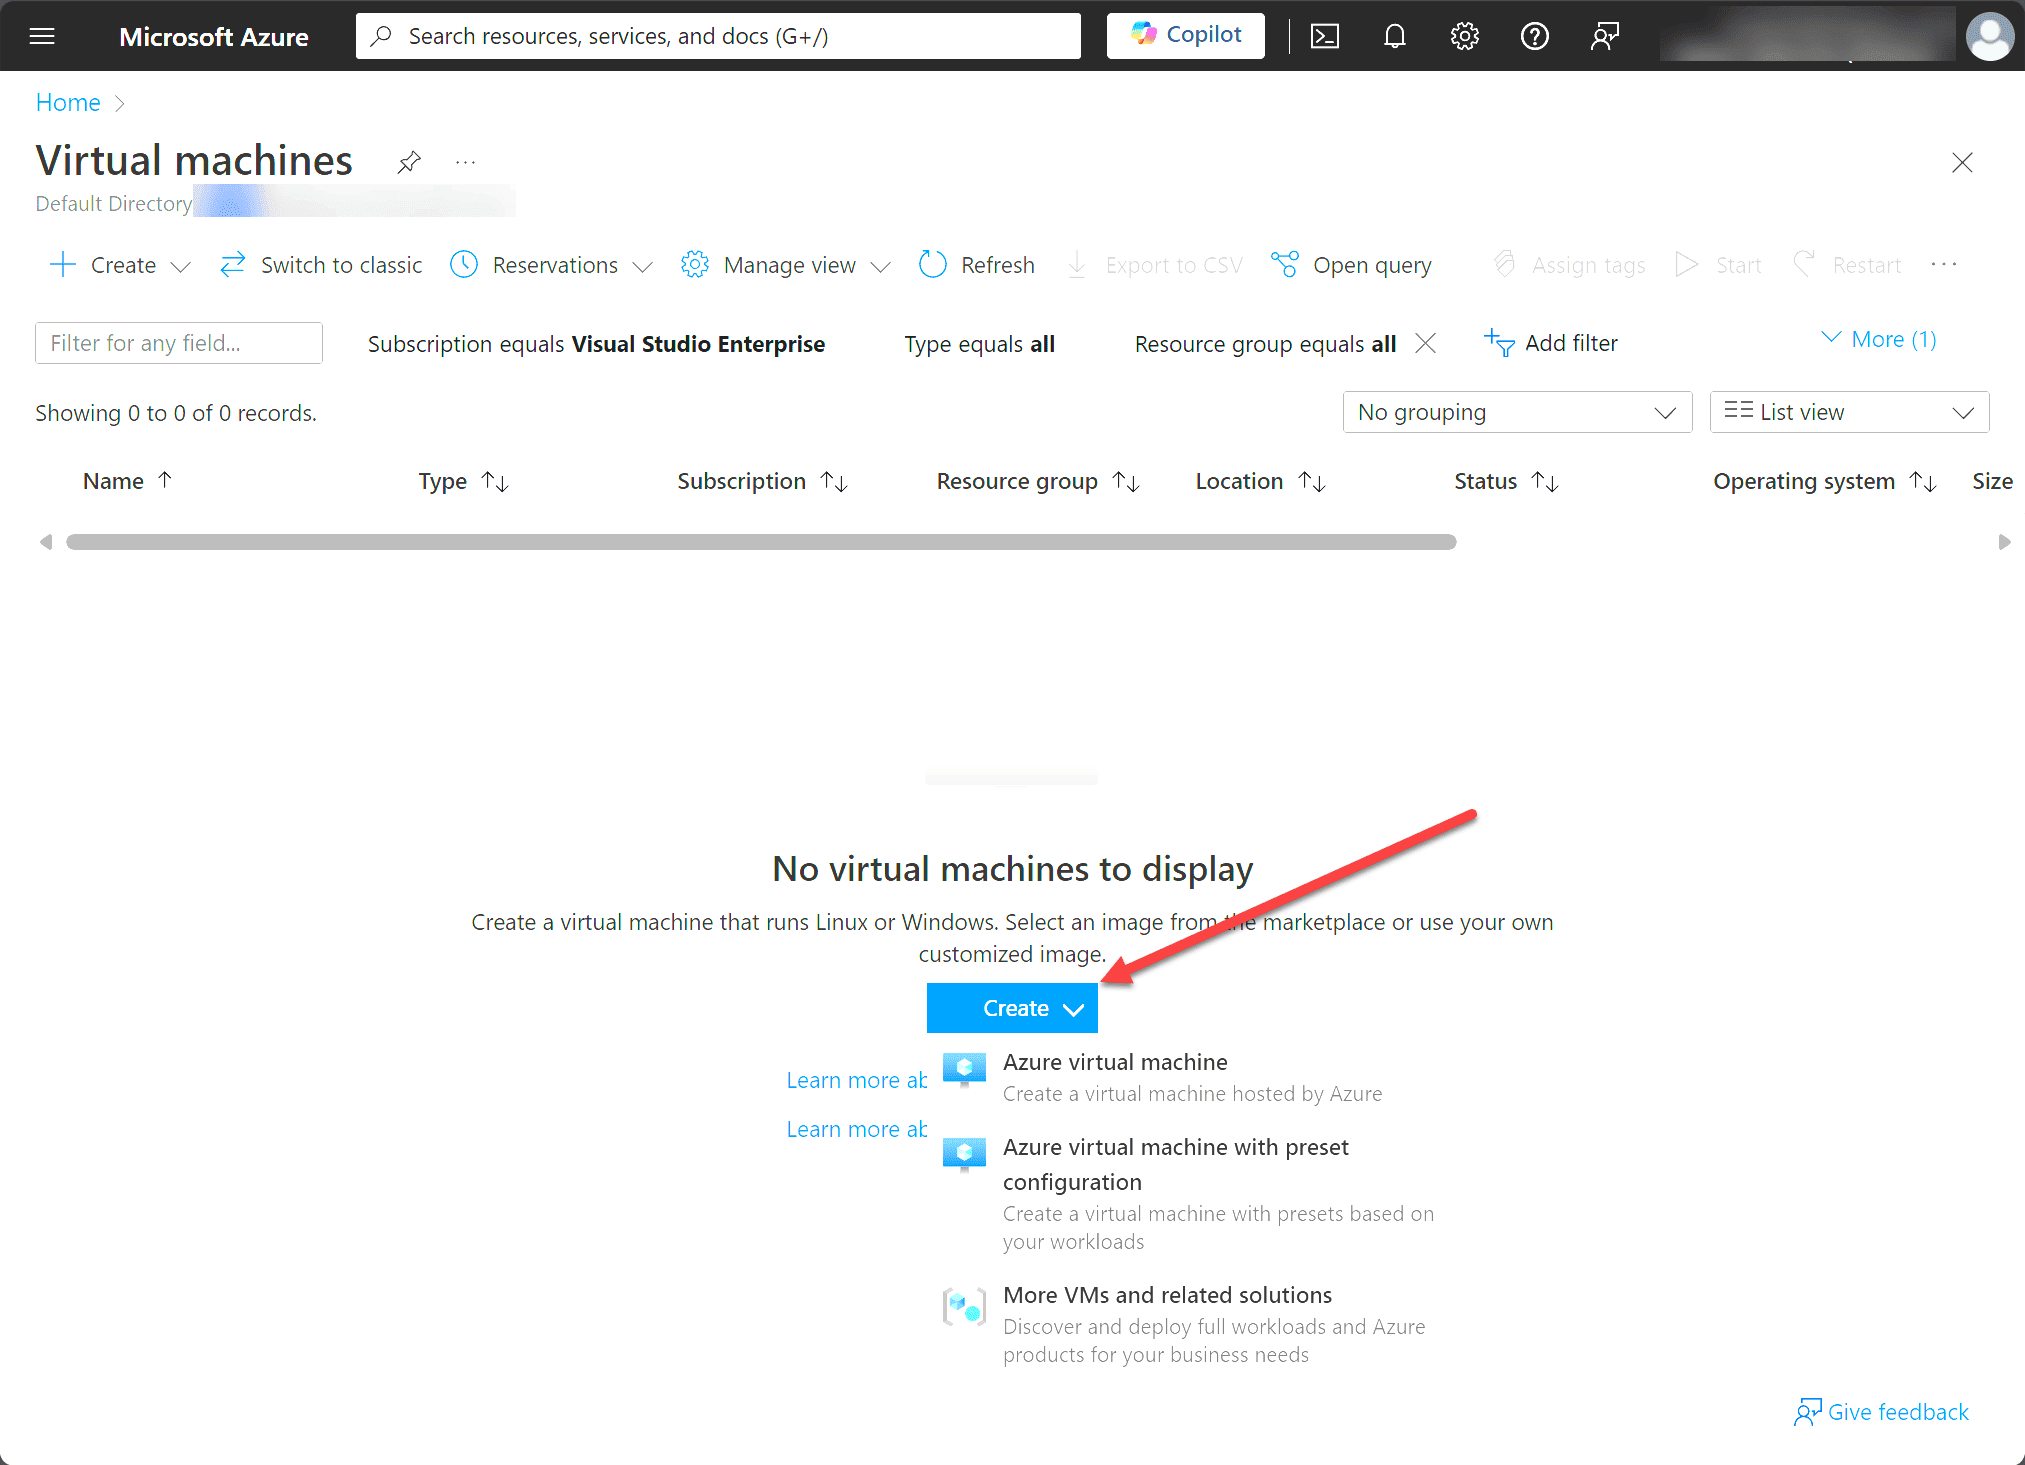
3. Create Virtual Machine
Navigate to “Virtual machines” from the sidebar and click on “Create.”
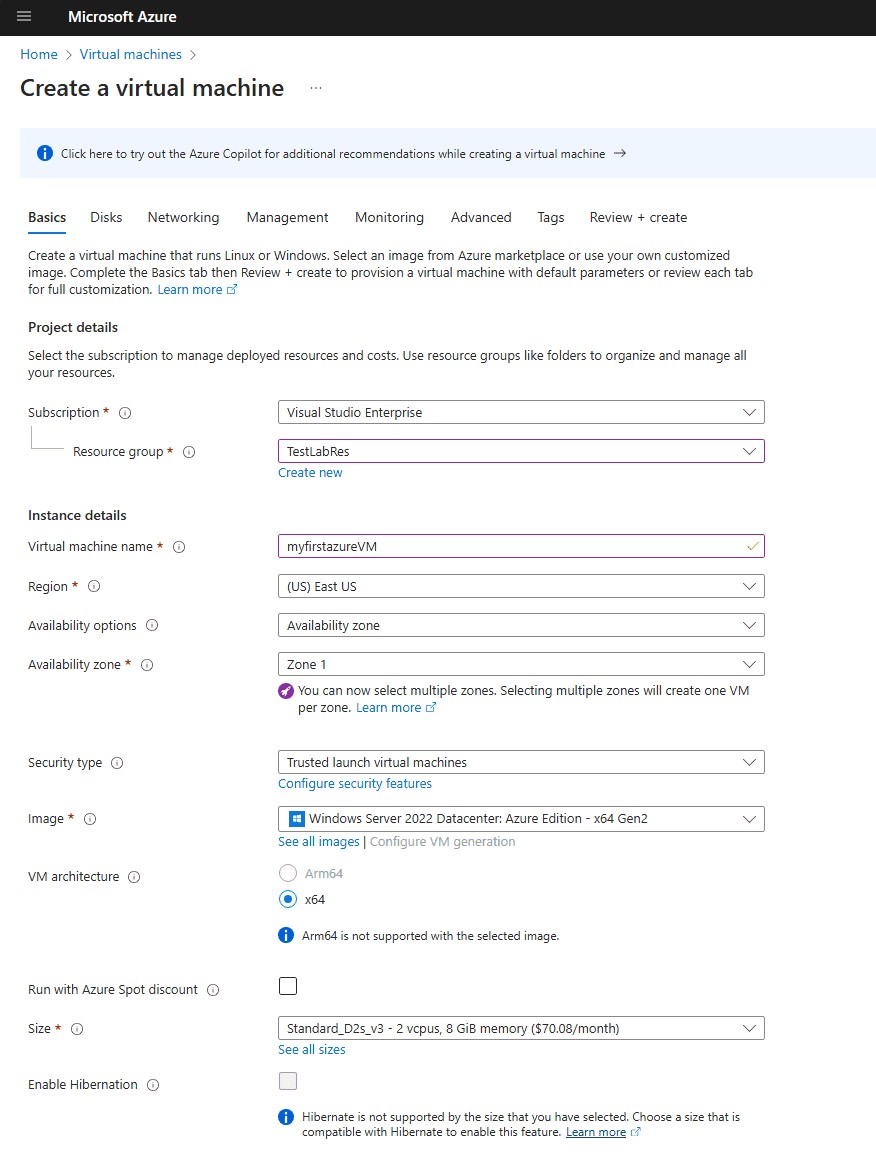
Note the following configuration you will need to populate on the Basics screen:
- Choose the resource group you want to use or create a new one on the fly
- Enter the Virtual Machine Name, Region, Availability options, and the Image for the OS you want to use
- Select the size of the VM. Azure will populate the size for you, but you can also browse all sizes to find one that fits your needs
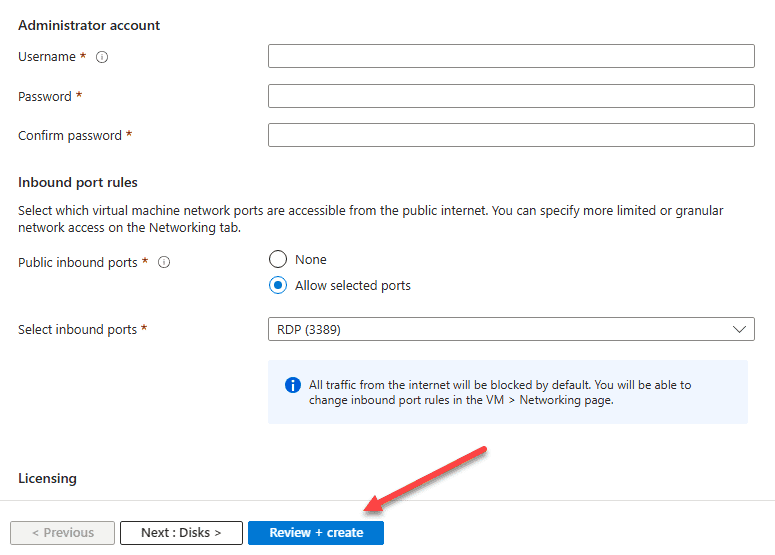
- Set up administrator account credentials to access the VM once it’s running. Also, configure optional features like inbound port rules. For example, you might enable HTTP and RDP ports
- Finally, review + create the VM
Deployment might take a few minutes, during which Azure will initialize the VM and configure it as per your specifications.
After creating the virtual machine
After the Azure VM is created, you may want to configure backups or manage network settings on the new VM. Below are a couple of options that are suggested:
- Backups: Set up Azure Backup for DR purposes. You can also use a third-party backup software like BDRSuite for Azure VM Backup which includes features like agentless backup, automated backups, instant recovery & more. Start your 30-day free trial today
- Networking: Adjust any networking configuration to make sure the VM can communicate with other servers or clients in Azure or on-premises
Create an Azure VM using PowerShell
Before you can use PowerShell to create an Azure VM, you will need to install the Az PowerShell module:
You can do this with the command
Install-Module -Name Az -AllowClobber -Scope CurrentUser
Now, login to your account using the cmdlet:
Connect-AzAccount
Steps to create the VM
Now that we have the Azure PowerShell module installed and are connected to the Azure account, we can actually create the Azure virtual machine. To do this, use the following steps.
- Variables – We will set some variables that will contain the resource group, region, VM name, etc
- Resource group – To create a resource group using PowerShell, use the following code:
- Virtual network – To create a new virtual network in Azure:
- Public IP address: To create a public IP:
- Network security group and rule – To create security groups with rules to allow communication such as to port 3389 for RDP, use the following PowerShell code:
- Network interface – To create a network interface for the VM to connect to the new virtual network, use the following:
- VM config: This step will set the VM size, OS, and other config like the administrative credentials
- ProvisionVMAgent -EnableAutoUpdate
$resourceGroupName = ‘MyResourceGroup’
$location = ‘EastUS’
$vmName = ‘MyVM’
New-AzResourceGroup -Name $resourceGroupName -Location $location
$subnetConfig = New-AzVirtualNetworkSubnetConfig -Name ‘MySubnet’ -AddressPrefix ‘10.0.0.0/24’
$vnet = New-AzVirtualNetwork -ResourceGroupName $resourceGroupName -Location $location -Name ‘MyVNet’ -AddressPrefix ‘10.0.0.0/16’ -Subnet $subnetConfig
$pip = New-AzPublicIpAddress -ResourceGroupName $resourceGroupName -Location $location -Name “MyPublicIP” -AllocationMethod Dynamic
$nsgRuleRDP = New-AzNetworkSecurityRuleConfig -Name ‘MyNetworkSecurityGroupRuleRDP’ -Protocol Tcp -Direction Inbound -Priority 1000 -SourceAddressPrefix * -SourcePortRange * -DestinationAddressPrefix * -DestinationPortRange 3389 -Access Allow
$nsg = New-AzNetworkSecurityGroup -ResourceGroupName $resourceGroupName -Location $location -Name “MyNetworkSecurityGroup” -SecurityRules $nsgRuleRDP
$nic = New-AzNetworkInterface -Name “MyNIC” -ResourceGroupName $resourceGroupName -Location $location -SubnetId $vnet.Subnets[0].Id -PublicIpAddressId $pip.Id -NetworkSecurityGroupId $nsg.Id
$vmConfig = New-AzVMConfig -VMName $vmName -VMSize “Standard_D2s_v3”
$vmConfig = Set-AzVMOperatingSystem -VM $vmConfig -Windows -ComputerName $vmName -Credential (Get-Credential) -ProvisionVMAgent -EnableAutoUpdate
$vmConfig = Set-AzVMSourceImage -VM $vmConfig -PublisherName ‘MicrosoftWindowsServer’ -Offer ‘WindowsServer’ -Skus ‘2022-Datacenter’ -Version ‘latest’
$vmConfig = Add-AzVMNetworkInterface -VM $vmConfig -Id $nic.Id
New-AzVM -ResourceGroupName $resourceGroupName -Location $location -VM $vmConfig
Wrapping up
You can practice and learn how to create an Azure virtual machine with a free account and use the Azure Portal or PowerShell to spin up new Azure VMs. This task is a basic skill for those administering Azure environments and looking to be familiar with the content on the AZ-104 exam.
Read More:
Follow our Twitter and Facebook feeds for new releases, updates, insightful posts and more.

Leave A Comment