In this article, we will look into how to deploy a static website in AWS S3.
The purpose of static websites is to deliver simple, efficient, and fast-loading web content to users. They are well-suited for scenarios where dynamic features or complex interactivity are not required.
The main purposes of static websites include:
Informational Sites: Static websites are ideal for presenting information, such as company profiles, contact details, product catalogs, and event schedules.
Documentation: Technical documentation, user manuals, and guides can be efficiently presented using static websites, ensuring clear and organized access to information.
Landing Pages: For marketing campaigns, promotions, or product launches, static landing pages provide focused content and quick loading times.
Single-Page Applications (SPAs): Some SPAs use static websites to deliver the initial content and user interface, while dynamic features are powered by client-side JavaScript frameworks.
Event Sites: Static websites are useful for creating temporary event sites, such as conferences, workshops, and weddings, with essential details and schedules.
Low-Cost and Green Hosting: Static websites have lower hosting costs and a smaller carbon footprint compared to dynamic websites, making them cost-effective and environmentally friendly.
Simplicity and Ease of Maintenance: Static websites are easy to create, manage, and update, requiring minimal maintenance effort and allowing focus on content creation.
While static websites have their limitations, their purpose is to provide a streamlined way to deliver content quickly and effectively, making them a valuable choice for specific use cases.
Step by Step Instructions on How to Host a Static Website on Amazon S3
Hosting a static website on AWS S3 is a straightforward process. Below is the Step by step procedure on how to enable a static website on S3:
Step 1: First step is to create a S3 bucket
In the AWS Management Console, search for the Amazon S3 service.


Click on “Create Bucket”
Give a name for your bucket and choose a region.
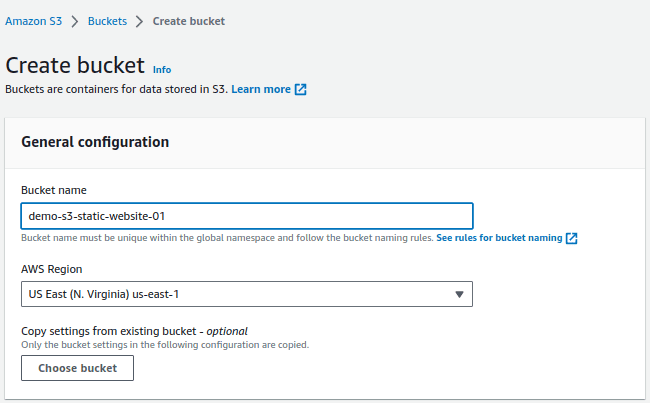
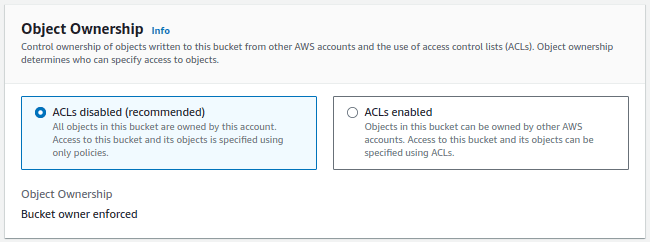
For object ownership, choose ‘ACLs Disabled’.
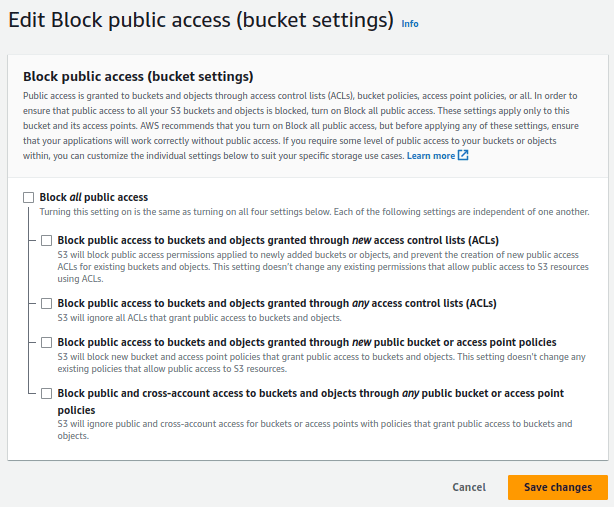
Keep the checkbox “Block all public access” disabled. We are allowing public access to the bucket.
Then, ‘Disable‘ bucket versioning.

Configure tags if required

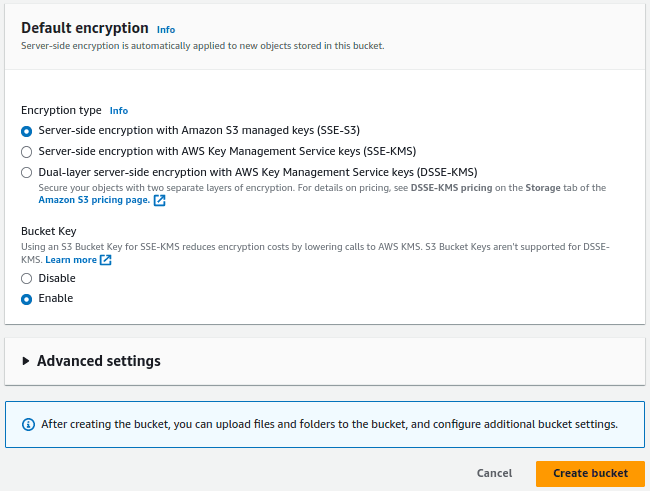
For the default encryption, select the encryption type and bucket key. In this demo, we will leave it to default options. Finally, Click on ‘create bucket‘.
After the bucket is created, the output is shown as below.

Step 2: Upload Your Website Content
Open your newly created bucket.
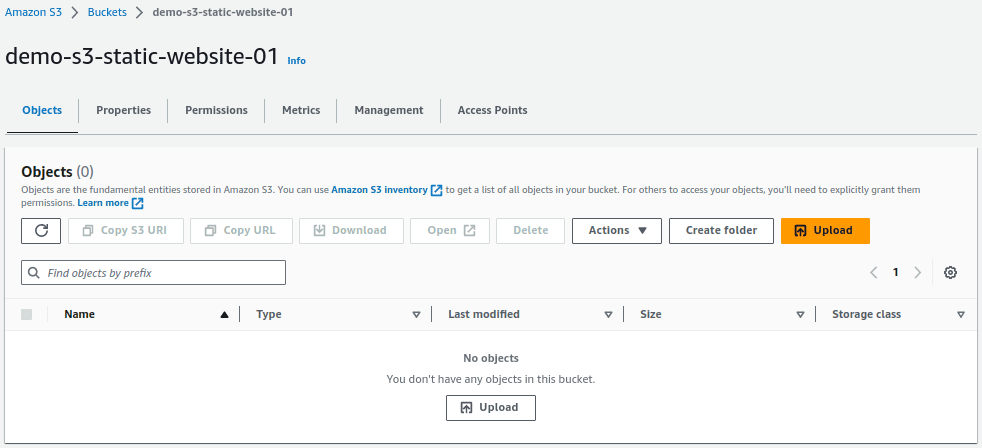
Click the “Upload” button and upload the html file to the bucket. Here we have uploaded a file index.html.

Step 3: Configure Your Bucket for Website Hosting
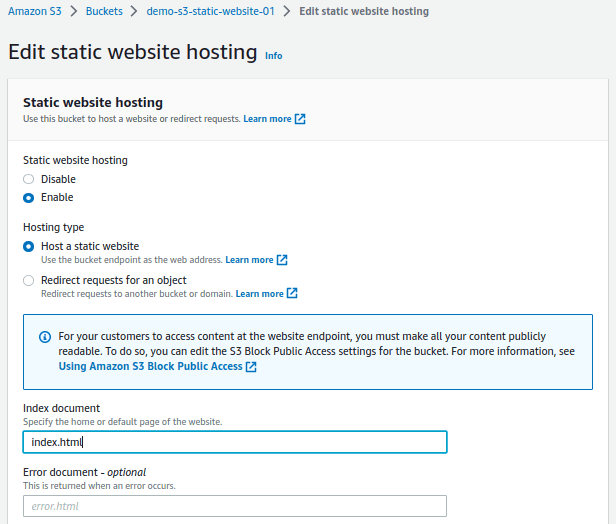
- In your bucket, click the “Properties” tab, Scroll down to the “Static website hosting” section. Click ‘Edit’ and ‘Enable‘ static website hosting on S3
- Select the hosting type as ‘Host a Static Website’ – Use the bucket endpoint as the web address
- Enter the name of the default HTML file (In this tutorial, the file name is “index.html”).
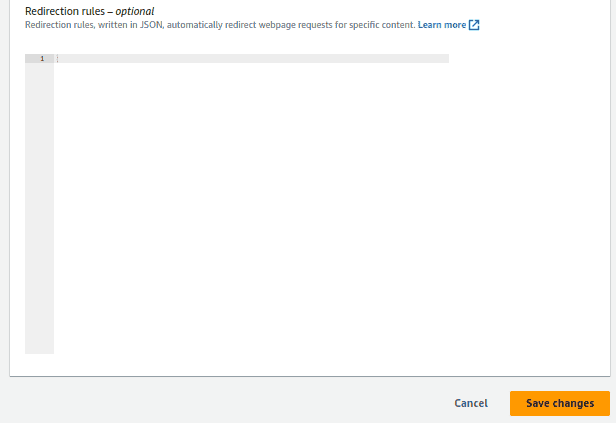
- Click “Save changes.”


Step 4: Configure Bucket Permissions
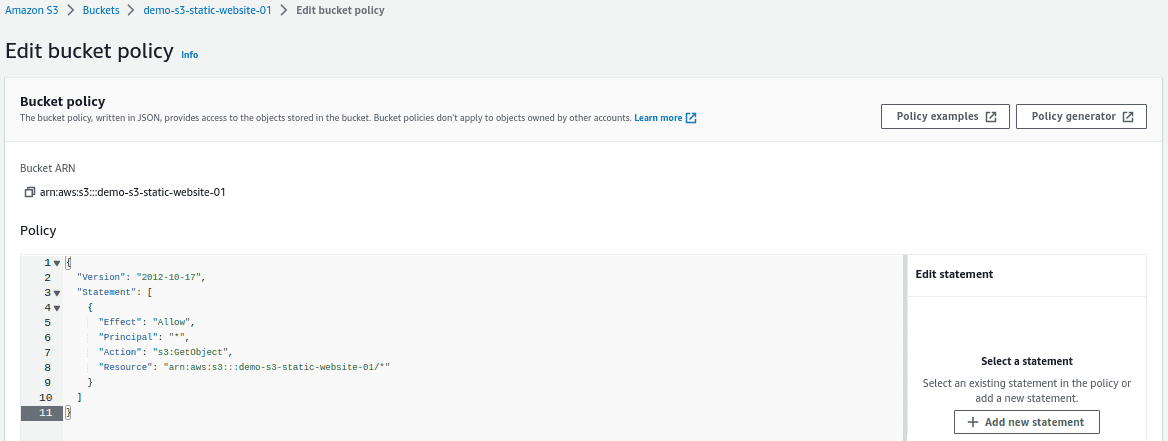
In the “Permissions” tab of your bucket, click “Bucket policy.”
Add the below policy statement. Without this policy statement, you will get 403 Forbidden error. Replace the bucket name in the policy with your bucket name.
{
“Version”: “2012-10-17”,
“Statement”: [
{
“Effect”: “Allow”,
“Principal”: “*”,
“Action”: [
“s3:GetObject”,
“s3:PutObject”
],
“Resource”: “arn:aws:s3:::demo-s3-static-website-01/*”
}
]
}
Step 5: Access Your Static Website
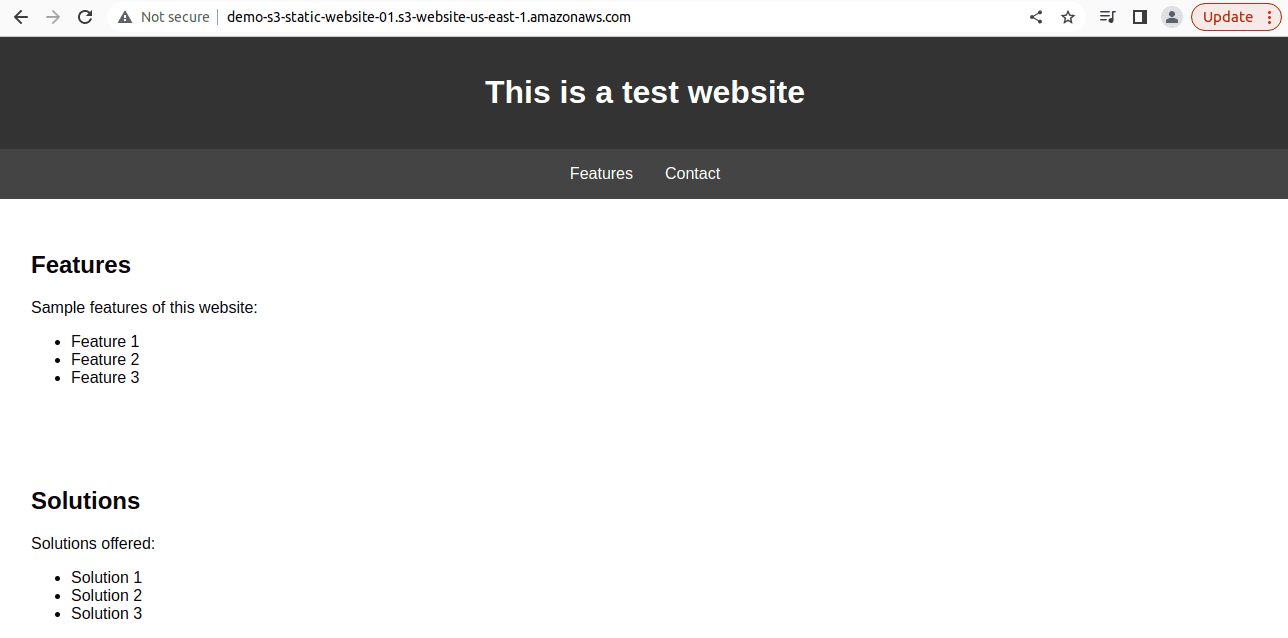
After setting up the bucket, you’ll see the “Static website hosting” section with a “Endpoint URL”.
This is the URL where your website will be accessible (e.g., http://demo-s3-static-website-01.s3-website-us-east-1.amazonaws.com/ ).

Open a web browser and navigate to the endpoint URL to access your static website.
Conclusion
In this article, we have seen the end-to-end steps about how to create a S3 bucket and use it to host a static website. Setting up a static website using Amazon S3 offers a reliable and cost-effective solution for hosting your web content. This approach eliminates the need for server maintenance, ensures faster load times, and reduces operational expenses.


Leave A Comment