What is an elastic load balancer in EC2
A load balancer in Amazon EC2 is a service that helps distribute incoming network traffic across multiple EC2 instances to ensure optimal availability, fault tolerance, and scalability of your applications. Load balancers play a crucial role in distributing the workload evenly across instances, improving the overall performance and reliability of your application.
There are two main types of load balancers available in Amazon EC2:
Elastic Load Balancing (ELB):
ELB is a managed load balancing service from AWS that distributes incoming traffic across targets, like EC2 instances, containers, IP addresses, or Lambda functions.
It offers three types of load balancers: Application Load Balancer (ALB), Network Load Balancer (NLB), and Gatewat Load Balancer (GLB).
- ALB is best suited for routing HTTP/HTTPS traffic and provides advanced routing features, including path-based routing and host-based routing
- NLB is designed for handling high-throughput, low-latency traffic, making it suitable for TCP, UDP, and TCP/UDP hybrid workloads
- GLB can be used when deploying virtual third party appliances and for managing traffic between appliances
Auto Scaling Groups and Target Groups:
When using Elastic Load Balancing, you typically work with Auto Scaling groups and target groups. An Auto Scaling group automatically adjusts the number of instances in response to changing demand. This ensures that the right number of instances are available to handle traffic.
A target group is associated with a load balancer and routes traffic to registered instances based on the load balancing algorithm and health checks.
Key Benefits of Using a Load Balancer:
- High Availability: Load balancers distribute traffic across multiple instances, ensuring that if one instance fails, traffic is directed to healthy instances
- Scalability: Load balancers can automatically scale the number of instances based on incoming traffic, ensuring consistent performance during traffic spikes
- Fault Tolerance: Load balancers regularly perform health checks on instances and route traffic only to healthy instances, improving application reliability
- Reduced Latency: Load balancers can distribute traffic to the nearest healthy instance, reducing response time for users
- SSL Termination: Load balancers can terminate SSL/TLS connections, offloading the encryption/decryption process from instances and improving overall performance
- Session Management: Load balancers can manage session persistence and stickiness, ensuring that a user’s session is maintained on the same instance
- Advanced Routing: Application Load Balancers support advanced routing features, enabling you to route traffic based on specific URL paths or hostnames
Using a load balancer in Amazon EC2 is an effective way to ensure your application remains highly available, performs well, and can seamlessly handle varying levels of traffic. It’s a critical component for building scalable and reliable applications in the AWS cloud.
How to configure Application Load Balancer in AWS
Below we will walk through the process of configuring an Application Load Balancer (ALB) in AWS using a real case scenario. In this scenario, we’ll set up an ALB to distribute traffic to a web application running on multiple EC2 instances.
Scenario: Setting Up an ALB for a Web Application
Test Cases:
- Access web application using Load balancer DNS when both the EC2 instances are up and running
- Access web application using Load balancer DNS when one EC2 instance is down
Step 1: Create Amazon EC2 Instances
Launch EC2 Instances:
Launch two EC2 instances in the same Availability Zone or different Availability Zones, depending on your availability and fault tolerance requirements.
Install and configure your web application on each instance using the nginx web server application.
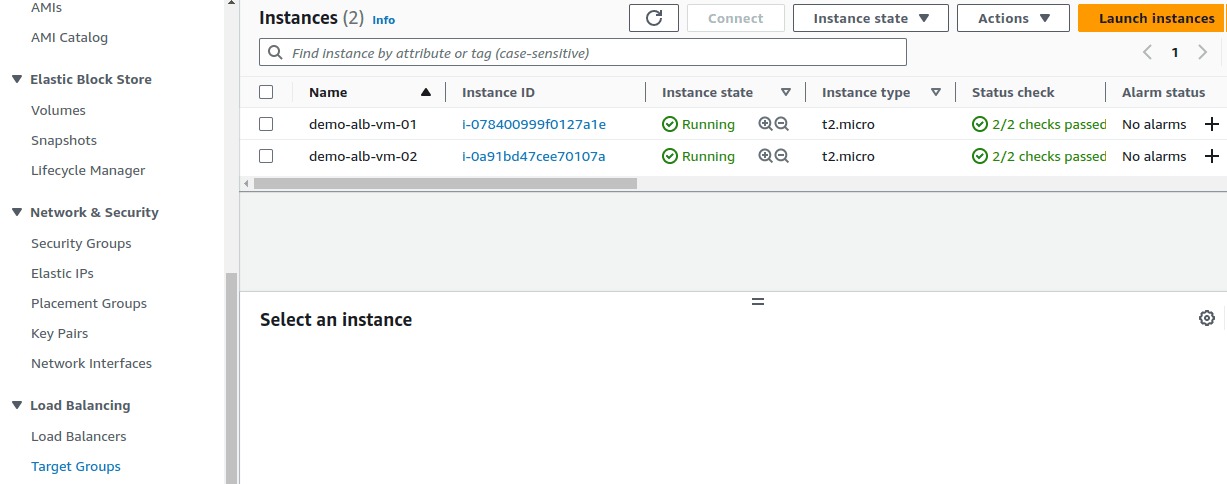
Here we have installed 2 EC2 instances, demo-alb-vm-01 and demo-alb-vm-02.

In both these VM’s, we have installed “nginx” web server application and configured the default html page to reflect the EC2 instance names respectively when opening the web
page. Please note that this difference in the web pages are configured only for understanding the load balancer functionality. In real time, the web pages will be exactly same in both the EC2 instances.
EC2 Instance: demo-alb-vm-01
When opening the web url 134.127.120.139 which is the IP address of EC2 instance demo-alb-vm-01 we can see the below web page. This web page has the instance name demo-alb-vm-01 in this page.

EC2 Instance: demo-alb-vm-02
When opening the web url 118.245.227.141 which is the IP address of EC2 instance demo-alb-vm-02 we can see the below web page. This web page has the instance name demo-alb-vm-02 in this page.

Step 2: Create a Target Group
Create a Target Group:
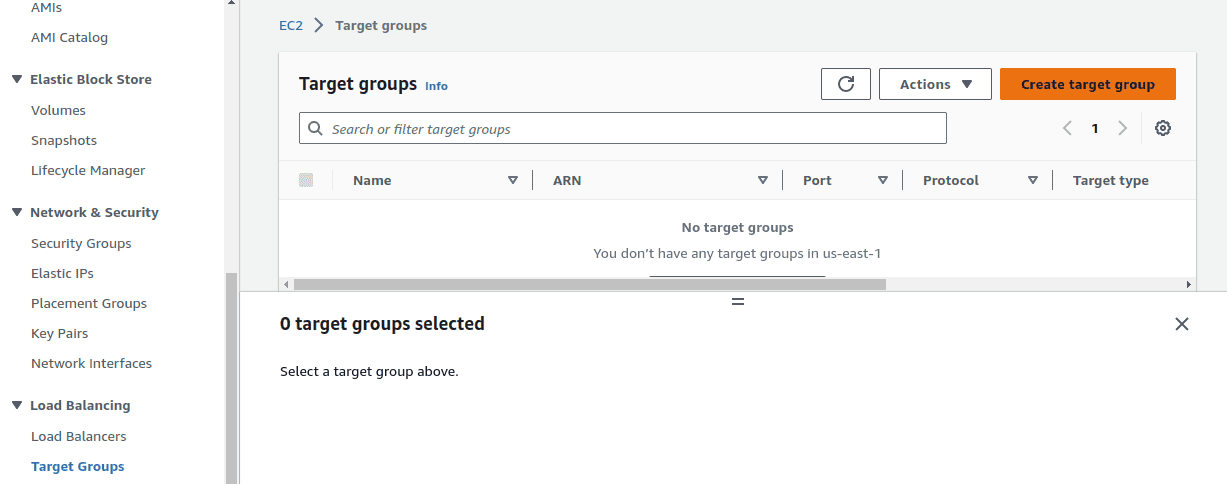
Go to the EC2 Dashboard, and under “Load Balancing,” click on “Target Groups.”
Click the “Create target group” button.
Provide a name for the target group and choose the protocol (HTTP or HTTPS).
Define the target type (instances or IP addresses) and specify the port your web application is listening on.
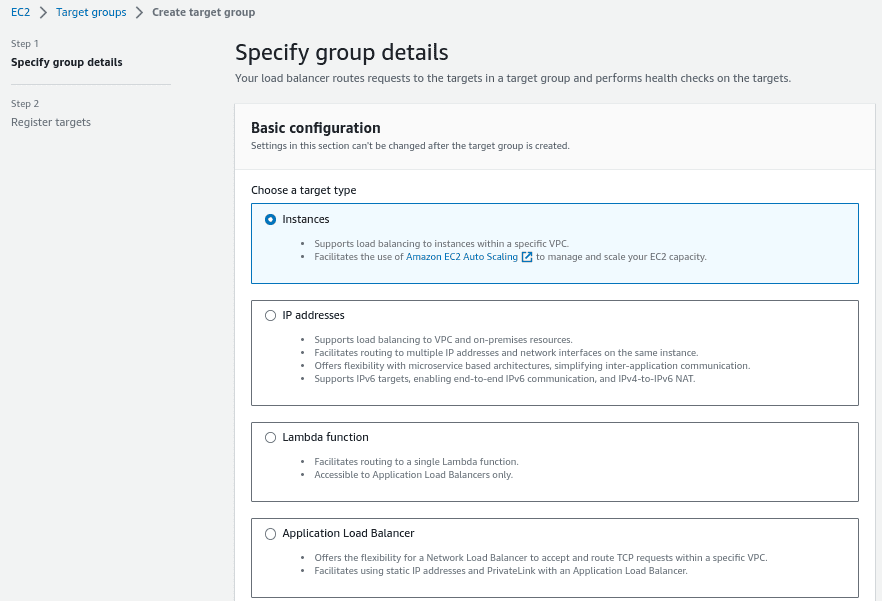
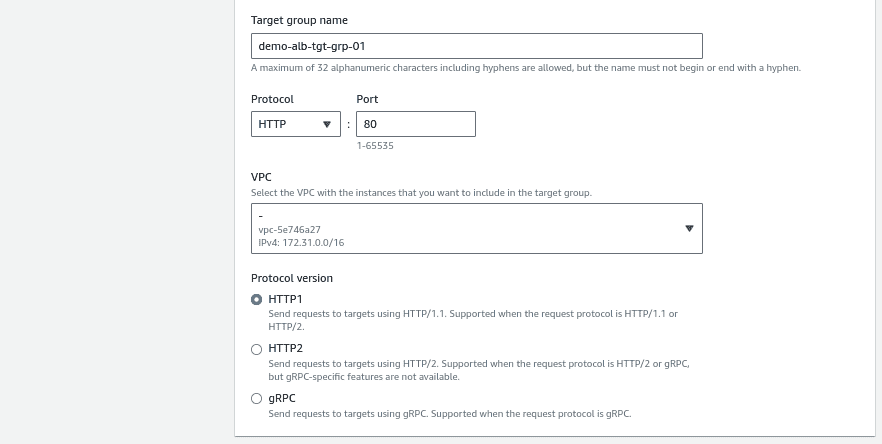
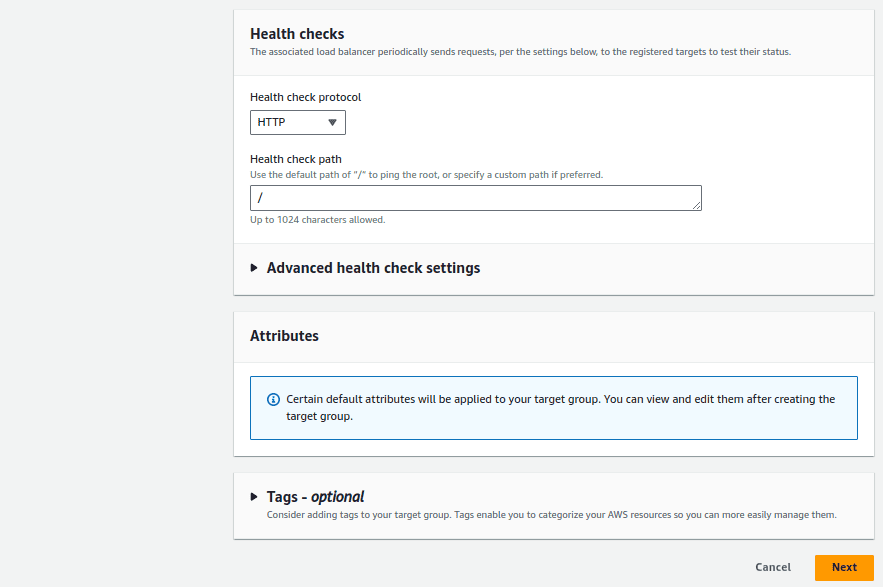
Select the Health check protocol as HTTP and health check path as “/”. This is the default setting.
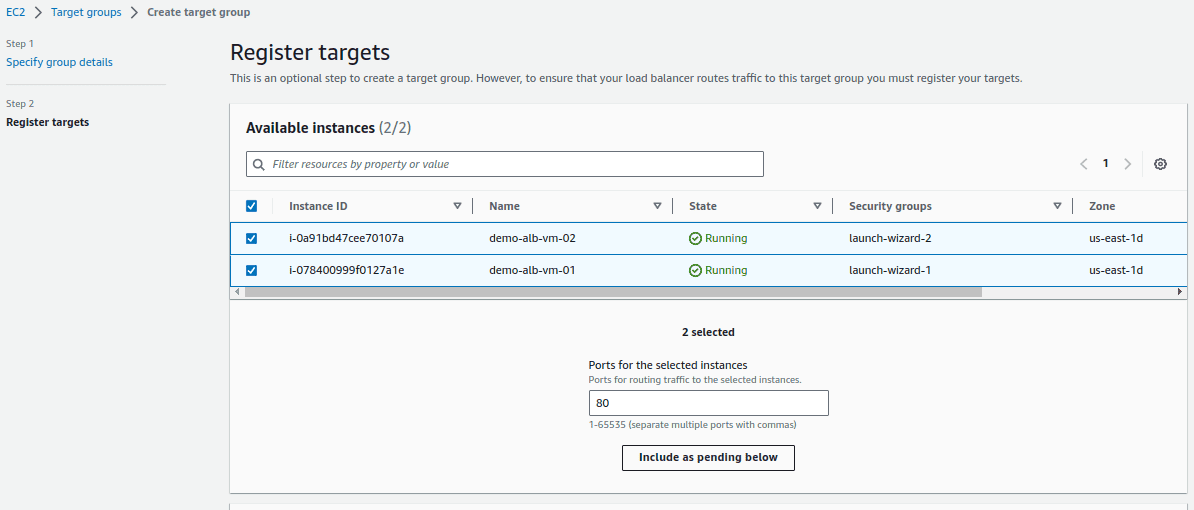
The next step is to register targets. Select the 2 instances that we have created for this demo and click on “include as pending below”
In the review targets section, you can find the EC2 instances are now added and showing in pending state. Now click on the “Create target group” button.

Now, the target group is created. But it is not attached to a load balancer yet.

Step 3: Create an Application Load Balancer
In the EC2 Dashboard, under “Load Balancing,” click on “Load Balancers.”
Click the “Create Load Balancer” button and choose “Application Load Balancer.”

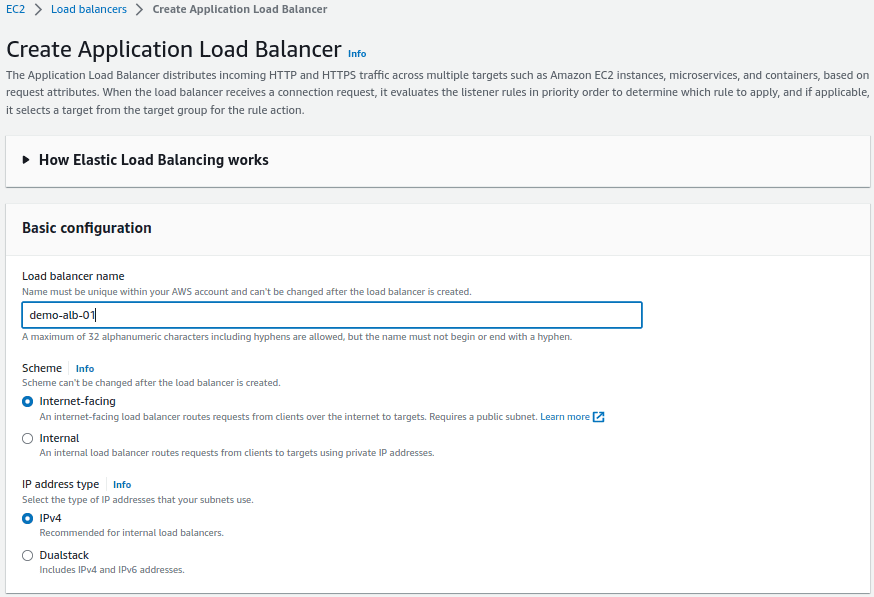
Configure the load balancer settings, including a name, scheme (internet-facing or internal), and listener configuration (protocol and port).
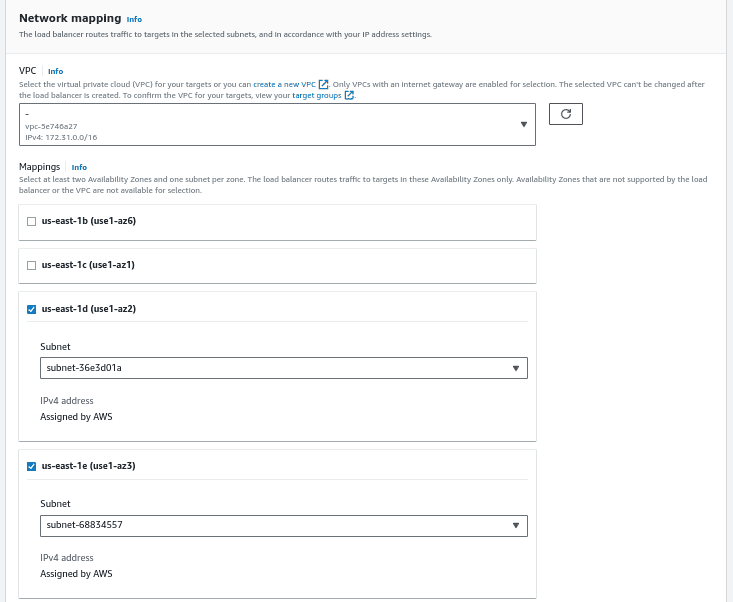
Specify the availability zones where your instances are located.
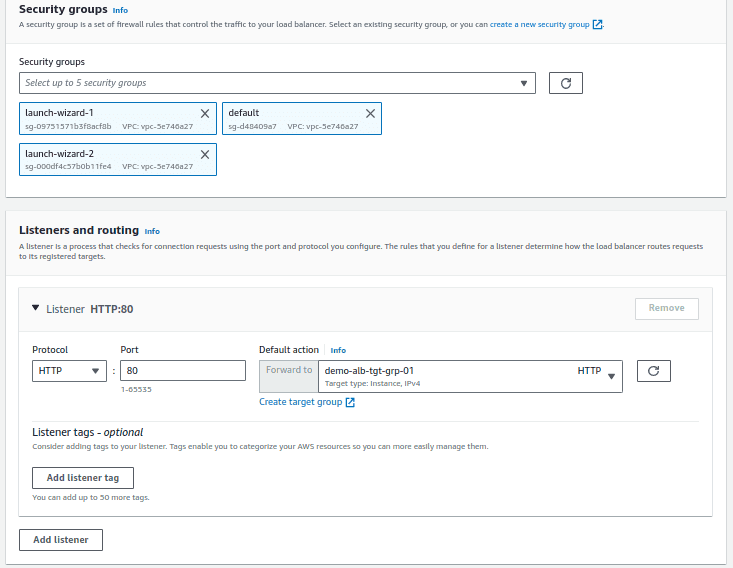
Specify the security groups associated with the EC2 instances and configure the listener settings. Enter the listener protocol (HTTP in this case), the port number on which the web application is listening (Port 80) and the action is to forward the requests to the target group created earlier (demo-alb-tgt-grp-01). This target group contains both the EC2 instance details created for this demo.
Finally, review the information entered and then click on “Create Load Balancer” button.
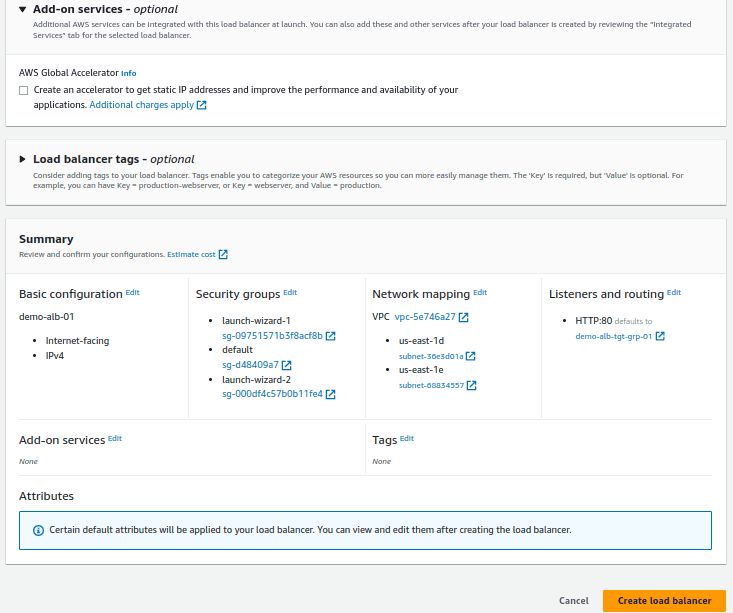
The load balancer will take few minutes to be created. The state will be showing as provisioning, until the creation completes.

Once the provisioning is completed, the state of the load balancer will turn to “ACTIVE”. After this, you can use the DNS name associated with the load balancer and access the web server application in a web browser.

Test Case – 1:
In this case, both the EC2 instances are up and running. When you access the web server application using the DNS name of the load balancer for the first time, you will be see the result appearing from the first EC2 instance demo-alb-vm-01.

When you access the same web server application using the DNS name of the load balancer for the second time, you will see the result appearing from second EC2 instance demo-alb-vm-02.

Thus in this first case, the traffic is directed in a round robin fashion between the 2 instances that is configured in the target group of the load balancer.
Test Case – 2:
In this case, the EC2 instance demo-alb-vm-01 is running and the EC2 instance demo-alb-vm-02 is shutdown. Now the web page from demo-alb-vm-01 is alone displayed.

Error code when both the EC2 instances are shutdown

When both the EC2 instances are shutdown, then the Loadbalancer throws the error 504 Gateway timed out

Conclusion
By following these steps, you’ve configured an Application Load Balancer (ALB) to distribute traffic to your web application running on two EC2 instances. The ALB enhances the availability, fault tolerance, and scalability of your application by intelligently distributing traffic and ensuring that instances remain healthy. Remember that this is a simplified scenario, and in a real-world production environment, you would also consider security, scaling, and other factors to optimize your setup.
Follow our Twitter and Facebook feeds for new releases, updates, insightful posts and more.


Leave A Comment