
What is AWS Systems Manager?
AWS Systems Manager is the operation hub for your AWS applications and resources. Systems manager has lots of capabilities.
Application Management: Application manager, AppConfig and Parameter Store
Change Management: Change manager, Automation, Change calendar, Maintenance window
Node Management: Compliance, fleet manager, Inventory, Session Manager, run command, State Manager, Patch manager, Distributor, Hybrid Activations
Operations Management: Incident Manager, Explorer, OpsCenter, CloudWatch Dashboard
Shared resources: Documents
We will explore session manager under node management section to connect EC2 instances without public IP.
What is session manager?
Use Session Manager to manage your edge devices and Amazon Elastic Compute Cloud (Amazon EC2) instances through an interactive one-click browser-based shell or through the AWS CLI. Session Manager provides secure and auditable edge device and instance management without needing to open inbound ports, maintain bastion hosts, or manage SSH keys. Session Manager also allows you to comply with corporate policies that require controlled access to edge devices and instances, strict security practices, and fully auditable logs with edge device and instance access details, while still providing end users with simple one-click cross-platform access to your edge devices and EC2 instances.
Benefit of Session Manager
- Centralized access control to managed nodes using IAM policies
- No open inbound ports and no need to manage bastion hosts or SSH keys
- One-click access to managed nodes from the console and CLI
- Connect to both Amazon EC2 instances and non-EC2 managed nodes in hybrid and multi-cloud environments
- Cross-platform support for Windows, Linux, and macOS
- Logging and auditing session activity
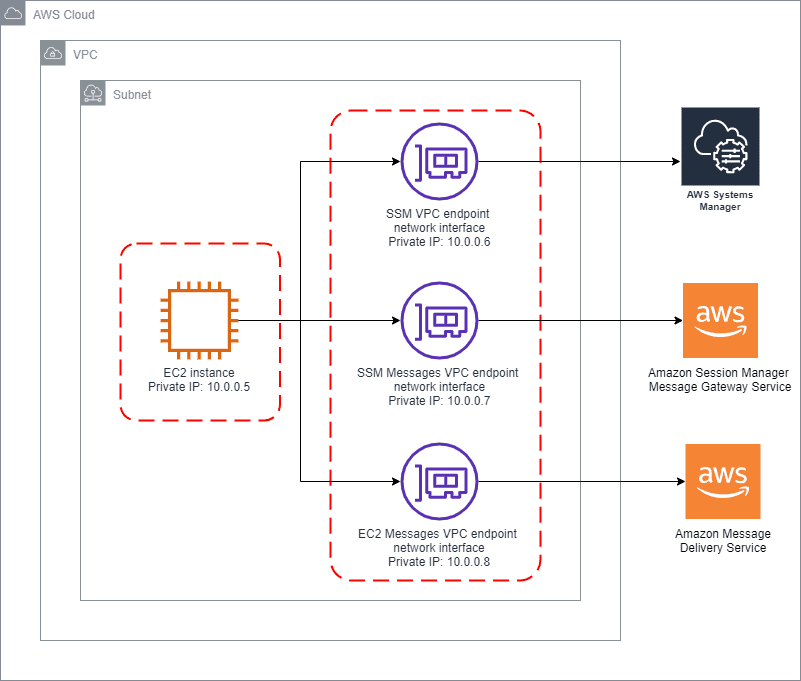
Architecture to follow
Steps to follow
- Create an EC2 instance profile (IAM role)
- Create an EC2 Instance and attach instance profile
- Install SSM agent if not installed
- Create VPC endpoints
- Connect to EC2 instance using session manager
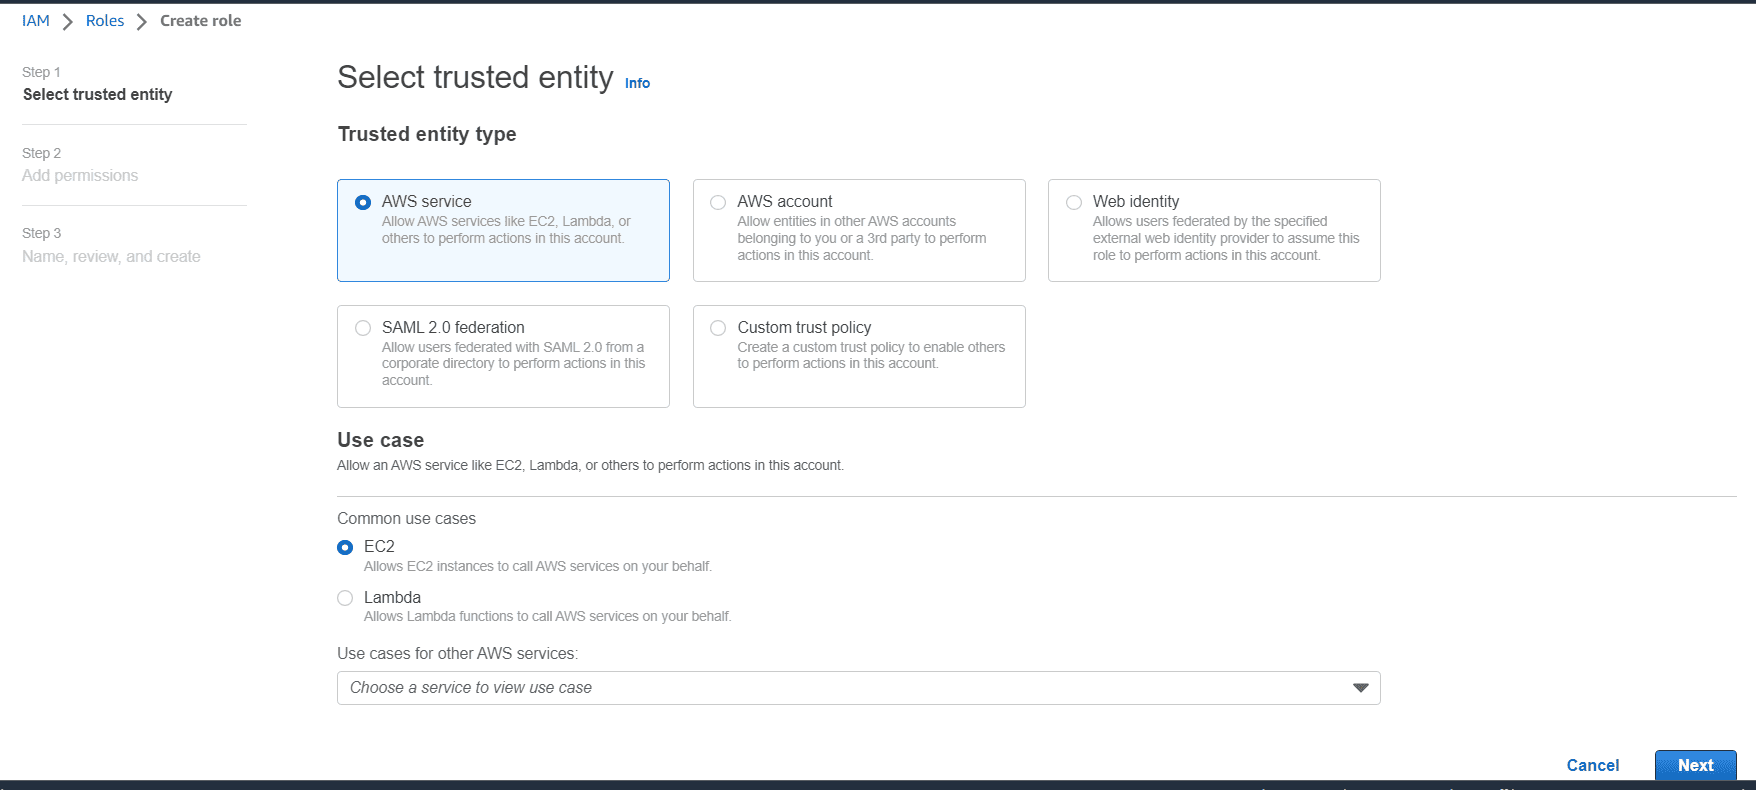
Step 1: Create an EC2 Instance Profile
AWS Systems Manager doesn’t have permission to perform actions on your instances. You can provide instance permissions at the account level using an AWS Identity and Access Management (IAM) role, or at the instance level using an instance profile.
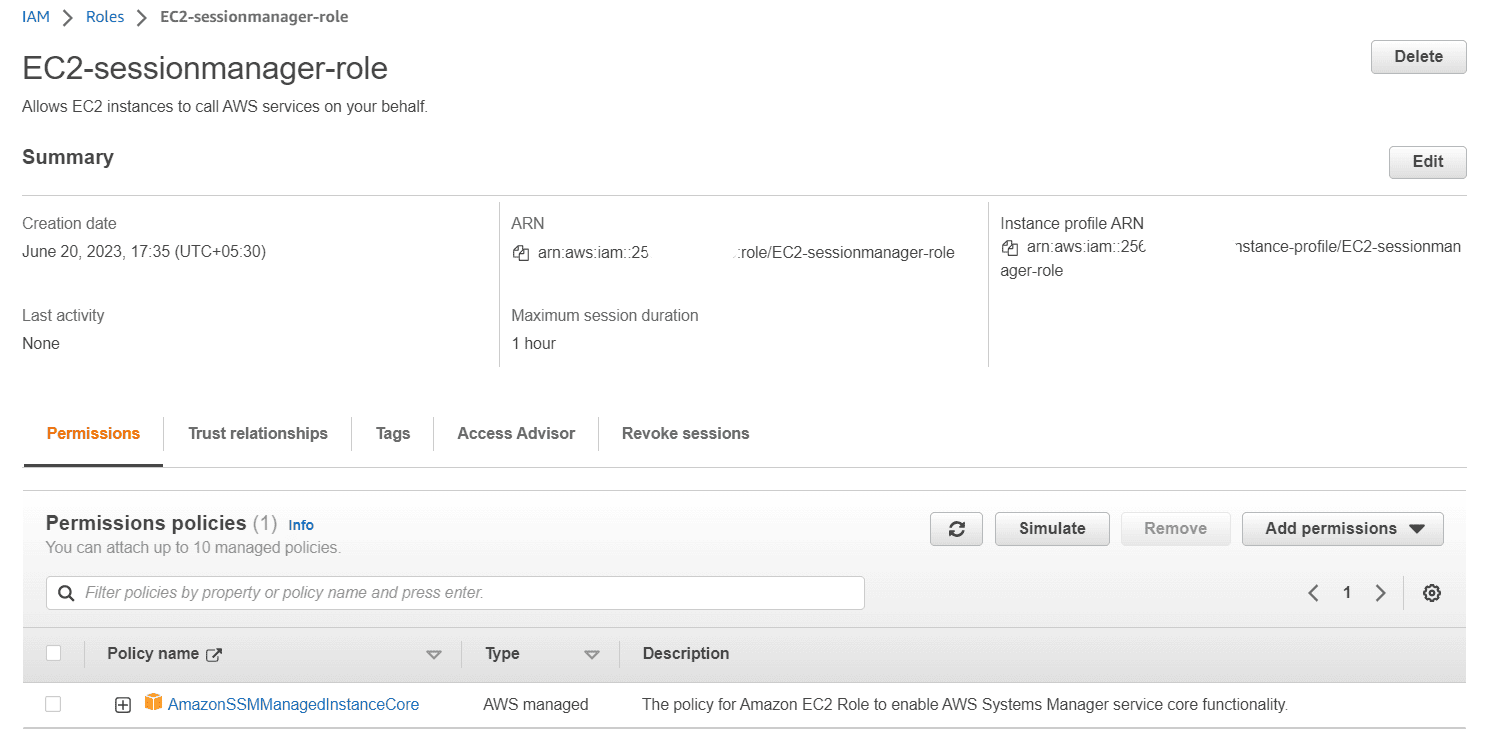
Login to AWS Account, Navigate to IAM roles. Click on create role, choose EC2 as use case

In Add permissions search for AmazonSSMManagedInstanceCore and attach
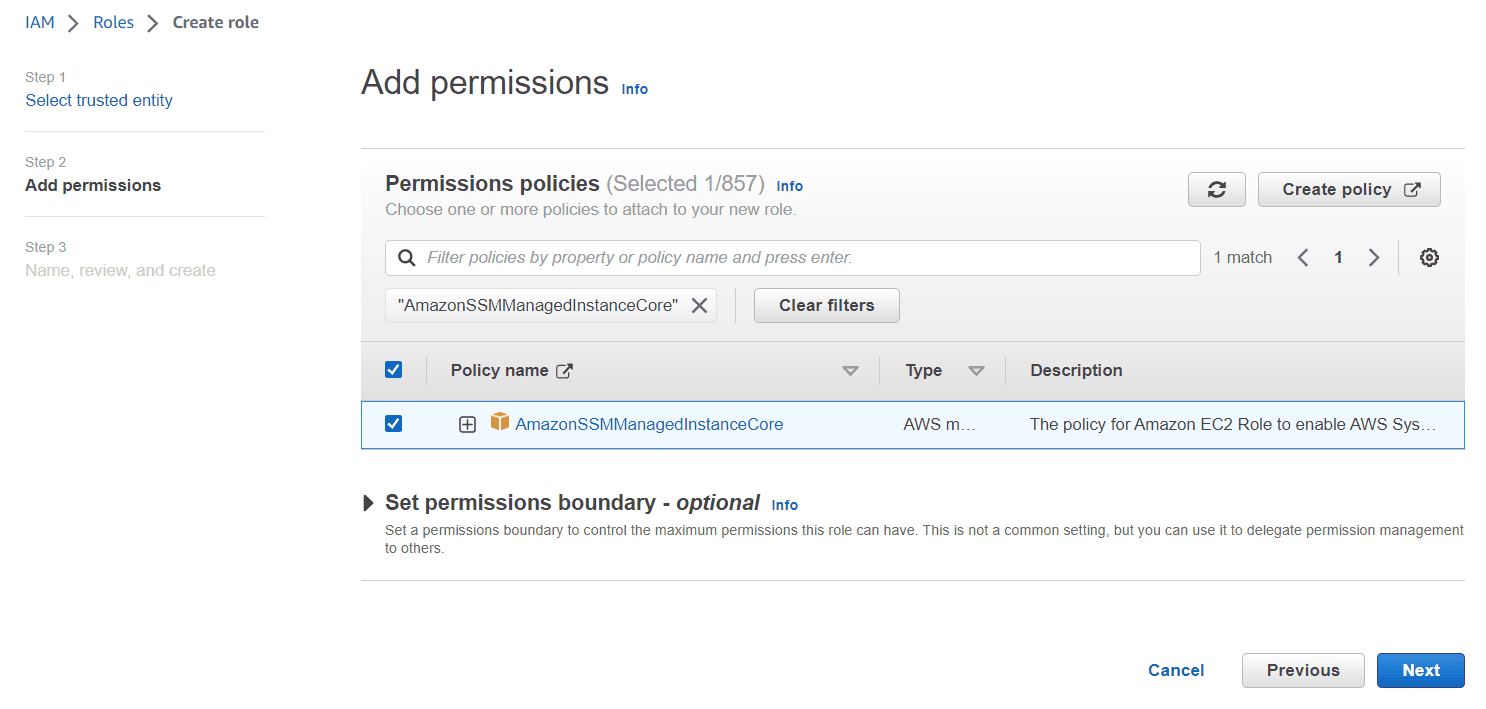
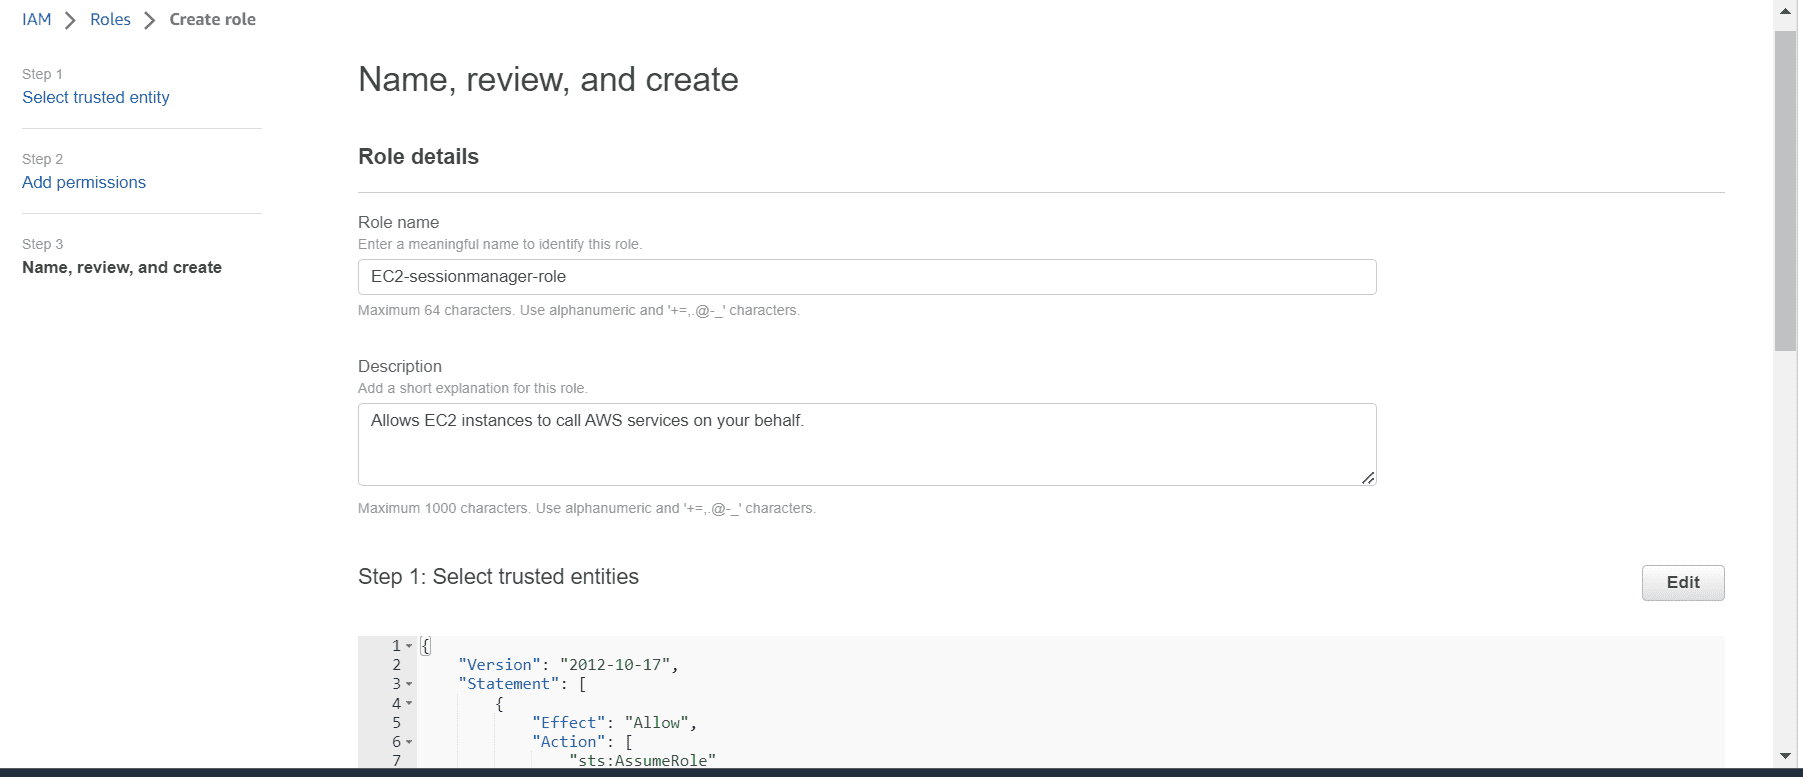
Click on next. Provide a meaningful name to the role and create the role
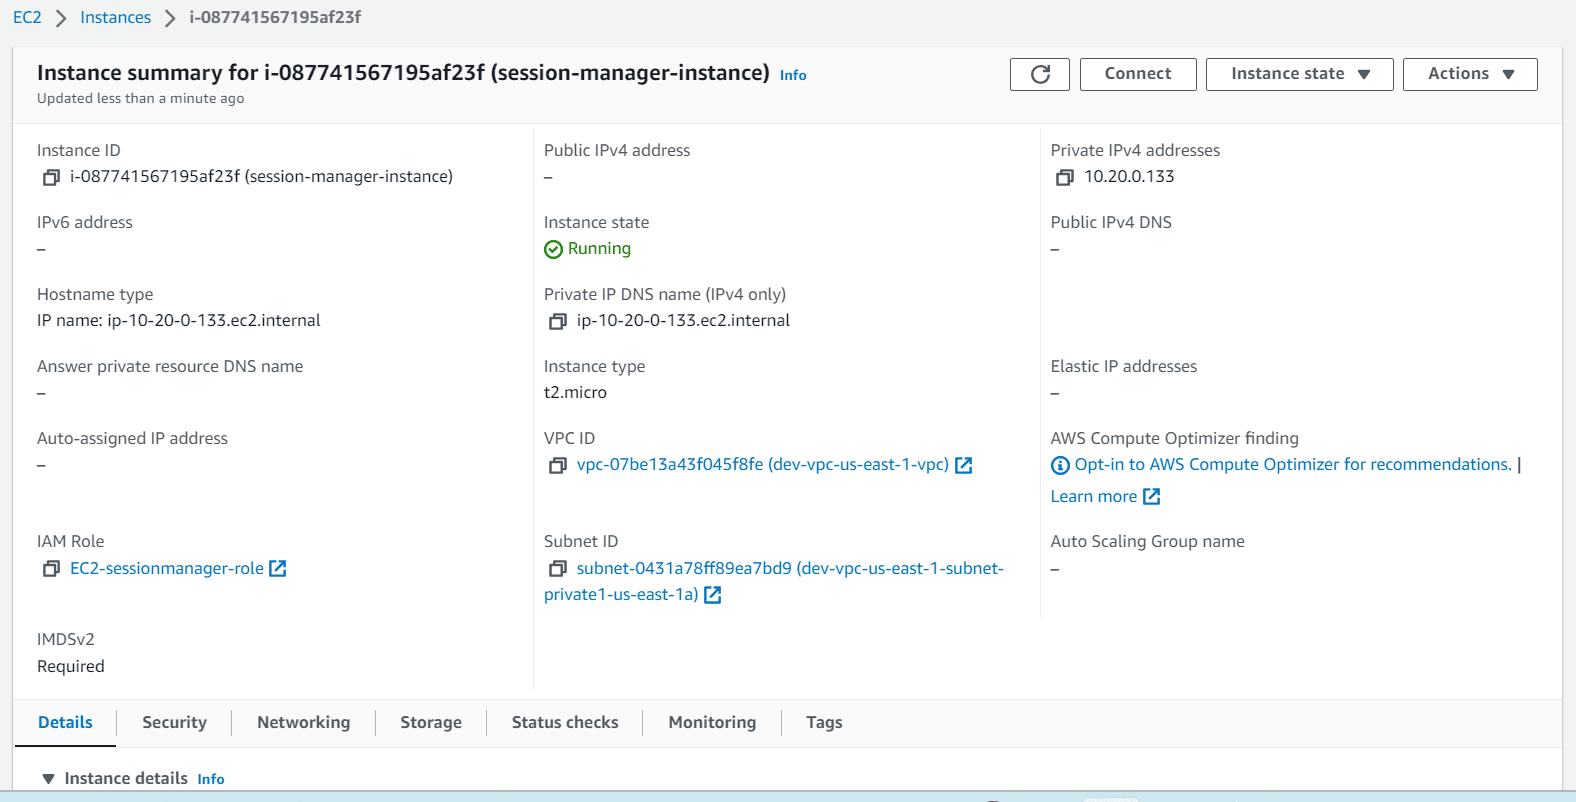
Step 2: Create an EC2 Instance and attach instance profile
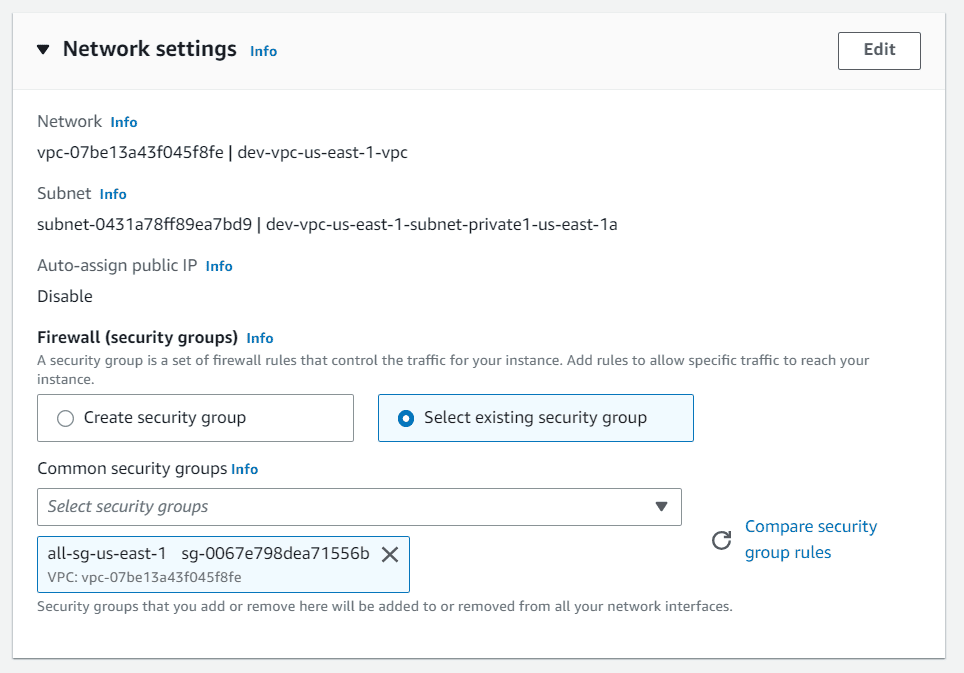
Let’s create an EC2 instance in any private subnet with no public IP assigned. The subnet should not have internet connectivity.
Navigate to EC2 instance, click on launch an instance
Provide a name and choose Amazon linux as Operating system
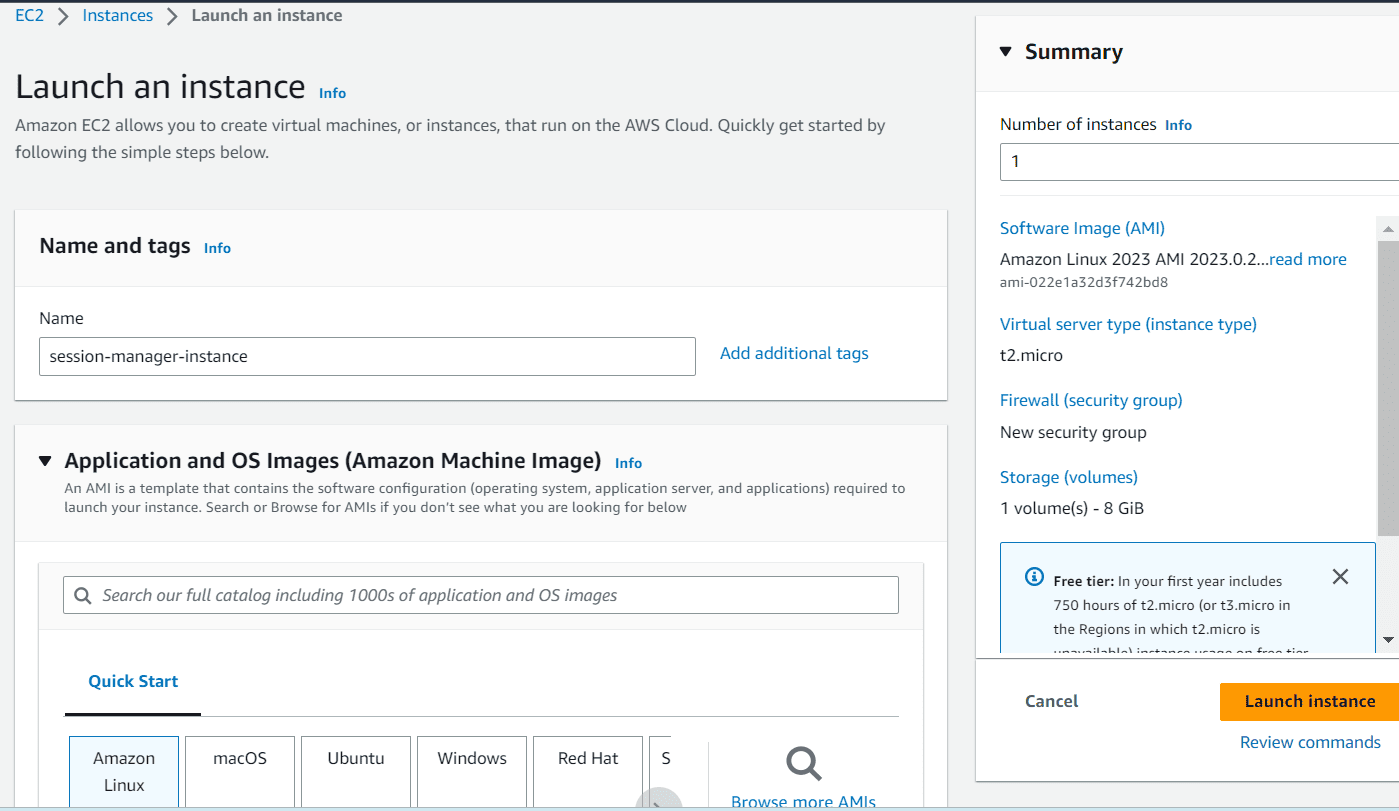
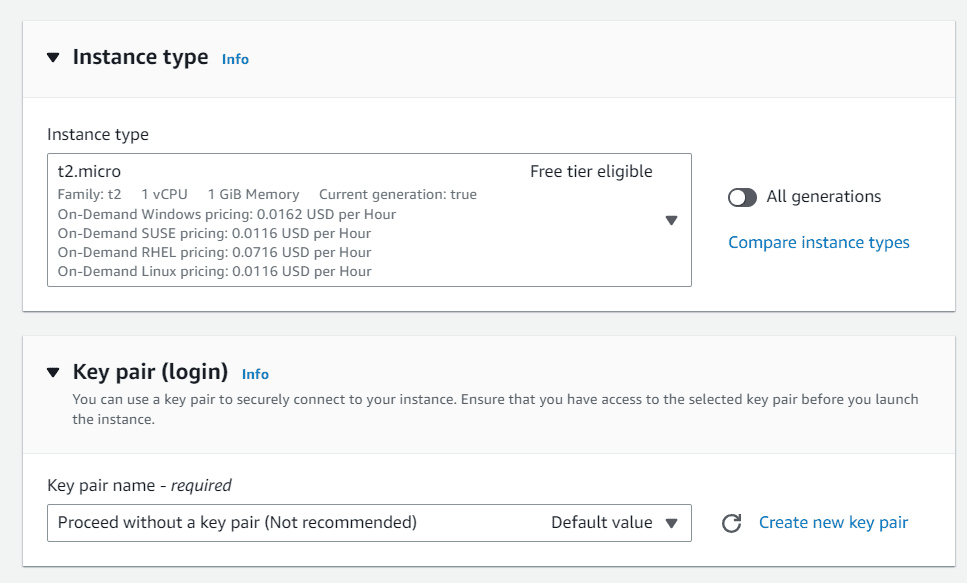
Choose proceed with no key pair, we don’t need any key pair to connect to EC2 instance
In network section, disable auto-assign public IP
Under advanced details section, choose the previously created IAM role or instance profile.
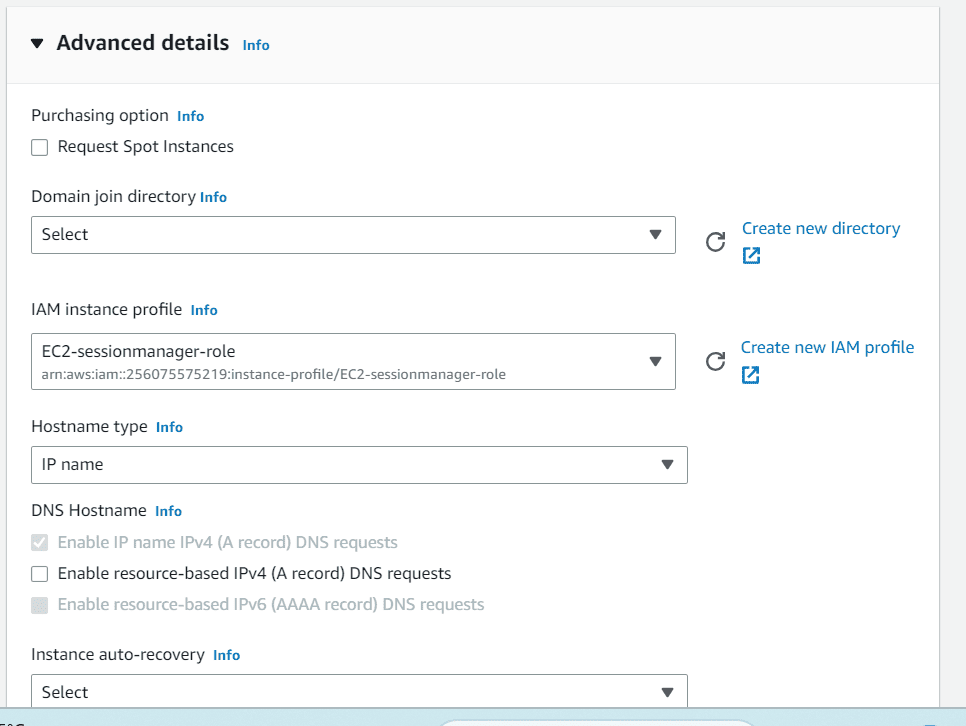
Click on Launch instance
Step 3: Install SSM agent if not installed
Under this step we should install SSM agent if it’s not installed.
There are couple of Operating systems in which SSM agent is already installed.
Below are the AMI where SSM agent is already installed
- Amazon Linux Base AMIs dated 2017.09 and later
- Amazon Linux 2
- Amazon Linux 2 ECS-Optimized Base AMIs
- Amazon Linux 2023 (AL2023)
- Amazon EKS-Optimized Amazon Linux AMIs
- macOS 10.14.x (Mojave), 10.15.x (Catalina), and 11.x (Big Sur)
- SUSE Linux Enterprise Server (SLES) 12 and 15
- Ubuntu Server 16.04, 18.04, and 20.04
- Windows Server 2008-2012 R2 AMIs published in November 2016 or later
- Windows Server 2016, 2019, and 2022
Step 4: Create VPC endpoints
As we are not using any public IP or internet connection from EC2 instance. The EC2 instance will not be able to communicate to SSM session manager APIs.
To communicate internally we can create VPC endpoints and must allow HTTPS (port 443) outbound traffic to the following endpoints. Below are the VPC endpoint required
- ec2messages.region.amazonaws.com
- ssm.region.amazonaws.com
- ssmmessages.region.amazonaws.com
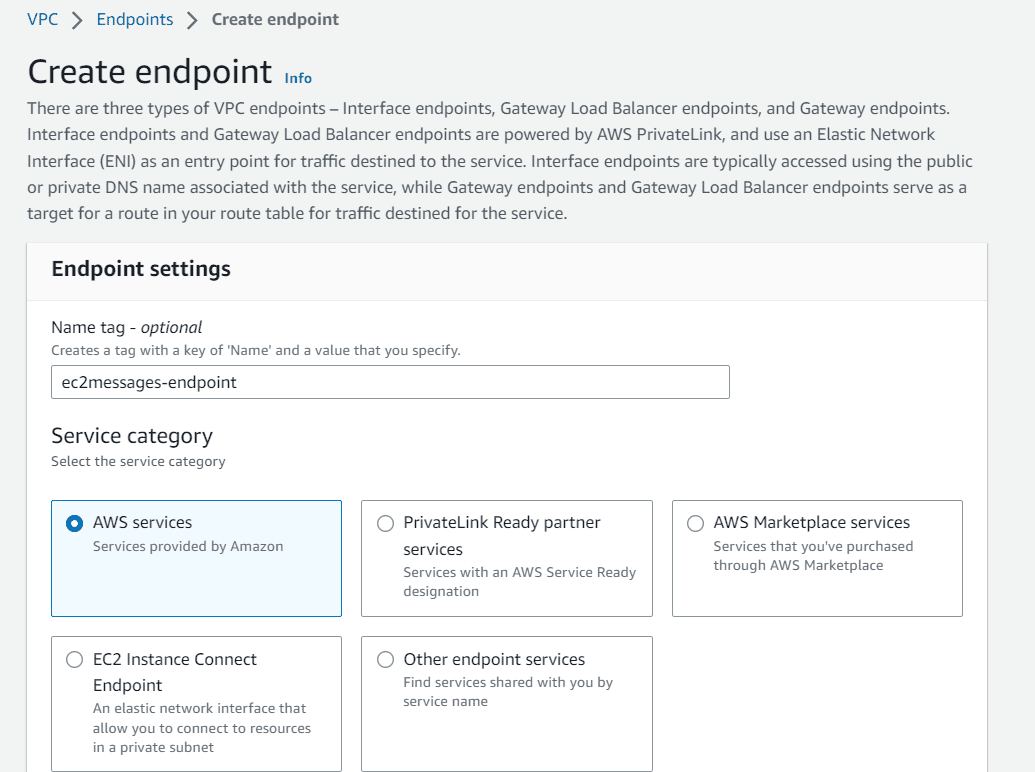
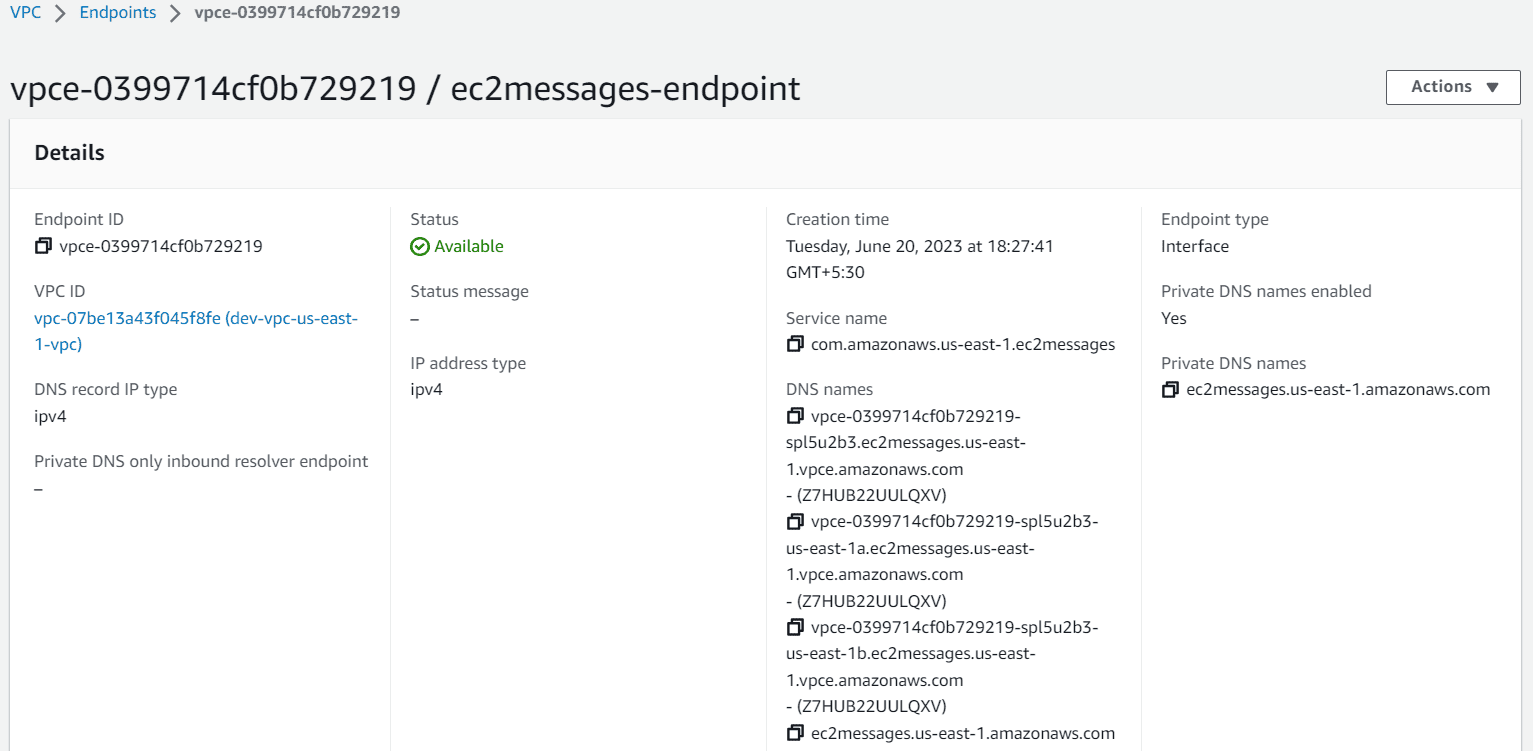
To create these VPC endpoint, Navigate to VPC, click on endpoints
Provide a name and choose AWS services
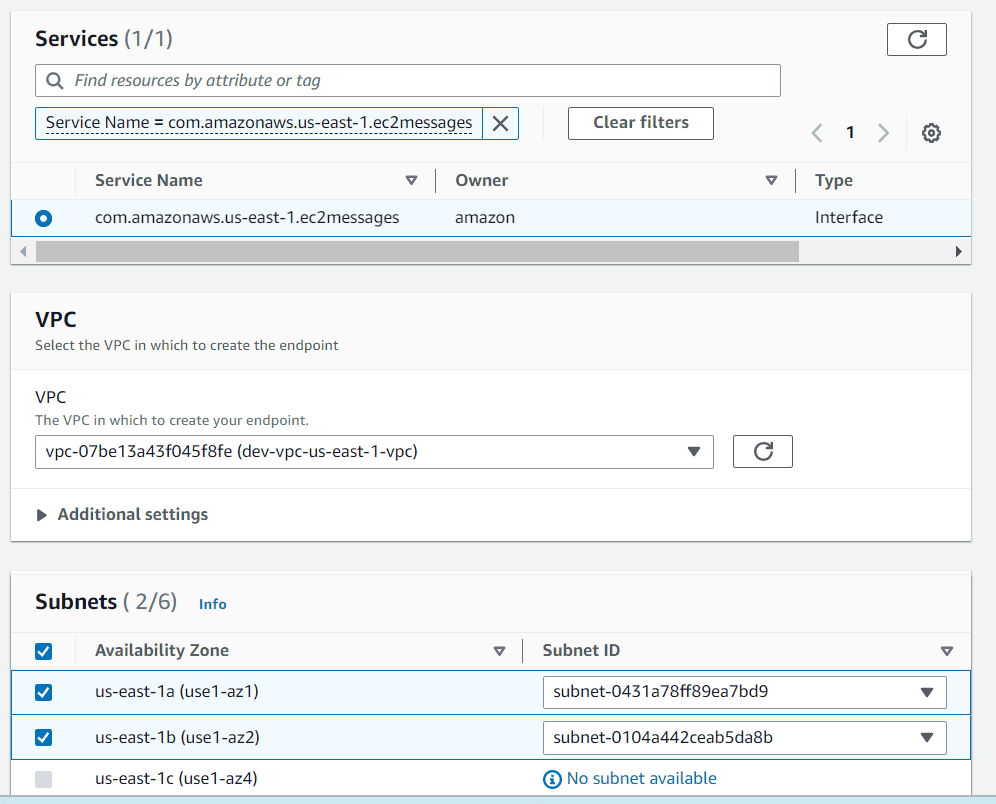
Search of ec2messages under services section, choose com.amazonaws.us-east-1.ec2messages
Select VPC in which you have EC2 instance created and select the subnets
Choose IPv4 in address type , choose a security group with outbound 443 rule and full-access in policy
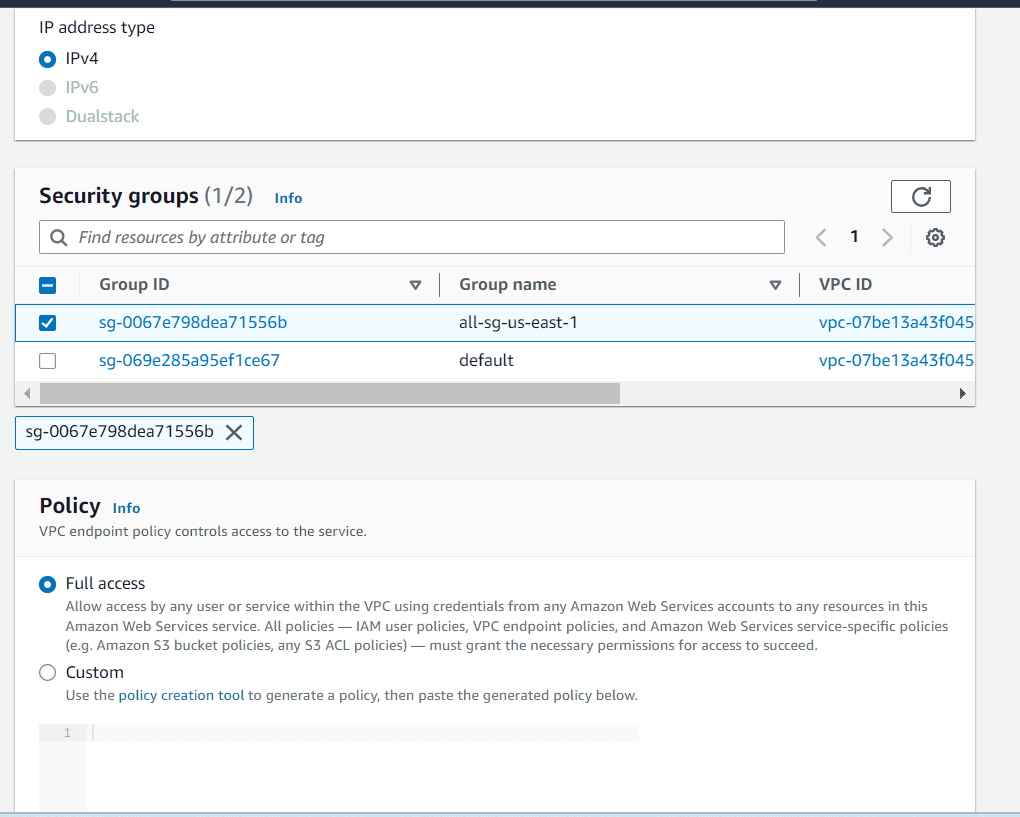
Click on create the endpoint
Repeat the same steps for ssm and ssmmessages to create the endpoint.
com.amazonaws.us-east-1.ssm
com.amazonaws.us-east-1.ssmmessages

Step 5: Connect to EC2 instance using session manager
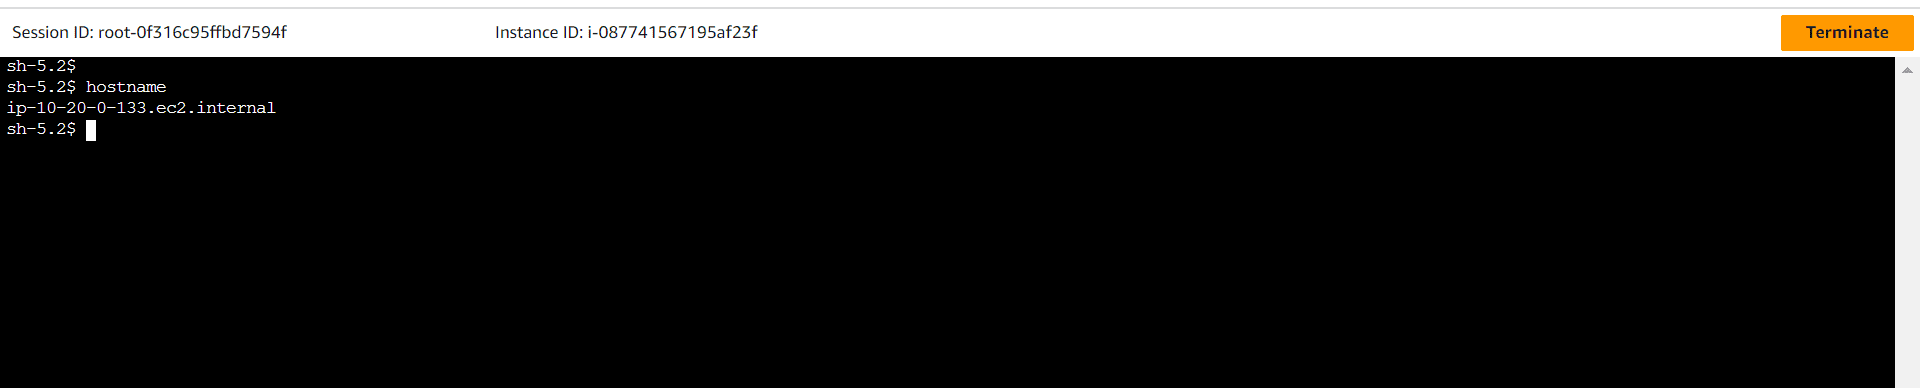
Let’s navigate to EC2 instance created earlier. Click on the EC2 instance you want ssh session and click on connect in the top right corner, then choose session manager

Once you click on connect, a new window will open. Where you can interact with the EC2 instance.
Conclusion
SSM session manager is a great solution to connect and manage EC2 instances privately without a public IP address or internet connection. It’s going leverage AWS native VPC endpoints to get connected with session manger. Increase your security posture by using session manager to manage EC2 instances.

Leave A Comment