
Cloud storage has many benefits. However, with cloud storage, organizations still need to consider data protection and recovering data that may get accidentally deleted, modified, or otherwise changed. Microsoft Azure storage has two features that help recover your data: snapshots and soft delete. You need also to be familiar with these concepts for the AZ-104 exam.
What are snapshots for Azure files?
Azure Files allows you to take snapshots of file shares. When you take a snapshot of Azure file shares in Azure files, it captures the state of the file share at that point in time. These are incremental and only include the data changed after your most recent share snapshot is saved. Write operations or metadata update operations are counted in the changed content that is stored in the share snapshot.
You can only create a total of 200 snapshots per Azure file share. Also, the snapshot size doesn’t contribute towards the 100 TiB maximum size for premium file shares.
Use cases
What are the use cases for Azure files? There are several key use cases for Azure files. These include:
- Protection against application errors and data corruption – Organizations may use or deploy Azure file share applications. If new code is deployed, bugs could be introduced that could accidentally overwrite or corrupt a few blocks. A snapshot of the Azure files can be taken before deploying the new application code. If corruption or unexpected changes happen to the data, you can roll back to the Azure files snapshot
- Roll back accidental deletions or changes – Similar to rolling back a snapshot on a virtual machine, you can use Azure file snapshots to roll back changes to your data or accidental deletions. If you have a text document and make unneeded changes and then close the file, you can use the Azure file snapshot to restore the version of the text file contained in the snapshot
- Backups – When you create a file share, you can create a share snapshot to back up your data. These can be used with Azure file share backup for disaster recovery purposes or audit requirements
Enabling snapshots
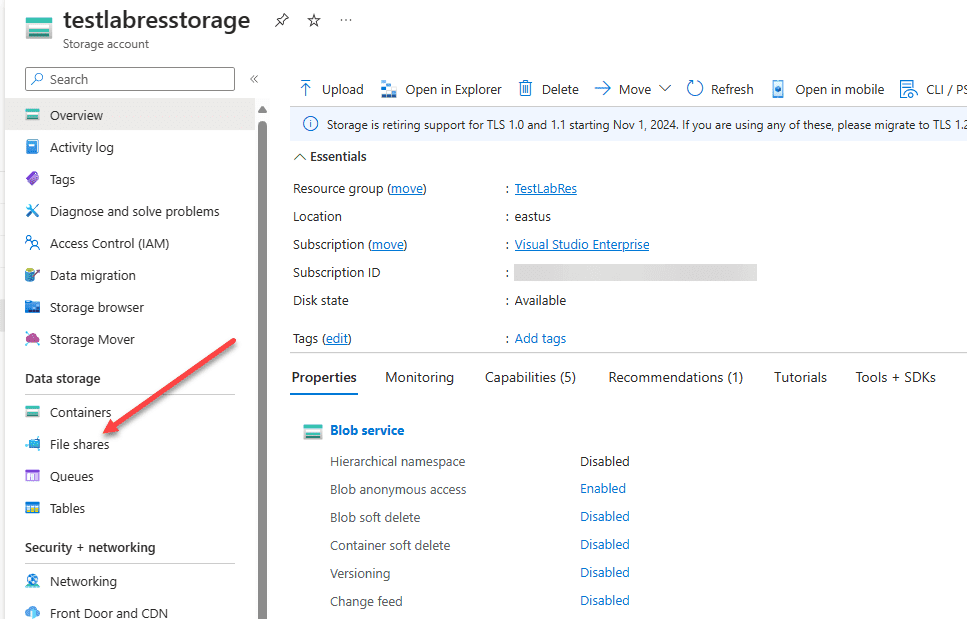
To add a snapshot, navigate to your Azure storage account. Then click File Shares.

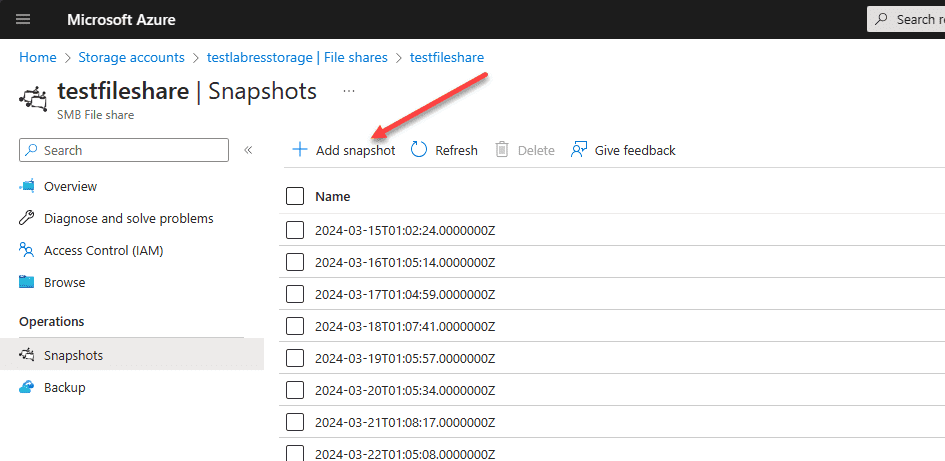
Click your Azure file share and select Snapshots.

You will see existing snapshots and have the ability to Add snapshots to your file share.
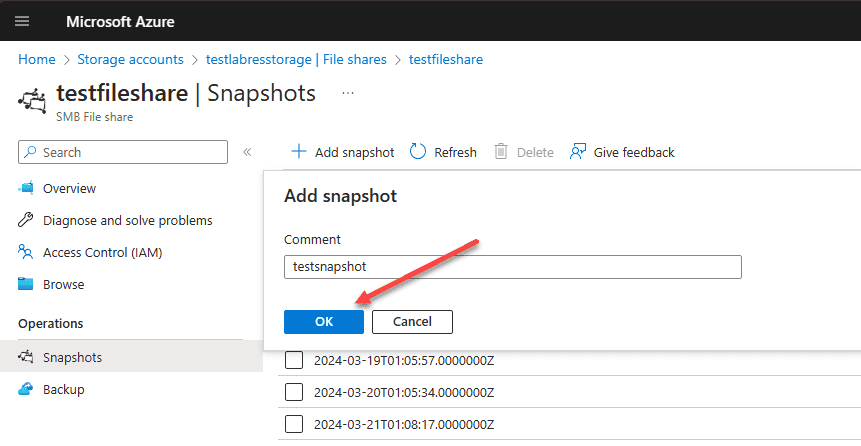
You can add a comment (optional) and click ok.
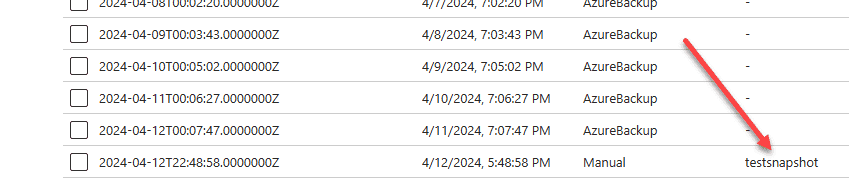
If you refresh your snapshot list, you will see the manually added snapshot with the name chosen.
What is soft delete for Azure files?
The soft delete feature works on a file share level. It protects Azure file shares from being accidentally deleted permanently. If you have a share with the soft delete feature enabled, when it is deleted, the state moves to a soft deleted state internally to Azure instead of permanently deleted.
You can then restore the file share until the retention period is over. You can configure how long your data is recoverable before it’s permanently deleted, and then you can undelete it.
There are a couple of things to consider. If you want to delete a share with the soft delete turned on permanently, you must undelete the file share, turn off soft delete, and then permanently delete the file share. Also, Azure file shares are still billed on the amount of space used, even when they are soft deleted.
Retention period
The retention period is the time the soft deleted shares are stored and available for recovery. With Azure file shares, you can specify a soft delete retention period of 1 to 365 days. The retention period can be changed at any time. Any shares deleted before the update will expire based on the retention period configured before making the changes.
Enabling soft delete
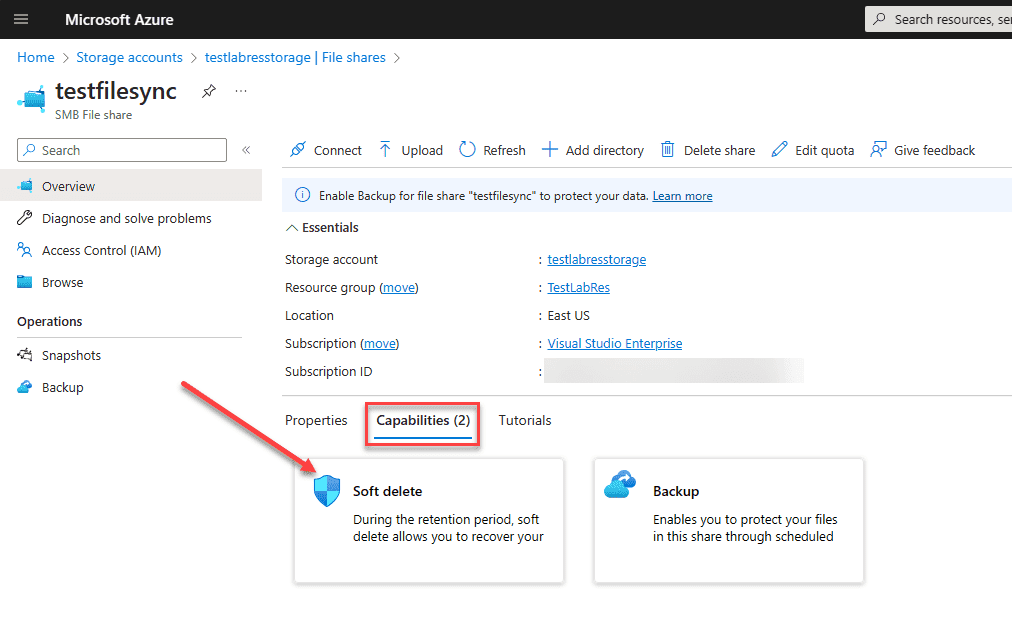
Navigate to your Azure storage account and then File Shares. Select your file share, and then under the Overview screen, select Capabilities. You will see:
- Soft delete
- Backup
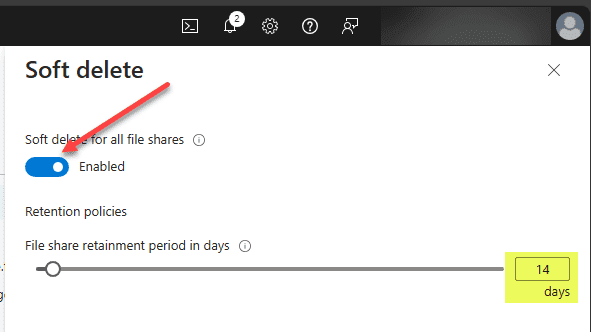
When you click soft delete, the following blade pop out. You can enable the toggle to turn on Soft Delete. Also, you will see the slider that allows the retainment (retention period) for the soft delete to be defined.
Wrapping up
Understanding the Azure file share snapshots and soft delete mechanisms provides excellent tools for Azure admins to use for disaster recovery and data protection. Be sure to know how to configure both snapshots and soft delete for Azure file shares on the AZ-104 exam and understand the use cases for both.
Read More:
Microsoft Azure Administrator: AZ-104: Configure Storage Tiers – Part 33
Follow our Twitter and Facebook feeds for new releases, updates, insightful posts and more.

Leave A Comment