Quick Bites:
- The blog discusses migrating on-premises VMware environments to Microsoft’s Azure cloud using Azure Migrate
- It highlights the benefits and complexities of such migrations, emphasizing Azure Migrate’s centralized platform for managing the migration process
- The article covers the types of workloads that can be migrated, advantages and limitations of Azure Migrate, and necessary prerequisites
- Detailed steps are provided for using the tool to assess and migrate servers
One of the primary objectives on the task list in most environments today is migrating at least part of the on-premises infrastructure footprint to the cloud. For many, migrating at least part of their on-premises infrastructure to the cloud is extremely beneficial in a number of ways.
However, migrating on-premises workloads to a public cloud environment does not come without the complexity and hidden challenges. Microsoft has set about to help you with your migration plan to migrate workloads to the Azure public cloud by way of Azure Migrate.
Table of Contents
- What is Azure Migrate?
- Workloads That Can Be Migrated with Azure Migrate
- Azure Migrate Advantages and Limitations
- Azure Migrate Server Assessment and Migration Prerequisites
- Assess and Migrate Servers
Having the right tools to help with migrating workloads between on-premises and the cloud is key to successfully rehoming business-critical workloads. Azure Migrate is a tool that helps you to successfully accomplish the task of moving various workloads to the Azure cloud.
This post on Migrating from VMware to Azure Using Azure Migrate is a two-part series.
In this first part, we will look at the following:
- What is Azure Migrate
- Azure Migrate Advantages and Limitations
- Azure Migrate Server Assessment and Migration Prerequisites
- Steps to choose & add assessment and migration tool
In the second part, we will discuss the steps to deploy the Azure Migrate Virtual Appliance and the process involved in replicating and migrating VMware vSphere VMs with Azure Migrate
Now, Let’s take a look at Azure Migrate and get a good overview of using it to migrate your workloads.
What is Azure Migrate?
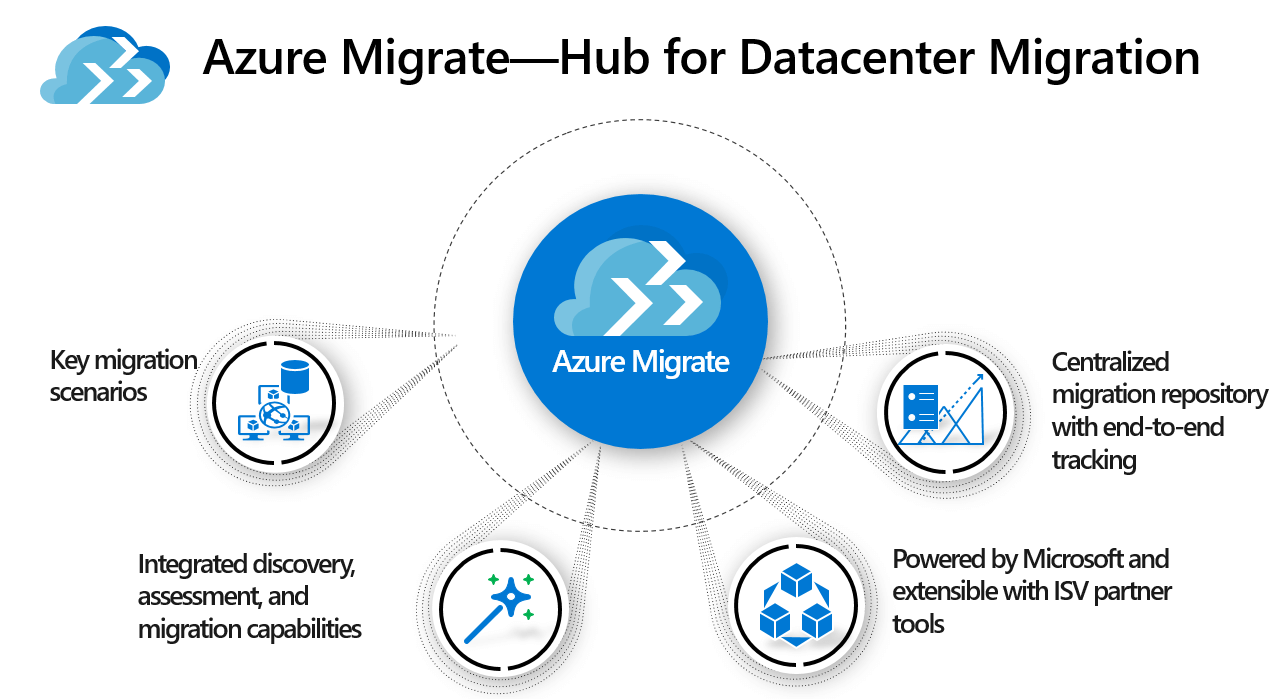
Azure migrate is a tool from Microsoft that helps you to migrate on-premises workloads using a centralized portal that allows you to track the discovery, assessment, and migration of your on-premises workloads and data to your Azure environment. Azure Migrate started out as a VMware vSphere specific migration tool but has evolved into “the migration tool” for all of Azure to migrate any workload to the Azure cloud.
It allows you to have easy access to the following:
- Unified, centralized migration platform that allows managing your migrations at scale to your Azure environment
- Azure Migrate “hub” as it is called provides numerous tools that can be used for assessment and migration, including native Azure tools as well as third-party ISV tools to perform your assessment and migration
- Migration of numerous types of workloads
Workloads That Can Be Migrated with Azure Migrate
There are many different types of workloads that can be migrated with Azure Migrate including the following:
- Servers
- Databases
- Web applications
- Virtual desktops
- Data
New Features
- New physical servers and VMs running on other clouds – Physical server workloads do require an installable package to migrate the physical workload up to the Azure cloud
- CMDB import – import 20,000 records at one go
- Agentless dependency mapping – inventory apps and roles without agents – Microsoft debuted agentless .NET web application migration and dependency checking at Ignite 2019.
Azure Migrate Advantages and Limitations
Azure Migrate provides great features and capabilities for those who want to seamlessly migrate their VMware vSphere virtual machines from an on-premises environment up to their Azure IaaS environment. The many advantages were touched on in the outset, however, to review:
- Consolidated view of your vSphere migrations
- Wide variety of tools and third-party vendors who can integrate into your Azure Migration tasks
- Secure process – the data migrated with Azure migrate is encrypted both in-flight and at-rest during the process
- The new limit is 35,000 VMs for discovery and assessment which more than likely will cover the needs of most environments
- It supports the newest vSphere environments of 6.7+
There are a few limitations with Azure Migrate to be aware of:
- Assessment limit is (not coincidentally) 35,000 VMs which was announced at Microsoft Ignite 2019. Incidentally, the number of VMs supported by a single vCenter is 35,000.
- Only agentless VM migration for vSphere and Hyper-V. Agentless application migration is limited to .NET applications.
- Azure Migrate is limited to a number of regions that can be targeted
Azure Migrate Server Assessment and Migration Prerequisites
One of the great things about the Azure Migrate process is that it does not require agents to be installed on your on-premises vSphere virtual machines. Instead, using an Azure Migrate on-premises virtual appliance, it talks to vSphere using VMware PowerCLI.
While there are many assessments and migration tools you can choose from, in this walkthrough of the Azure Migrate tool to migrate on-premise VMware vSphere virtual machines to Azure, we will be looking at the Azure Migrate Server Assessment Tool and the Azure Migrate Server Migration Tool for migrating the on-premises vSphere workloads.
There are a few requirements and prerequisites that you want to be aware of before using the Azure Migrate Server Assessment and Migration tools to migrate your on-premise VMware vSphere VMs to Azure.
Let’s start with the Azure specific requirements which are mainly permissions related:
- Permissions to create a VM in the selected resource group, create a VM in the selected virtual network, and write to an Azure managed disk
- Permissions to create a project, register the Azure Migrate replication appliance, and create a key vault
You will also need to have access to your VMware vSphere environment:
- Permissions to access vCenter Server, deploy a virtual appliance/create a virtual machine, and interact with the VMs you plan to migrate
Assess and Migrate Servers
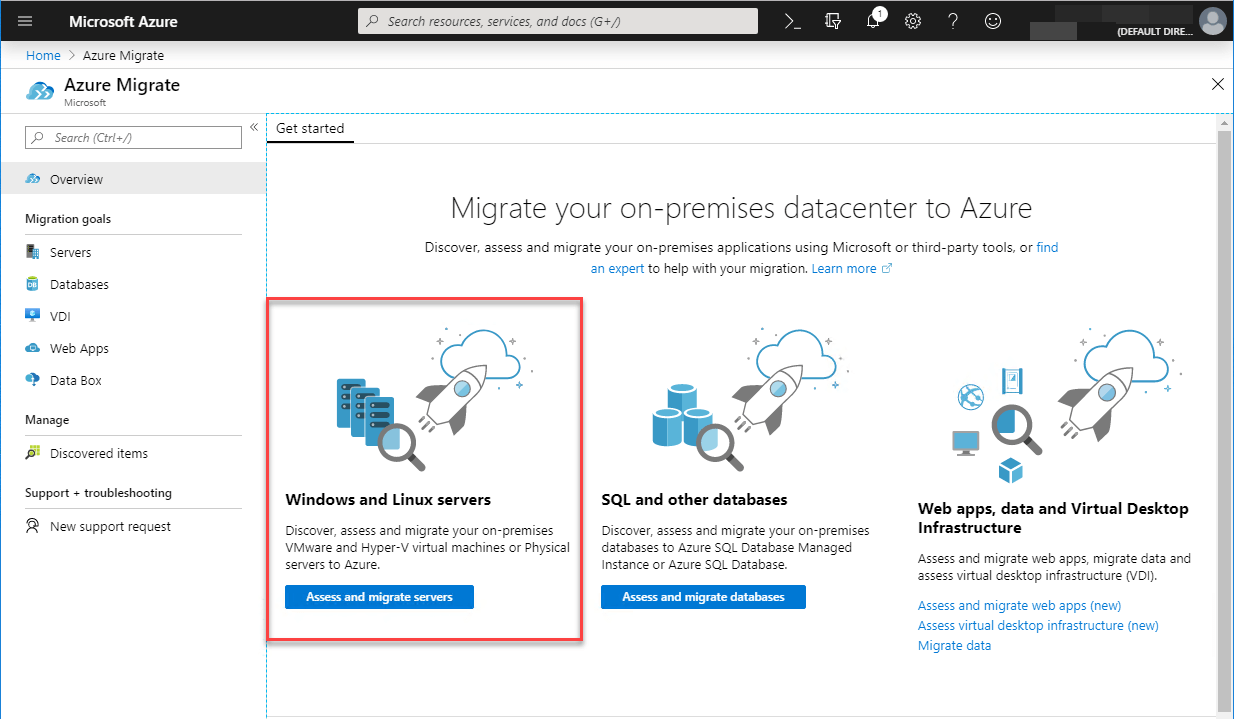
Azure Migrate is easily found by typing this in the search box at the top. Once you bring up the Azure Migrate dashboard, click on the Overview blade to see the migration assistant. To migrate your VMware vSphere virtual machines, click the Assess and migrate servers button.
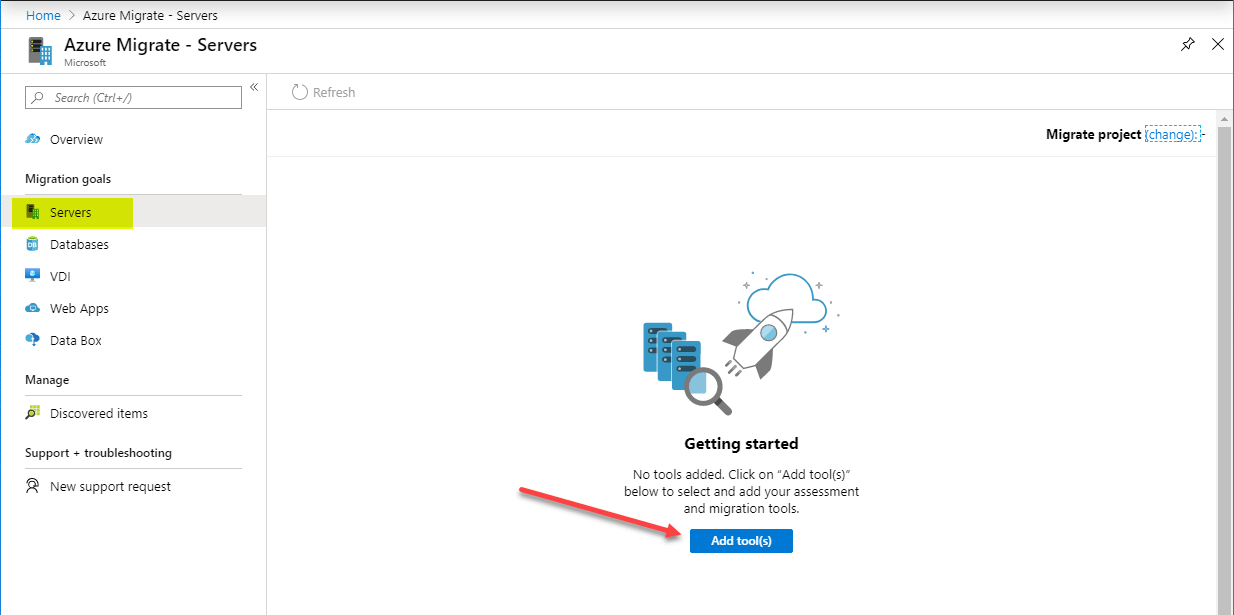
This will take you to the next screen. Here click on the Add tool(s) button.
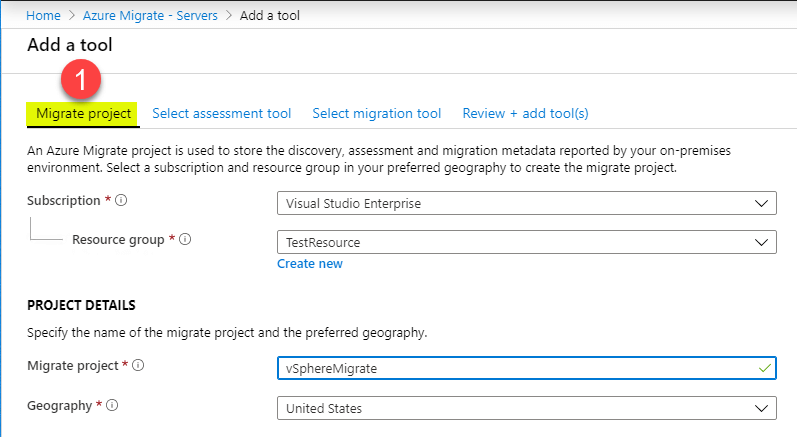
This launches the Add a tool wizard. The first screen is the Migrate project screen. On this screen you choose:
- Subscription
- Resource group (you can create a new RG from this screen)
- Migrate project name
- Geography
On the Select assessment tool, you choose the server discovery and assessment tool that you want to use to assess your VMware vSphere virtual machines for readiness to migrate to Azure. Below, you can see the wide range of tools that are available.
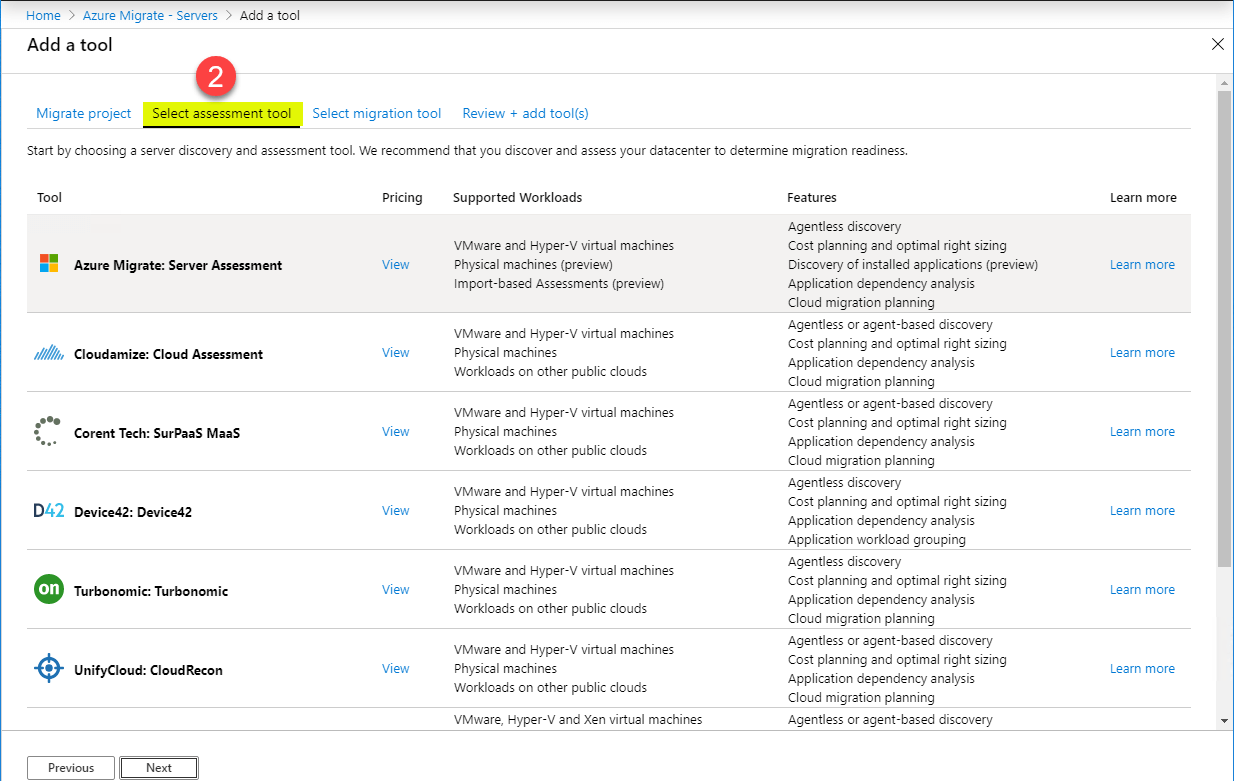
In the screenshot above, you can see you have a View link for Pricing. If you follow the link for the Microsoft tools, you will see Microsoft provides the Server Assessment and Server Migration tools for free.

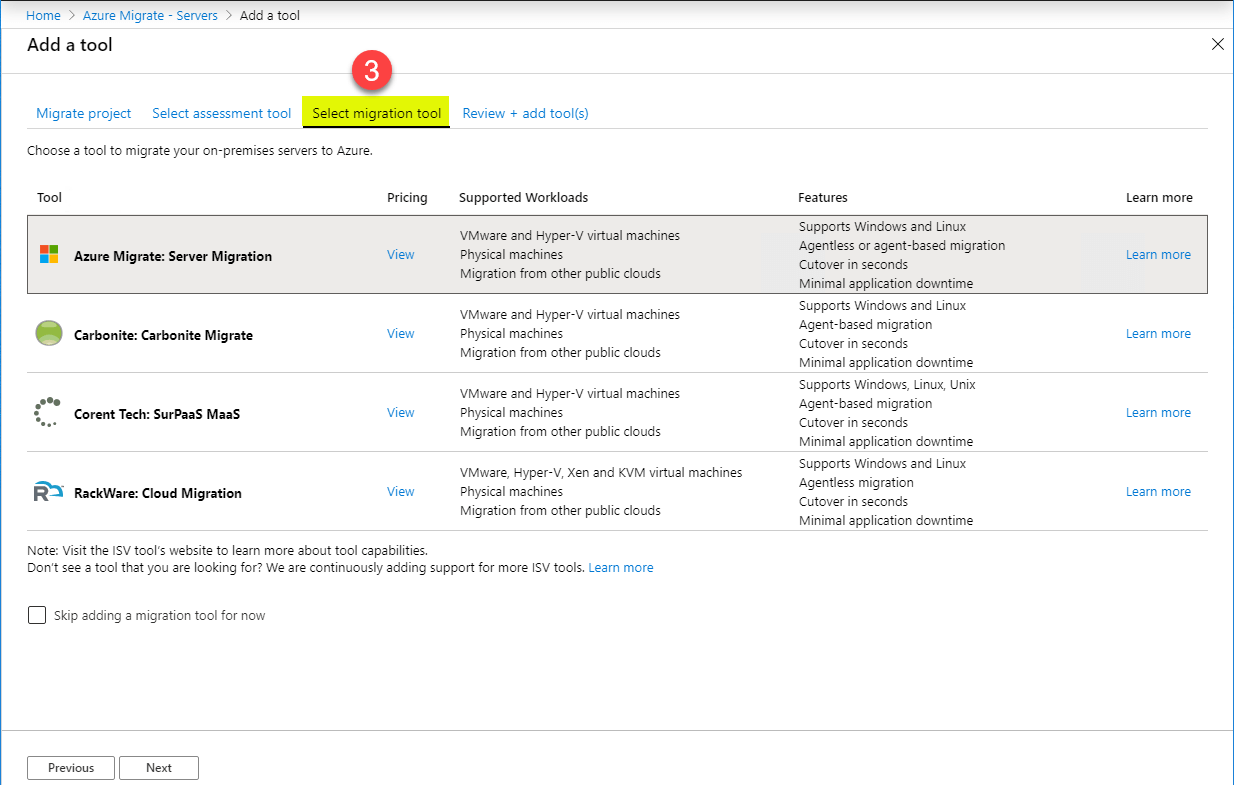
The same as you choose the assessment tool, you need to choose the migration tool to migrate your on-premises VMware vSphere virtual machines.
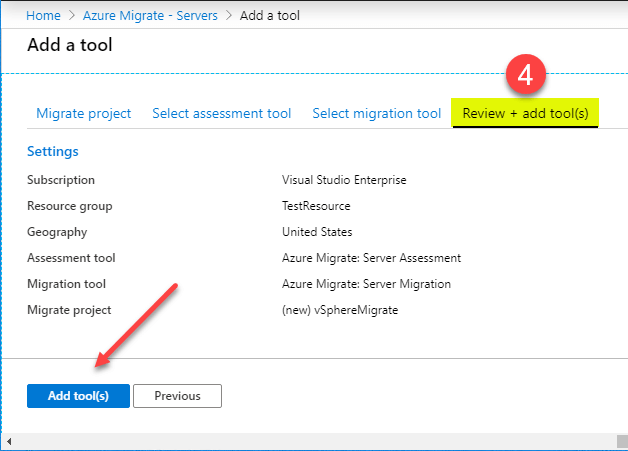
After you select the migration tool, you make it to the Review + add tool(s) screen. Click the Add tool(s) button.
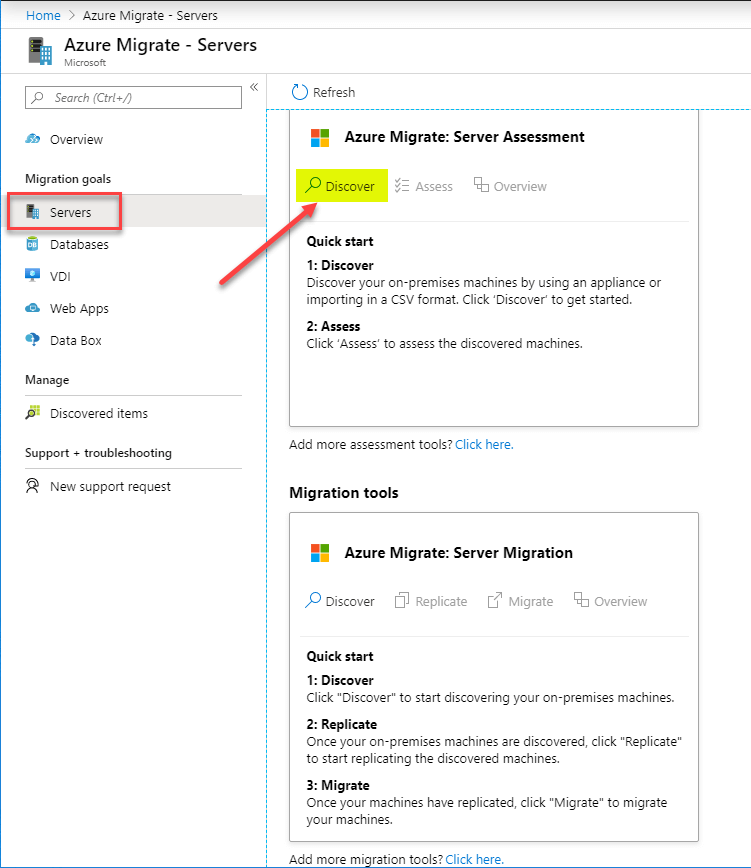
Once the tools are added, click the Servers blade. You will see you have two boxes. The first is the Azure Migrate: Server Assessment and the second underneath is the Azure Migrate: Server Migration box. You want to start with the Server Assessment. Here you will want to choose Discover. This will take you to the page to download the Azure Migrate on-premises appliance.
If you are migrating either VMware vSphere or Hyper-V virtual machines, Azure Migrate provides a virtual appliance that you deploy in your environment that acts as a bridge between your on-premises environment and Azure. You select the source system (VMware in our case for this tutorial) and then download the appropriate appliance.
The OVA that you download for your VMware vSphere environment is fairly hefty at around 12 GB in size. However, it is a full-blown Windows VM that Microsoft is using as the on-premises Azure Migrate appliance.
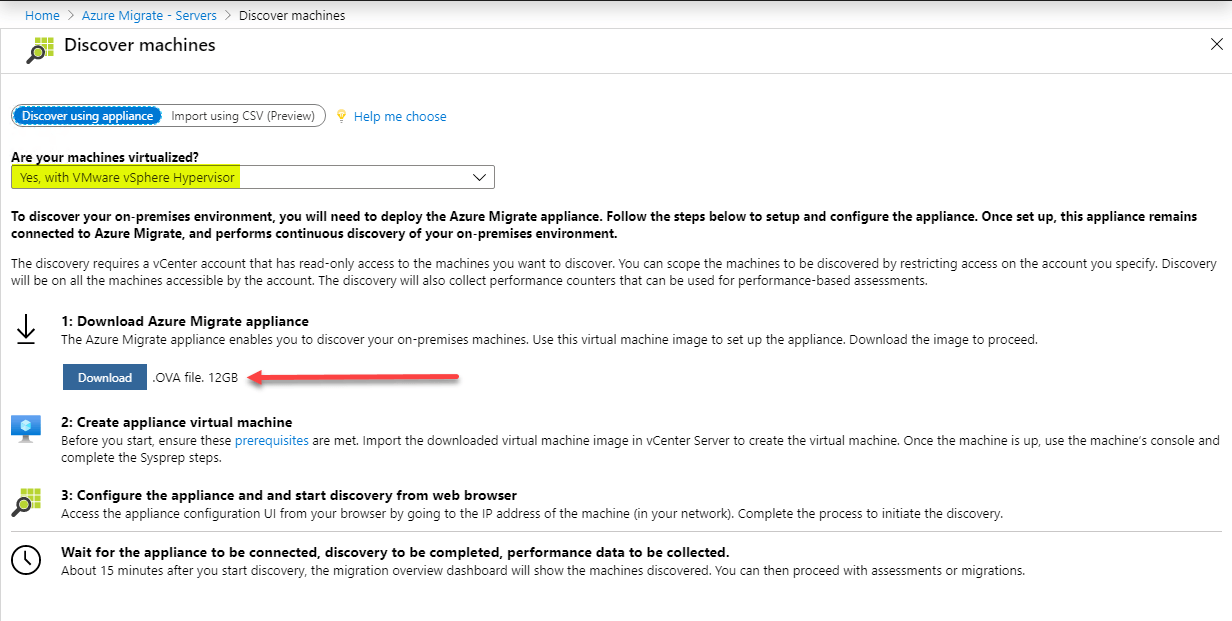
Once you download the vSphere OVA appliance, you will need to deploy this in your vSphere environment.
We will look at that process of deploying the appliance and the steps involved in replicating & migrating VMware vSphere VMs with Azure Migrate in our next post.
Related Posts:
Migrating from VMware to Azure Using Azure Migrate – Part 2
Follow our Twitter and Facebook feeds for new releases, updates, insightful posts and more.


Leave A Comment