Businesses that could not spend on backup expenses because of their tight IT budget are always on the lookout for free backup software that is efficient and easy to use. Understanding this, we(Vembu) offer a Free Edition of our flagship product – BDRSuite.
“BDRSuite is a Comprehensive and Cost-Effective Backup & Disaster Recovery Solution designed to protect data that span across Data Center/Private Cloud (VMware, Hyper-V, Windows, Linux, Applications & Databases), Public Cloud (AWS), SaaS (Microsoft 365, Google Workspace), and Endpoints (Windows, Mac).”
Learn more about Vembu BDRSuite Free Edition here.
We will talk about BDRSuite Free Edition for VMware environments in this article. Next, we’ll look into step by step instructions on how to backup and restore VMware workloads using BDRSuite.
What does BDRSuite Free Edition for VMware Offer?
Backup and Recover up to 10 VMware Virtual Machines at Zero Cost with no feature limitations.
Agentless VM Backup – Set up agentless image-level backups for VMware vSphere VMs running on an ESXi host or vCenter Server without installing any agents inside the VMs.
Automatic Backup Scheduling – Automate the backup process with flexible scheduling on an hourly, daily, or weekly basis or backup your data for every 15 minutes RPO to meet the industry standard
Application-aware Backup – Create a consistent backup of VMs that runs applications like Microsoft Exchange, SQL, SharePoint, and Active Directory.
Flexible Recovery Options – Instant VM Recovery, File-Level Recovery, Granular Application-level Recovery and more for various recovery scenarios.
Cross-Platform Migration – Easily migrate from VMware hypervisor to other hypervisors – Hyper-V or KVM with minimal downtime without using any external tools.
Step-by-Step VMware Backup Configuration
Step 1: Download and Install BDRSuite Backup Server. Refer to the installation instructions here
Step 2: Login to the BDRSuite Backup Server and Navigate to VMware/Hyper-V/Windows/Linux Tab.
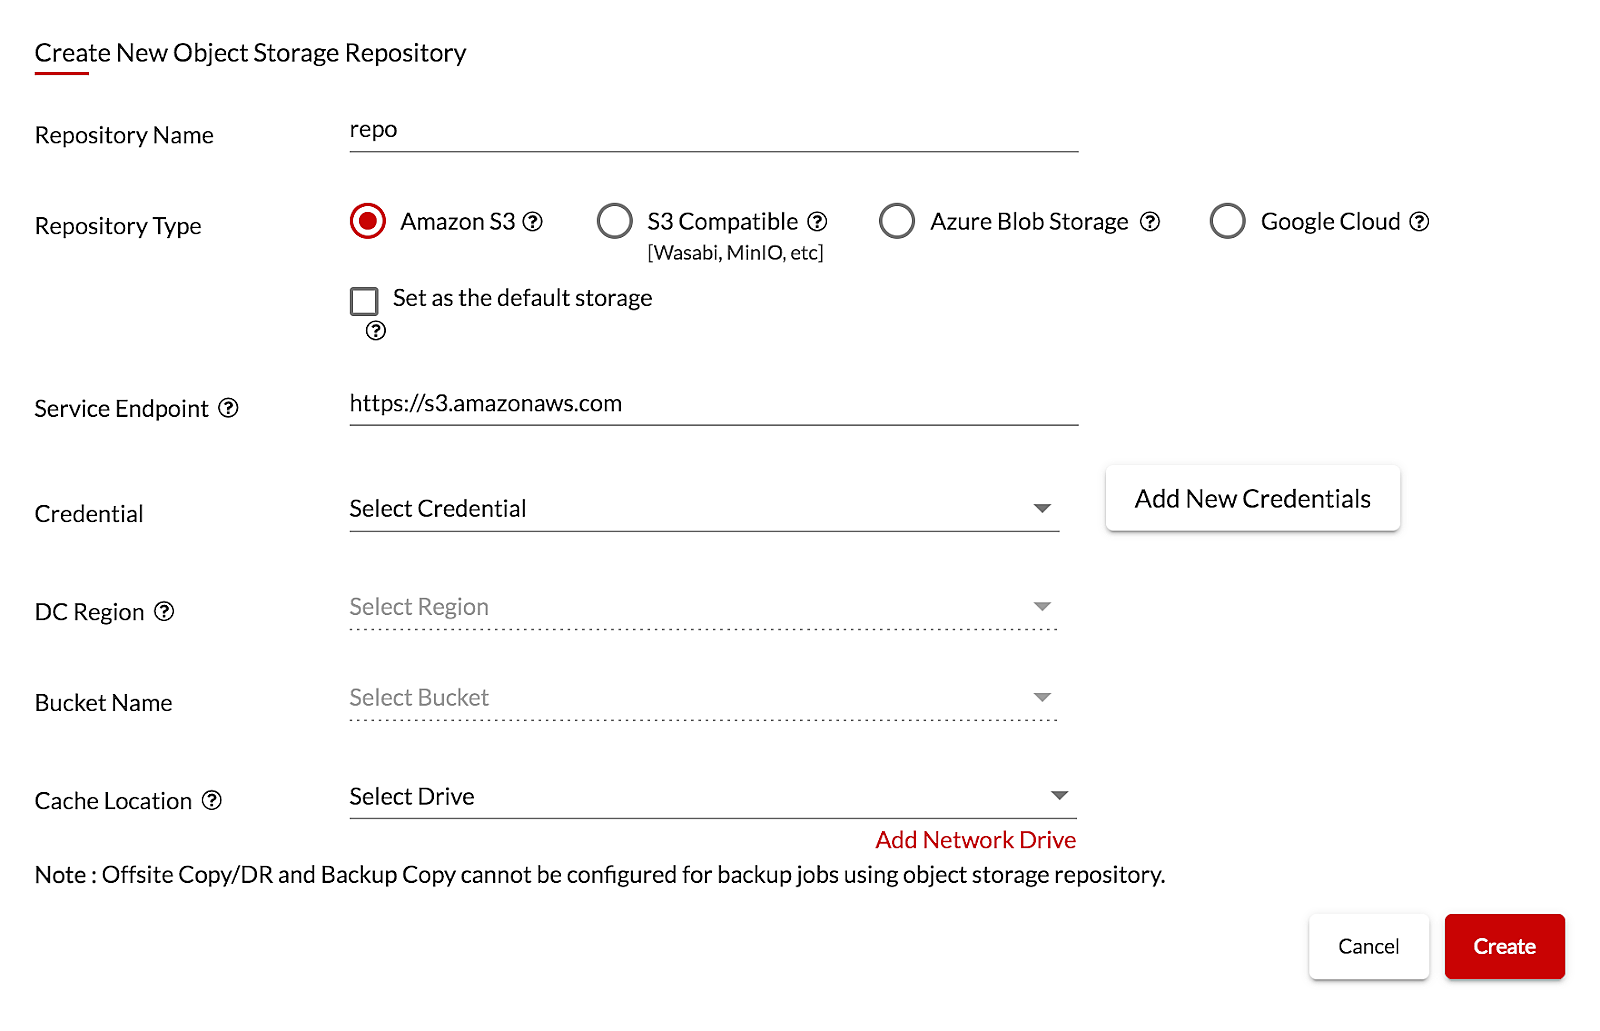
Step 3: Navigate to Backup Server Tile -> Backup Repository. Configure a Backup Repository – either block (NAS,SAN, DAS, etc) or object-based cloud storage (S3, Azure Blob, Google Cloud, S3 Compatible like Wasabi, MinIO, etc) based on where you want to store the backup data.
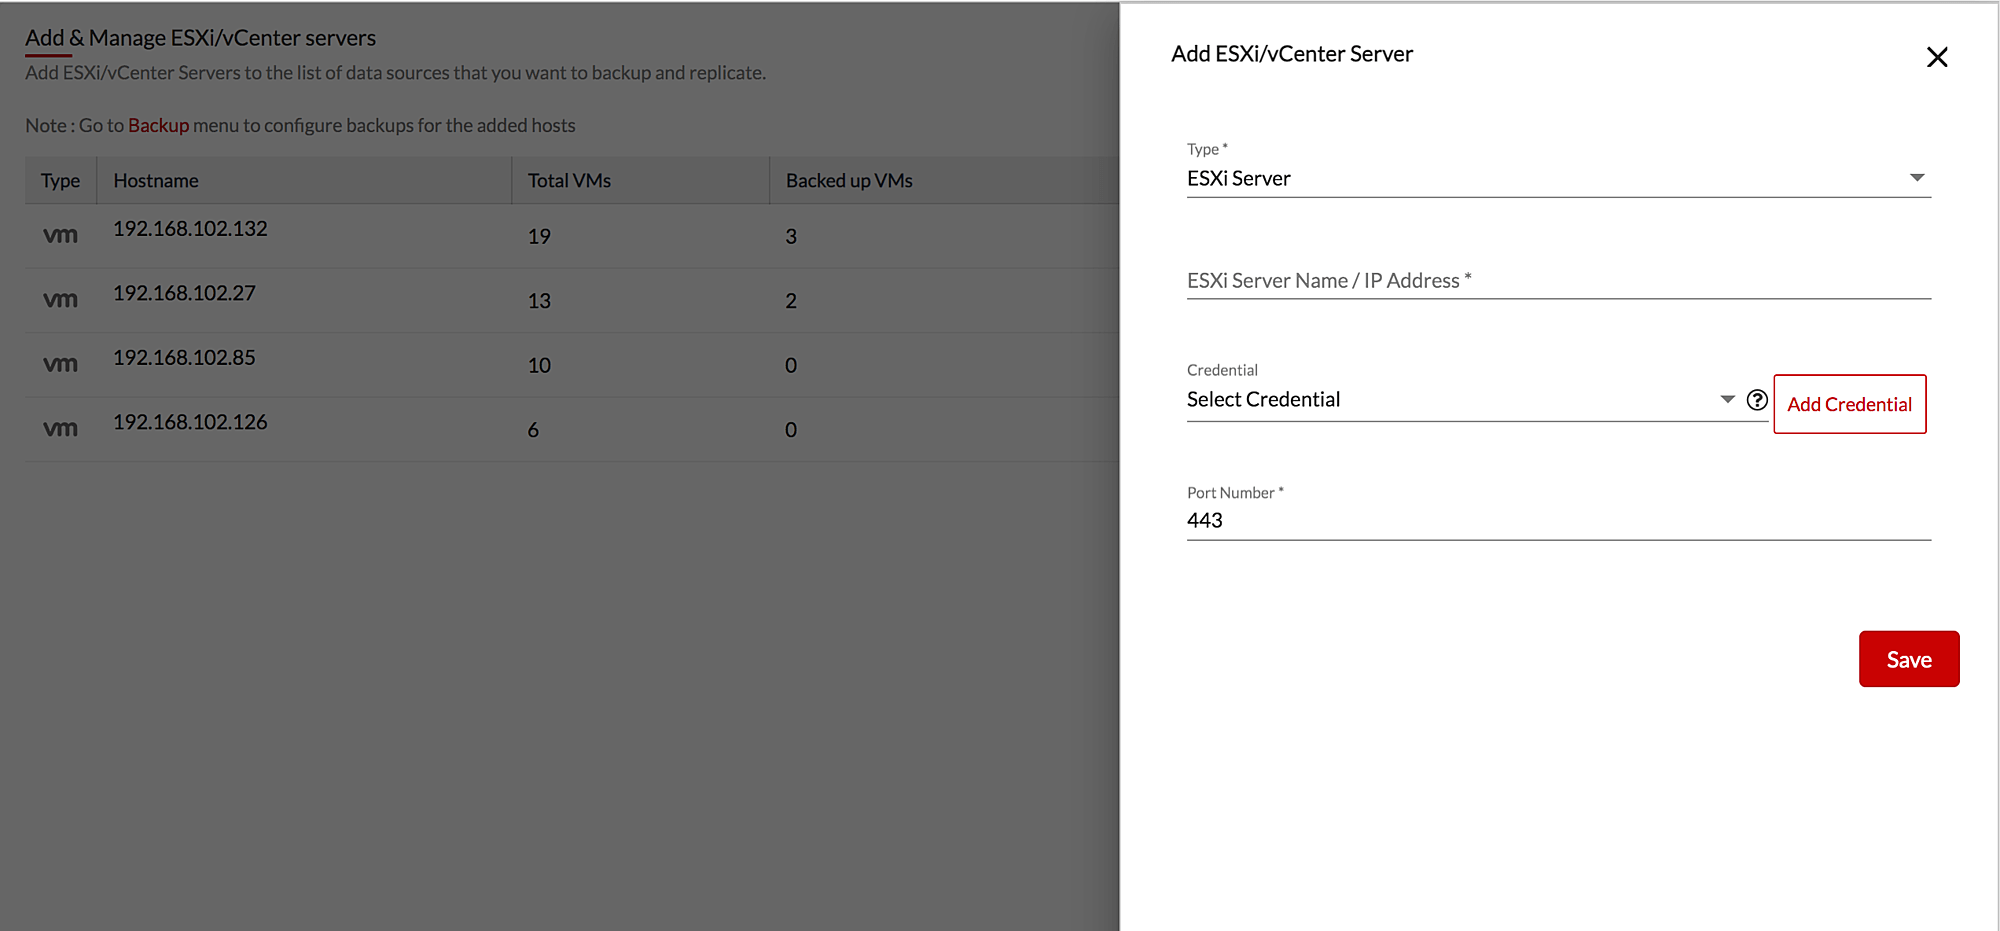
Step 4: As a first add the VMware hosts that you want to backup. Go to Data Sources -> Add VMware vSphere -> and select ESXi & vCenter. Provide the host details & credentials and save it on the backup server.
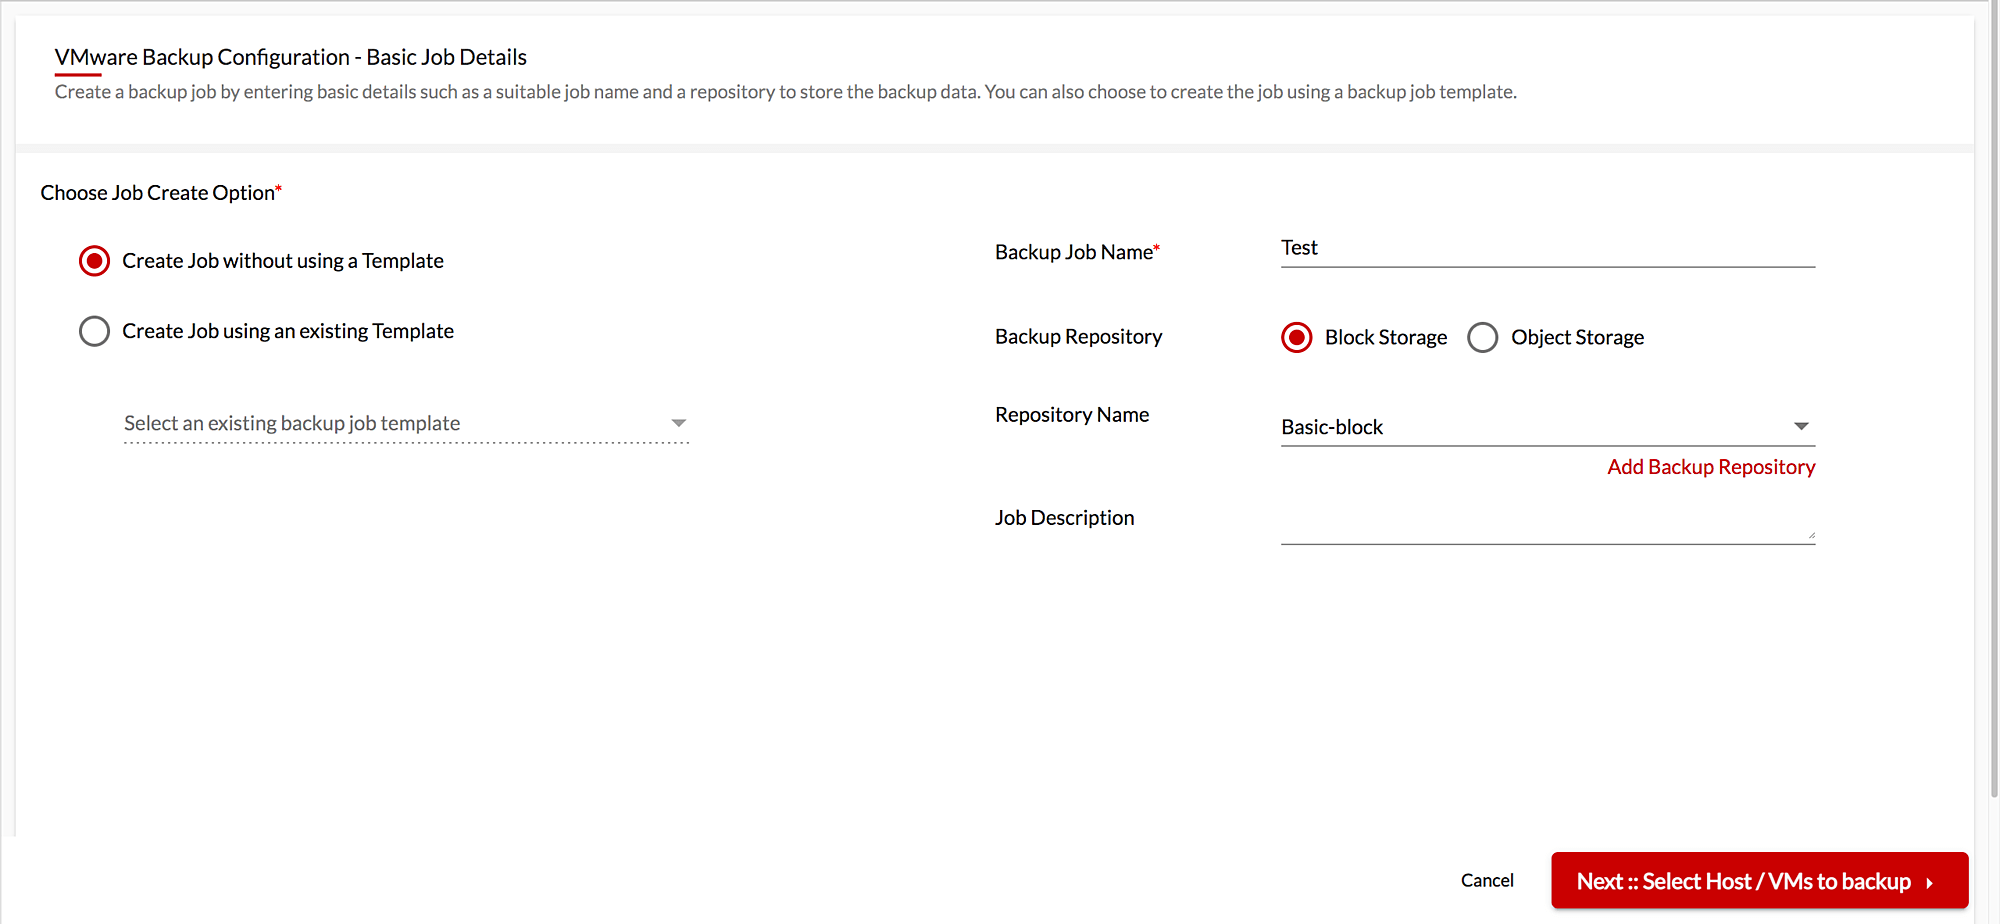
Step 5: Navigate to Backup -> Configure Backup -> VMware vSphere. Then, on the basic details page, provide a backup job name, select backup repository and proceed.
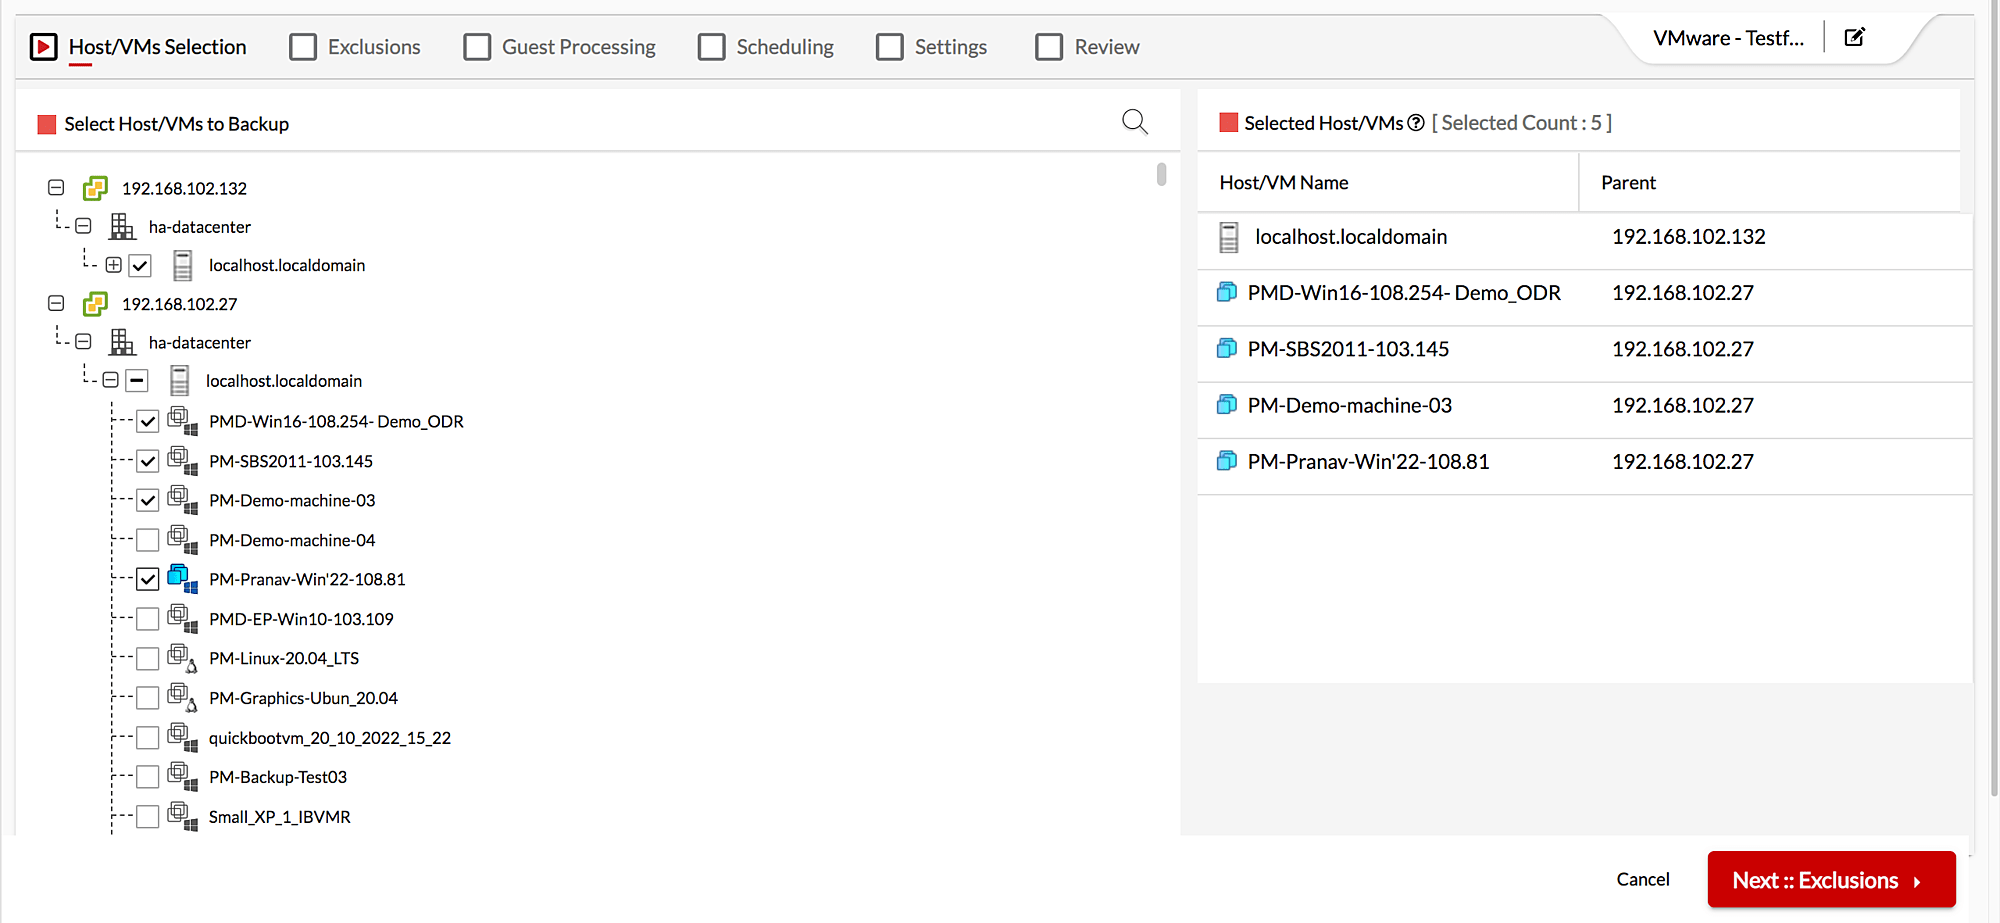
Step 6: In Host/VMs Selection: Select the entire host or only specific VMs that you want to backup.
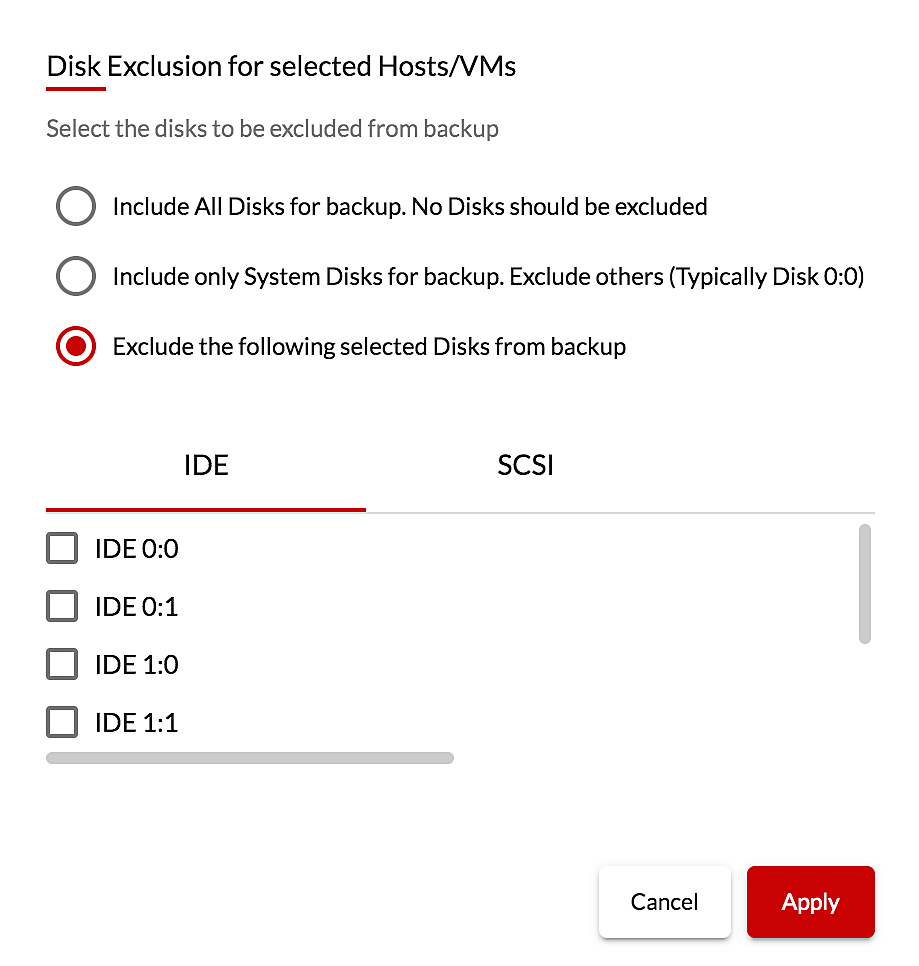
Step 7: Exclusions: You have options for VM Exclusion – to exclude specific VMs when an entire host is selected and Disk Exclusion – to exclude specific disks from the selected VMs.
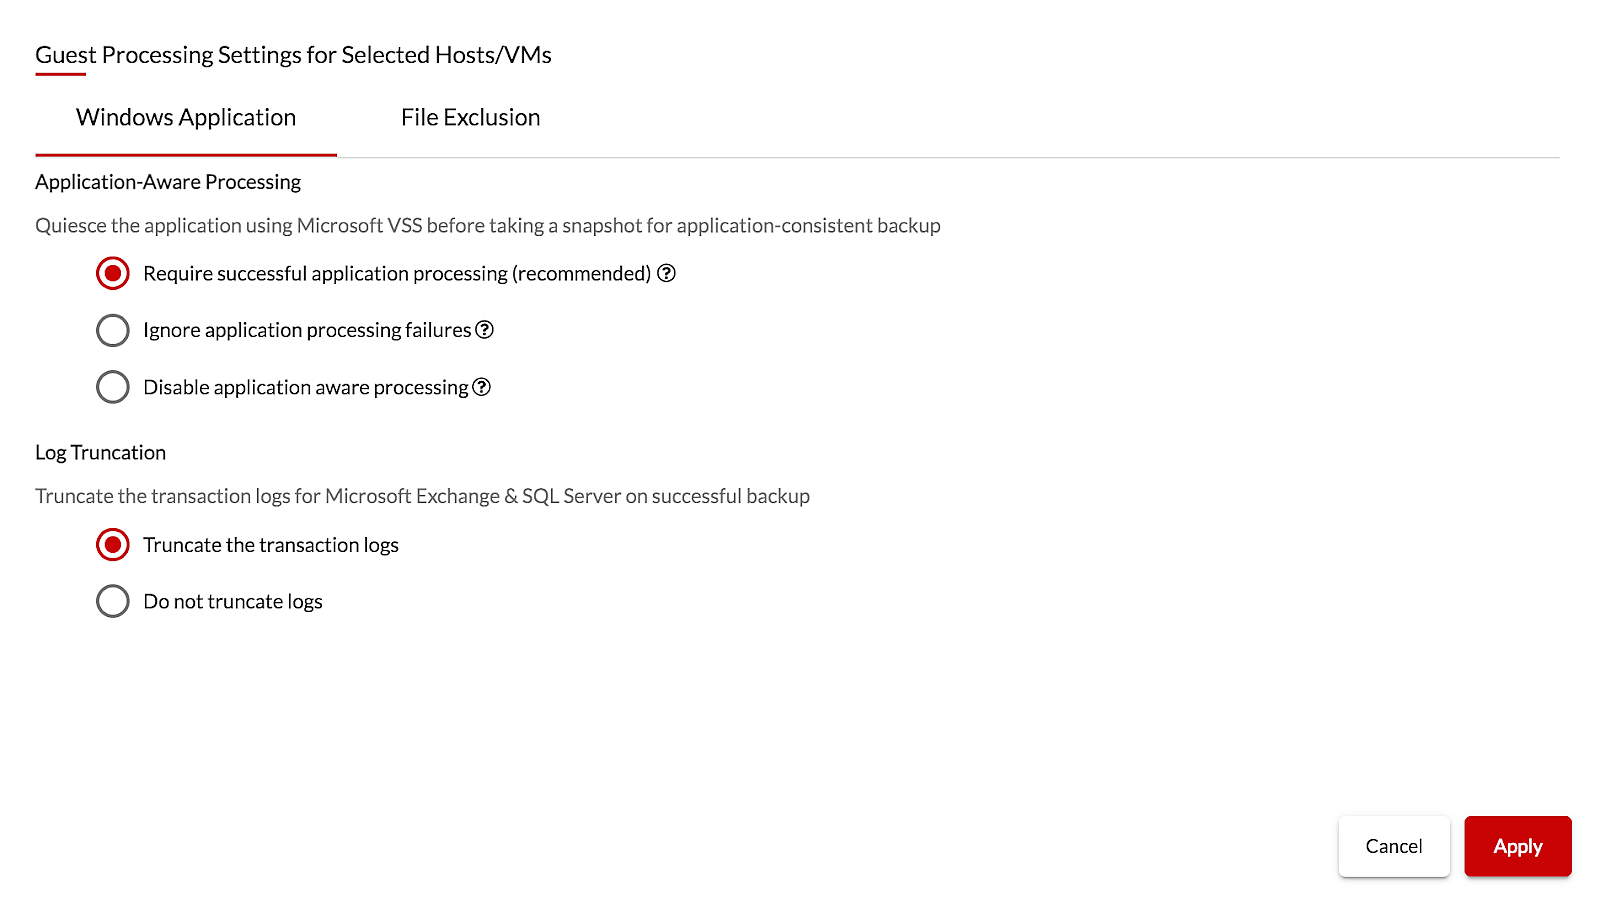
Step 8: Guest Processing: Enable Application-aware processing and Log Truncation for VMs with Microsoft Applications to create a consistent backup.
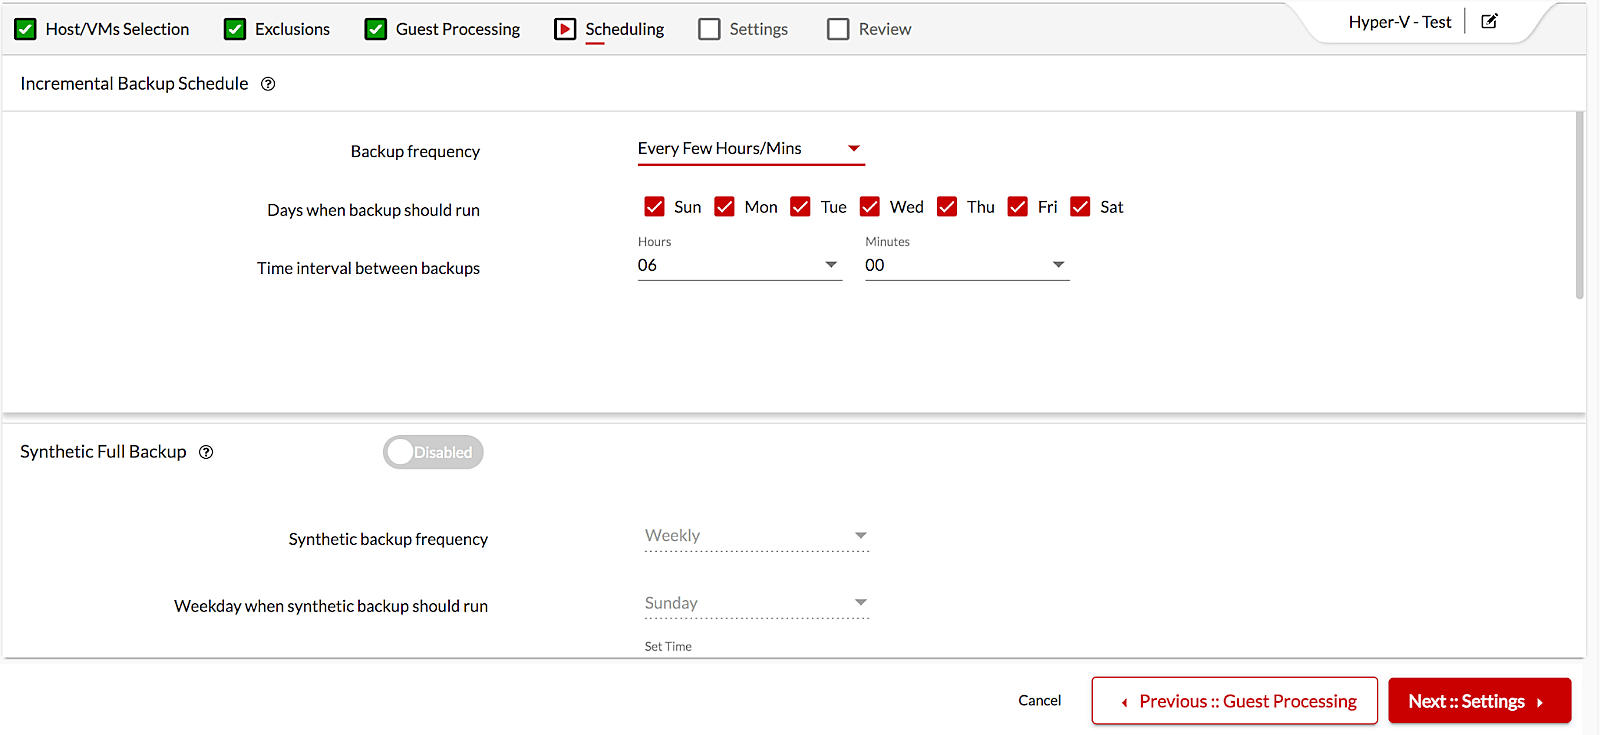
Step 9: Scheduling: BDRSuite offers near continuous data protection that lets you run a backup as often as every 15 mins. Automate the backup process with flexible scheduling hourly, daily, weekly, monthly, etc. You can also configure the scheduling for Incremental, Synthetic full backup, and Additional Full backup.
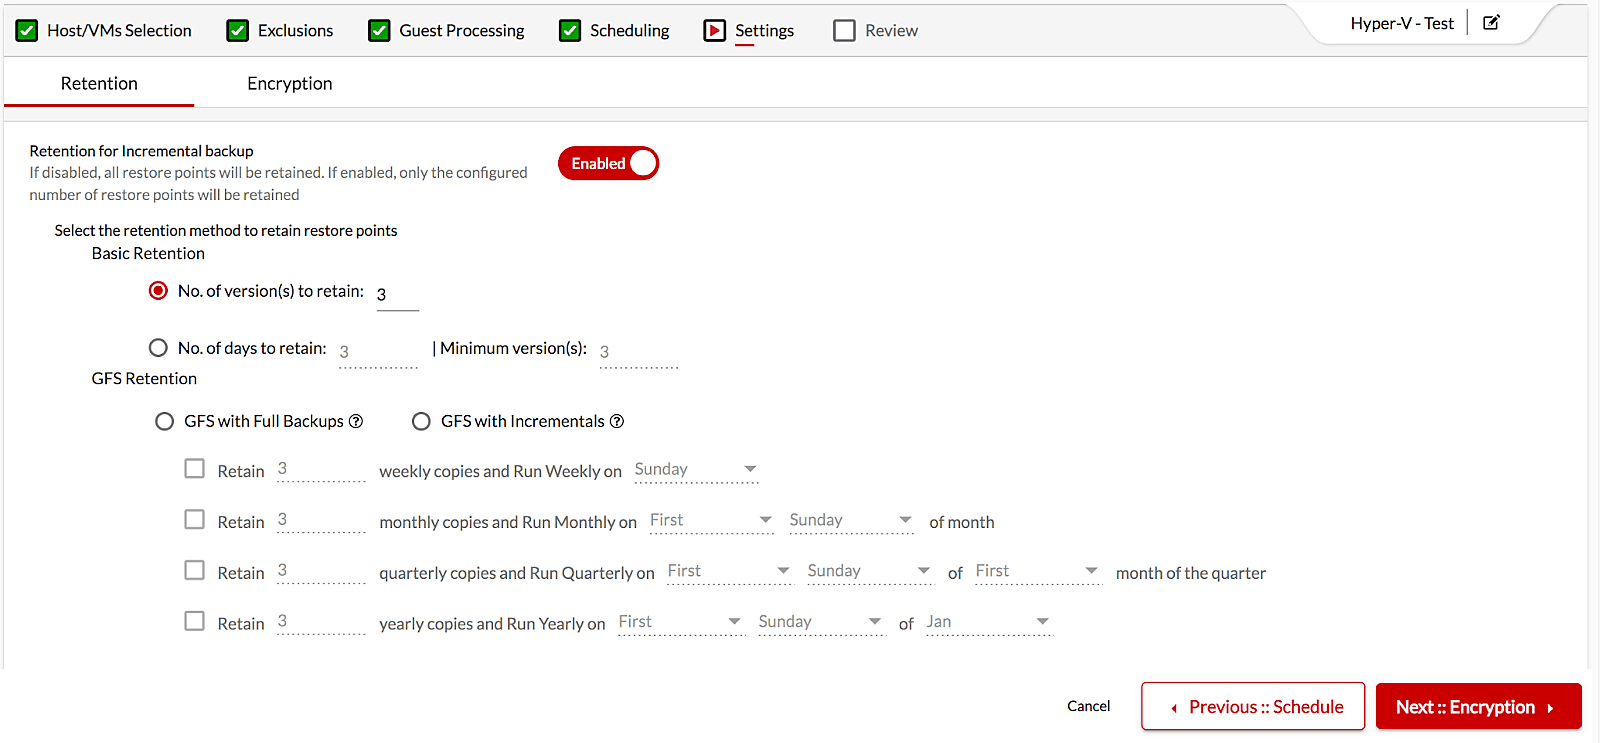
Step 10: Settings:
Retention – You can turn on retention to set how many versions or days of backup data should be retained. All data will be retained if retention is disabled.
Encryption – You have the choice to set up either system-generated or custom passwords to encrypt backup data.
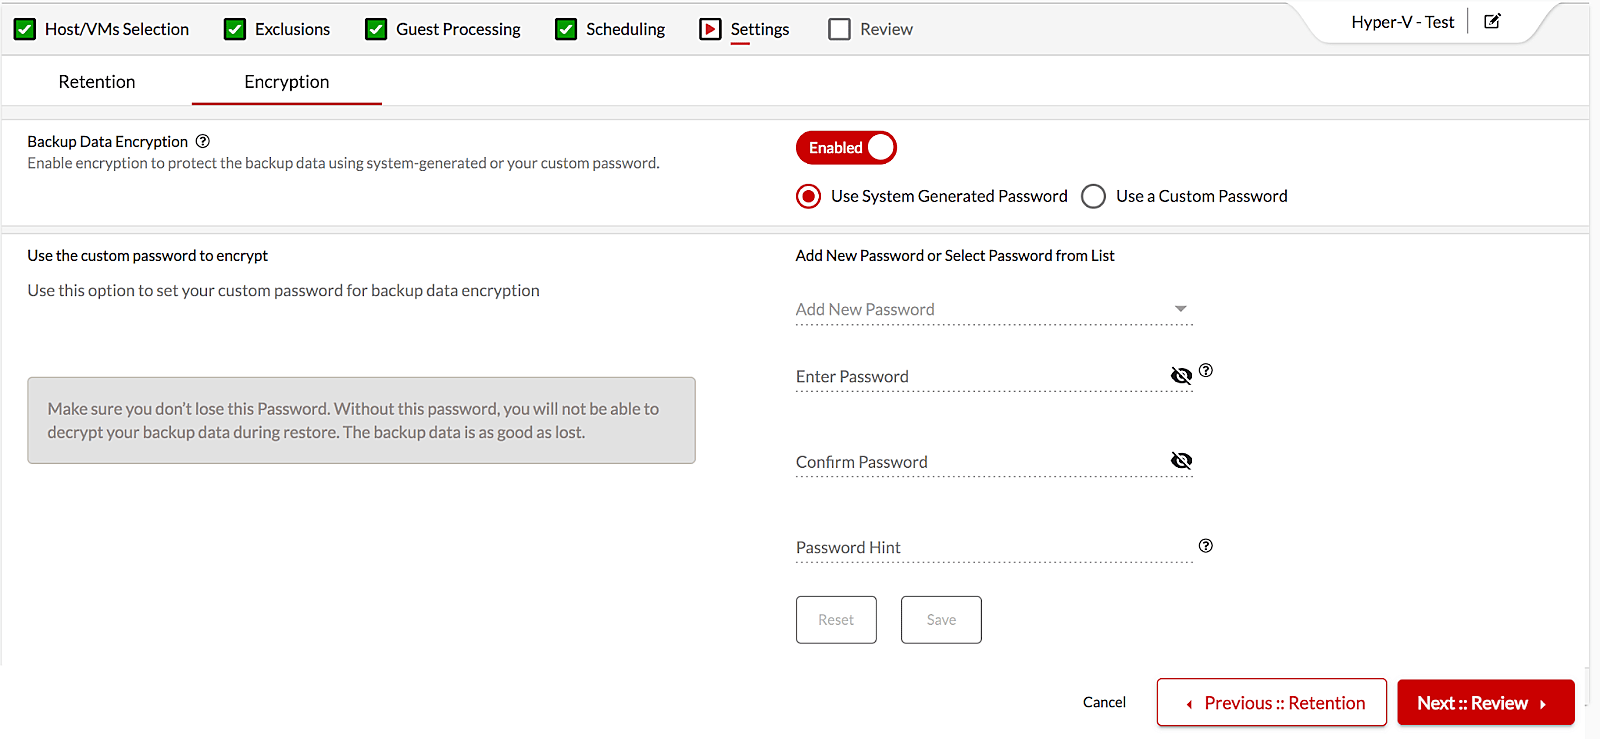
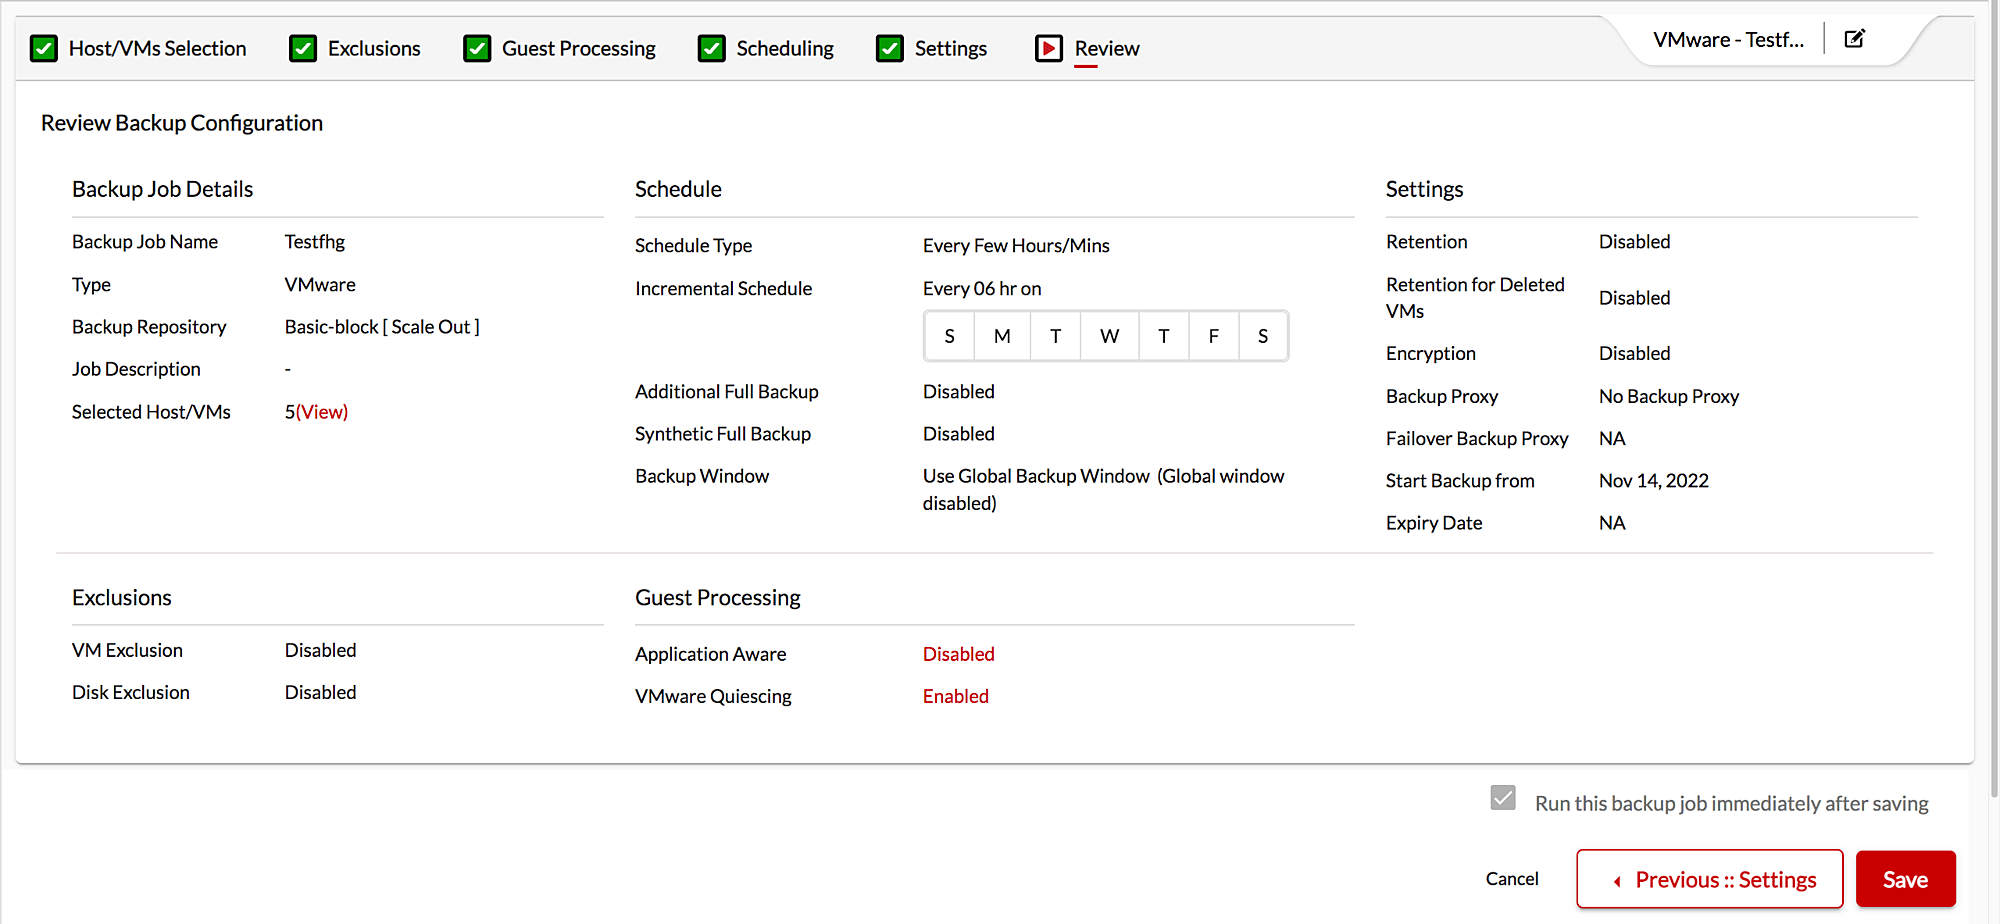
Step 11: Review: Review the backup configuration before saving the task. According to the backup schedule, the job will begin to run.
How to Recover the Backed-up VMware VMs
Backed-up VMware VMs can be restored from the Backup Server using multiple recovery options – Instant VM Boot, Full VM Recovery, File Level Recovery, Disk Level Recovery, Recovery to Microsoft Azure, Application Recovery and more. Click here to know more about each restore option
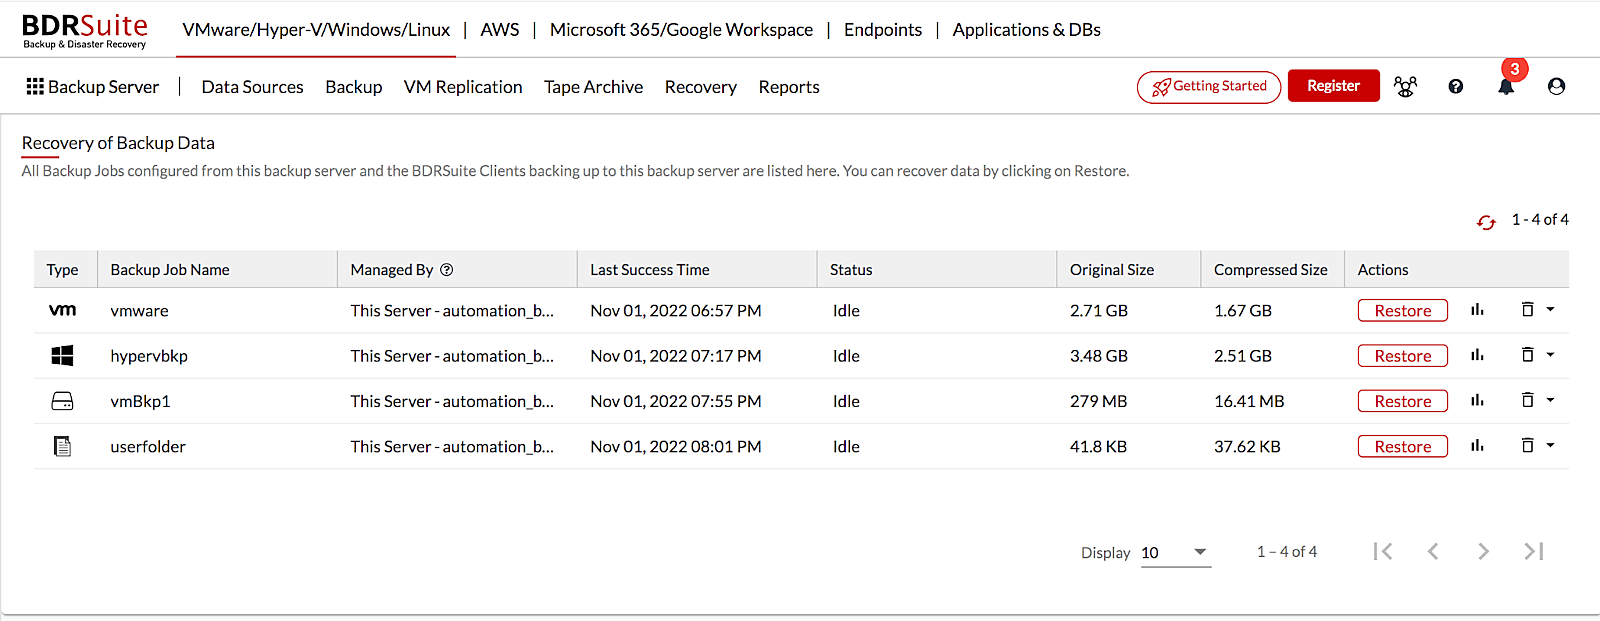
1. Navigate to Recovery -> Restore Backup Data page. Click the ‘Restore’ button alongside the backup job from which you want to restore the backed-up VMware VMs.
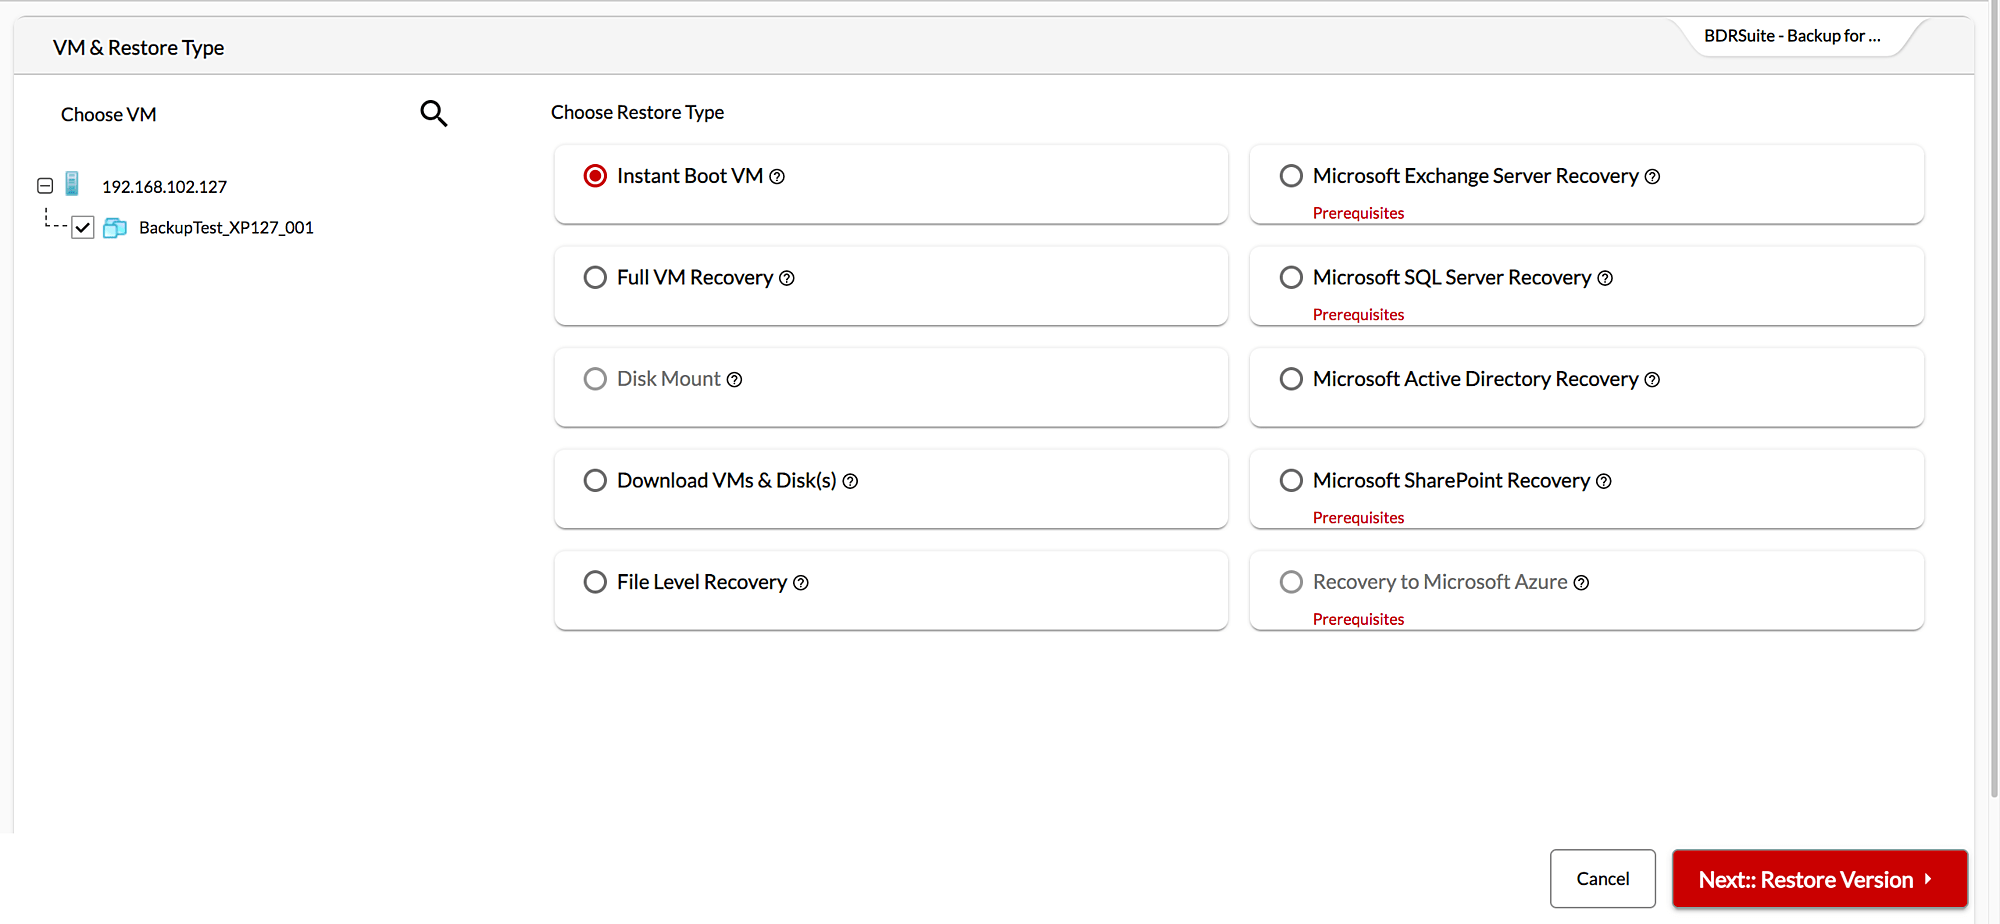
2. Select one or more VMs that you want to restore. Then, Choose one of the restore options based on how you want to restore the backed-up VMs. Here we are proceeding with the Instant Boot VM option which restores the backed up VM in less than 15 mins.
3. Select the restore version.
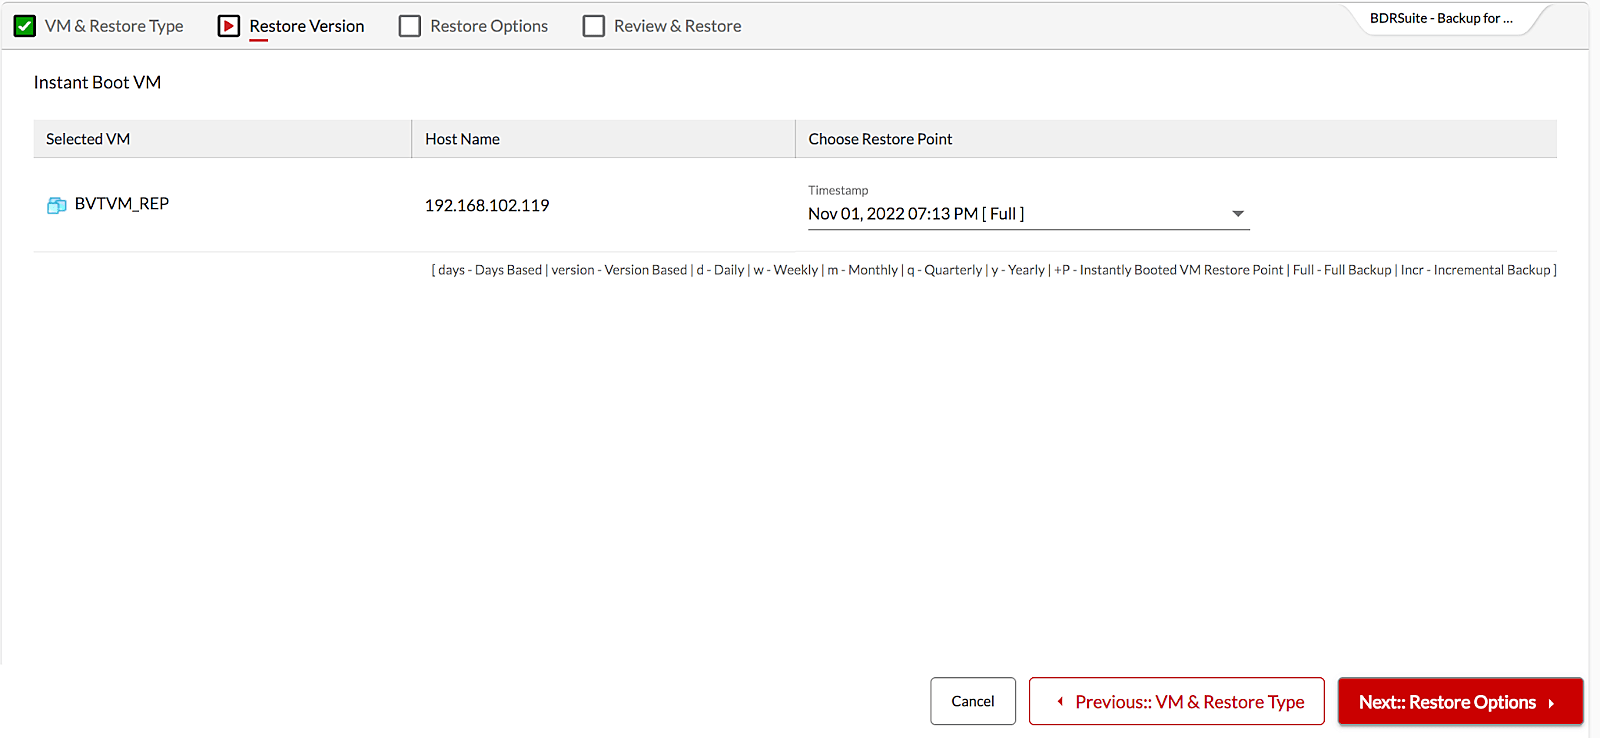
4. Based on the selected restore option, choose the recovery configuration.
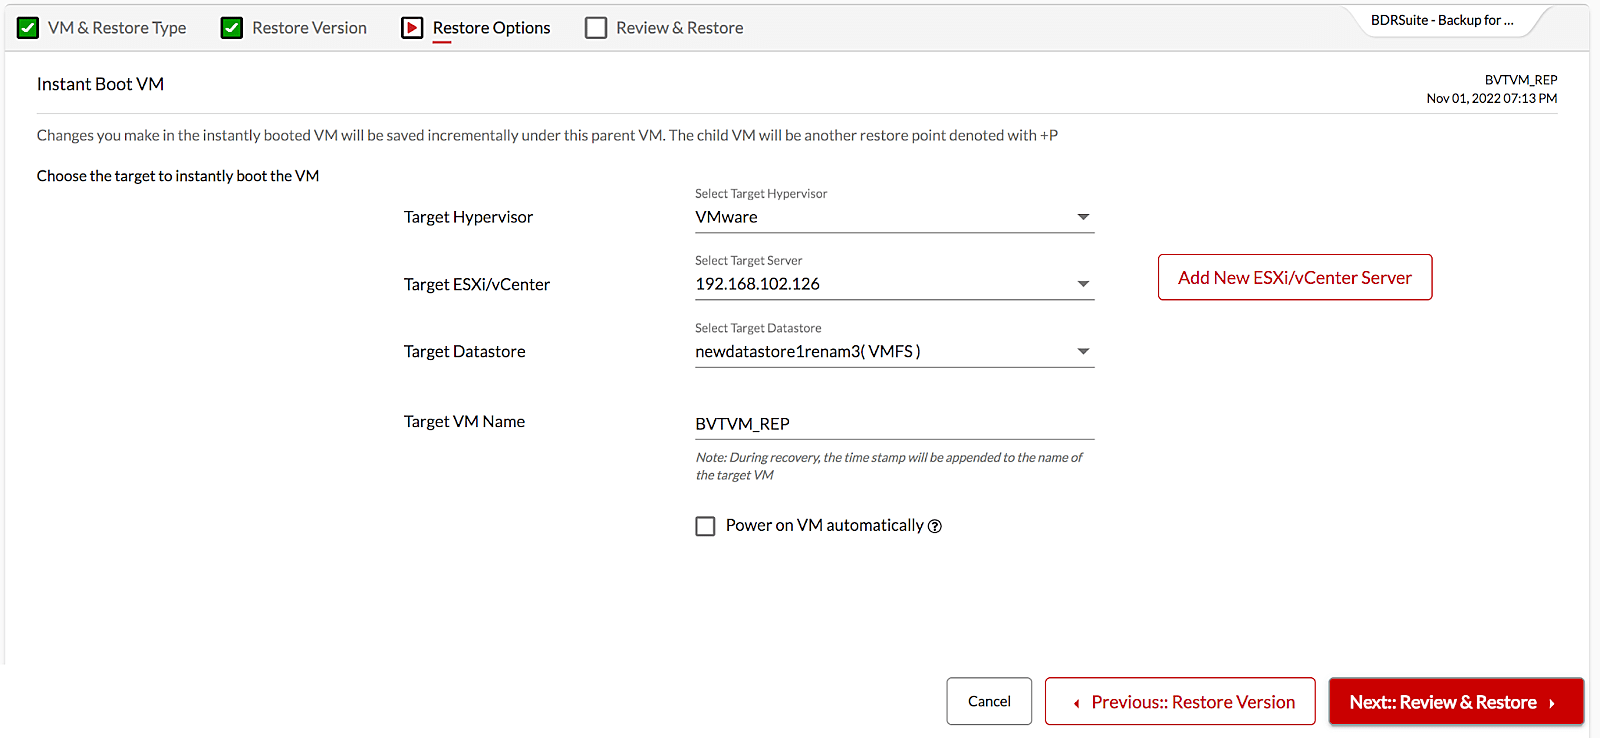
5. Finally, review the configuration and initiate the restore. The backed-up VM will be instantly booted on the target host.
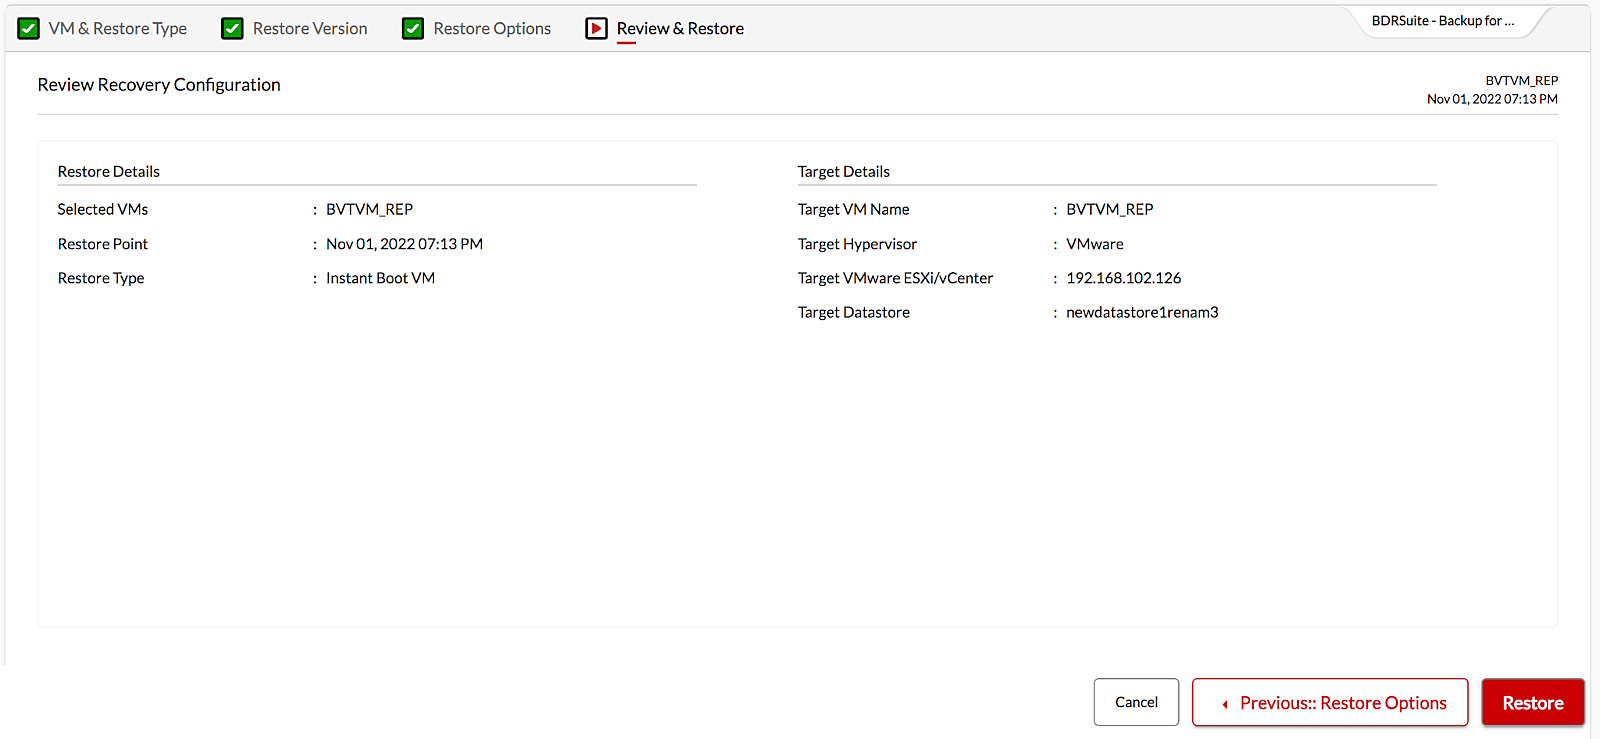
For detailed information on VMware Backup and Recovery Configuration, Refer to BDRSuite User Guide.
Are you Interested in checking out BDRSuite? Try our 30-day free trial now or Request a demo
Follow our Twitter and Facebook feeds for new releases, updates, insightful posts and more.


Leave A Comment