The last post covered installing Microsoft Hyper-V for beginners with Server Manager in Windows Server.
Quick Bites:
- The blog post discusses how to install Microsoft Hyper-V using PowerShell for beginners, emphasizing its simplicity and efficiency compared to traditional methods like using Server Manager
- It covers the benefits of PowerShell, provides step-by-step instructions for both local and remote installations, and highlights scenarios where PowerShell is particularly useful, such as setting up Hyper-V clusters or managing Windows Server Core
- Overall, it underscores the versatility and power of PowerShell in managing Hyper-V environments effectively
Table of Contents
- What is PowerShell, and why should you use it?
- Install Microsoft Hyper-V with PowerShell for beginners
- When would you use PowerShell to install Microsoft Hyper-V?
- Wrapping Up
What is PowerShell, and why should you use it?
PowerShell has quickly become the premier command line scripting tool for Windows environments. Windows PowerShell was first natively included in Windows Server 2008 R2. Ever since then, it has grown and matured into a robust command line tool providing powerful capabilities.
PowerShell uses a verb/noun structure that is very human-readable and easy to understand. As a result, even those without much experience with scripting or development can quickly get up to speed with performing basic tasks using it. One of the great benefits of learning and using PowerShell along with your endeavor to learn Microsoft Hyper-V is that it is used everywhere and by arguably most, if not all, vendors.
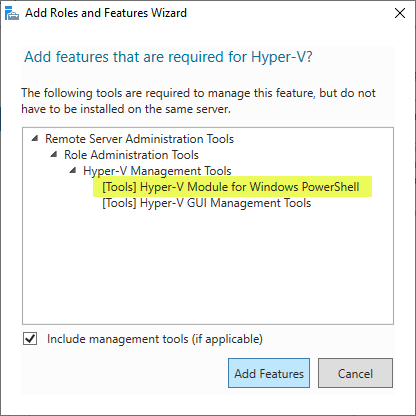
PowerShell provides a way to perform routine tasks and configuration changes consistently, predictably, and collectively regarding Hyper-V administration, management, configuration, and other tasks. When installing the Windows Server Hyper-V role, you will notice that, by default, the installation will install Hyper-V Module for Windows PowerShell.

In a future post, we will take a much deeper dive into the Hyper-V Windows PowerShell module. But, first, it helps to start understanding the benefits of using PowerShell with Hyper-V, which is a great way to take your Hyper-V learning and administration to the next level.
Install Microsoft Hyper-V with PowerShell for beginners
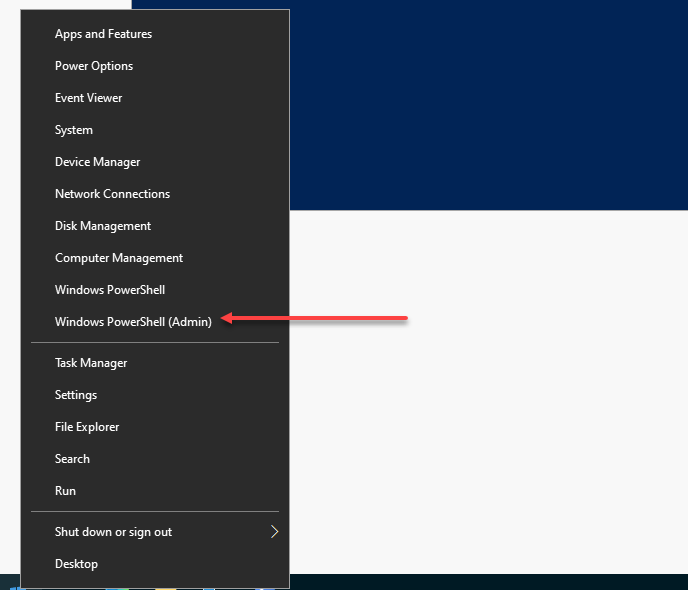
Ok, let’s see how we can install Microsoft Hyper-V with PowerShell in Windows Server 2022. The process is extremely easy. First, let’s launch a Windows PowerShell admin prompt. To do this in Windows Server 2019 and higher, you can right-click the Windows Start button and select Windows PowerShell (Admin) to launch the PowerShell prompt with administrative permissions. We need the admin privileges since we will be adding a Windows Server role and the underlying management components to manage the solution.

Once Windows Powershell is launched as an administrator, installing the Windows Server Hyper-V role is a simple one-liner PowerShell command. There are a few variations of the command to note, but we will cover those below.
Installing the Windows Server Hyper-V Role on a local server using PowerShell
The Windows PowerShell command you can run to install the Hyper-V Windows Server Role is the following:
- Install-WindowsFeature -Name Hyper-V -IncludeManagementTools -Restart
Note in the above command, the “-IncludeManagementTools” parameter is included. This parameter tells PowerShell also to install the Hyper-V Management Tools, Hyper-V Module for Windows PowerShell, and Hyper-V GUI Management Tools.
If you only want to install the Hyper-V Windows Server Role, you can omit this parameter, and it will only install the Hyper-V Role itself, without the management tools. Also, installing the Windows Server Hyper-V Role requires a restart. If you pass in the “Restart” parameter, the server will be restarted as soon as the installation of the Windows Role is complete.
If you don’t want to restart the designated Hyper-V host immediately, you can leave off the “Restart” parameter and restart the Windows Server manually.
Install the Windows Server Hyper-V Role on a remote server using PowerShell
We only need to slightly tweak the above PowerShell cmdlet to adjust it to install the Windows Server Hyper-V role on a remote computer. The command to install the Hyper-V Role on a remote Windows Server is as follows:
- Install-WindowsFeature -Name Hyper-V -ComputerName
-IncludeManagementTools -Restart
In the above command, we are only adding the “-ComputerName” parameter. This parameter tells PowerShell we want to install the Windows Server Role on the computer name specified. Again, be sure you want to restart the Windows Server immediately if you pass in the “Restart” parameter. The server will restart automatically and immediately after the Hyper-V role installation is complete.
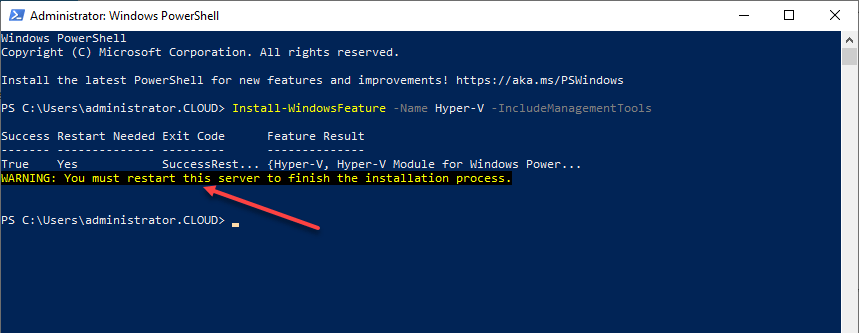
Below, I have removed the “Restart” parameter to allow seeing what is displayed in the PowerShell window after installing the Hyper-V role.

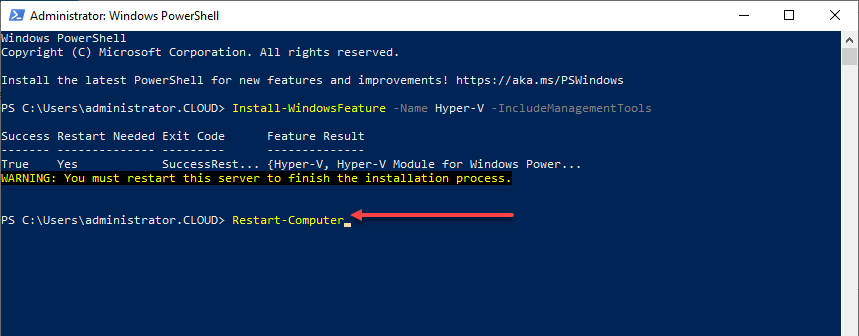
As noted, if you didn’t use the “Restart” parameter as part of the command, you will need to reboot the server manually. You can easily do this in PowerShell using the cmdlet:
- Restart-Computer

When would you use PowerShell to install Microsoft Hyper-V?
Using PowerShell to install Microsoft Hyper-V makes a lot of sense when installing Hyper-V on multiple Windows Servers, such as when setting up a Hyper-V cluster. PowerShell works well in this case because you can quickly install the Hyper-V Role on multiple Windows Server hosts without touching the GUI.
It is also a great option to install the Windows Server Hyper-V Role when working with Windows Server Core. Windows Server Core is a “headless” operating system without a GUI. So, you don’t have Server Manager available locally to install the Hyper-V Role. With Windows Server Core, PowerShell is a great way to manage, configure, and administer Hyper-V and other Windows Server roles.
PowerShell can also be used as a DevOps configuration management tool allowing Hyper-V administrators to check and enforce configuration on Hyper-V servers in their estate, ensuring these align with standardized configuration across the organization.
Wrapping Up
Microsoft has provided many ways to install Microsoft Hyper-V in Windows Server. For example, you can use the Server Manager GUI or PowerShell from the command line to install the Hyper-V Role. As shown, using PowerShell to install Hyper-V is a one-liner PowerShell cmdlet, and it is easy to install Hyper-V across multiple servers. Powershell is an excellent option when installing a Hyper-V cluster with numerous Windows Server hosts. Finally, it also provides a way for Hyper-V administrators to use a DevOps approach to configuring Hyper-V hosts and managing the Hyper-V hosts in their production Hyper-V server environment.
Read more on our Hyper-V Beginner’s series:
Hyper-V Mastery: A Step-by-Step Guide for Beginners to Elevate Your IT Skills and Boost Your Career
Related Posts:
Why use PowerShell Jobs?
6 reasons why you should learn Powershell
Convert VHD to VHDX using Hyper-V Manager and Powershell
Automating Windows Server 2019 Package Management with PowerShell
How to create Hyper-V Dashboard using Windows PowerShell?
Guide on how to make Html reports in PowerShell
How to Merge Hyper-V Checkpoints using Hyper-V Manager and Powershell
Beginner’s Guide for Microsoft Hyper-V: Top 10 PowerShell Commands for Hyper-V – Part 12
Follow our Twitter and Facebook feeds for new releases, updates, insightful posts and more.


Leave A Comment