Hyper-V lets you run multiple operating systems at the same time on one physical computer, by running each one in a virtual machine. Flexibility and performance are essential in your Hyper-V environment, so you may want to analyze your Hyper-V nodes by running the Hyper-V Best Practices Analyzer (BPA) to ensure that everything works like a charm on your infrastructure.
To prevent any issue on your Hyper-V environment, you should use the Best Practice Analyzer (BPA), which is a great Microsoft Tool to comply with best practices. Best practices are guidelines that are considered the ideal way, to configure a server as defined by Microsoft.
What is Best Practices Analyzer(BPA) and how does it work?
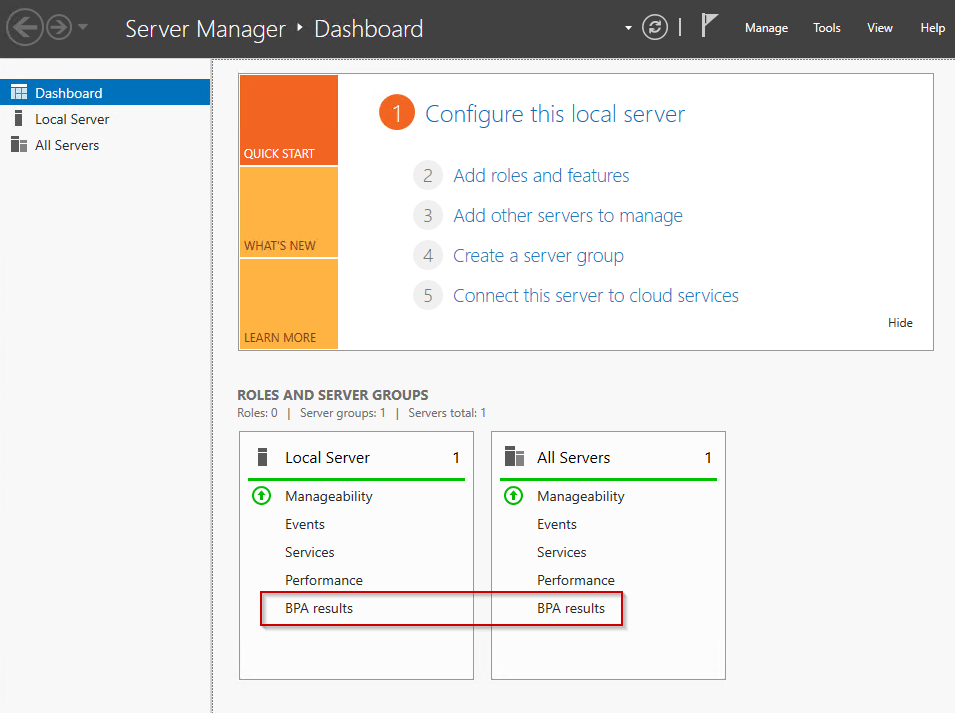
Every time when we open the Server Manager, we will have a summary of the roles and server groups and one of the items is the BPA results (Best Practices Analyzer). The Best Practices Analyzer scans your computer using the rules based on these best practices and reports the results. BPA works by measuring a role’s compliance with best practice rules in eight different categories:
- Security
- Performance
- Configuration
- Policy
- Operation
- Pre Deployment
- Post Deployment
- BPA Prerequisites
Please note that BPA is not limited to Hyper-V. You can run BPA analyzer for all the Microsoft roles.
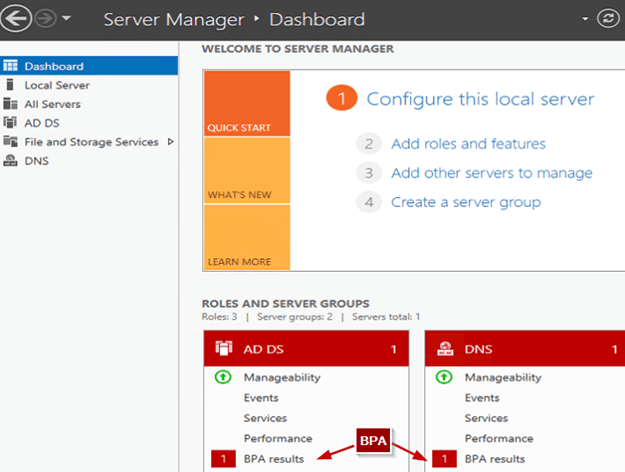
In the following picture, AD DS and DNS roles have been scanned and Windows Server Manager indicates two results for these roles. It means that when a scan finds conditions that don’t comply with best practices, the BPA will show a warning in this console.
Let’s imagine, you open the port number 23 for telnet requests, well the BPA will probably not interpret this port as a best practice, so it will raise a warning message in the console.
In the following picture, BPA results indicate that everything is ok, so all the best practices are implemented.
Running the BPA analyzer is great, To know more on the best practices, read the article on Hyper-V configuration best practices written by Brandon Lee
Using the Server Manager to operate Best Practices Analyzer?
BPA is installed by default on all editions of Windows Server 2008 R2 and later except the Server Core installation option. The BPA analyzer exists in the Windows Server 2016 edition.
Here are the basic steps to run the best practices analyzer on a Windows Server:
- Install the Hyper-V Role
- Get the BPA model IDs for the Role
- Run the BPA
- Review the results
How to Scan Hyper-V using BPA GUI?
To scan a role by using the BPA GUI, open the Server Manager by clicking “Start”, point to “Administrative Tools”, and then click “Server Manager”. In the tree pane, open Roles, and then select the Hyper-V role. In the details pane, open the Summary section, and then open the Best Practices Analyzer area.
Next, click “Start BPA Scan” to start a new scan.
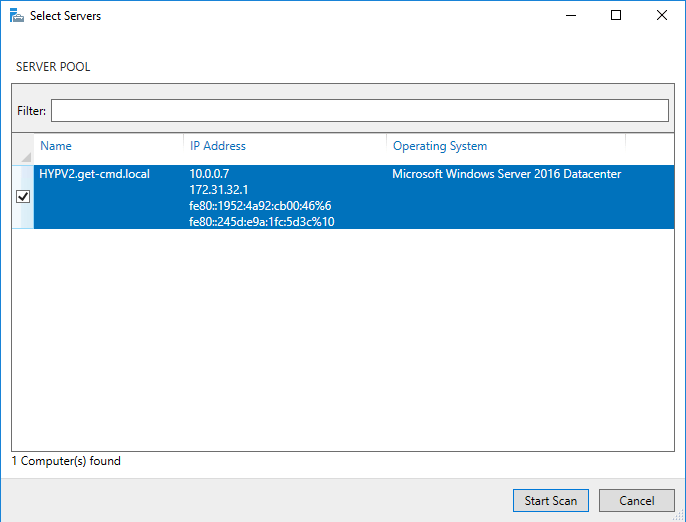
A new window will appear. You must confirm which server you want to scan. Depending on the number of servers that were added to the Server Manager, you could choose which servers the BPA will run against. In my case, I have only one Hyper-V node, so I just select it and click “Start Scan”:

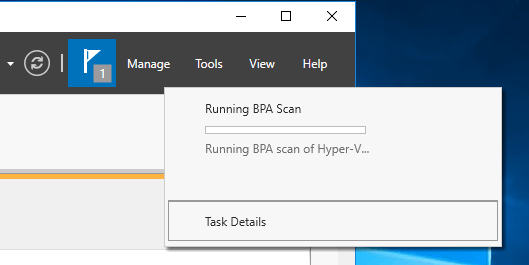
The scan is running, so you must wait until the end of the scan:
Interpreting and managing the results of the Hyper-V Best Practices Analysis in Server Manager
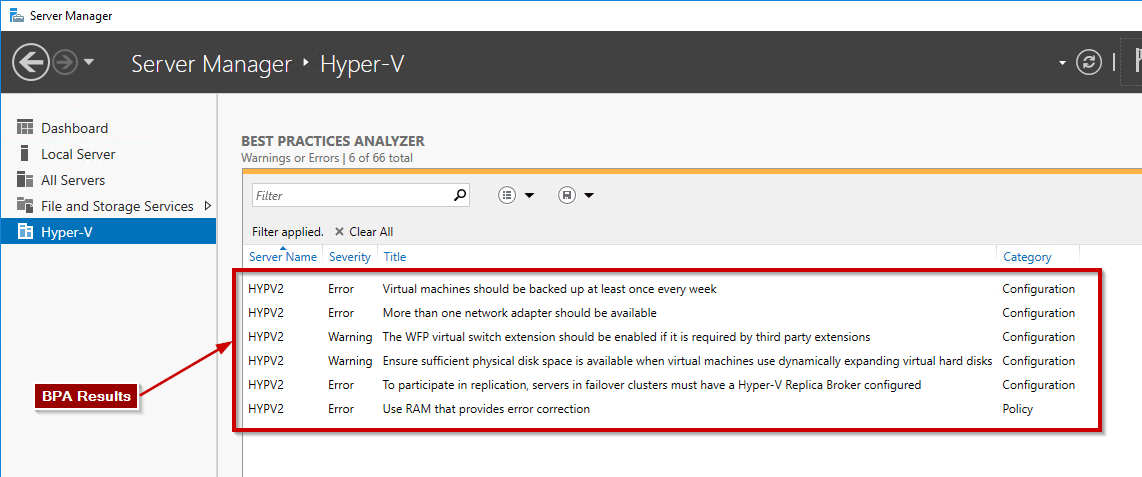
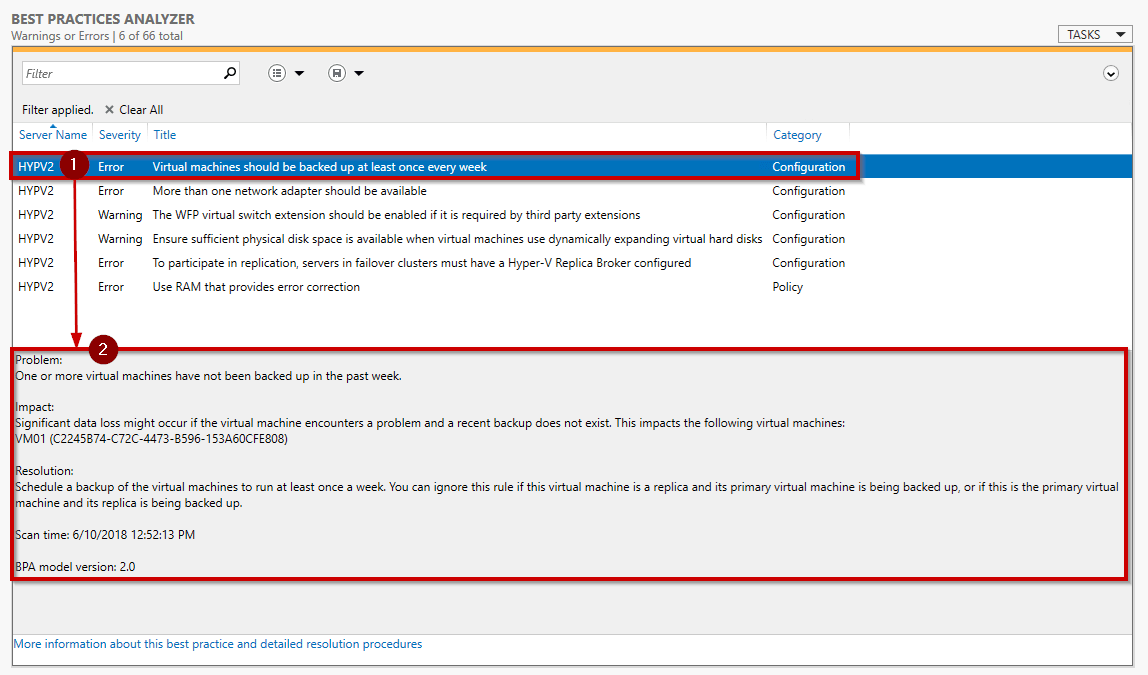
The Hyper-V scan is done and some warning messages are listed in the Server Manager. What you can see in the following picture is the severity level. In my lab environment, I can notice:
- 4 critical errors
- 2 warning messages
Once the scan completed, If no items appear in this section it means that you have no errors or warnings on your Hyper-V host.
When you click on the item, you will notice that more information about this alert and detailed resolution procedure are available. In this section, you will also see a Problem and an Impact section.

As you can see, some alerts are just a recommendation. For instance, in my case, some Virtual Machines have not been backup. As I use a lab environment, I can exclude this alert.
How to Exclude Results?
In some cases, the administrator is aware of a recommendation but that is not applicable to the system. In that case, you could remove these results from the list. In order to do that, just click on the desired recommendation and click on Exclude Result.

How to List Excluded Results?
How about if you want to see an excluded recommendation?
Click on the icon on the upper-right corner and then all the filters that are in place will be shown. In the following picture, I can confirm that my excluded alert is visible:

How to use Windows PowerShell to run a Best Practices Analyzer scan on Hyper-V
For those of you who love Windows PowerShell, you can also use it to run a BPA scan on your environment.
Below is a great script to generate a BPA scan from the Microsoft PFE Platform:
https://blogs.technet.microsoft.com/askpfeplat/2016/10/10/best-practice-analyzer-for-hyper-v/
Note: Do not forget to run the ISE or Windows PowerShell console as administrator.

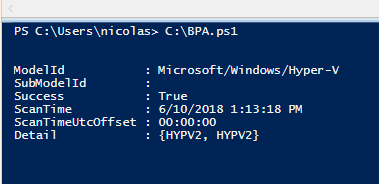
Here is the output
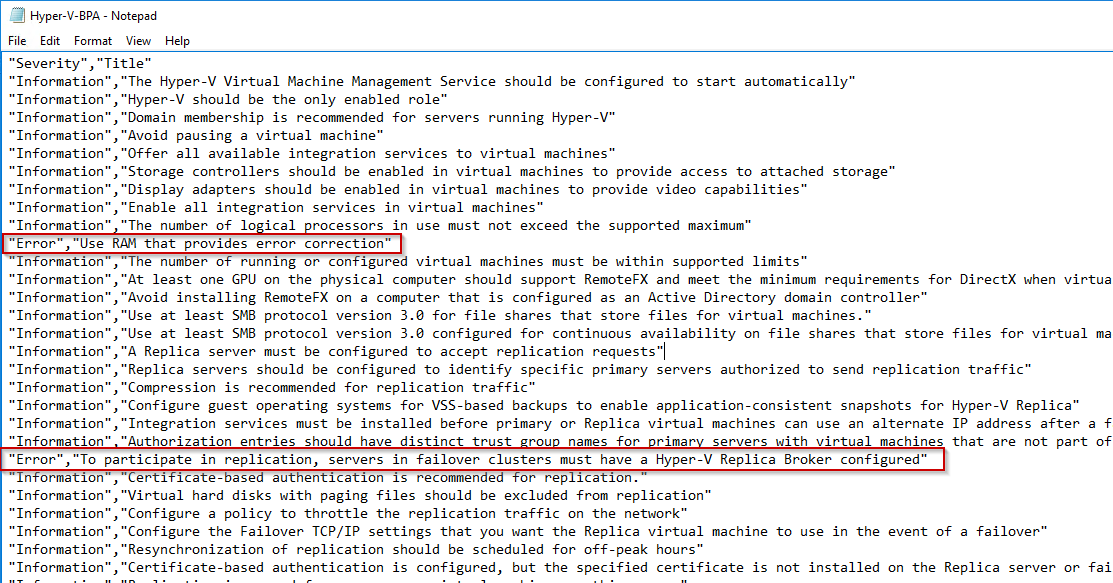
This script will generate a CSV file. You can notice that all the security level are collected:
- Information
- Warning
- Error
Let’s see how to use the BPA PowerShell module.
First, import the Server Manager module into your Windows PowerShell session:
PS > Import-Module ServerManager
Then, import the BPA module:
PS > Import-Module BestPractices
Now, you can run the BPA cmdlets such as the Get-BPAModel cmdlet to get the list of BPA models installed on the system:

To get help about these cmdlets, you can use the Get-Help cmdlet. The syntax is very simple:
PS > get-help Get-BpaModel
Below are the cmdlets available in the BPA PowerShell module:
- Get-BpaModel: Retrieves and displays the list of BPA models installed on the system
- Get-BpaResult: Retrieves and displays the results of the most recent Best Practices Analyzer (BPA) scan for a specific model
- Invoke-BpaModel: Starts a Best Practices Analyzer (BPA) scan for a specific model that is installed on a computer
- Set-BpaResult: Excludes or includes existing results of a Best Practices Analyzer (BPA) scan to display only the specified scan results
To run a Hyper-V BPA scan on the local Hyper-V host and place the results in C:\BPA directory, run the following command:
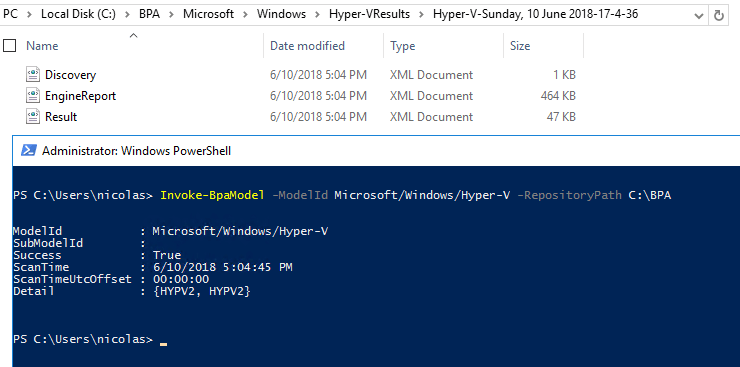
Note: The location specified for RepositoryPath must exist.
You can get results from the BPA scan using PowerShell and the Get-BPAResult cmdlet. For example, you can display just by severity and title:
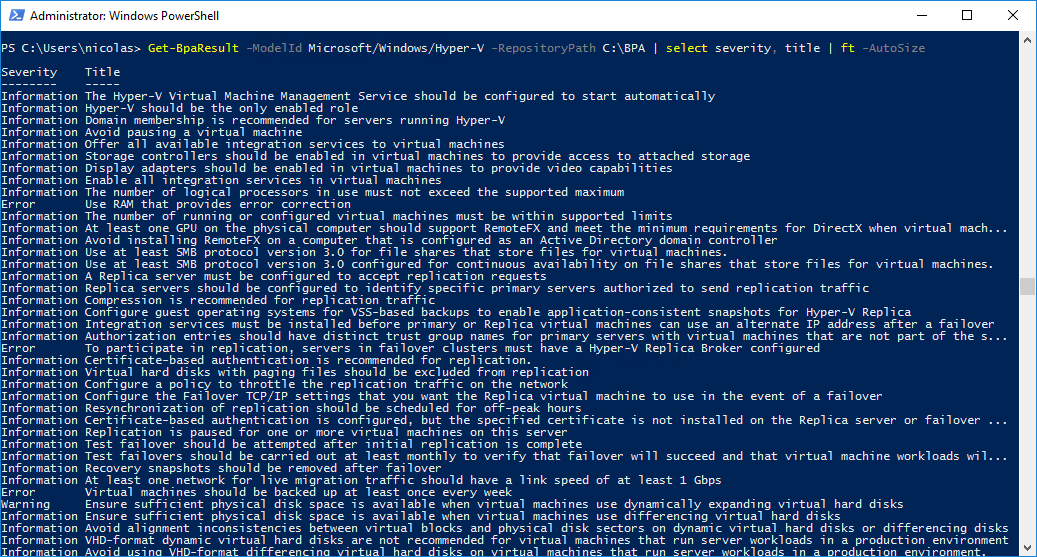
You can create some custom reports using the BPA PowerShell module and send reports to Hyper-V administrators. Actually, it seems that no Stop-BPAModel cmdlet exists, so you cannot stop a running BPA scan on your system.
Conclusion
Thanks to the “Hyper-V Best Practices Analyzer” tool, this lets us scan our Hyper-V nodes to ensure that everything is working like a charm, which is useful for every Hyper-V Administrator. You can generate BPA results based on the security level (Information, Warning, and Error). Another interesting thing is that you can generate a BPA scan using Windows PowerShell, which is cool to run and automate a scan on a regular basis.
If these recommendations are not applicable to your system for any reasons, then you can just exclude them in the console.
Running a BPA scan once per month is very important to ensure that your Hyper-V environment is working as expected.
Follow our Twitter and Facebook feeds for new releases, updates, insightful posts and more.


Leave A Comment