Introduction
What is Azure App Service?
Azure App Service is an HTTP-based service for hosting web applications, REST APIs, and mobile back ends. Users can develop applications in their known language be it in .Net, Java, Ruby, PHP, or Python, and can run on Windows or Linux environments in a hassle-free manner quickly with ease.
App Service not only adds the power of Microsoft Azure to the user application, such as security, load balancing, autoscaling, and automated management, also take advantage of its DevOps capabilities, such as continuous deployment from Azure DevOps, GitHub, Docker Hub, and other sources, package management, staging environments, custom domain, and TLS/SSL certificates.
With the App Service in Azure, users can pay the amount only the resources they use and it is determined by the App Service plan that a user runs the application on it.
Some key features of the Azure App service.
According to the Azure documentation, below are some of the key features that help the Azure App service to use efficiently for the users.
Multiple languages and frameworks – App Service has first-class support for ASP.NET, ASP.NET Core, Java, Ruby, Node.js, PHP, or Python. Users can also run PowerShell and other scripts or executables as background services.
Managed production environment – App Service automatically patches and maintains the OS and language frameworks for the users. Spend time writing great apps and let Azure worry about the platform.
Containerization and Docker – Dockerize the user app and host a custom Windows or Linux container in App Service. Run multi-container apps with Docker Compose. Migrate the user Docker skills directly to App Service.
DevOps optimization – Set up continuous integration and deployment with Azure DevOps, GitHub, BitBucket, Docker Hub, or Azure Container Registry. Promote updates through test and staging environments. Manage user apps in App Service by using Azure PowerShell or the cross-platform command-line interface (CLI).
Global-scale with high availability – Scale up or out manually or automatically. Host user’s apps anywhere in Microsoft’s global data center infrastructure and the App Service SLA promise high availability.
Connections to SaaS platforms and on-premises data – One can choose from more than 50 connectors for enterprise systems (such as SAP), SaaS services (such as Salesforce), and internet services (such as Facebook). Access on-premises data using Hybrid Connections and Azure Virtual Networks.
Security and compliance – App Service is ISO, SOC, and PCI compliant. Authenticate users with Azure Active Directory, Google, Facebook, Twitter, or Microsoft account. Create IP address restrictions and manage service identities.
Application templates – Options to Choose from an extensive list of application templates in the Azure Marketplace, such as WordPress, Joomla, and Drupal.
Visual Studio and Visual Studio Code integration – Dedicated tools in Visual Studio and Visual Studio Code streamline the work of creating, deploying, and debugging.
API and mobile features – App Service provides turn-key CORS support for RESTful API scenarios, and simplifies mobile app scenarios by enabling authentication, offline data sync, push notifications, and more.
Serverless code – Users can run a code snippet or script on-demand without having to explicitly provision or manage infrastructure and pay only for the compute time his code actually uses.
In this blog, we are going to provide the steps involved while creating an Azure App service under an Azure account.
Creating an Azure App Service.
Login to Azure Portal using a Global Administrator or a privileged account administrator.
Select Azure App Service under All Services → App services under Mobile Category as shown in the attached image below shown in Redbox.
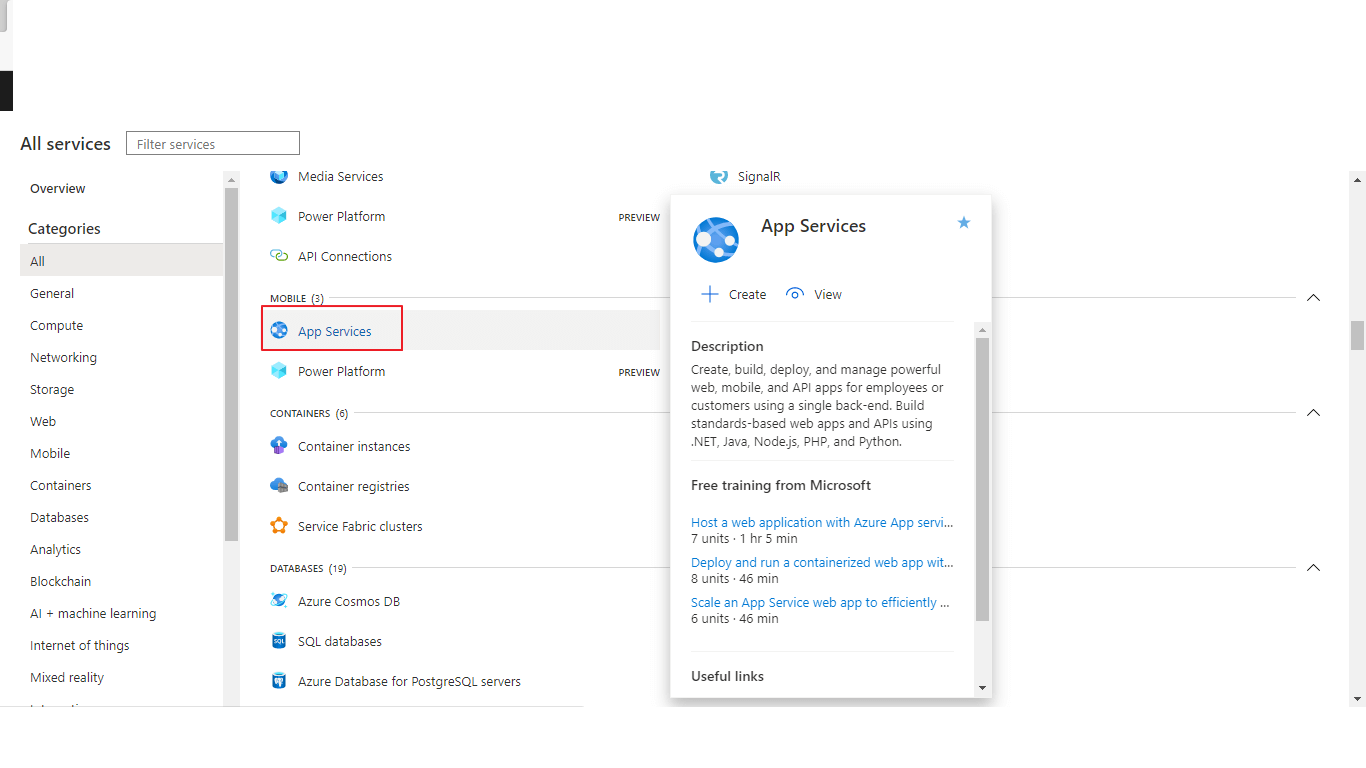
On the main page of the App web services, users can create an app service, by clicking on the button “create app service” at the bottom of the page.
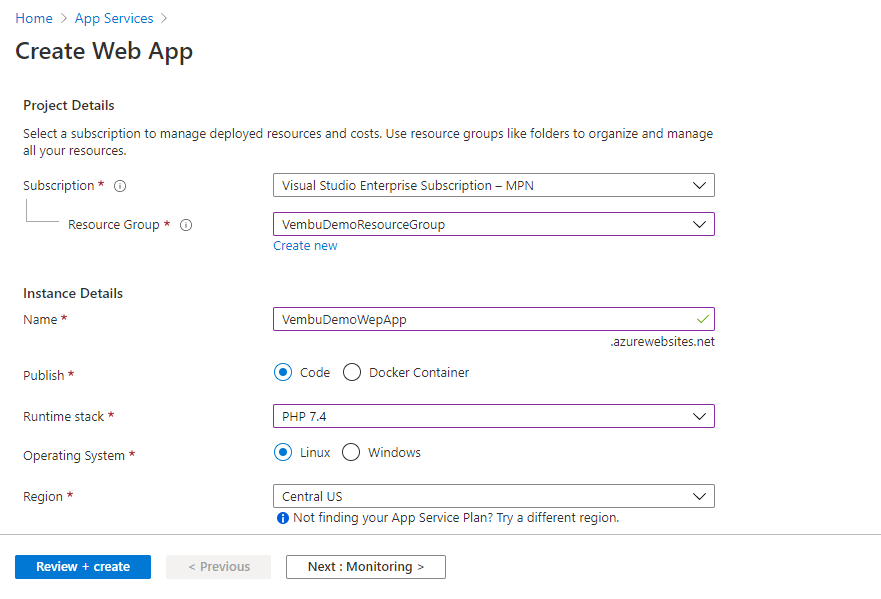
Creating a web app service on Azure involves four steps. The first step called Basic shows the Project details, Instance details, and App service plan.
Step 1 Basic configuration
Under Project details, select a subscription to manage deployed resources and costs. Use resource groups like folders to organize and manage all your resources. Users can create a new resource group or can use the existing one. In our case, we are using an existing resource group.
Under Instance details, provide a web app name for the Instance. Under publish, users have the option to choose either code or container. In the code option, the user has to choose his web application language ( called Runtime stack ) and the OS under which the application is going to run. Users can choose the Docker container option too. In our case, we have chosen PHP 7.4 version and Linux OS
App Service plan pricing tier determines the location, features, cost, and compute resources associated with the user’s app. Users can change the provided service plan depending on their requirements. Azure offers spec picker under three options viz Dev/Test, Production, and Isolated categories. The user must understand the cost estimation and choose his pricing tier.
Click Next to Configure Monitoring.
Step 2 Monitoring configuration
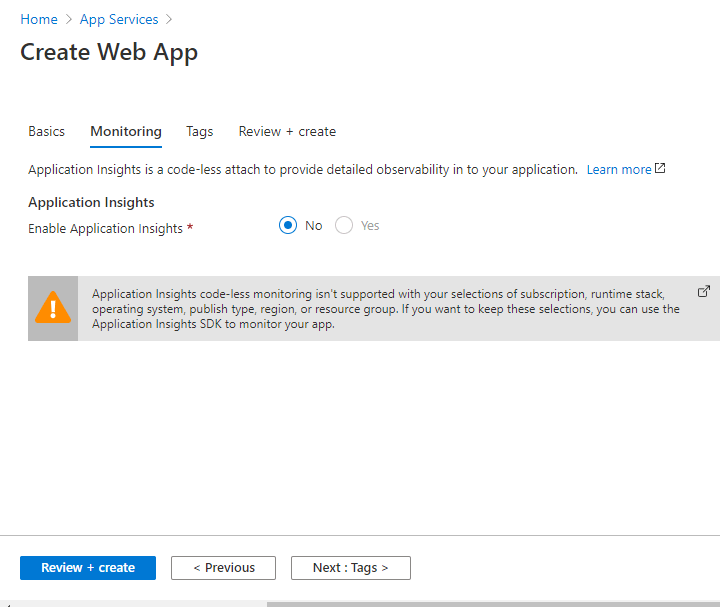
In this step, we will enable or disable Application Insights. Itis an extensible Application Performance Management (APM) service for developers and DevOps professionals. Use it to monitor the user’s live applications. This application insight may not support all the runtime stack application language. Do check your application language supporting for the Application Insight before implementing, otherwise, the option will be disabled. The below screenshot shows this configuration.
Click Next to create Tags
Step 3 Creating Tags
Tags are name/value pairs that enable you to categorize resources and view consolidated billing by applying the same tag to multiple resources and resource groups.
Note that if you create tags and then change resource settings on other tabs, your tags will be automatically updated. This is an optional step, you can continue without adding tags also.
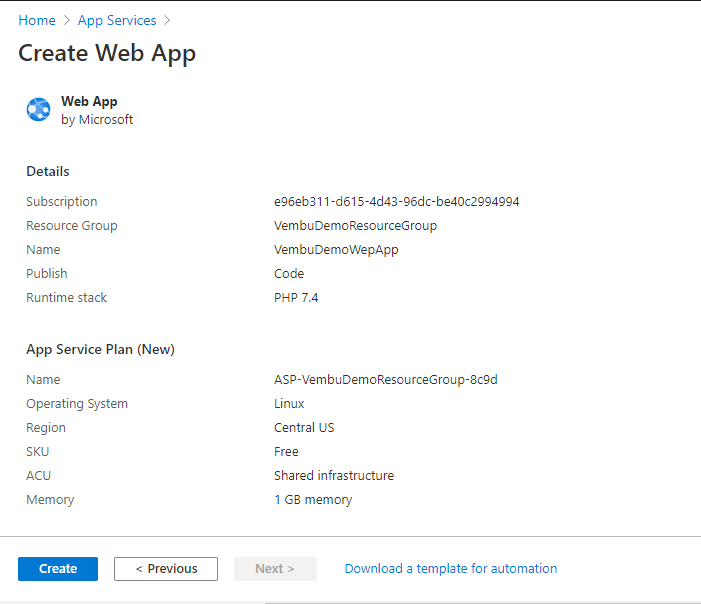
Step 4 Review and Create
On this final step, users can review the information they provided. On confirmation, you can click the Create button.
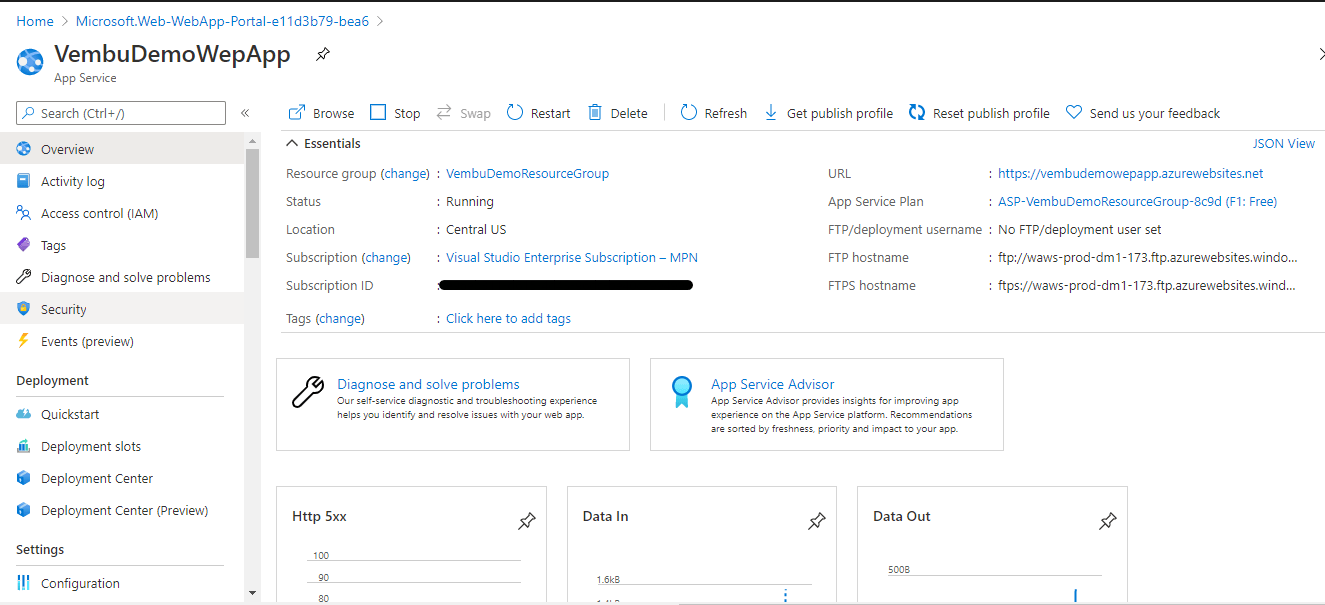
You will get a “Deployment in progress” notification in the Notification area and will get a Deployment succeeded message in minutes. On clicking the resource button after deployment, you will get detailed information about the newly created Web service as below.
Working with the newly created Web App Service using Deployment Center
Once your App service is ready, you can access the service through the provided URL, you will get a similar welcome message on the home page as below.

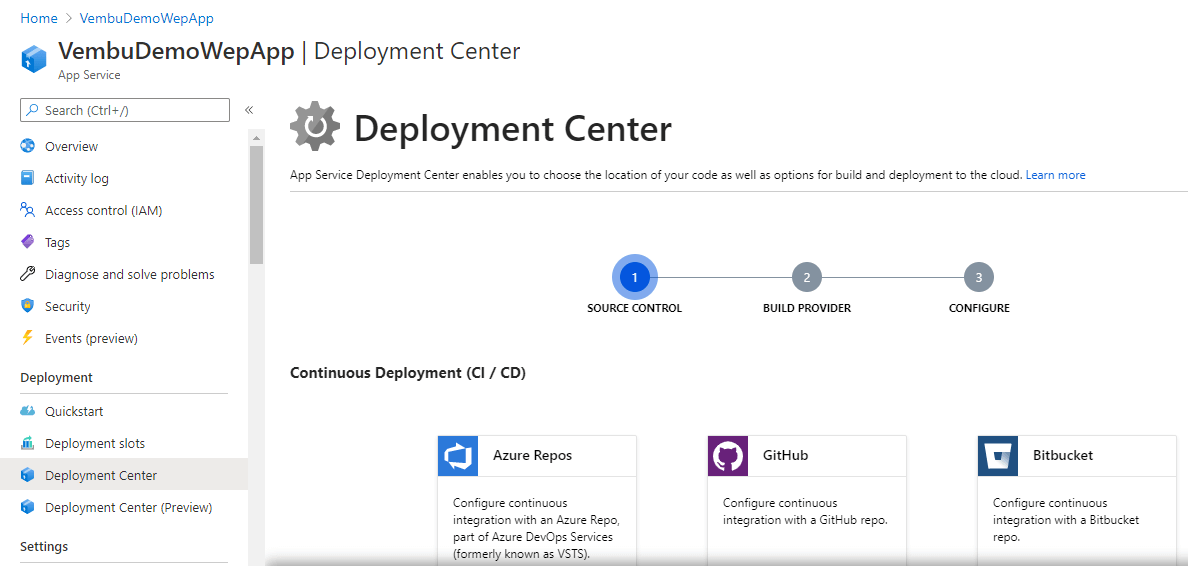
You can use the Deployment Center to set up your web application further. If you are familiar with source control software such as Git, Github, Azure Repos and have your application code in hand, you can push the code to Azure using continuous deployment or manual deployment method described in Deployment Center.
In this blog, we have provided an overview of creating a Web App service in Azure. Further configuration of their web service using their application language is on individual developer scope.
Conclusion
Using Azure App service, one can easily set up, deploy, and manage his application in a few steps. Azure App service completely removes the hassle of deploying servers, OS, and application software, which eases the life of the developer and end-users. Also, App Services has built-in load balancers that help save infrastructure costs. Azure App Service also provides Infrastructure and platform security where the application is run securely on the cloud. App service provides layered security like multi-factor authentication to access the application. Azure App Service is also ISO and PCI compliant.
Follow our Twitter and Facebook feeds for new releases, updates, insightful posts and more.


Leave A Comment