What is AMI in Amazon EC2?
Amazon Machine Image (AMI) is a fundamental concept in Amazon Web Services (AWS), particularly within the context of Amazon Elastic Compute Cloud (EC2). An AMI is a pre-configured virtual machine image used as a template to launch instances in the cloud. It contains the necessary information to launch an EC2 instance, including the operating system, software, settings, and even data.
Components of an EC2 AMI
- Root Volume Snapshot: An AMI includes a snapshot of the root volume of an EC2 instance. This snapshot captures the instance’s operating system, installed software, and any configurations made to the instance
- Launch Permissions: AMIs can be shared with specific AWS accounts or made publicly available. This determines who can use the AMI to launch instances
- Block Device Mapping: AMIs define block device mapping, which specifies how the snapshot of the root volume should be attached to an instance when launched. It can also include information about additional EBS volumes and their configurations
What is AMI used for in AWS?
- Instance Replication: AMIs allow you to replicate instances easily. You can create an AMI from an existing EC2 instance and use it to launch new instances with the same configuration
- Instance Scaling: When you need to scale your application, you can create an AMI of a properly configured instance and then launch multiple instances based on that AMI
- Disaster Recovery: AMIs are used to create backups and ensure disaster recovery. You can create an AMI of a stable and well-configured instance to ensure you have a copy of your environment that can be quickly restored
- Custom Images: You can create customized images that include your software, applications, and configurations. This is particularly useful for ensuring consistency across instances
- Golden Images: AMIs serve as golden images that define the standard configurations and settings for instances in your organization
- Software Distribution: You can package and distribute your software through AMIs, allowing others to launch instances with your software pre-installed
- Version Control: As you make changes to your instance’s configuration or software, you can create new AMIs to preserve different versions of your environment
EC2 AMIs provide flexibility, scalability, and consistency in managing your infrastructure. They simplify the process of deploying and managing instances by allowing you to capture and replicate specific configurations and settings across multiple instances.
What is Custom AMI in AWS?
A Custom AMI (Amazon Machine Image) in AWS is a personalized image that you create from an existing EC2 instance. It includes the operating system, application software, configurations, and any customizations you’ve made to the instance. Custom AMIs allow you to quickly launch new instances with the same setup and configuration as the original one, saving time and ensuring consistency across multiple instances.
Why do you need a EC2 custom AMI
Using a custom Amazon Machine Image (AMI) in AWS EC2 offers several benefits and use cases that can enhance the efficiency, security, and scalability of your infrastructure. Here are some reasons why you might need a custom AMI:
- Preconfigured Environments: With a custom AMI, you can create instances that come with your specific software, configurations, and applications pre-installed. This ensures that instances are ready to use as soon as they’re launched, saving time and effort
- Consistency and Reproducibility: Using custom AMIs helps ensure consistency across your instances. You can replicate a known, stable environment every time you launch an instance, reducing the risk of configuration errors
- Security and Compliance: By creating a custom AMI with hardened security settings, you can ensure that all instances launched from that AMI adhere to your organization’s security and compliance requirements
- Performance Optimization: Custom AMIs can include optimized settings for your application’s performance. This might involve installing specific drivers, tuning resource settings, or configuring networking for better performance
- Application Stack: For complex applications with multiple components, you can create an AMI that includes the entire application stack. This allows you to easily launch instances with the complete environment, reducing setup time and potential errors
- Rapid Scaling: When your application experiences sudden spikes in demand, you can launch instances from a custom AMI to quickly scale up your infrastructure
- Disaster Recovery: Custom AMIs can be used for disaster recovery scenarios. If your primary environment fails, you can launch instances from a custom AMI in another region or Availability Zone to quickly restore service
- Reduced Dependency on Configuration Management Tools: While configuration management tools are valuable, using a custom AMI can simplify deployment by baking configurations directly into the image, reducing the need for complex scripting during instance launch
- Version Control: Custom AMIs can represent different versions of your application stack or environment. This can be useful for testing, development, and rolling back to previous configurations if needed
- Vendor-Specific Requirements: If your application has dependencies on specific libraries, tools, or environments, creating a custom AMI can ensure that these dependencies are always available
- Multi-Region Deployments: Custom AMIs can be copied to multiple regions, enabling you to deploy your application in various geographic locations with consistent configurations
While custom AMIs offer numerous advantages, keep in mind that managing multiple AMIs requires careful planning to avoid bloating your AMI repository with unused or outdated images. Regular maintenance, version control, and proper documentation are important for effective AMI management.
Step-by-Step Guide – How to Create a Custom AMI using AWS EC2 Instance
Creating an Amazon Machine Image (AMI) in AWS EC2 involves capturing the state of an existing EC2 instance and saving it as a reusable image. This image can be used to launch new instances with the same configuration, software, and data as the original instance.
Here’s how to create an AMI:
Step 1: Launch an EC2 Instance:
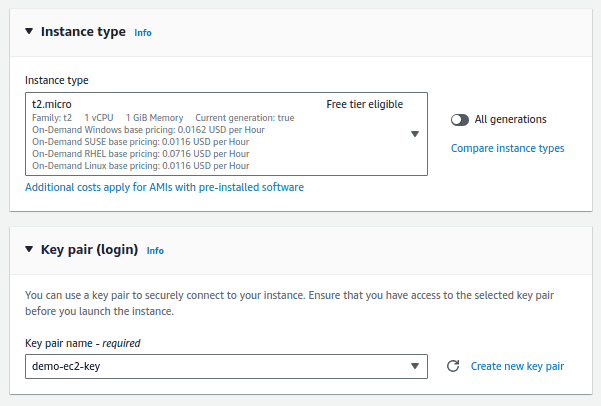
Start by launching an EC2 instance of which want to create an AMI from. Configure the instance with the desired operating system, software, and configurations.
Let’s assume that a company requires some configurations to be present across all the EC2 instances, for example, a monitoring agent, same level of kernel patches, OS hardening configurations etc,. Instead of doing all these steps after creating each and every EC2 instance, it can be done on one EC2 instance and an AMI can be created out of it. Then this AMI can be used to launch other EC2 instances so that those steps need not be done again.


In this demo, we have created an EC2 instance “demo-ec2-ami-01” . This instance is created out of Amazon Linux AMI provided by AWS.

For this demo, in this EC2 instance, we have installed “nginx” software and configured /etc/sysctl.conf with additional settings for system hardening.


Step 2: Prepare the Instance
Before creating an AMI, it’s a good practice to ensure your instance is in a consistent state. Stop applications or services that might be writing data to disk when the AMI is created.
Step 3: Create the AMI
In the AWS Management Console, select the EC2 instance and under the “Actions” button select the option “Image and Templates” and then select “Create Image” to create the AMI

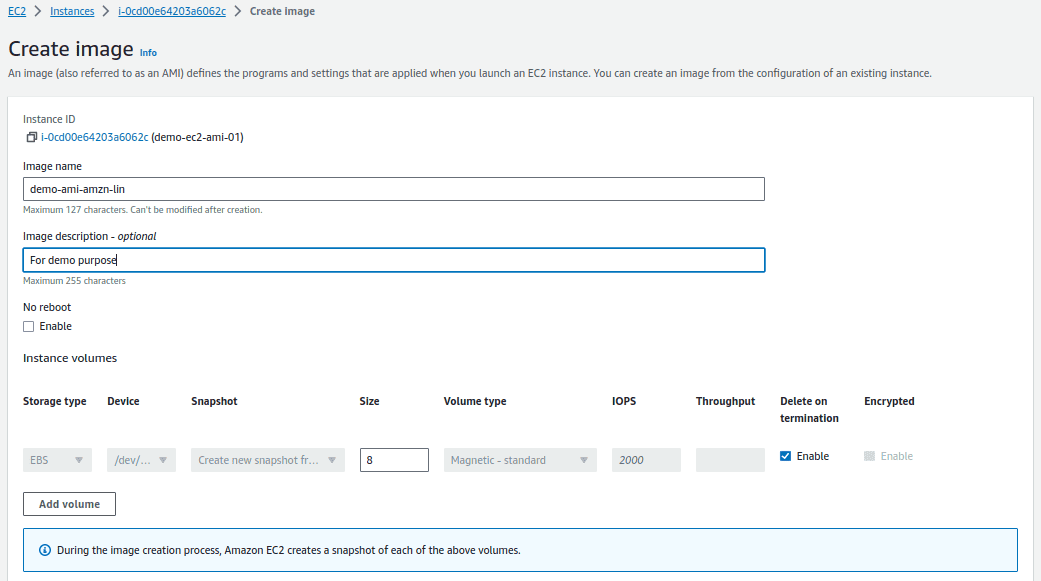
In the next screen configure image details, provide the name of the Image and a description. Below that, you can find the disks that will be part of the AMI created.
You can choose the enable the “No Reboot” option. If not enabled, then the instance is rebooted to take the snapshot, so that the EC2 instance snapshot is in consistent state without any active writes during the snapshot creation. If enabled, the EC2 instance is not shut down when the AMI is created.
You can configure additional settings such as instance storage optimization, instance tagging, and more. Adjust these settings according to your requirements.
Review the tags and click on “Create Image” option.
This initiates the process of creating the AMI. The instance will be temporarily stopped during the process.

You can monitor the progress of the image creation in the “AMIs” section of the EC2 console. Once, the image creation process is started, it will be in pending state. The AMI can be used once the image is in “available” status.

Step 4: Launch Instances from AMI
The AMI created will be available in your account’s AMI repository. You can now use the created AMI to launch new instances. Remember that creating an AMI copies the entire state of the instance, including the root volume and any attached EBS volumes. This can result in larger AMIs, so be mindful of storage costs and optimize your instance’s storage before creating the image. Additionally, regularly update and prune your AMIs to avoid accumulating unnecessary images.

Now to launch the EC2 instance from this AMI, select the AMI and click on “Launch instance from AMI”

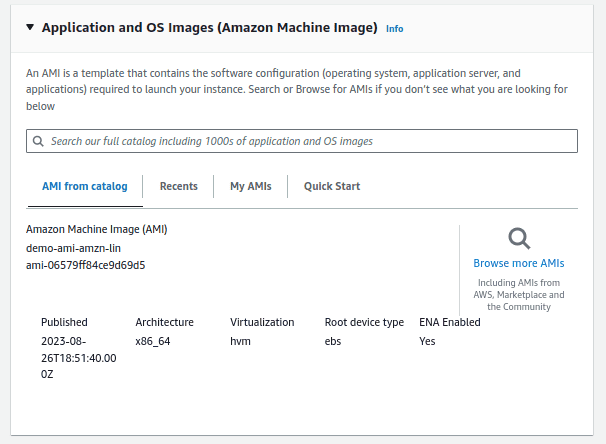
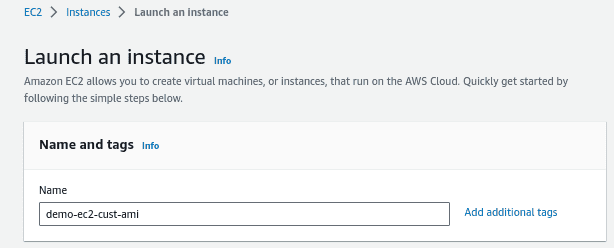
In the next screen provide all the required data for the new EC2 instance. But in this case, the image for the new instance will be ”demo-aws-amzn-lin”
Now click on “Launch Instance”

The new EC2 instance from the custom AMI image is created. Now you can login to the new instance and find the customizations we did before.

We can find that the configuration done in the AMI is now reflecting in the new EC2 instance that was deployed from the custom AMI image.


Conclusion
In this article, we created a custom AMI and created an EC2 instance out of it. We have seen the procedure step by step and discussed some of the benefits of creating a custom AMI. By following this procedure you can create your own custom AMI.
Read more on AWS:
AWS for Beginners: How to Deploy Microservices on Amazon EKS Cluster – Part 80
AWS for Beginners- Protect from DDOS attack using AWS Shield – Part 79
AWS for Beginners – How to Protect Web Applications Using AWS Web Application Firewall (WAF)- Part 78
Follow our Twitter and Facebook feeds for new releases, updates, insightful posts and more.


Leave A Comment