
Introduction
Managing virtual machines (VMs) efficiently is crucial in today’s IT environments. Proxmox VE, a powerful virtualization platform, offers a robust solution for deploying VMs. This guide focuses on leveraging Proxmox’s clone method to deploy VMs from pre-configured templates.
Templates serve as standardized blueprints for VMs, containing a pre-installed operating system and desired configurations. The clone method allows you to create new VMs based on a template, inheriting its settings while offering significant advantages:
- Speed: Provisioning VMs becomes a quick process, saving valuable time compared to manual configuration
- Consistency: Clones ensure all deployed VMs share the same base configuration, promoting consistency and reducing errors
- Storage Efficiency: Proxmox utilizes linked clones by default, which share the base disk image of the template, minimizing storage consumption
This guide will walk you through the steps involved in deploying a VM from a template using the clone method in Proxmox VE. We’ll cover essential concepts of cloning process itself, enabling you to streamline VM deployment in your Proxmox environment.
Choosing Linked clone or Full clone for creating a VM
Choosing between a linked clone or a full clone for VM creation from a template depends on your priorities:
Linked Clone
- Pros:
- Storage Efficiency: Saves disk space by sharing the base template’s virtual disk. This is ideal when you need many VMs with the same configuration
- Faster Creation: Creates VMs quickly since it only copies differences from the template.
- Cons:
- Performance: May have slightly lower performance compared to a full clone due to the “copy-on-write” mechanism used for changes
- Dependence: Relies on the original template VM being available. If the template is deleted, linked clones become unusable
- Limited Customization: Difficult to make significant changes to individual VMs without impacting the template and other linked clones.
Full Clone
- Pros:
- Performance: Offers optimal performance as the VM has its own independent copy of the virtual disk
- Independence: Completely independent of the template VM. Changes in the full clone won’t affect the template or other clones
- Customization: Allows for extensive customization of individual VMs
- Cons:
- Storage Consumption: Requires more storage space as each full clone has its own complete virtual disk
- Slower Creation: Takes longer to create compared to a linked clone.
Here’s a quick decision guide:

Choose a linked clone if:
- Storage efficiency is a top priority
- You need to create many VMs with the same configuration quickly
- Customization needs are minimal
Choose a full clone if:
- Performance is critical
- You need independent VMs that won’t be affected by changes to the template
- Individual VM customization is important
We’ve chosen the linked clone method for creating new VMs from templates in this blog post.To achieve this, let’s walk through the steps involved in creating a new VM using a linked clone from a template.
1. Access the Proxmox Web Interface: Open a web browser and navigate to the Proxmox VE web interface URL (usually https://
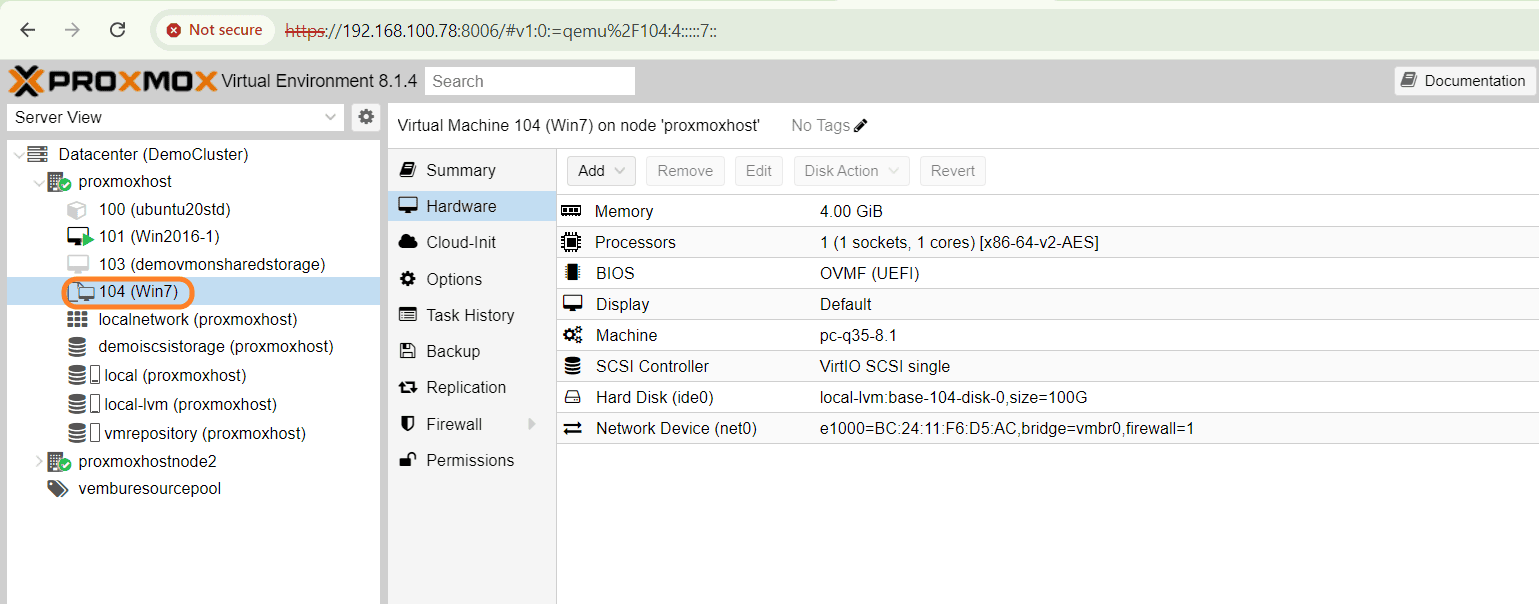
2. Locate the Template VM: In the left sidebar, navigate to the “Datacenter” where your template VM resides. Click on the datacenter name to expand it and list the VMs. Below screenshot shows the example VM template in the Proxmox datacenter
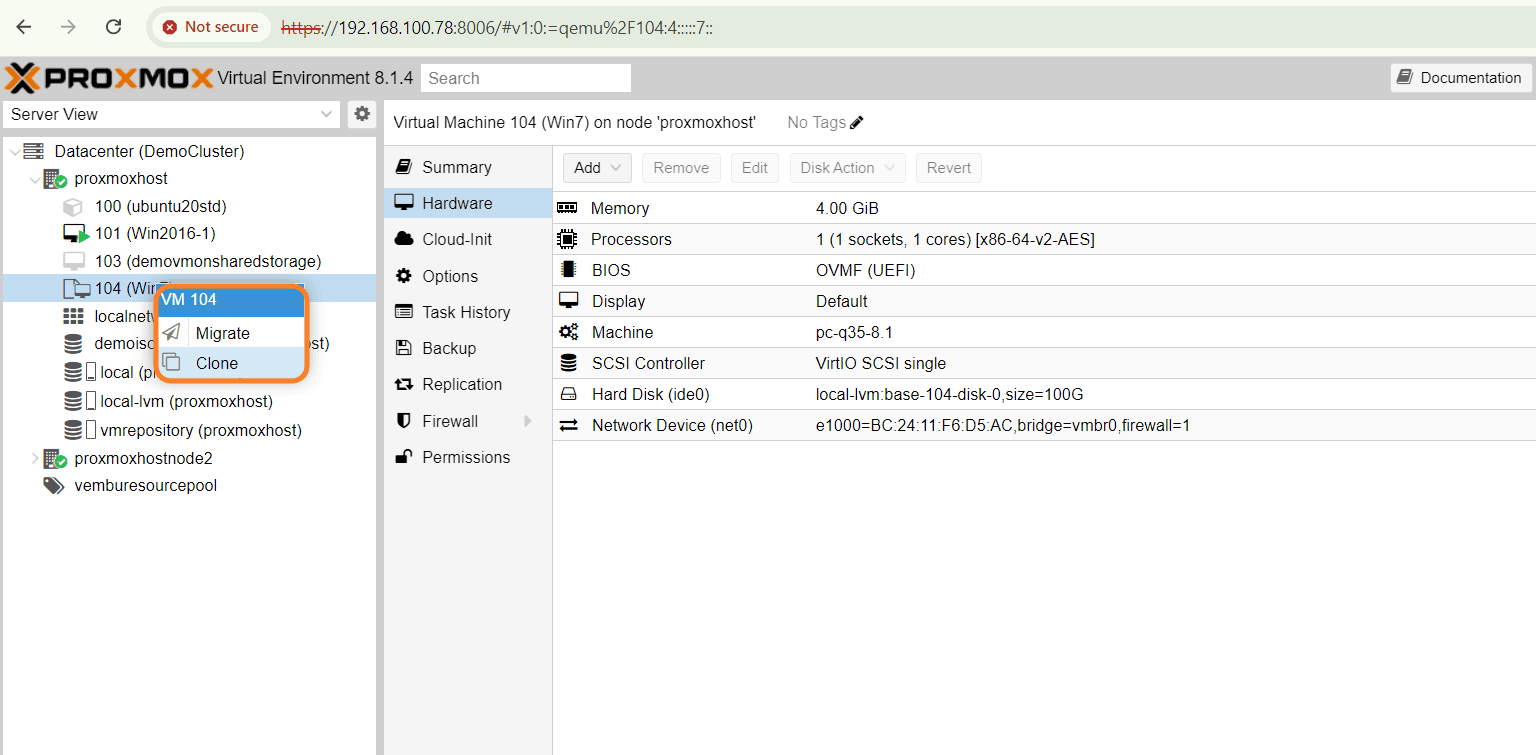
3. Right-Click the Template VM: Select the template VM you want to use for the linked clone. Right-click on the VM name.
4. Choose “Clone”: From the context menu, select the option “Clone”
5. Configure Linked Clone Settings:
- Target Node: Select the Proxmox node where you want to deploy the new VM. (Ensure shared storage is available if using a cluster)
- VM ID (Optional): You can leave the suggested VM ID or enter a unique identifier for the new VM
- Name: Provide a descriptive name for your new VM. This will help differentiate it from the template and other linked clones
- Resource Pool: If you have already created a resource pool and want to assign this VM to it, select the appropriate pool from the dropdown menu. Otherwise, leave the Resource Pool field blank
- Target Storage: Select the appropriate storage location for the new VM’s virtual disk. (Linked clones share the base disk from the template, but store changes in a separate delta file)
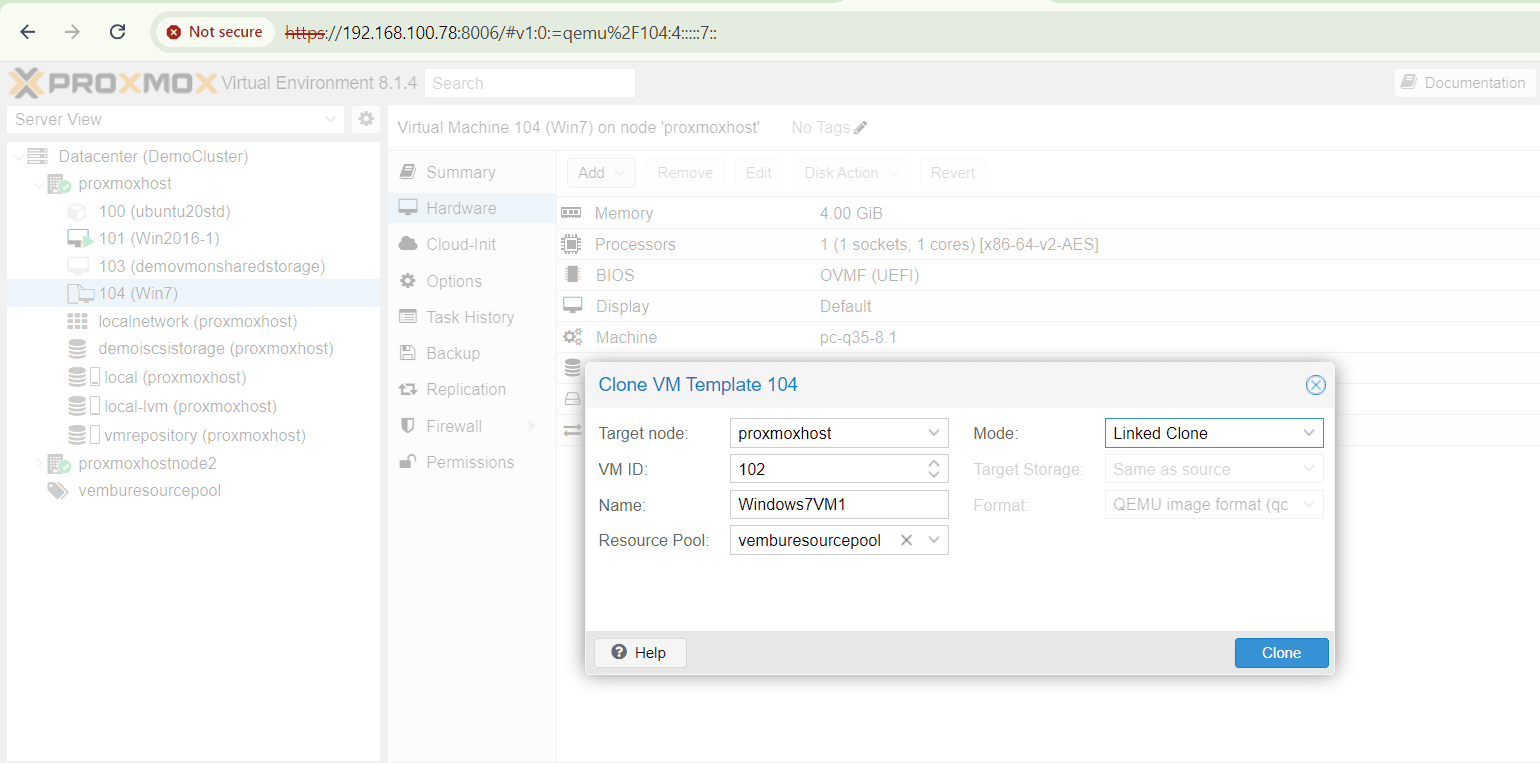
6. Verify and Start Cloning: Review all the settings you’ve chosen. Then, click the “Clone” button to initiate the linked clone creation process.
7. Monitor Progress: A task viewer window will appear, displaying the progress of the linked clone creation. This process might take some time depending on the size of the template disk.
8. Success Notification: Once complete, the task viewer will show a “TASK OK” notification. You can now close the window.

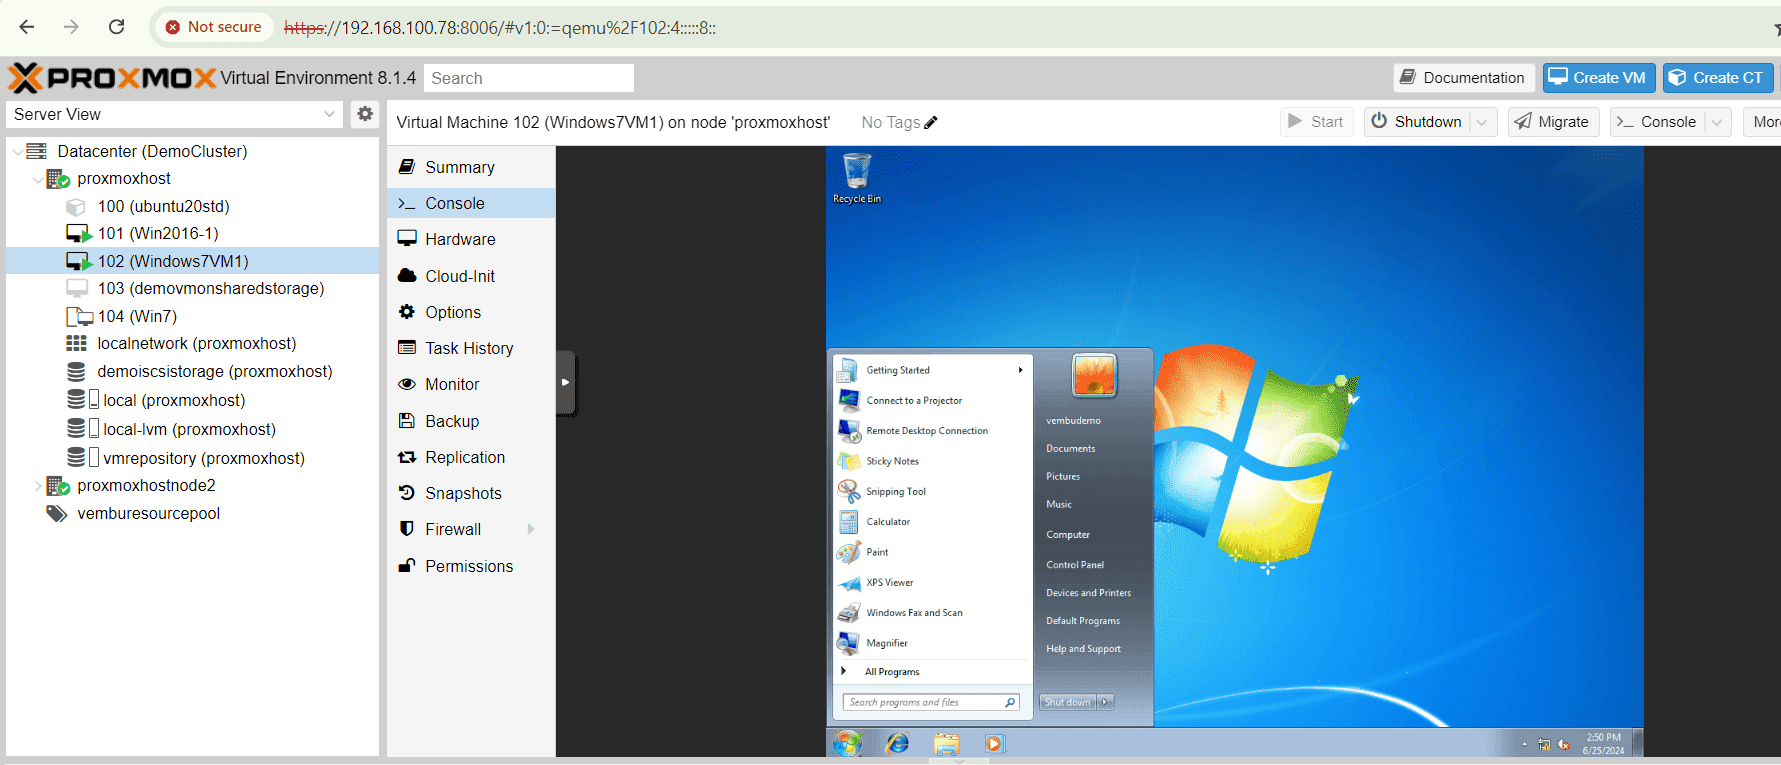
Verify New VM: Navigate back to the “Datacenter” view in the left sidebar. You should see your newly created linked clone VM listed alongside the original template.Right click the VM and choose Start, and verify with OS login credential.
Conclusion
In conclusion, deploying a new virtual machine from a template using the clone method in Proxmox VE is a streamlined process that offers efficiency and convenience for users looking to create multiple VM instances quickly. This method not only saves time but also ensures consistency across VM deployments.
Read More:
Proxmox Virtualization Series: How to Convert a VM to a Template? A Step-by-Step Guide – Part 15
Follow our Twitter and Facebook feeds for new releases, updates, insightful posts and more.

Leave A Comment