
Introduction: How to activate vmnics from vDS network to vDS LACP
When enabling LACP(LAG) in our vDS and using LACP on our vmkernel, we need to consider the timeout or even losing communication while LACP is enabled.
In the last article, we already checked how the LACP runs on both sides(Physical and virtual), meaning that the LACP is working on your vSphere with LAG.
But to migrate a vmkernel (that could be using Active / Passive or even Active/Active Teaming), one physical adapter must be done each time. If not, you could lose connection to your ESXi host or to your Datastores if using NFS.
Note: Before starting the migration, if you have two new physical adapters(vmnics) configuring a vDS with LACP, this migration is more straightforward. But if you plan to use vmnics that are in use, the migration must be done one vmnic at a time.
Migrate vmkernel and vmnics to a new vDS with LACP using the same vmnics
As I explained above, when migrating to an LACP but using the same physical network adapters, the process must be done differently, one vmnic at a time.

If we enable LACP on both ports in the physical Switch, we will automatically lose the connection in the Virtual Switch(a Standard Switch or a vDS) because we didn’t change the settings in the vSphere. If we are doing this for a management vmkernel, then we don’t have access to the ESXi host to make these changes.
Whenever there is a networking modification, it is advisable to allocate a maintenance window due to the potential for network disruptions. This is particularly crucial, when working with a vSphere Distributed Switch (vDS) since the vDS is controlled by vCenter, and individual hosts cannot make alterations to the vDS without a connection to vCenter.
Implementing LACP can introduce complications for restoring vCenter or host management functionality during critical situations since the LACP connection may need to be terminated to revert back to a Standard Switch if required (as LACP is not compatible with a Standard Switch).
How do we do this?
Note: Since LACP is not supported in nested environments, we will not use the Nested environment that we are using in our articles. We will use a physical environment for these tasks.
First, this process is recommended with the ESXi in maintenance mode.
This is our network vDS for the physical environment: 2 ESXi hosts with a management vDS.
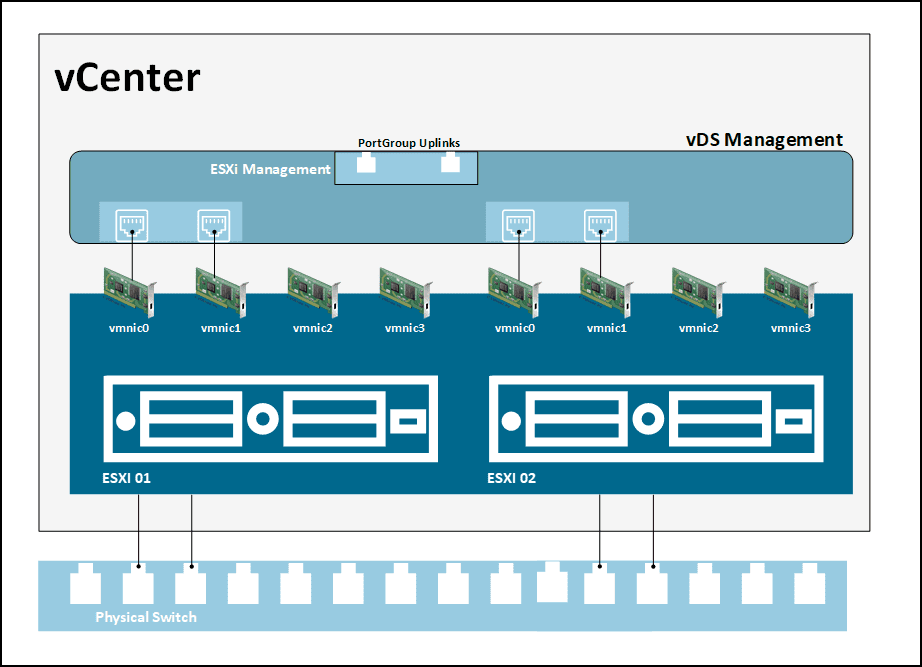
As mentioned, we will use vmnic0 and vmnic1 for this migration. So, our first step is to shutdown the port in the physical Switch where vmnic0 is connected to the ESXi 01.
Note: I will use my HPE procurve for the physical Switch example. Don’t forget that other Switch vendors commands are different to perform these tasks.
- conf (enter configuration shell)
- interface 13 disable (shutdown port 13 where vmnic0 is connected)
- interface 13 LACP (add port 13 or vmnic0 to LACP/Etherchannel configuration)
- interface 13 enable
- interface 12 disable (shutdown port 12 where vmnic1 is connected)
- interface 12 LACP (add port 12 or vmnic1 to LACP/Etherchannel configuration)
- interface 12 enable
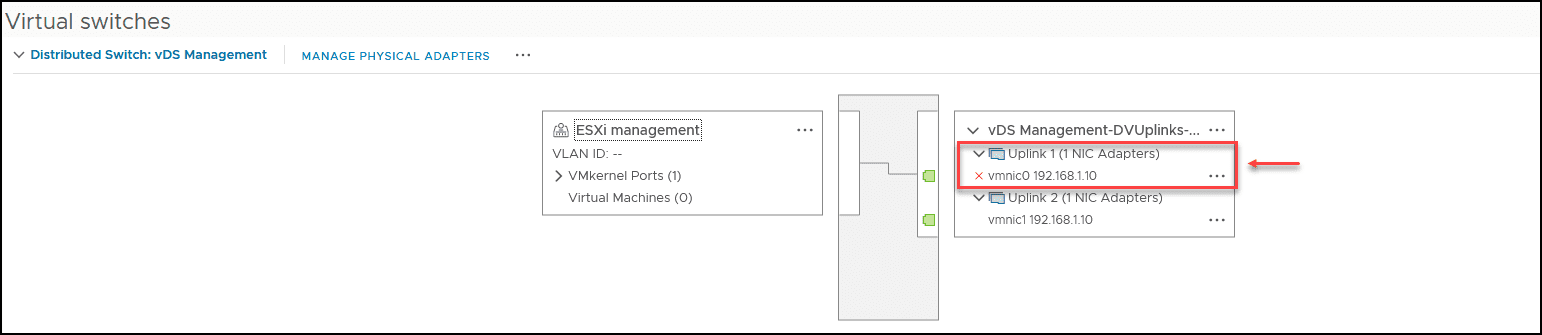
After the port is disabled, we should see it in the vDS.
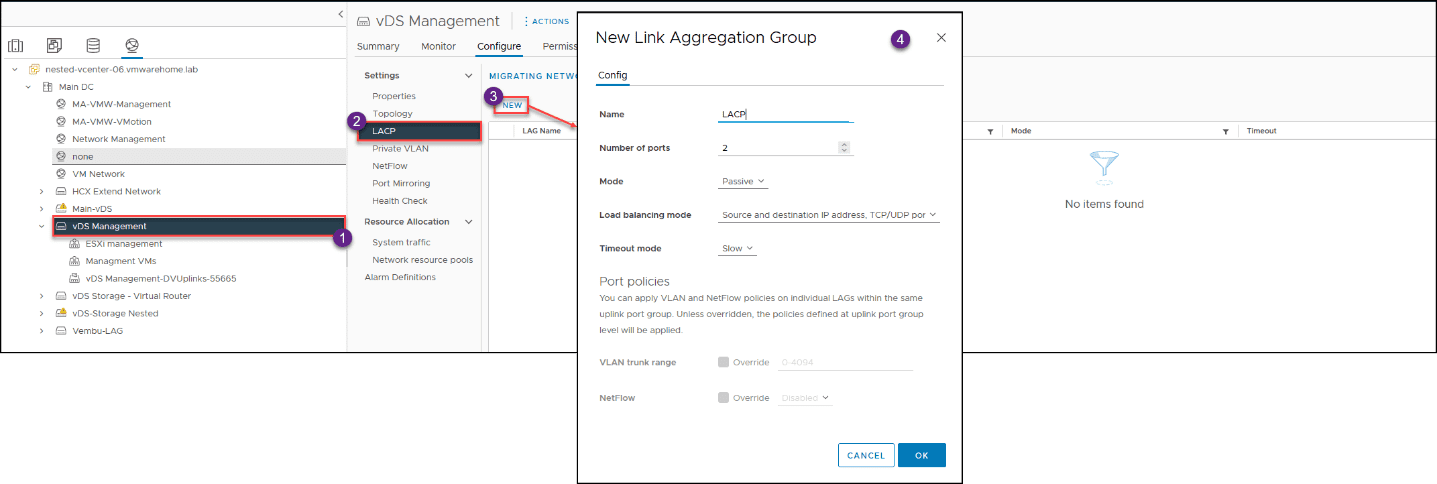
In the vDS Management create a LAG.
Now lets us add the vmnic0 to the LAG uplinks.
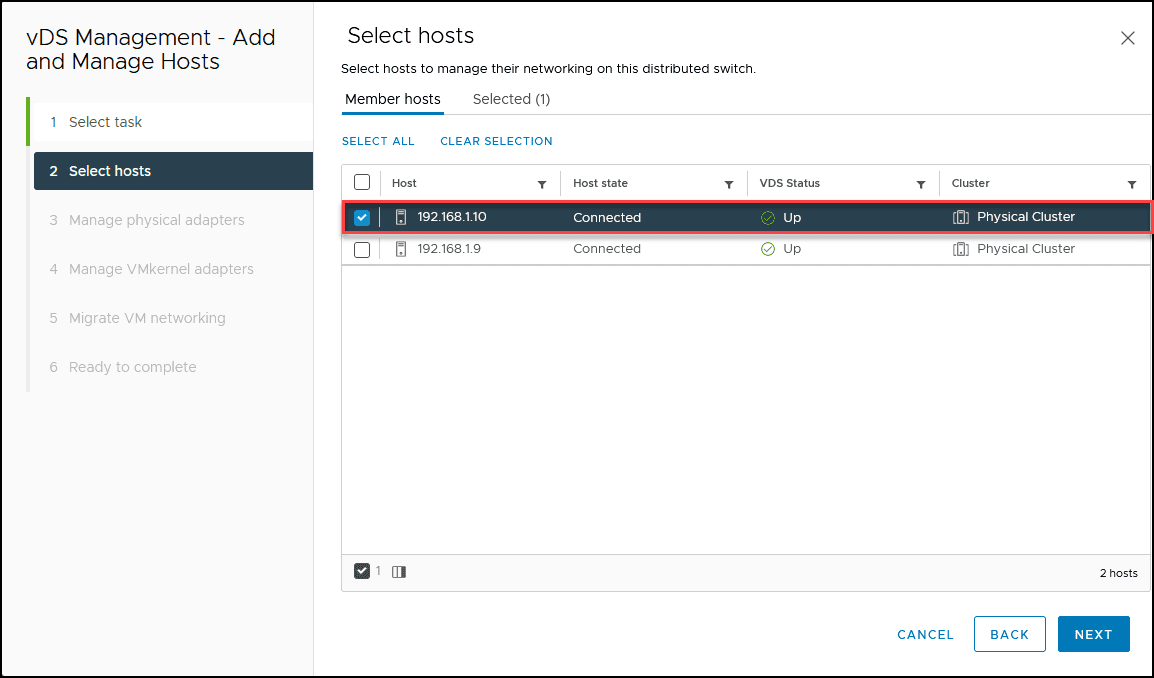
On the vDS Management, select Manage host networking.
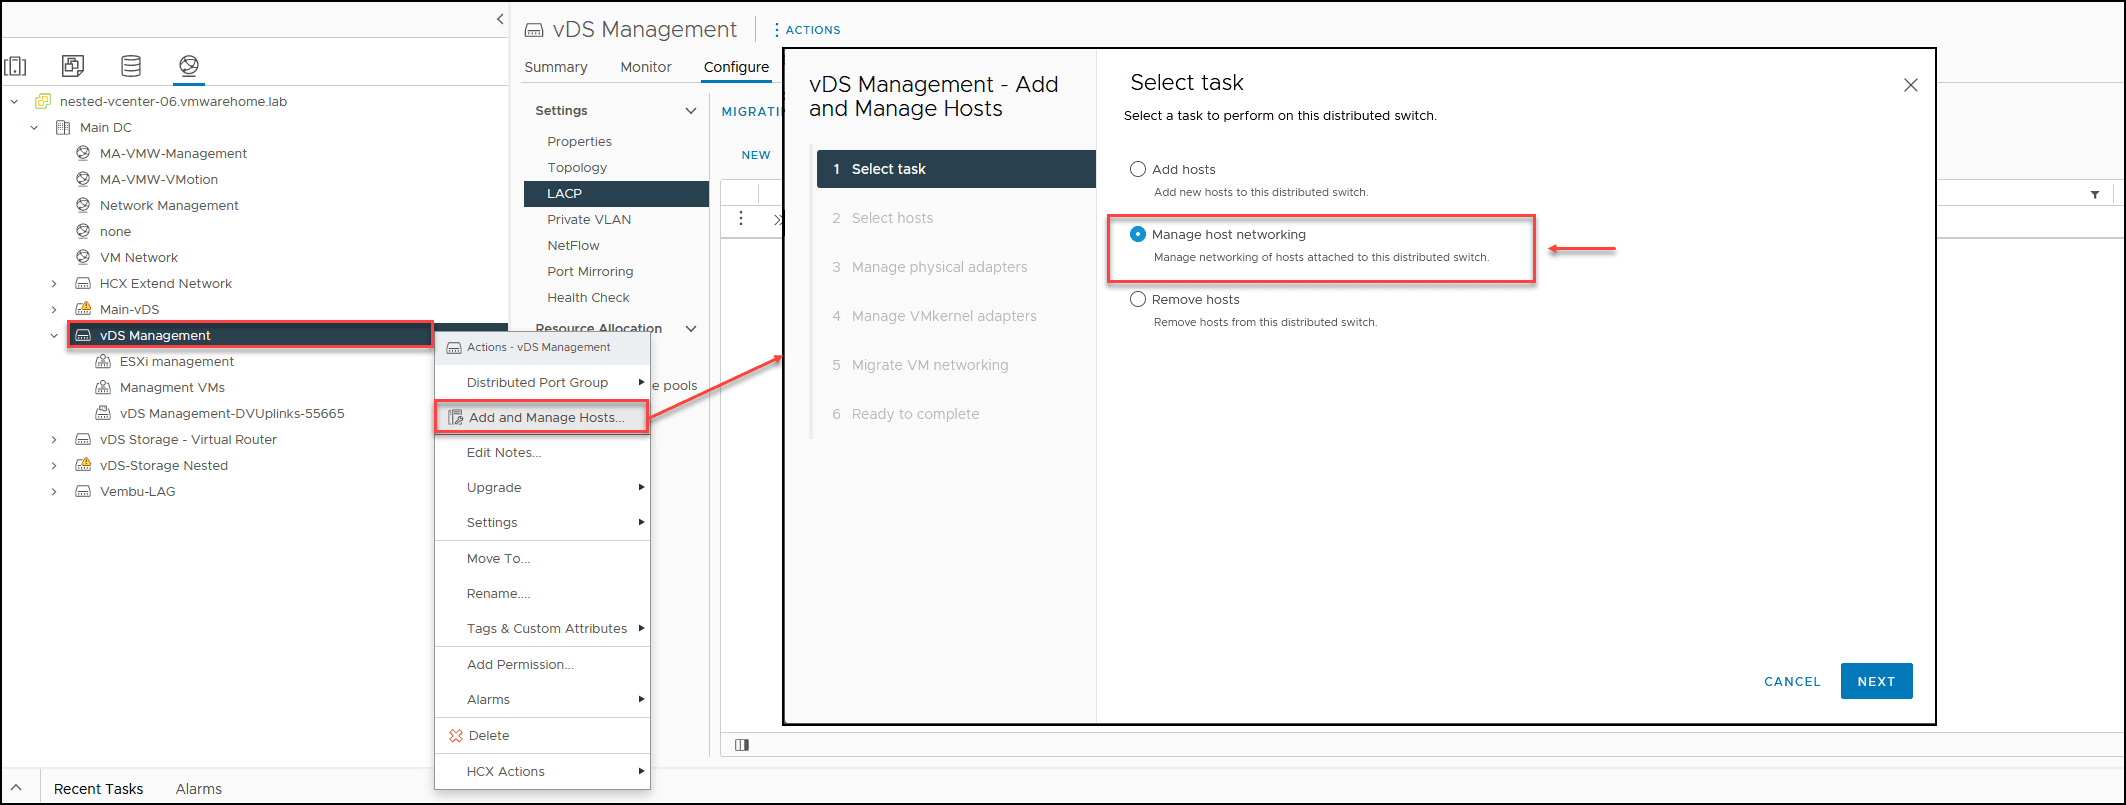
Then select the ESXi host that you disable the vmnic, in our case is the ESXi 01, and click Next.
Next, select vmnic0 and that interface to the LAG uplink(the vDS LACP).
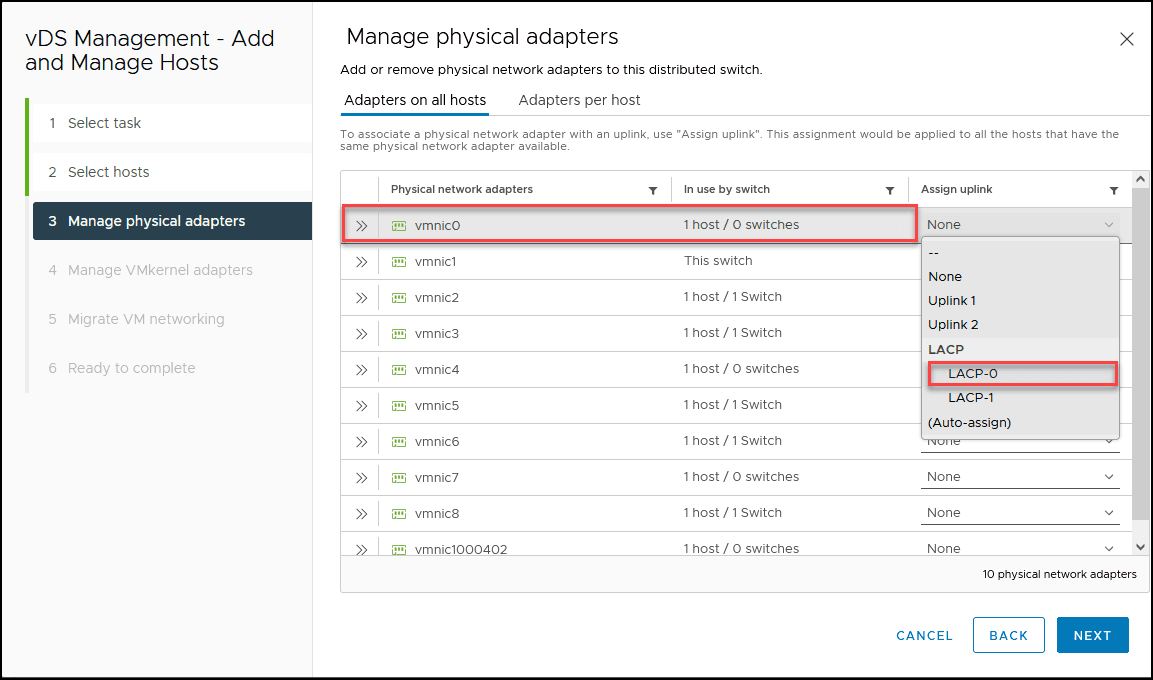
Do not change anything else, and click Next until it is finished.
Return to the physical Switch and enable back the port 13(vmnic0).
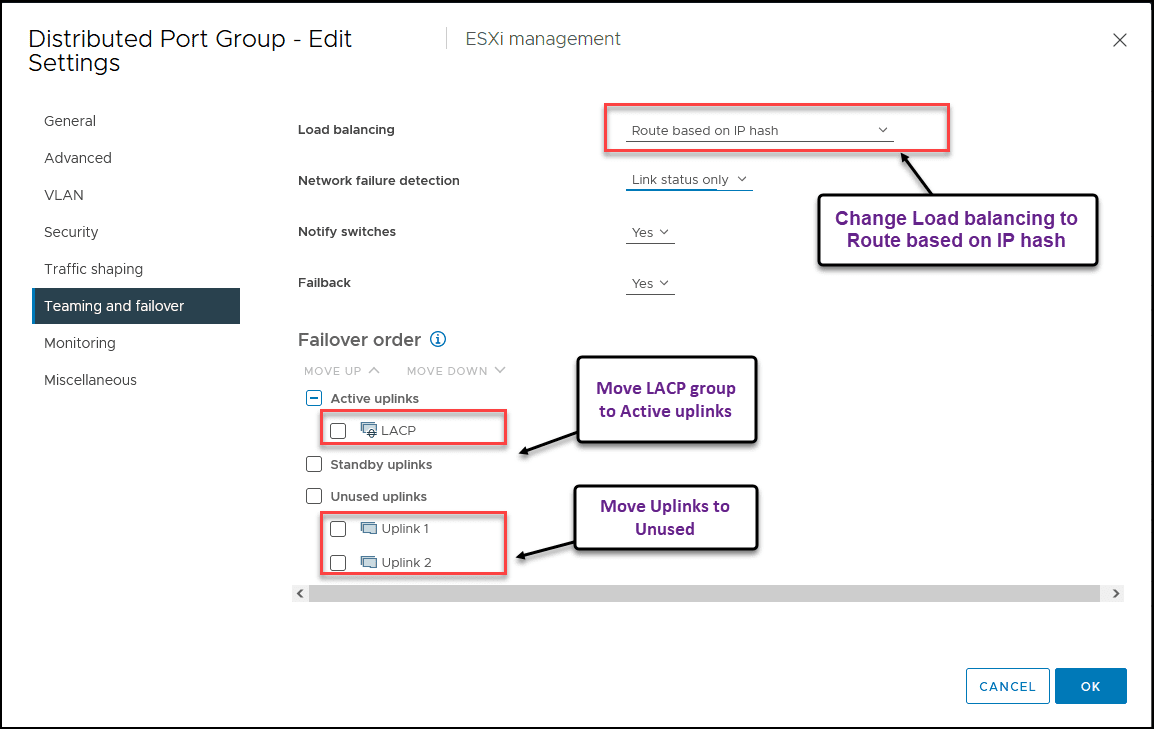
Now edit the vDS LACP and in the Teaming and failover, move the LACP group to the Active uplinks and move the Uplinks to the Unused uplinks.
Note: We have discussed this in the blog post on how to create an LACP in vDS.
Note: While doing these changes, ensure the ESXi host doesn’t lose connection.
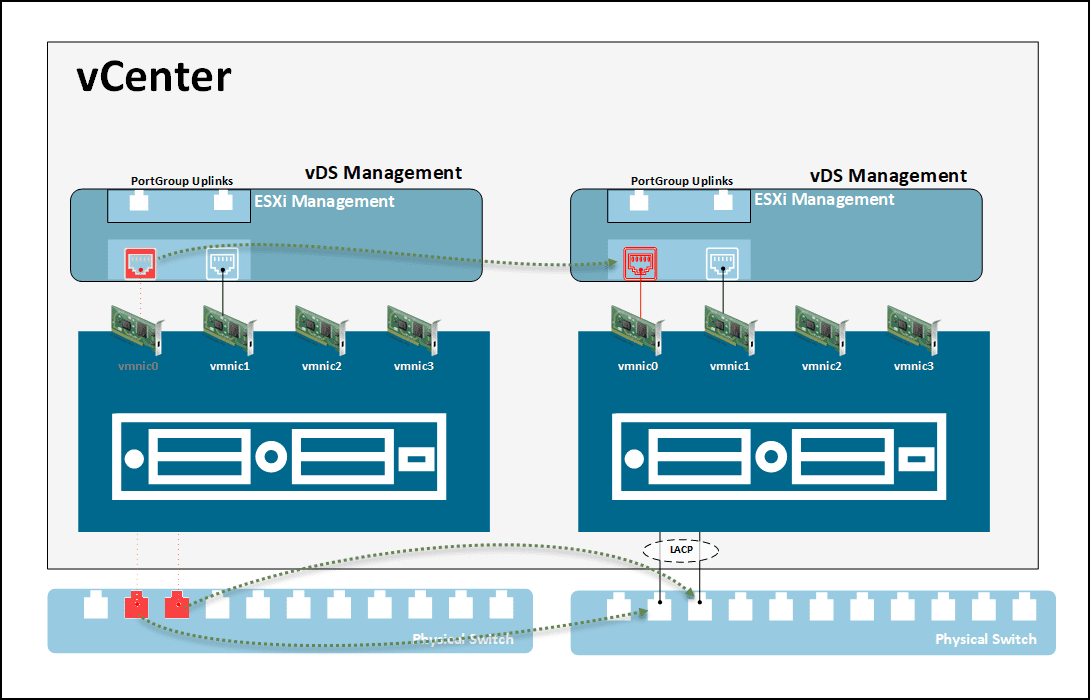
In the next image, we show the process of moving from a Standalone port, to an LACP port by disabling and enabling the port and adding it to LACP.
Now let us disable the second port(vmnic1)
As we can see, vmnic1 is down in vCenter.
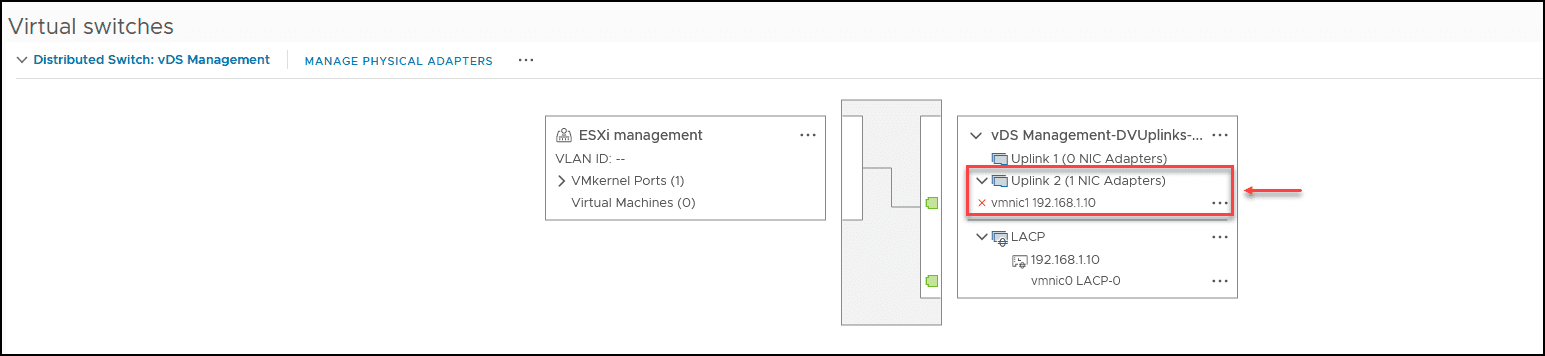
Next, following the same procedure above, move the vmnic1 to the LAG link.
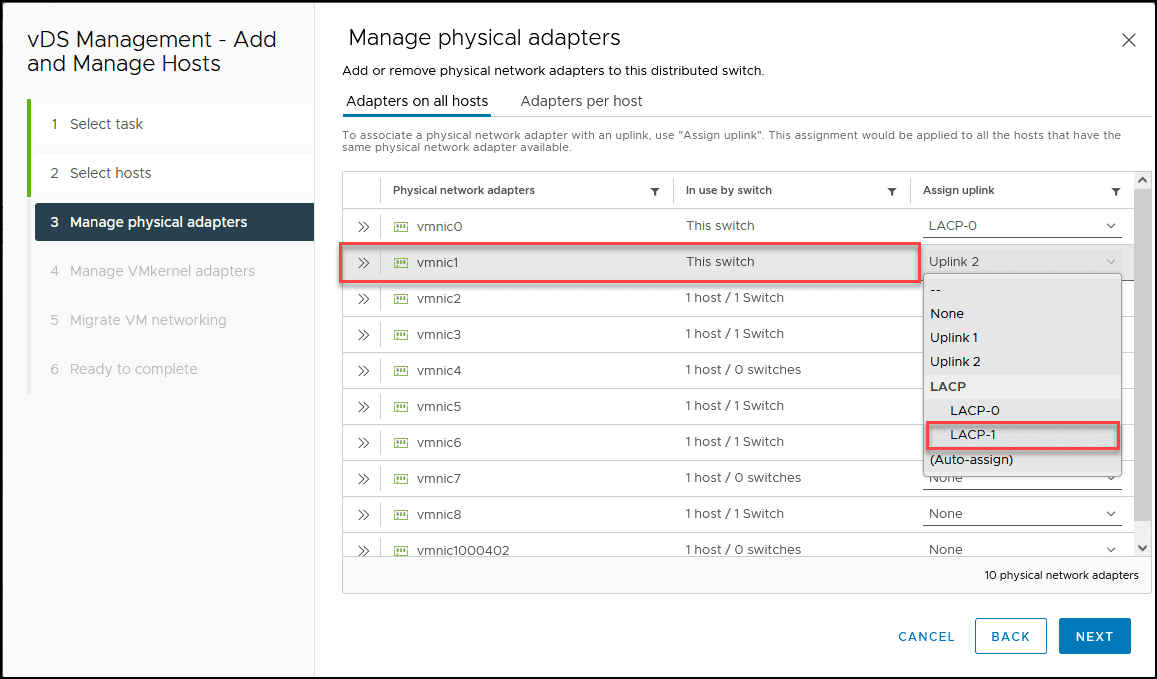
Again, do not change anything else and finish.
Finally, add port 12(vmnic1) to LACP in the physical Switch.
To finalize the vmkernel migration, enable back the port for the vmnic1
We have migrated our vmkernel to a vDS with LACP without losing any connection to our ESXi host.
We did this process for ESXi 01 and needed to do this for all ESXi hosts in the Cluster that are added to this vDS Management.
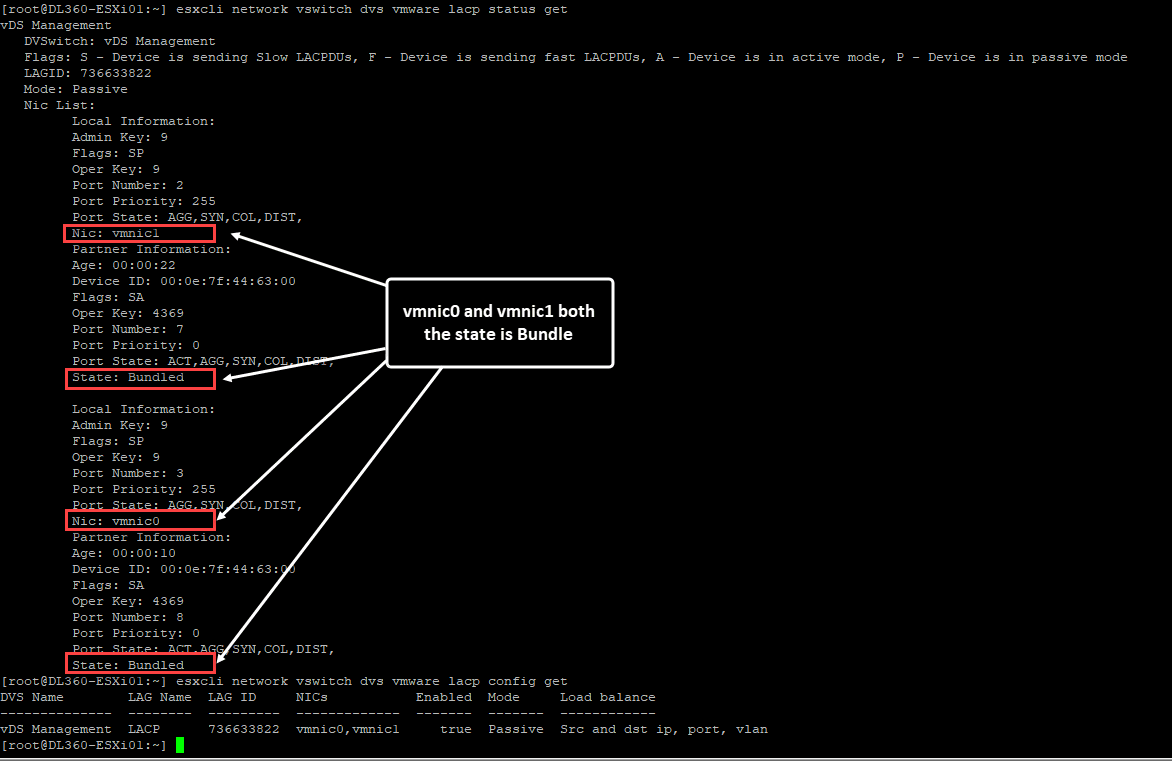
For a final check if LACP is running on your ESXi hosts, run the commands:
- esxcli network vswitch vmware lacp config get
- esxcli network vswitch dvs vmware lacp status get
With this final LACP configuration in our vDS, we finish the section about Virtual Switches in our vSphere environment.
Follow our Twitter and Facebook feeds for new releases, updates, insightful posts and more.

Leave A Comment