
Introduction
Proxmox VE, a powerful virtualization platform, offers a handy feature: converting virtual machines (VMs) into templates. This process streamlines VM deployment by creating a reusable base image containing your desired configuration. Imagine spinning up multiple VMs with identical settings in just a few clicks!
Think of a Proxmox VM template as a blueprint for your virtual machines. It captures a pre-configured virtual machine, complete with a specific operating system, applications, settings, and any other essential elements. This blueprint allows you to quickly deploy new virtual machines that mirror the template’s configuration, saving you significant time and effort.
This guide will walk you through the steps of converting a VM to a template in Proxmox VE. We’ll cover:
- The benefits of using VM templates
- Preparing your VM for conversion
- The simple conversion process using the Proxmox VE interface
By the end, you’ll be equipped to efficiently deploy pre-configured VMs, saving you time and effort in your Proxmox VE environment.
Benefits of Using VM Templates in Proxmox VE
There are several compelling reasons to leverage VM templates in Proxmox VE:

- Speed and Efficiency: Manually setting up VMs can be time-consuming, especially if you need to deploy multiple VMs with the same configuration. Templates eliminate repetitive tasks, allowing you to spin up new VMs in a fraction of the time
- Consistency and Standardization: Templates ensure all deployed VMs share the same base configuration, promoting consistency across your virtual environment. This reduces the risk of errors and simplifies management
- Scalability: When your needs grow, templates enable rapid VM provisioning. Need ten new web servers with identical settings? No problem! Simply clone the pre-configured template ten times
- Reduced Storage Usage: Proxmox VE supports linked clones, a space-saving technique that leverages the base template. Linked clones share the base image, minimizing storage consumption for VMs with minimal configuration changes
- Improved Security: Templates allow you to pre-configure security settings and software installations, promoting a secure baseline for all deployed VMs
- Repeatability and Documentation: Templates provide a documented and repeatable way to deploy VMs, simplifying future deployments and knowledge sharing within your team
In short, VM templates in Proxmox VE offer a powerful and efficient way to manage your virtual environment, saving you time, resources, and ensuring consistency.
Preparing your VM for template conversion
Before converting your Proxmox VM into a template, it’s crucial to ensure it’s ready for deployment to new VMs. Here’s a checklist to guide you through the preparation process:
1. Update and Secure
- Install Latest Updates: Make sure the VM has all the latest security patches and software updates installed. This creates a secure foundation for deployed VMs
- Remove Unnecessary Software: Uninstall any applications or programs not required for the template’s intended purpose. This keeps the template lean and efficient
2. Cleanup User Data and Personalization
- Remove Sensitive Information: This includes user accounts, passwords, SSH keys, and any other data specific to the initial VM configuration. Deployed VMs should prompt users to set their own credentials
- Clean Temporary Files: Clear temporary files, logs, and other transient data to minimize template size and improve deployment speed
3. Set Networking (Optional)
Depending on your network configuration, consider assigning a static IP or DHCP address to the VM. This ensures consistency when deploying new VMs from the template.
4. Verify Functionality
Once prepared, power on the VM and confirm everything functions as expected. This includes testing software installations, network connectivity, and any specific configurations.
5. Shutdown the VM
After successful testing, shutdown the VM in preparation for conversion.
Additional Considerations
- Special Guest OS Preparation: Some operating systems may require specific tools like sysprep (Windows) or user data scrubbing scripts (Linux) to properly generalize the VM for template conversion. Refer to your specific OS documentation for details
- Documentation: Consider documenting the configuration details captured within the template. This simplifies future reference and knowledge sharing within your team
By following these steps, you’ll ensure your Proxmox VM is clean, secure, and ready to serve as a robust template for efficient VM deployment.
Converting a Promox VE VM into a template in Proxmox VE web console
Now that your VM is prepped, let’s convert it into a template using the Proxmox VE web console. Here’s a step-by-step guide:
Access the Web Console: Open a web browser and navigate to the IP address or hostname of your Proxmox VE server, typically https://
Locate Your VM: In the left-hand pane, navigate to the “Datacenter” where your VM resides. Expand the datacenter and locate the VM you want to convert.
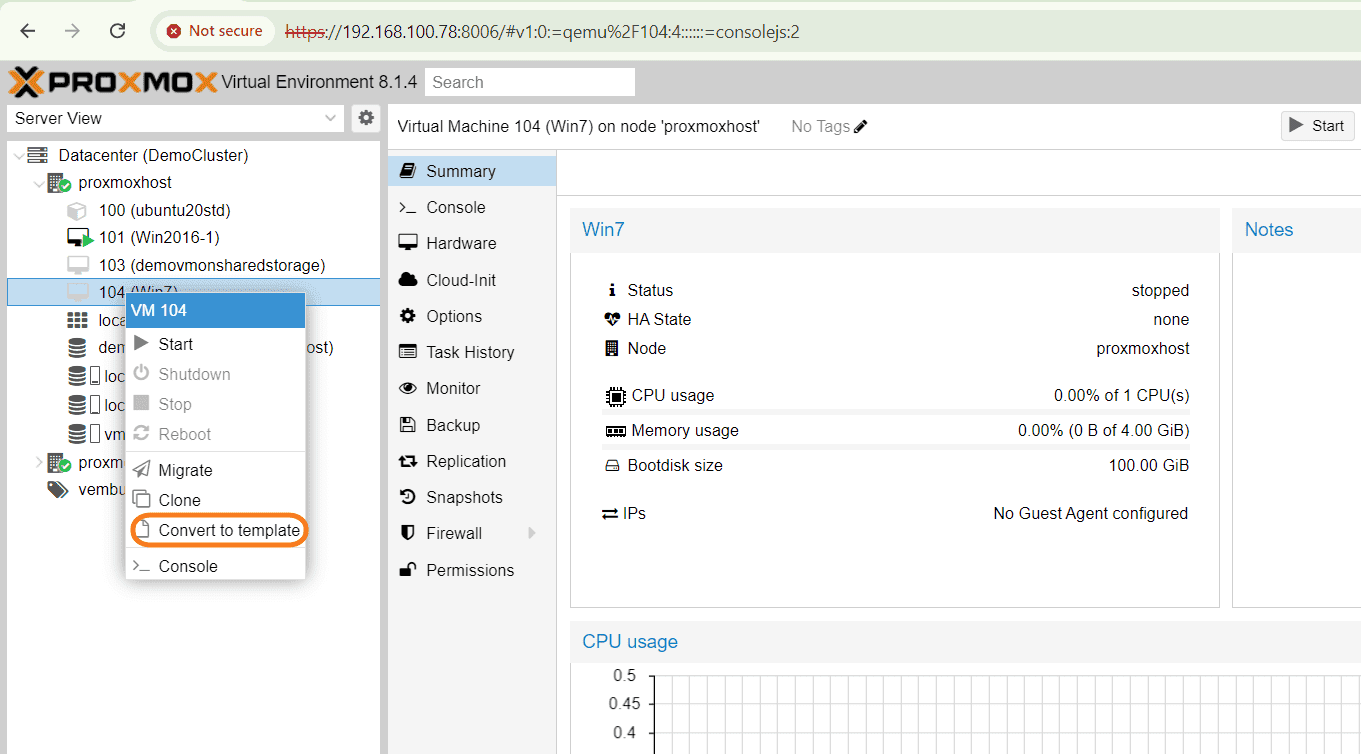
Right-Click and Convert: Right-click on the chosen VM. From the context menu, select the option “Convert to template.” Here we are converting the VM (104 Win7). The below screenshot shows this step.
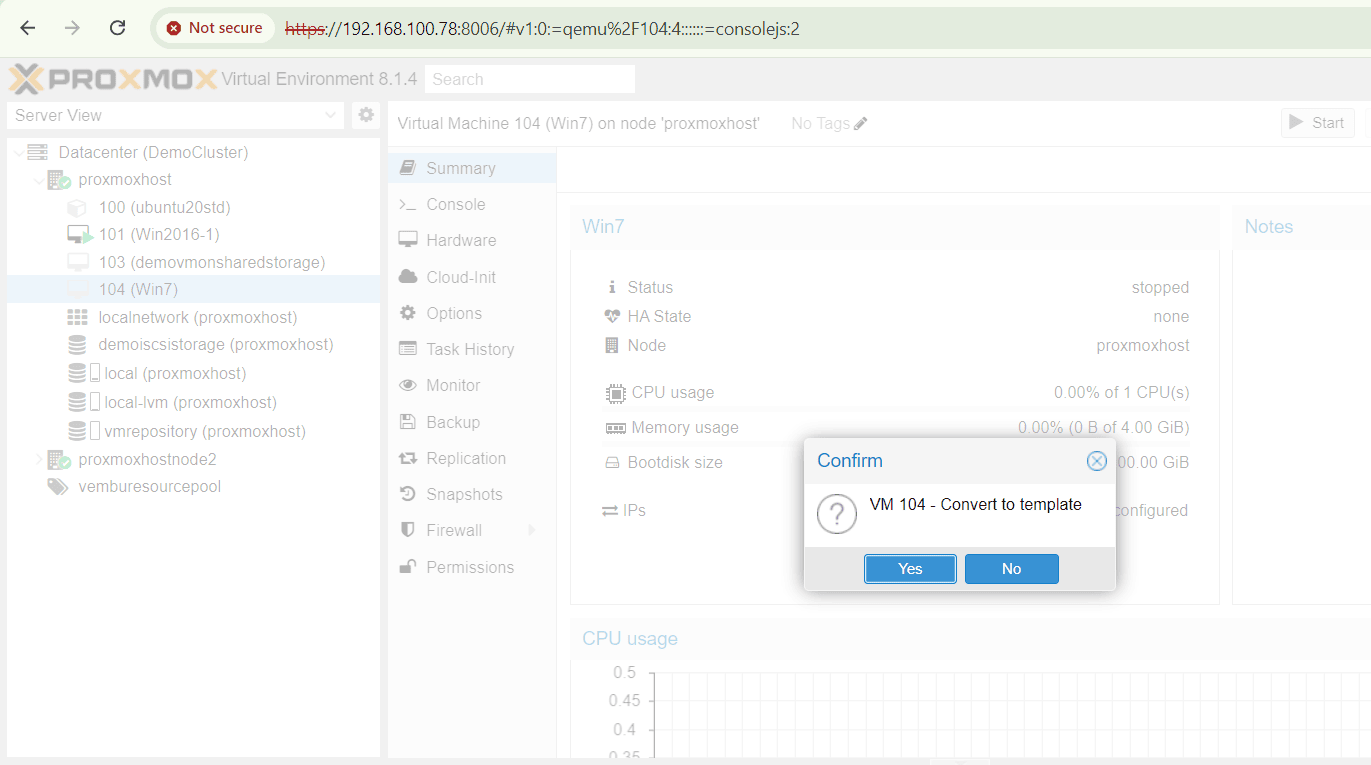
Confirmation : In all your Proxmox VE version, you might encounter a confirmation dialog. Click “Yes” to proceed. The below screenshot shows this step.
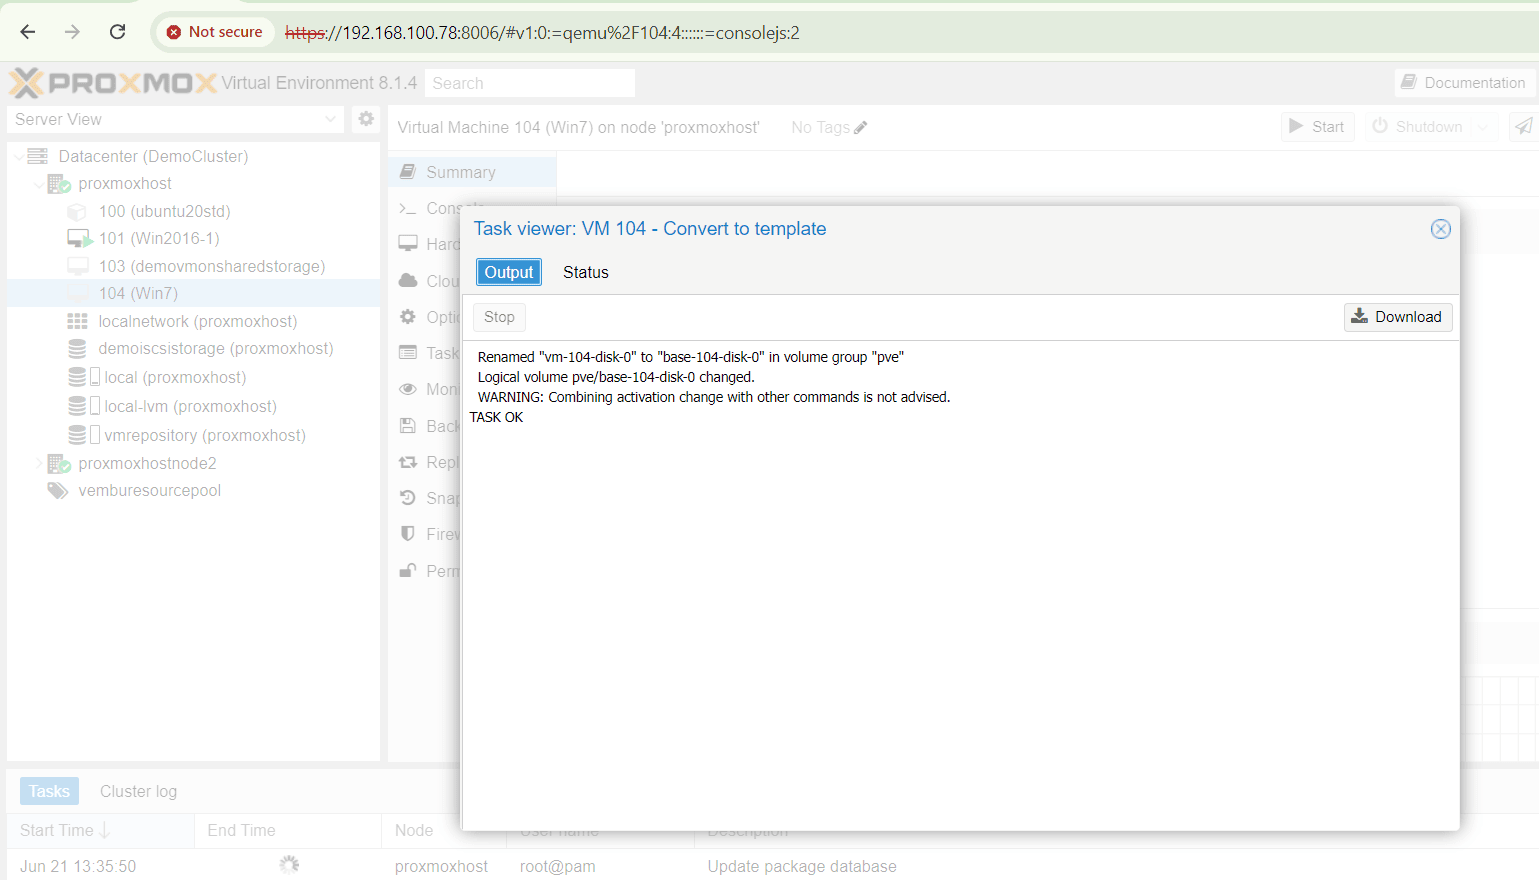
Conversion Process: Proxmox VE will initiate the conversion process. The VM will remain shutdown during this time. The progress might be indicated visually or through console logs (accessible by clicking the VM and then “Console”) or by clicking the description “Convert to template” under description in Tasks bar available at the bottom.
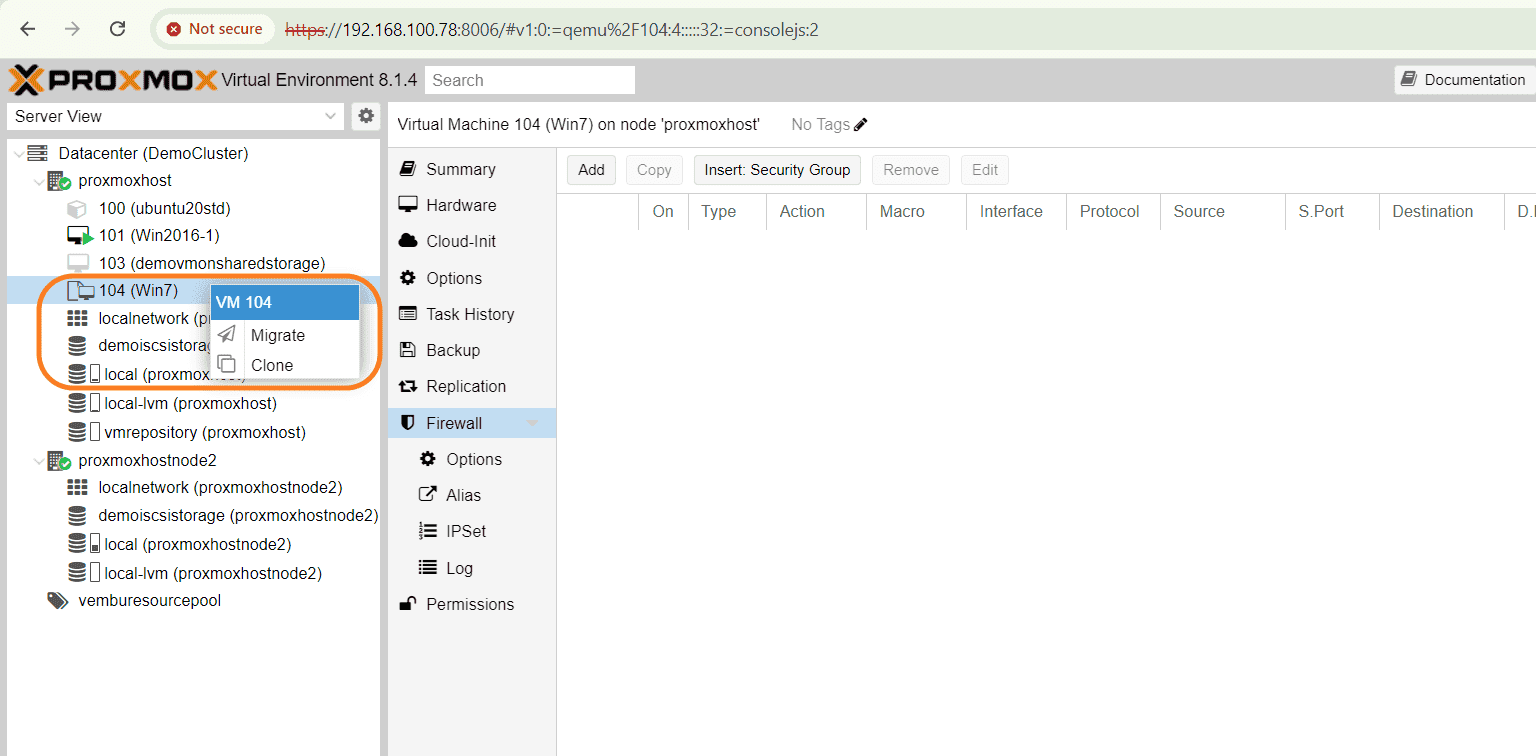
Success! Upon conversion completion, the VM will be marked as a VM template. Its icon will change, and the available options will be limited to Migrate and Clone, as illustrated in the image below. This signifies that the template can now be used to:
Clone a new VM: Create a new virtual machine based on the template’s configuration.
Migrate the template to another cluster host: Move the template to a different server within your Proxmox VE cluster (if applicable)..
Conclusion: Streamlined VM Deployment with Proxmox VE Templates
Congratulations! You’ve successfully navigated the process of converting a VM into a template in Proxmox VE. This powerful technique empowers you to streamline VM deployment, saving you time and ensuring consistency across your virtual environment.
Recap of Benefits:
- Reduced Deployment Time: Templates eliminate repetitive configuration tasks, allowing for rapid VM provisioning
- Enhanced Consistency: All VMs deployed from a template share the same base configuration, minimizing errors and simplifying management
- Improved Scalability: Easily scale your virtual environment by cloning new VMs from the template as needed
- Streamlined Security: Pre-configure security settings and software installations within the template, promoting a secure baseline for deployed VMs
Looking Ahead:
In our next blog post, we’ll dive deeper into utilizing the newly created template. We’ll explore the cloning method, a powerful technique that allows you to create full copies of the template with its configuration intact effortlessly. This enables you to spin up multiple VMs based on the same foundation, further enhancing your virtual environment management efficiency.
We encourage you to experiment with Proxmox VE templates and explore their potential to streamline your VM deployments. With a bit of practice, you’ll be well on your way to a more efficient and manageable virtual environment.
Read More:
Proxmox Virtualization Series: How to Clone VMs in Proxmox? A Step-by-Step Guide – Part 14
Follow our Twitter and Facebook feeds for new releases, updates, insightful posts and more.

Leave A Comment