Introduction
What is Amazon EC2 Image Builder?
EC2 Image Builder is a fully managed AWS service that makes it easier to automate the creation, management, and deployment of customized, secure, and up-to-date server images that are pre-installed and pre-configured with software and settings to meet specific IT standards. Amazon EC2 Image Builder is offered at no cost, other than the cost of the underlying AWS resources used to create, store, and share the images
Table of Contents
- Supported Operating Systems
- Supported image formats
- Accessing Image Builder Service in AWS console & Creating an Image pipeline
- Click create Image pipeline
- Creating an AMI image from the image pipeline
- Associating a VPC to the created image
- Distributing the AMI image to other regions
- Conclusion
You can use the AWS Management Console, AWS CLI, or APIs to create custom images in your AWS account. When you use the AWS Management Console, the Image Builder wizard guides you through these five steps given below:
- Provide starting artifacts
- Add and remove software
- Customize settings and scripts
- Run selected tests
- Distribute images to AWS Regions
In this blow, we are going to create a sample Image with the customized installed software. After creating the image, we are securing the image with AWS-provided custom templates. Later test the image with AWS provided test, and then distribute the Golden image to other selected AWS regions.
Supported Operating Systems
Currently, the Image Builder supports the following operating systems when you choose Image type as Amazon Machine Image ( AMI )
- Amazon Linux 2
- Windows Server 2019/2016/2012 R2
- Windows Server version 2004, and 20H2
- Red Hat Enterprise Linux (RHEL) 8 and 7
- CentOS 8 and 7
- Ubuntu 20, 18, and 16
- SUSE Linux Enterprise Server (SUSE) 12 & 15
Supported image formats
Amazon EC2 Image builder supports both AWS AMI and Container images. For your custom AMI images, you can choose an existing AMI as a starting point. For Docker container images, you can choose from public images hosted on DockerHub, existing container images in Amazon ECR, or Amazon-managed container images.
Currently, the Image Builder supports the following operating systems when you choose Image type as Docker Image
- Amazon Linux 2
- Windows Server 2016 and 2019
- Ubuntu 18 and 20 LTS versions
- CentOS 7 and 8
Note: Currently there is no RHEL and SuSE Linux Enterprise Server images not available when you choose the Container Image option
Accessing Image Builder Service in AWS console & Creating an Image pipeline
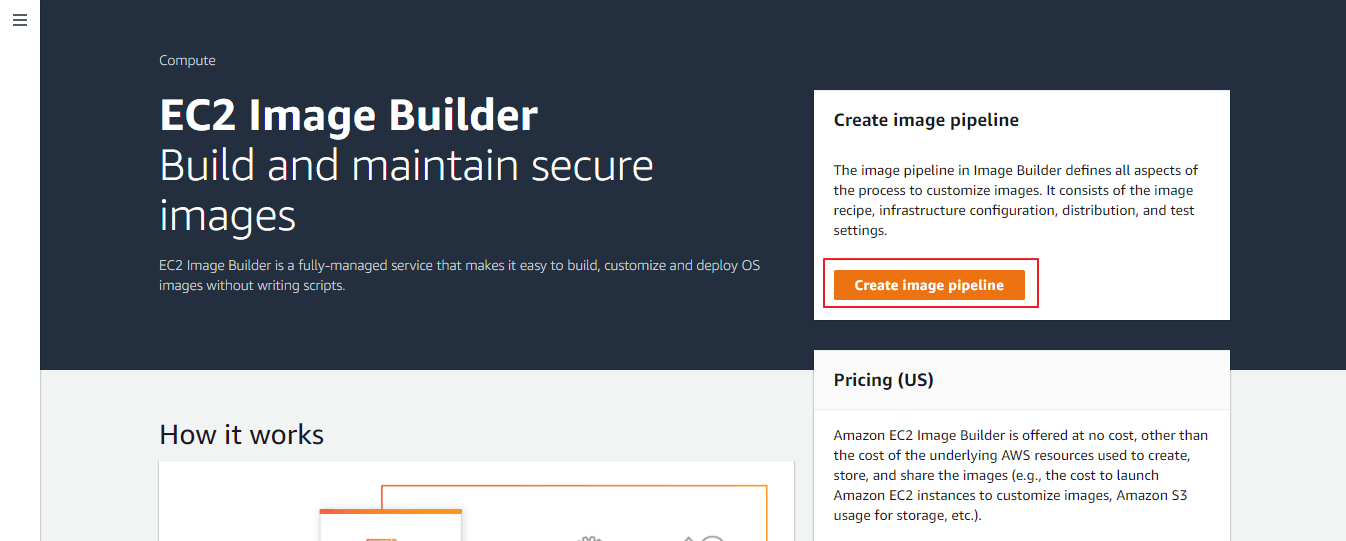
Login to your AWS console using the root user credentials. Choose EC2 Image Builder from All services → Compute section. Or you can browse the below URL directly https://console.aws.amazon.com/imagebuilder/ and choose the region where you want to create the image using the Image Builder service.
Click create Image pipeline
An image pipeline provides an automation framework for building secure AMIs and container images on AWS. The Image Builder image pipeline is associated with an image recipe or container recipe that defines the build, validation, and test phases for an image build lifecycle. In this blog, we are going to create an image pipeline using an AMI image.
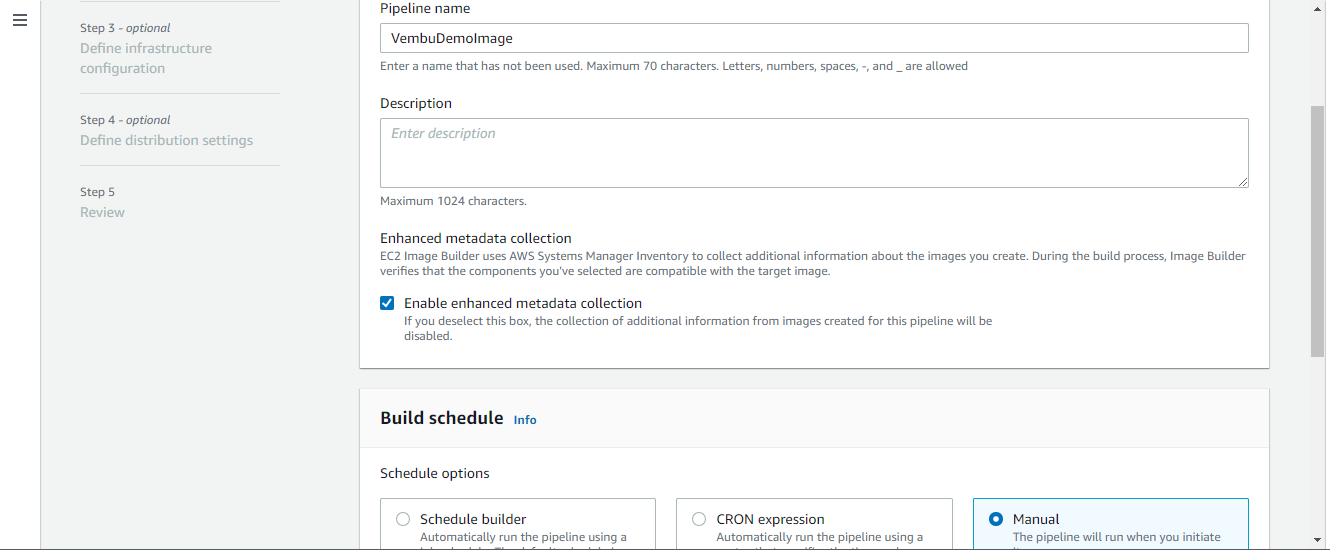
Step 1 Specify Pipeline details
In this step, we are providing a name for the pipeline as VembuDemoImage. Then provide a build schedule to run automatically, using the Schedule builder or a cron expression, or you can run your job manually. In our example, we are choosing Manual, so the pipeline will run once when you initiate it. You can also do it repeatedly using a schedule builder or using a cron expression if required to do every week in a specified time. The below picture shows these details.
If required you can use the tag, which is optional. To help manage your instances, images, and other Image Builder resources, you can optionally assign your own metadata to each resource in the form of tags. Each tag consists of a key and an optional value, both of which you define.
Click Next to proceed to Step 2
Step 2 Choose Recipe
An image recipe is a document that defines the components to be applied to the source images to create the desired configuration for the output image. After a recipe has been created, it cannot be modified. A new version must be created in order to change components. Here we are going to create a new recipe.
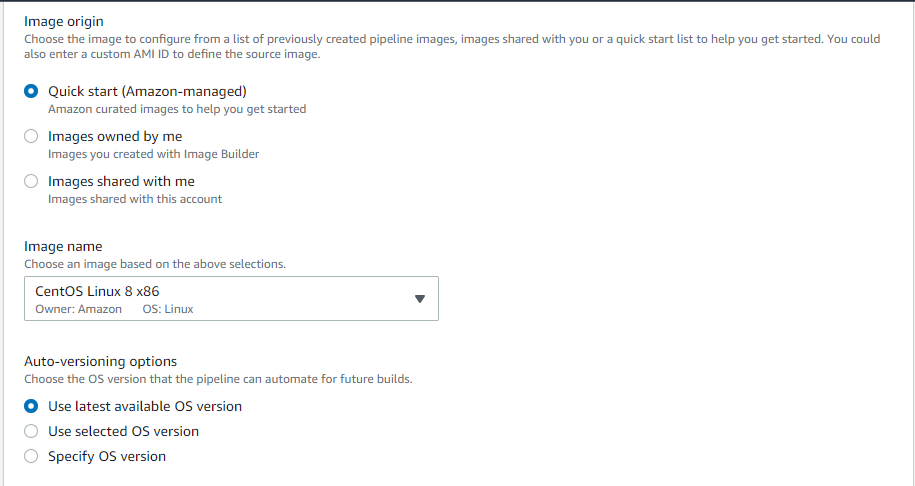
First, in this step, users need to choose either AMI or docker image to be used in the new recipe. Currently, the docker image does not support RHEL and SLES operating systems in most of the AWS regions. Here we are choosing CentOS AMI
You can also choose a custom AMI if you already have one, and it can be entered with the Custom AMI ID in the given box.
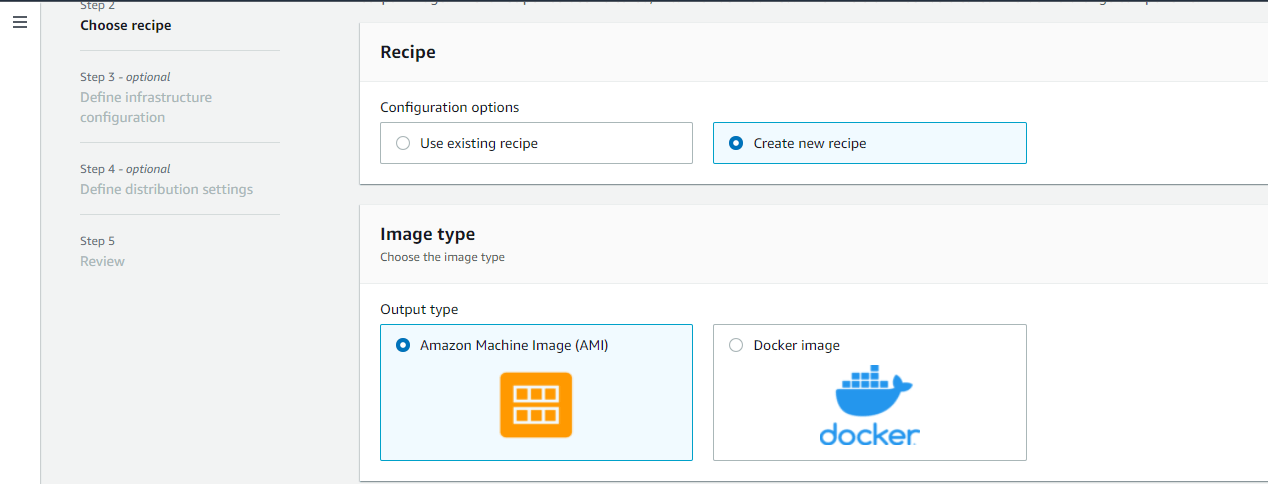
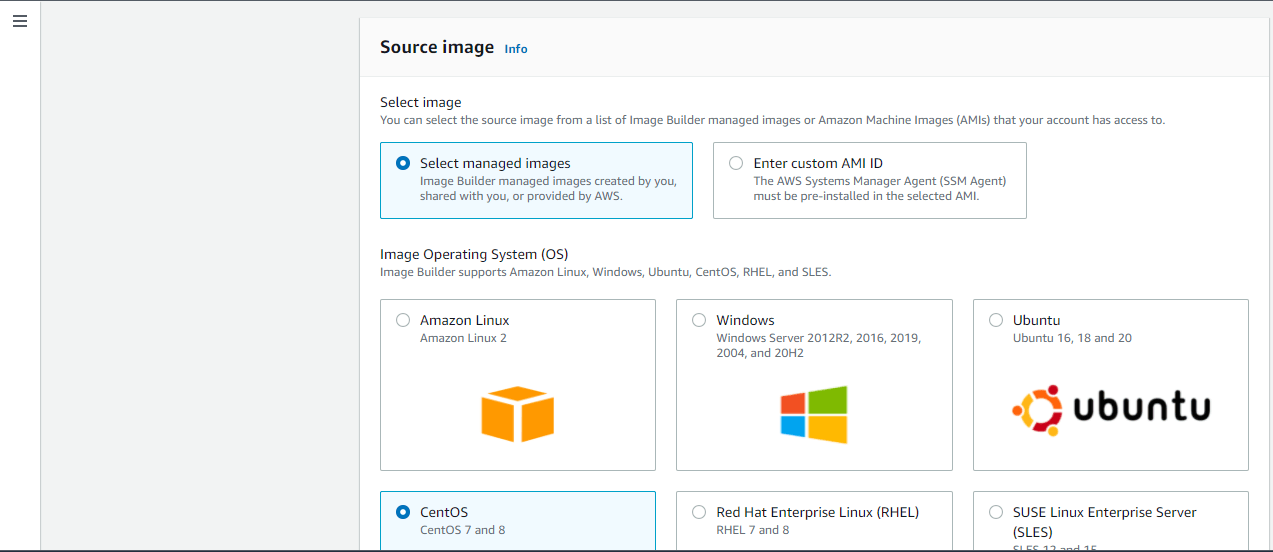
Image Origin – Here the user needs to Choose the image to configure from a list of previously created pipeline images, images shared with you, or a quick start list to help you get started. You could also enter a custom AMI ID to define the source image. The default selection is Amazon-managed.
Based on the Image origin, you can choose the image from the list, here we have selected CentOS Linux 8 x86 architecture.
Auto versioning options – Choose the OS version that the pipeline can automate for future builds, and the default “Use latest available OS version is selected.
Instance configuration – Before creating the new AMI, Image Builder launches temporary Amazon EC2 instances to build and test the image configuration. Instance configuration adds a layer of control over those instances. Users can define settings and scripts to run that are in addition to the components we choose for our image. Image Builder uses the AWS Systems Manager (SSM) agent to help build the AMI and to verify that the components we’ve selected are compatible with the base image
Working Directory – The working directory for use during the build and test workflows, usually the path will be /temp directory
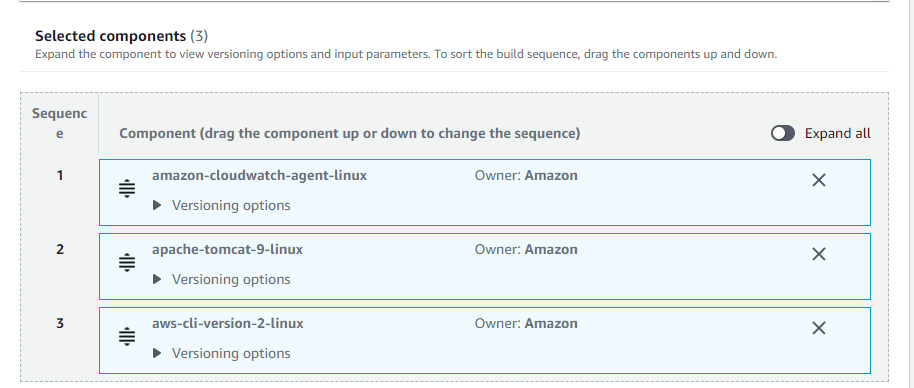
Components – Here, users need to pick the build components based on the chosen AMI ( In our case CentOS ). Build components define the steps to download, install, and configure the software. Build components cannot be modified or replaced after the recipe has been created. To change the build component in a recipe, users need to create a new recipe.
Build components – Build components are software scripts that define a sequence of steps for downloading, installing, and configuring software packages. They also define validation steps. Some of the components which are selected to produce the desired output AMI are listed below in the screenshot. Also, you can sort the build sequence, drag the components up and down.
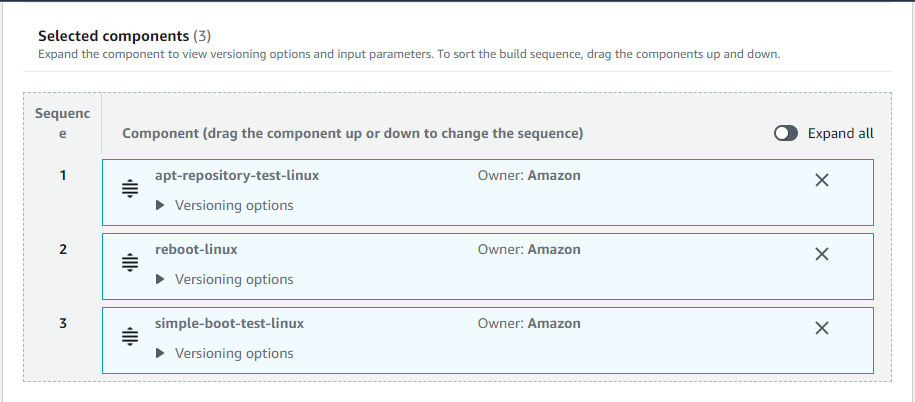
Test components – Test components are a sequence of steps used to verify that the output image built by your image pipeline is functioning as expected. You can choose any of them or all the components to include to verify the output AMI. The below screenshot shows some of the selected components, and you can sort the build sequence, drag the components up and down.
Click Next to proceed to the Step 3
Step 3: Infrastructure configuration
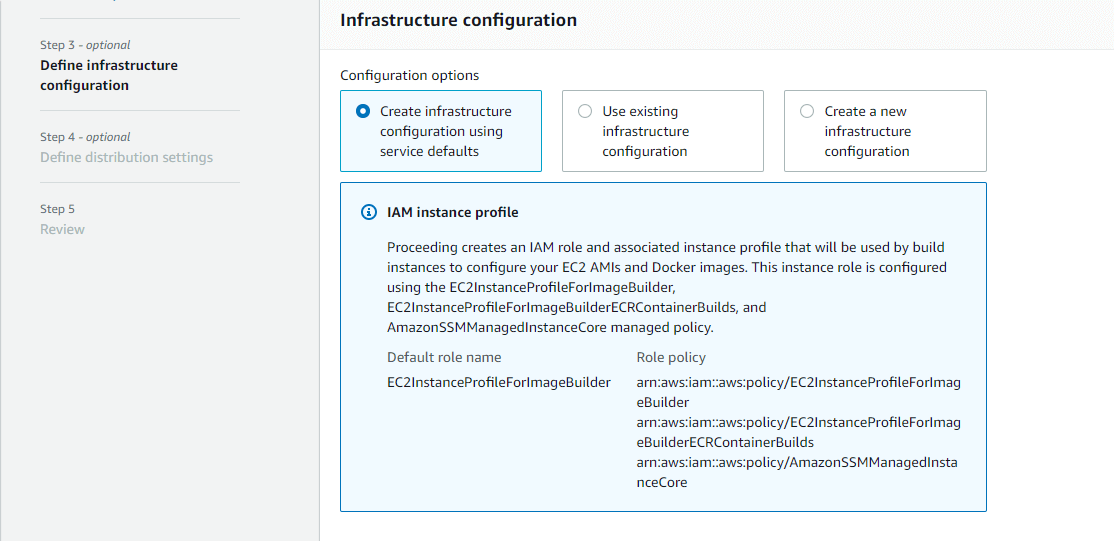
Image Builder launches EC2 instances in your account to customize images and run validation tests. The following settings specify infrastructure details for the instances that will run in your AWS account. Here you have three configuration options
- Create infrastructure configuration using service defaults
- Use existing infrastructure configuration
- Create a new infrastructure configuration
Here we are choosing the option first and it is the recommended one for the first EC2 Image builder process.
Click Next to proceed to the Step 4
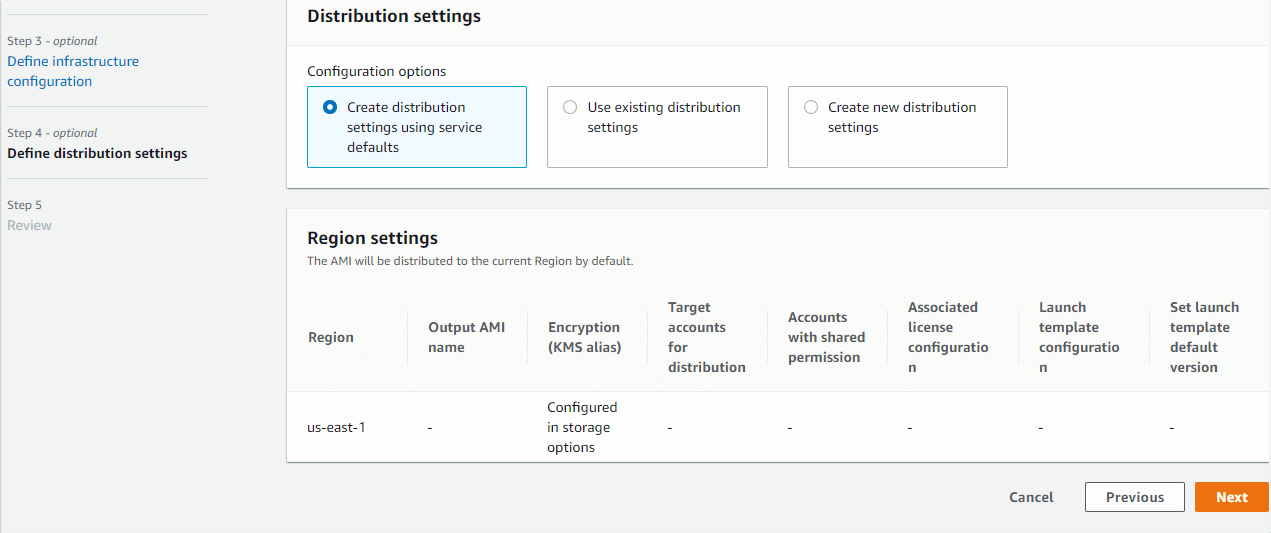
Step 4 Define distribution settings
Distribution settings include specific Region settings for encryption, launch permissions, accounts that can launch the output AMI, the output AMI name, and license configurations. Here too we have three configuration options
- Create distribution settings using service defaults
- Use existing distribution settings
- Create new distribution settings
We have selected the first option, the below screenshot shows this default configuration
Click Next to the final step.
Step 5 Review
On this final review step, you can review all the above three steps, and can do a final edit if required. Click the Create pipeline button to finish the configuration and to start creating the pipeline process.
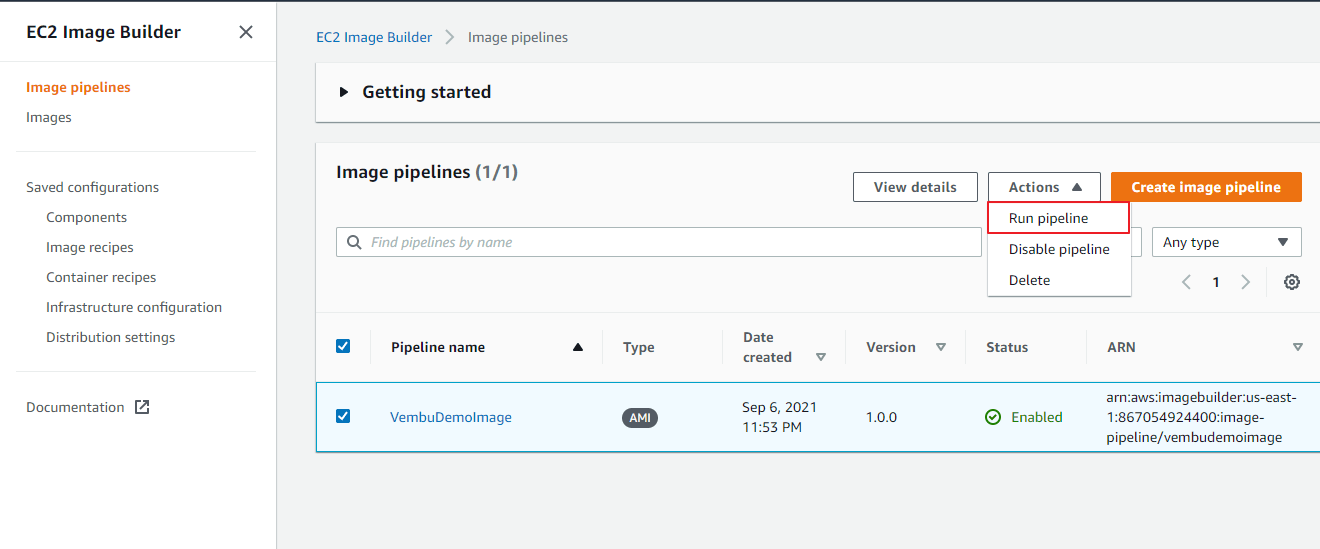
After a few minutes, a new image pipeline is created, and it is listed under EC2 Image Builder > Image pipelines as shown in the below image.
Creating an AMI image from the image pipeline
Once your image pipeline is ready, the next process is to Run the pipeline. Since we chose a manual schedule option for the pipeline, it will only run when you manually kick off the build. Choose the Pipeline name from the image pipeline list ( in our case the pipeline name is “VembuDemoImage ). From the Actions menu choose Run pipeline ( shown in the red box in the below image ). This process will create an AMI image from the created pipeline. A status message appears at the top of the page to notify you that your pipeline has started, or if there is an error.
Note: Some of the selected components may not be supported for the associated image selection, and will throw errors during the image pipeline process. Users need to edit the basic and test components from the list and will remove the unsupported component
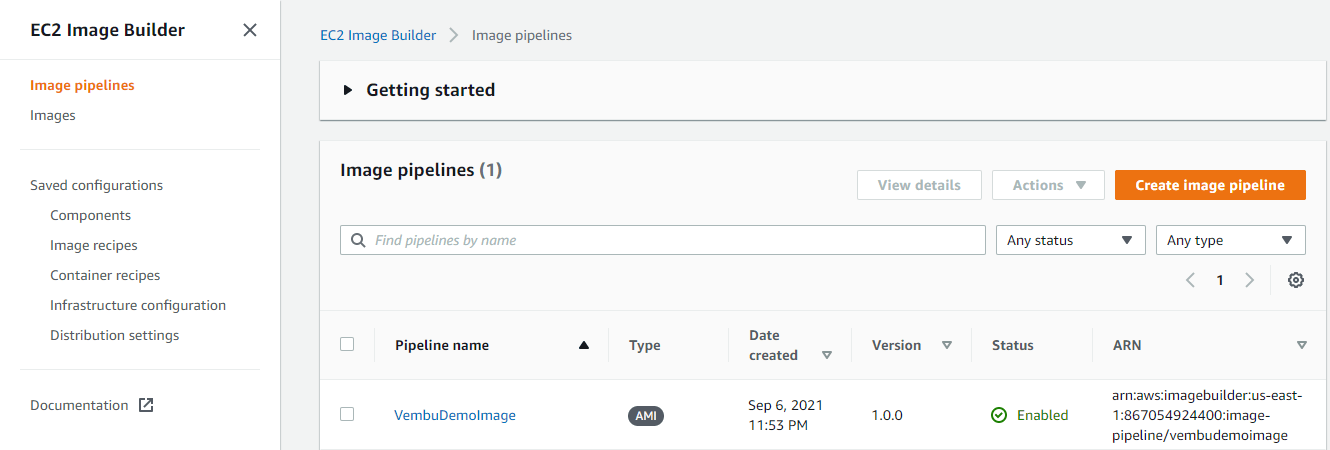
Now a new image will be created, and it will be listed under EC2 Image Builder > Images.

Associating a VPC to the created image
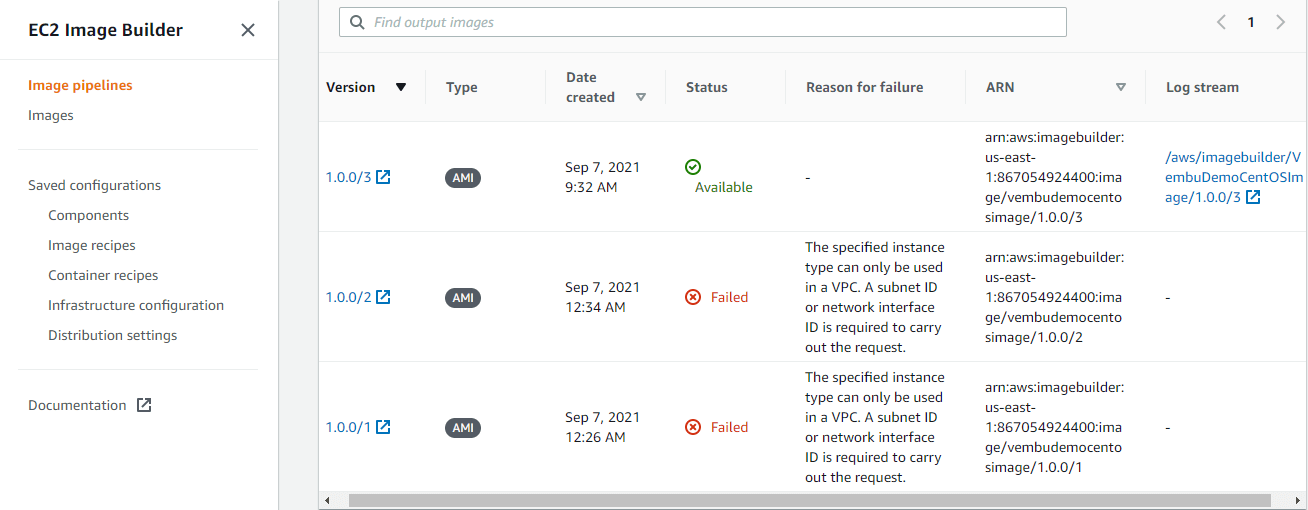
On every run pipeline process, you will get an AMI image, and the same will be listed on the Output Image section. You may experience a failure status with the failure reason “ The specified instance type can only be used in a VPC. A subnet ID or network interface ID is required to carry out the request”, the reason due to if the specified instance is not associated with a VPC.
In such a scenario, edit the infrastructure configuration settings, under the “VPC, subnet and security group” section provide a VPC & associated subnet ID and a security group. You may use the existing one or create a new VPC for the purpose. The below screenshot shows the success status of the next Image building process. after providing the VPC details.
Distributing the AMI image to other regions
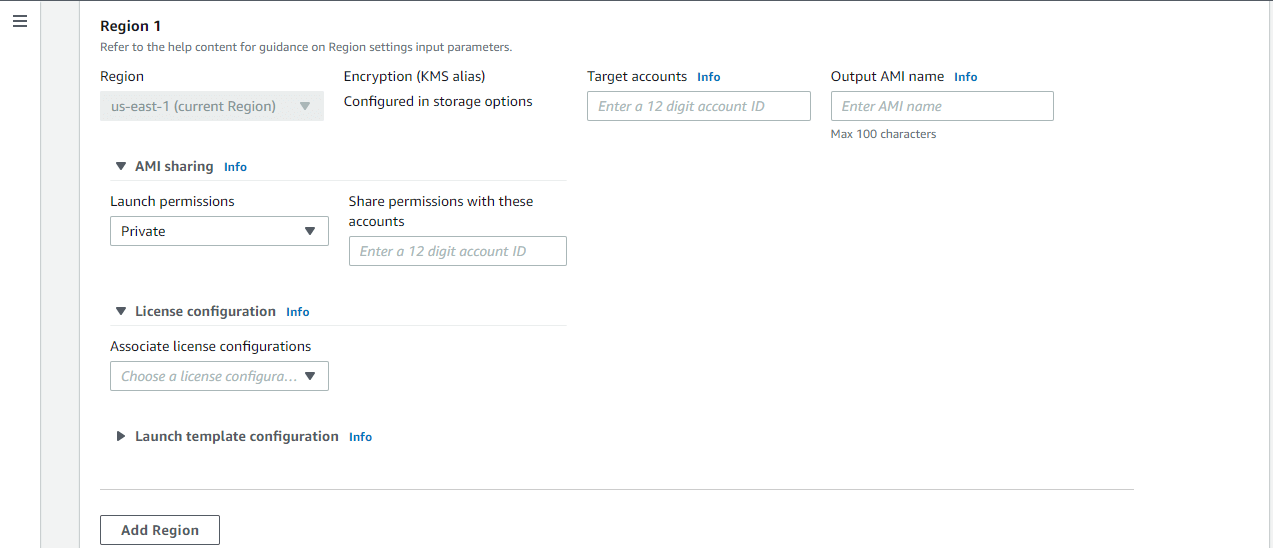
By default, the created AMI will be distributed to the current Region only. In order to use the AMI in different AWS regions, users need to add individual regions with AMI sharing permission. Users need to specify the sharing permission either private or public during this region adding a task. Additionally, you can provide License configuration and launch template configuration.
License configuration – License configurations contain licensing rules based on the terms of your enterprise agreements. Image Builder inherits license configurations that were associated with the new AMI image.
Launch template configuration – If you are using an EC2 launch template, you can instruct EC2 Image Builder to create a new version of your launch template that includes the latest AMI ID after the build completes
Click the “Add region” button for each region the AMI to be placed. The below screenshot shows these details.
Recently, Image Builder integrated with the following compliance products:
- Center for Internet Security (CIS) Benchmarks hardening – Now You can use CIS Hardened Images and the related CIS hardening components to build custom images that comply with the latest CIS Benchmarks Level 1 guidelines. CIS Hardened Images are available in AWS Marketplace
- Security Technical Implementation Guides (STIG) – For STIG compliance, user can use Amazon-managed AWS Task Orchestrator and Executor (AWSTOE) STIG components in the Image Builder recipes. STIG components scan the build instance for misconfigurations and run a remediation script to correct issues that they find
Conclusion :
EC2 Image Builder allows you to create images with only the essential components, reducing your exposure to security vulnerabilities. You can also apply AWS-provided or custom security policies to your images to meet applicable internal or industry-specific compliance criteria. Image Builder significantly reduces the effort of keeping images up-to-date and secure by providing a simple graphical interface, built-in automation, and AWS-provided security settings. With Image Builder, there are no manual steps for updating an image nor do you have to build your own automation pipeline. Not having to write and maintain automation code frees up resources and saves IT time. It is very easy to create an Image pipeline and create an AMI from the image pipeline within a few minutes.
Protect your AWS instances with BDRSuite for AWS now!
Download the full-featured 30-day free trial of our latest version BDRSuite v5.5 and experience modern data protection for your AWS environment.
Related Posts:
AWS for Beginners : What is AWS EC2 : Part 2
AWS for Beginners: What are EC2 Placement groups: Part 13
AWS – EC2 Launch Configuration vs Launch Templates
Follow our Twitter and Facebook feeds for new releases, updates, insightful posts and more.


Leave A Comment