While studying for the Microsoft and VMware certifications, you probably had a need to quickly and easily spin up various Hyper-V and VMware Lab environments in order to learn more about these technologies. Information Technology is a rapidly growing field. While certifications do not guarantee you a job, they often put a candidate’s resume over the top or gain you a decent pay premium over non-certified competitors.
Why earn an information technology certification? Many IT positions deal with specific technical procedures or software, so becoming certified in a specialized area proves to employers that you have the precise skills needed to succeed.
As it is always interesting to compare Microsoft and VMware, in this article, I will describe how to create your Virtual Lab to work on Microsoft and VMware technologies. Of course, you can also work on other technologies, such as Cisco, but that is not covered in this article.
Using VMware Virtual Labs
If you want to learn more about the VMware products, then you can go to the following website: https://labs.hol.vmware.com/. This website is called “VMware HOL” (e.g Hands-On Labs) and the only prerequisite is to use your VMware account or create a new one.
If you need a fast-track to try VMware Products, then it is the best way! Thanks to this platform, you can create Virtual Machines in the VMware Cloud System. These labs are created on-demand and destroyed at the end of the lab.
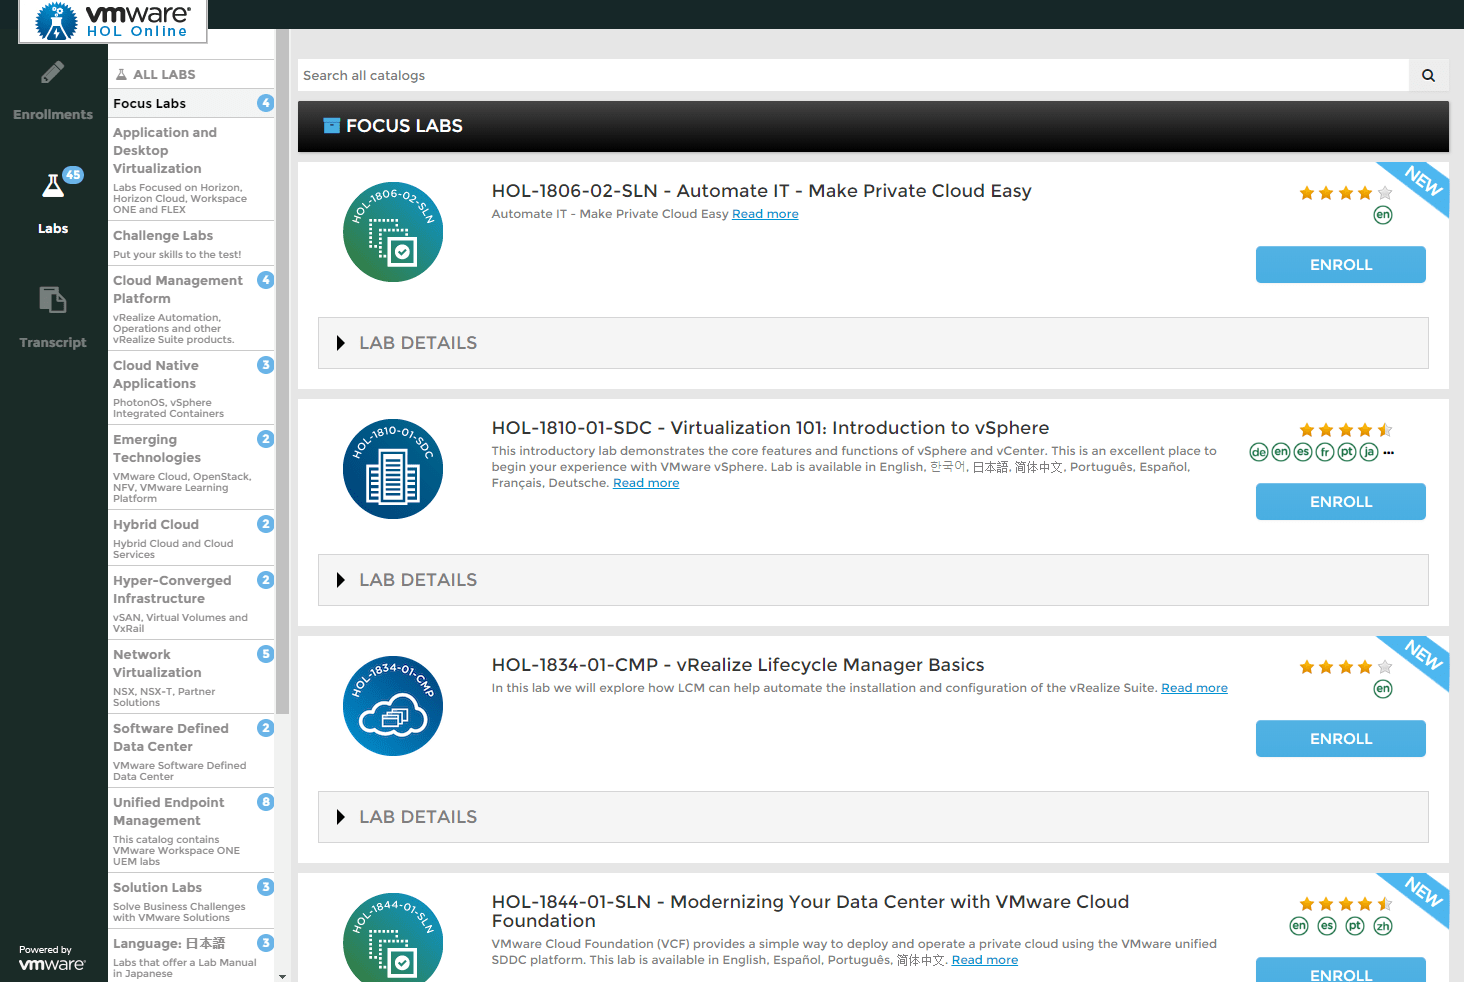
Let’s see how to use VMware Virtual Labs:
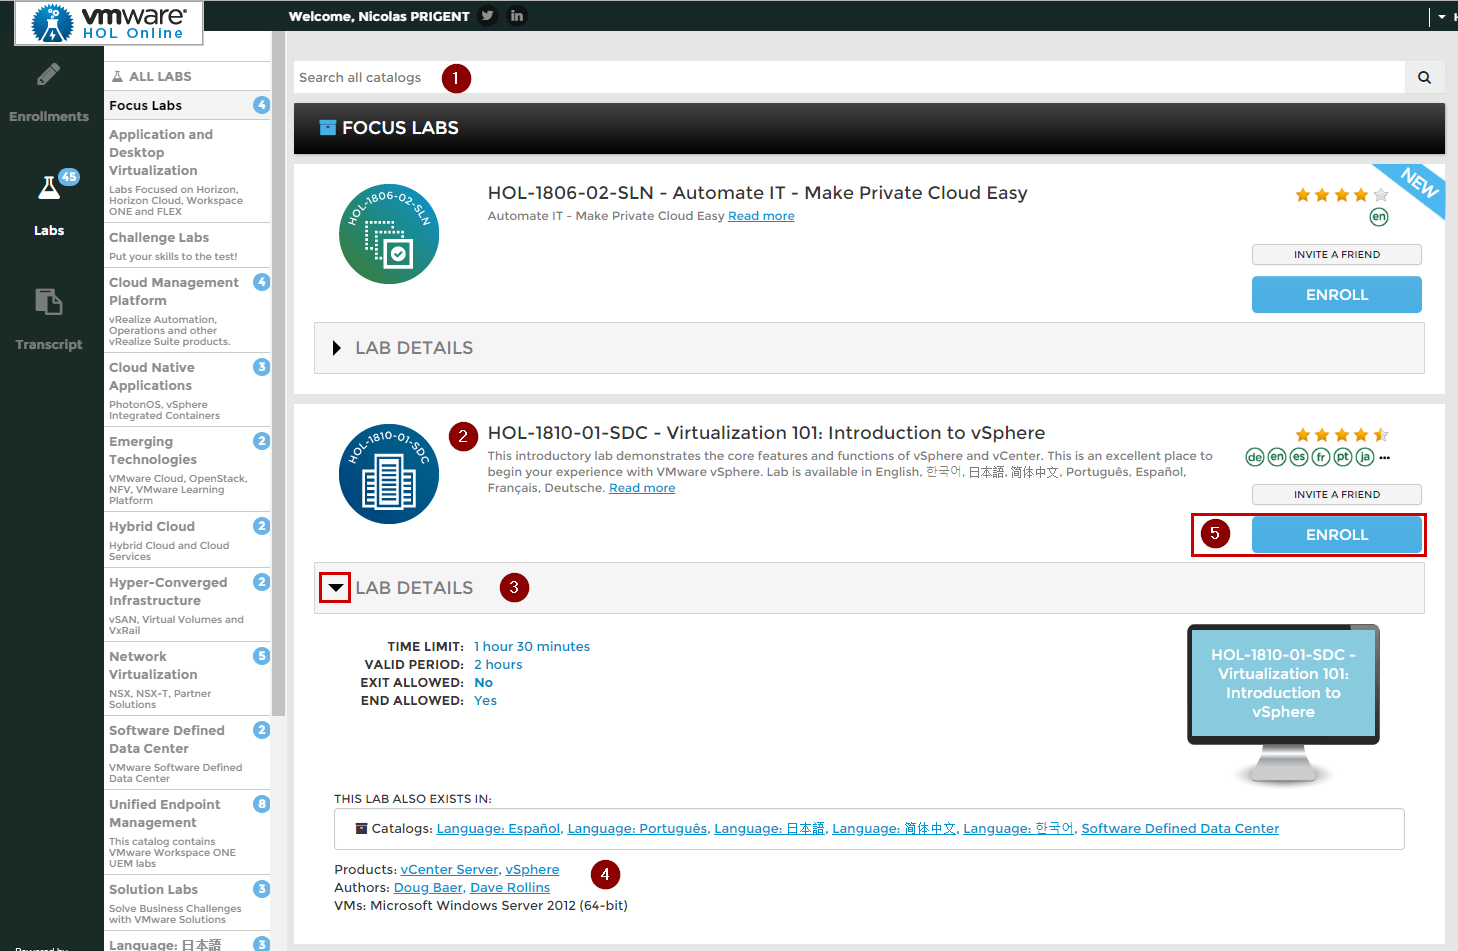
- First, you can type a keyword to find a specific lab
- If you don’t know which lab to enroll, then simply browse the catalog until you find your desired Virtual Lab. Many Virtual Labs are evaluated by the community, so check the five stars notation
- Then click on “Lab Details” to get more information about this lab such as the duration.
- At the end of this section, you can see in which languages this lab is available, the products on which you will work, and the authors
- Finally, if you are happy with this Virtual Lab, then click “Enroll” to create the lab
When you are ready, click “Start this lab”:

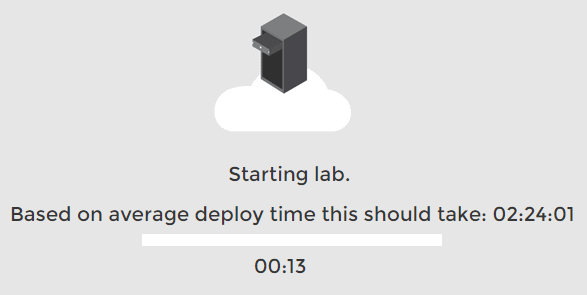
Wait a few minutes until the lab is starting
Once the lab has been created, you can see the following screen. Let’s examine this screen:
- At the top of the Window, you can see the Virtual Lab name, the progress bar and the time remaining in this lab
- On the right side of the Window, you can see the Guide section. This guide will help you to perform this lab step-by-step
- On the left side of the Window, it is the Virtual Machine which has been created for your Virtual Lab. Here, it is a Windows Server 2012 R2, with some basic tools installed. Of course, you can’t do what you want in this Virtual Machine. This VM has been configured to let you perform only the steps which are indicated in the guide. For instance, you can’t go on internet or something like that
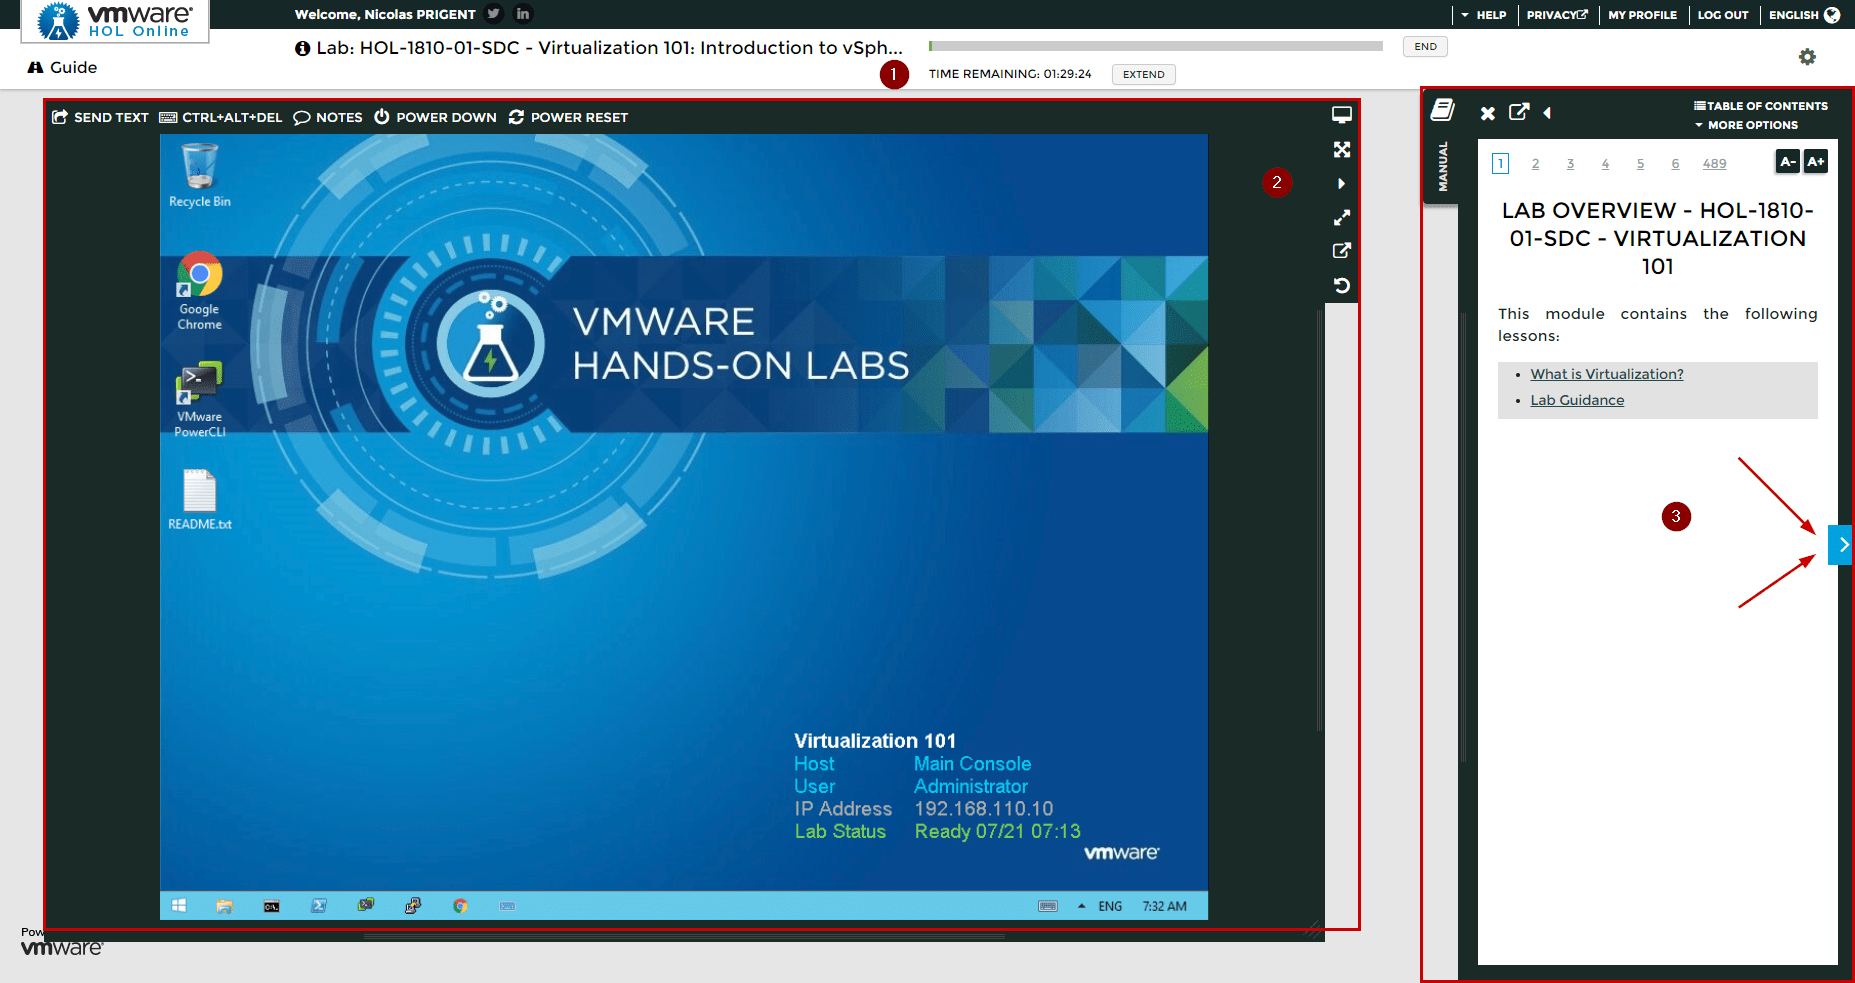
At the end of this lab, the Virtual machine will be destroyed.
Using Microsoft Virtual Labs
If you want to learn more about the Microsoft Products, then you can go to the following website: https://www.microsoft.com/handsonlabs/. The only prerequisite is to use your Microsoft account or create a new one. VMware and Microsoft use the exact same process about Virtual Labs.
After login on the website with your Microsoft account, you will notice some self-paced labs on the home page. On the right side, click on “View all Self-paced Labs” to list all the available labs:

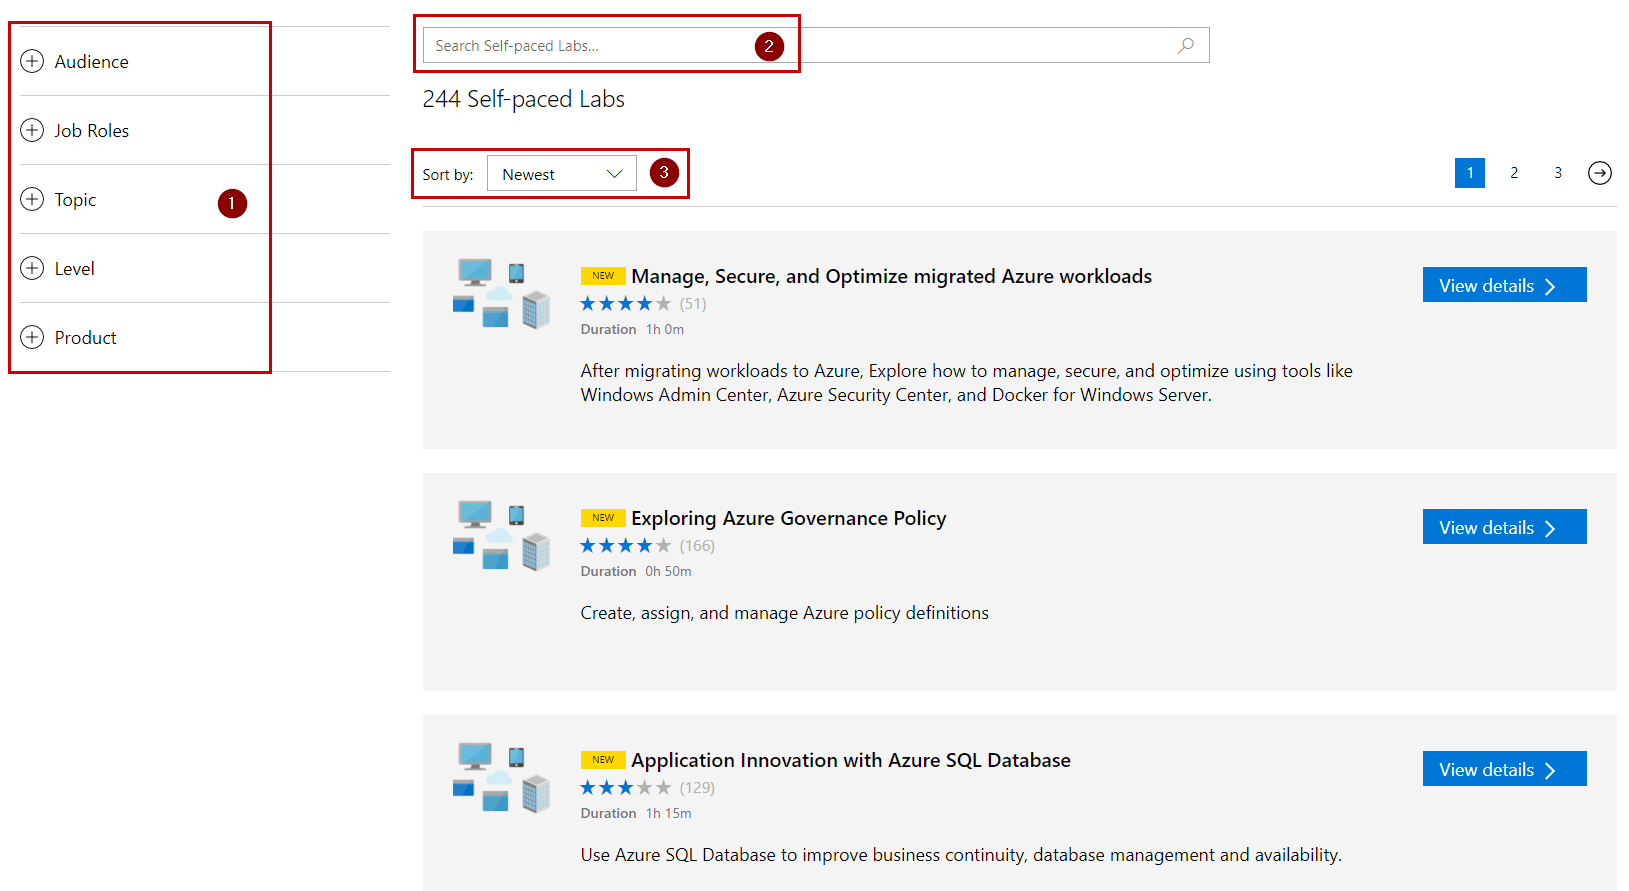
At the time of writing this article, there are 244 Self-paced Labs, which is great. To find your Labs, you can filter by:
- Audience: CFO, Data Developer, IT Administrator, IT Executives, IT Pros, …
- Job Roles: Business User, Cloud Architects, Engineer, …
- Topic: Azure DB, Compute, Containers, DevOps, … As you may imagine, there are many Azure topics to learn about this technology
- Level: Advanced, Beginner, Intermediate
- Product: Azure, Azure DNS, Disk Storage, Virtual Machine, …
Or you can also type a keyword in the search field (e.g Azure, Network, …). And finally, you can also just sort by published date (e.g Newest) or popularity (e.g Most popular):
In my case, I want to work on
Azure Site Recovery, so I will use the search field and select “Migrating assessed workloads with Azure Site Recovery”.
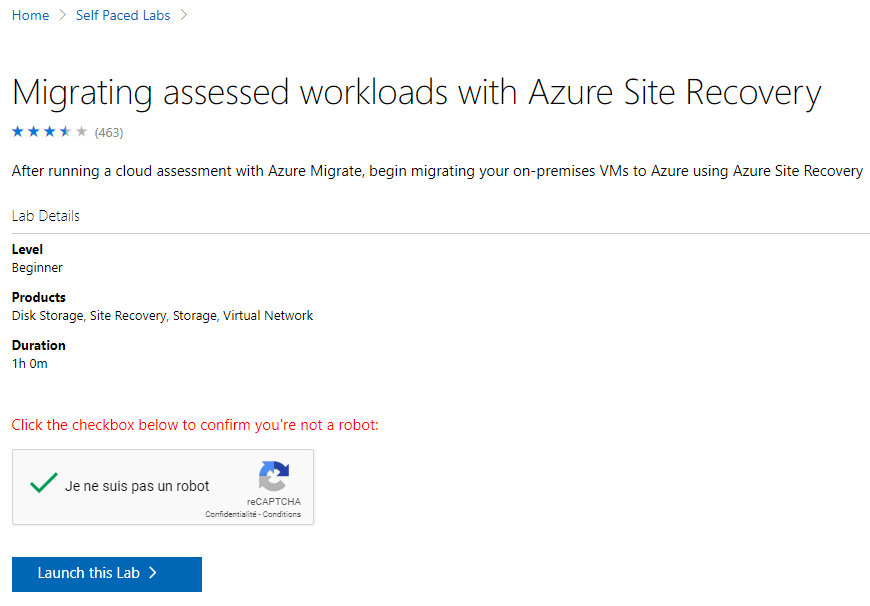
Before going deeper, I can check the level, which is “beginner”, the products I will work on, and the duration for this lab. Now, it is very simple, you just have to confirm you are not a robot, and then click on “Launch this lab”, and wait until the lab is ready.
This may take some minutes to build the Lab.

All done! You will be redirected to your lab. You can start the lab by clicking “Start”. Two Windows will be opened:
- The first one is your Lab, I mean it is your Virtual Machine in order to work on the technology
- The second one is your guide Window that contains the step-by-step instructions for your lab. As you complete the instructions, you can check the box on each step so your work is counted toward completion. A progress bar is shown at the top of the Guide window
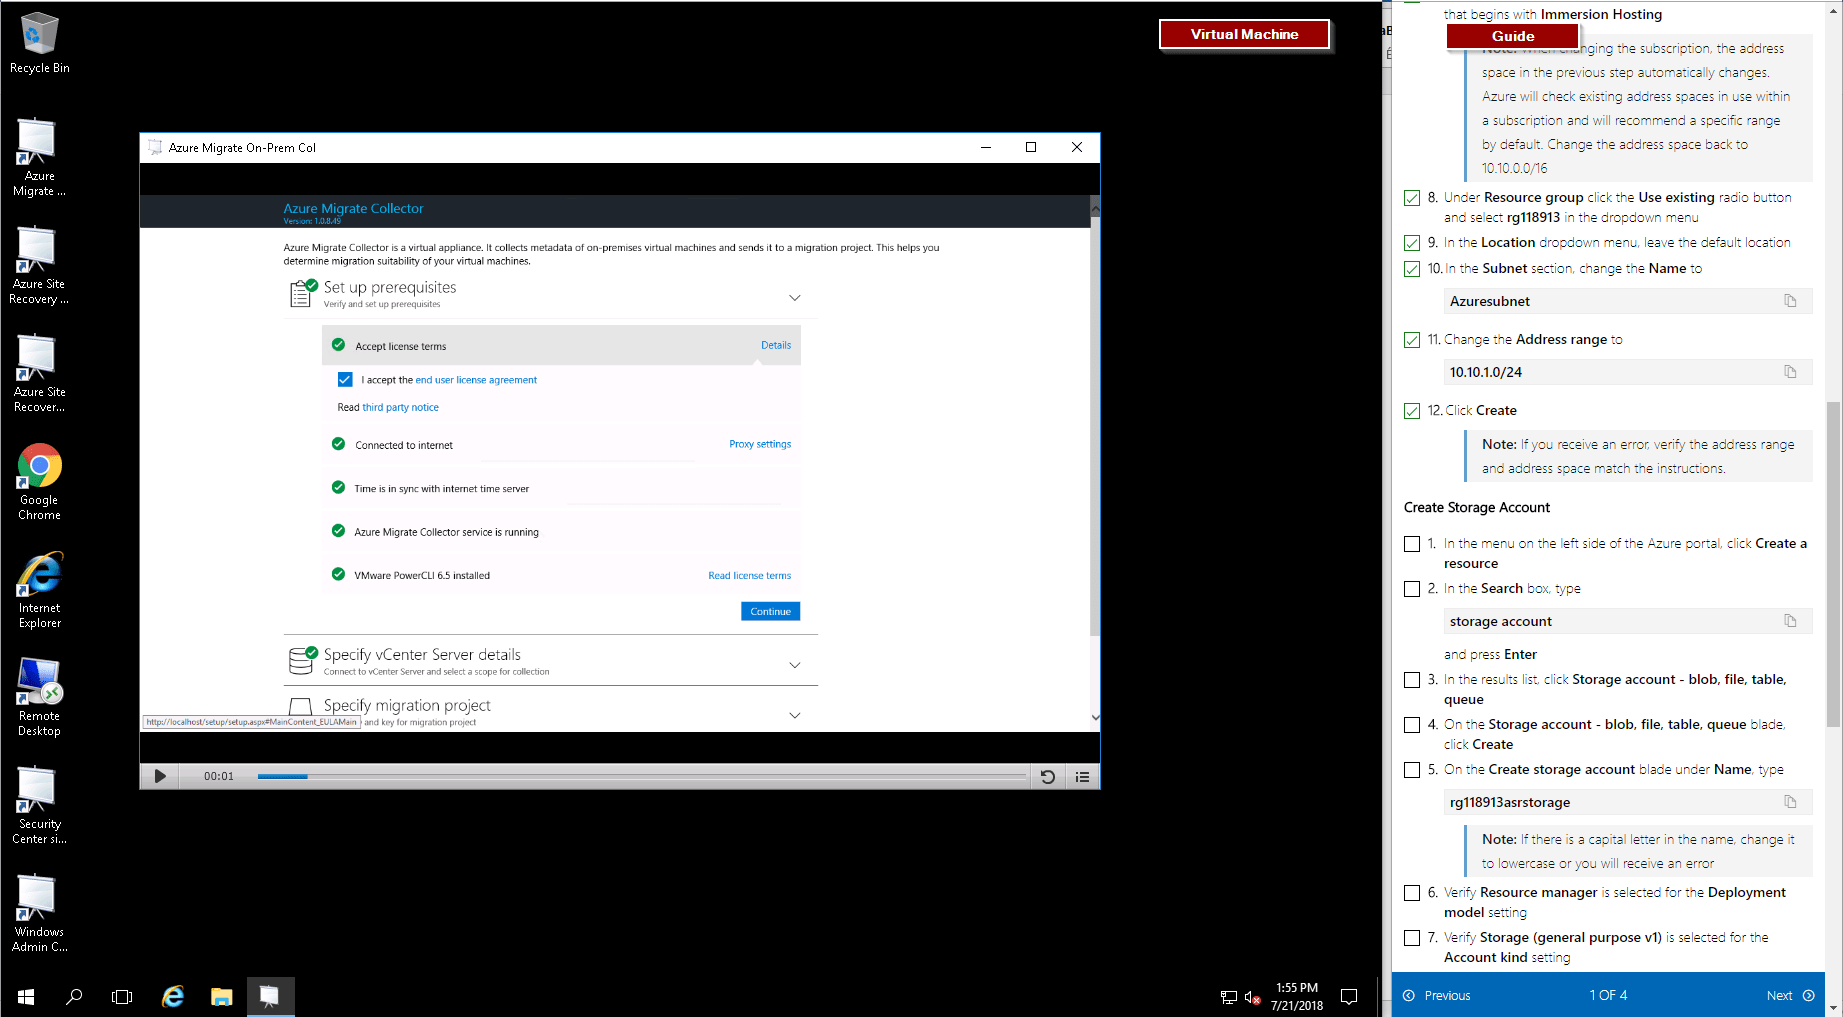
At the top of the Guide Window, note the time remaining and the progress bar:
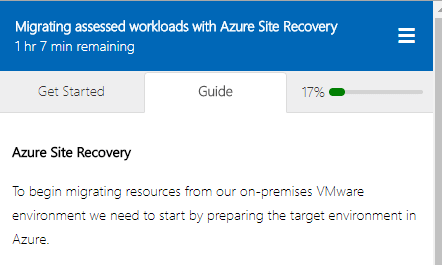
When you pause the lab, next you will be able to resume, restart or stop the lab.
Go back to your dashboard, and check the status for your labs:
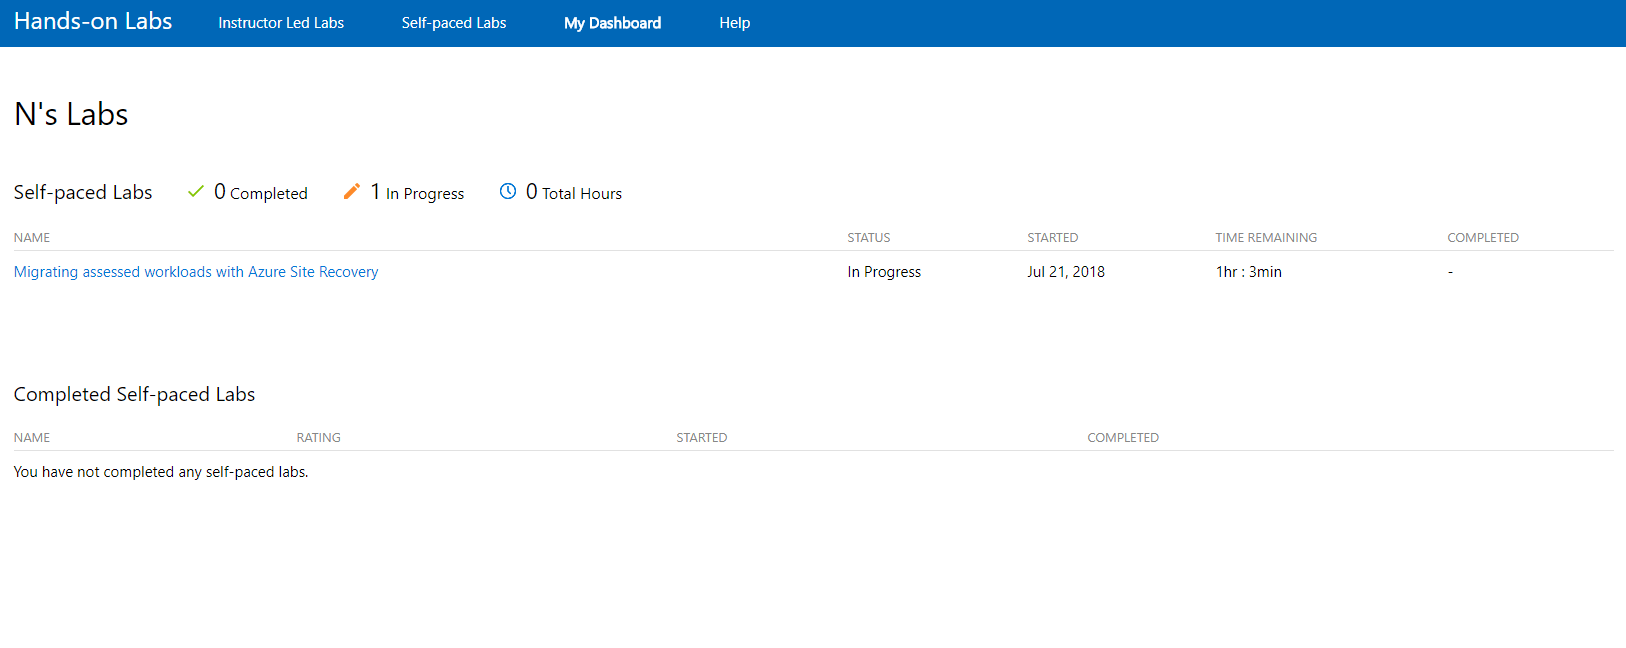
Build Your Own Virtual Lab
To finish this article, you must know that you can build your own Virtual Lab on your machines. To perform this task, there are some great PowerShell module created by the community and published on GitHub.
For example, Daniel Scott-Raynsford (Microsoft MVP) has created the following PowerShell Module called “LabBuilder” to build a multiple machine Hyper-V Lab environment from an XML configuration file.
The general goals of this module are:
- One-Click Create: Enable “one-click” creation of a Hyper-V Lab environment
- Easy Configuration: Enable non-developers to easily define Lab environments
- Multiple Labs: Support multiple Lab environments on the same Hyper-V host
- Stretched Labs: Allow a Lab environment to span or be installed on a remote Hyper-V host
- Lab Isolation: Ensure that multiple Lab environments are completely isolated from each other
- Minimal Disk Usage: Minimize Lab footprint by utilizing differencing disks where possible
- Configuration Flexibility: Allow GUI based tools to be easily created to create Lab configurations
- Extensible: Enable new Lab VM machine types to be configured by supplying different DSC library resources
Below are the prerequisites:
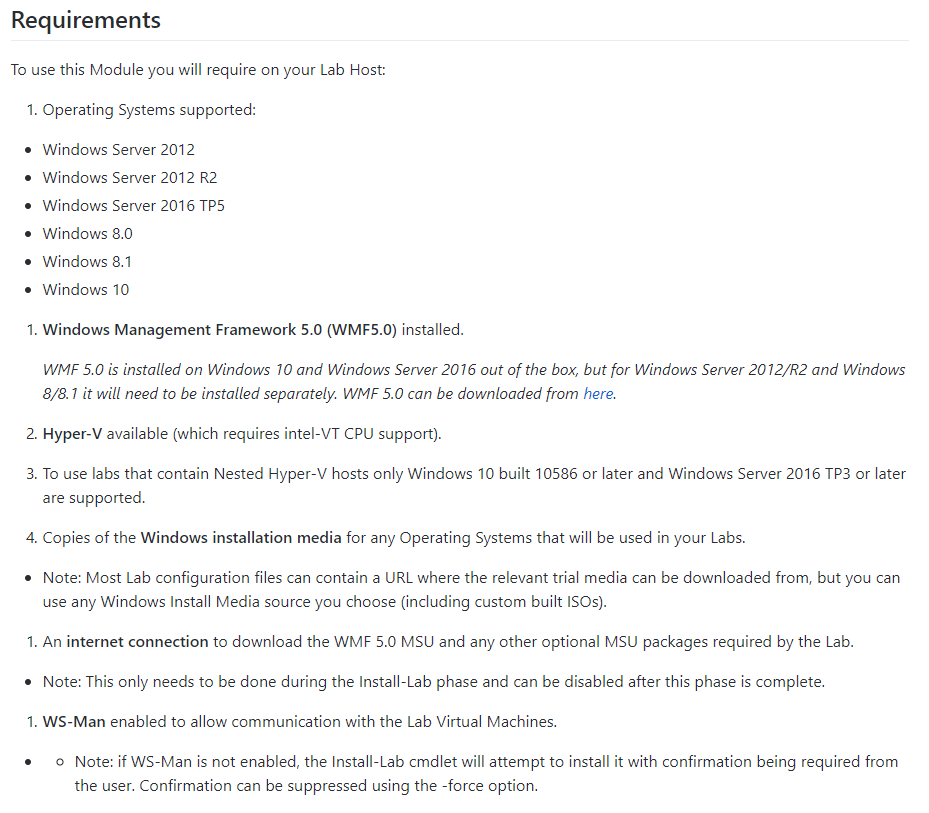
More information here: https://dscottraynsford.wordpress.com/2016/10/04/easily-create-a-hyper-v-windows-server-2016-ad-nano-server-lab/
Conclusion
In this article, we discussed about Virtual Labs, which are very important for IT Pros in order to increase their skills on Microsoft/VMware technologies. These Virtual Labs are also essential to work on the IT certifications to gain recognition in your professional career. You can also show your Virtual Labs Transcript to your employer.
When reading a blog post on internet, if you have a lack of resources, then you can use these Virtual Labs to create your Lab online.
To finish, here is an overview about the Microsoft Virtual Labs on which you can work:
- Azure,
- Hyper-V,
- Containers,
- System Center,
- Databases,
- and so on.
And VMware Virtual Labs lets you work on:
- Automation,
- vSphere,
- vRealize,
- SDDC,
- Horizon,
- Workspace One,
- and so on.
Follow our Twitter and Facebook feeds for new releases, updates, insightful posts and more.


Leave A Comment