
Introduction: Proxmox High Availability
For businesses relying on virtual machines (VMs) and containers, ensuring continuous operation is critical. Here’s where Proxmox High Availability (HA) comes in.
Proxmox VE, offers a built-in HA feature to guarantee maximum uptime for your virtualized resources. This means if a physical node in your Proxmox cluster fails, VMs and containers running on it automatically migrate and restart on a healthy node. This seamless failover minimizes downtime and ensures your applications remain accessible.
This guide will walk you through the step-by-step process of enabling High Availability for your Proxmox VMs and containers. We’ll cover essential requirements, configuration steps, and even discuss testing your HA setup for peace of mind. By the end, you’ll have a robust and highly available virtualized environment with minimal downtime risk.
What are the key metrics for defining a successful HA solution for Proxmox VMs and Containers?
A successful HA achieves its intended purpose by:
- Minimizing downtime: When a failure occurs, the HA system should automatically recover services with minimal interruption
- Fast failover: The HA system should detect and react to failures quickly, ensuring resources are migrated and restarted on healthy nodes with minimal delay
- Scalability: The HA solution should be able to adapt to changes in your environment, such as adding or removing nodes
- Minimal data loss: Ideally, no data loss should occur during a failover event
- Ease of management: The HA system should be easy to set up, manage, and test
Requirements for Proxmox High Availability (HA)
- At least three cluster nodes (to get a reliable quorum): This ensures a majority vote to determine the active cluster leader in case of network partitions or node failures. Two nodes can introduce split-brain scenarios where both nodes believe they are the leader, hindering failover
- Shared storage for VMs and containers: Local storage on individual nodes won’t work for HA. VMs and containers need to reside on shared storage accessible by all cluster nodes (e.g., SAN, NAS)
- Hardware redundancy (everywhere): This emphasizes the importance of robust hardware throughout your cluster. Redundant power supplies, network cards, and potentially even physical nodes are recommended to minimize single points of failure
- Use reliable “server” components: Consumer-grade hardware is not ideal for HA due to its lower reliability and limited support for features like hardware watchdogs. Invest in server-grade components designed for continuous operation
- Hardware watchdog – if not available we fall back to the linux kernel software watchdog (softdog). A hardware watchdog is a dedicated monitoring device that can automatically reboot a node if it detects a hardware or software issue. While a software watchdog (softdog) is a fallback option, a hardware watchdog offers faster and more reliable failover
- Optional hardware fencing devices: Fencing ensures only one node in the cluster has access to shared storage during a failover event. This prevents data corruption if both nodes attempt to access the storage simultaneously. While not strictly necessary for a basic HA setup, fencing devices are highly recommended for enhanced data integrity, especially in mission-critical environments
HA-Manager
Virtualization platforms like Proxmox VE simplify achieving high availability (HA) by removing reliance on specific hardware. This means if a physical server fails, your virtual machines (VMs) and services can remain operational.

Proxmox VE goes a step further by offering ha-manager, a software tool that automates HA functionality. Here’s how it works:
- Configuration: You specify which resources (VMs, containers) ha-manager should manage
- Monitoring: The ha-manager continuously monitors these resources for proper functioning
- Failover: If an error is detected, ha-manager automatically initiates failover, seamlessly transferring the affected resource to another healthy node within the cluster
- Resource Management: ha-manager can also handle routine tasks like starting, stopping, migrating, and relocating VMs based on user requests
ha-manager acts as an automated administrator, ensuring your virtualized environment remains highly available even in the event of hardware failures.
Enabling High Availability for Resources in Proxmox VE
This section outlines the process for enabling High Availability (HA) for your virtual machines (VMs) and containers within Proxmox VE. HA ensures continuous operation of critical resources in case of a hardware failure on one of the cluster nodes.
There are two convenient methods for enabling HA on a resource:
Using the Proxmox VE Web Interface (GUI)
- Access the Proxmox VE web interface and navigate to the “Datacenter” section
- Select the desired cluster or individual node
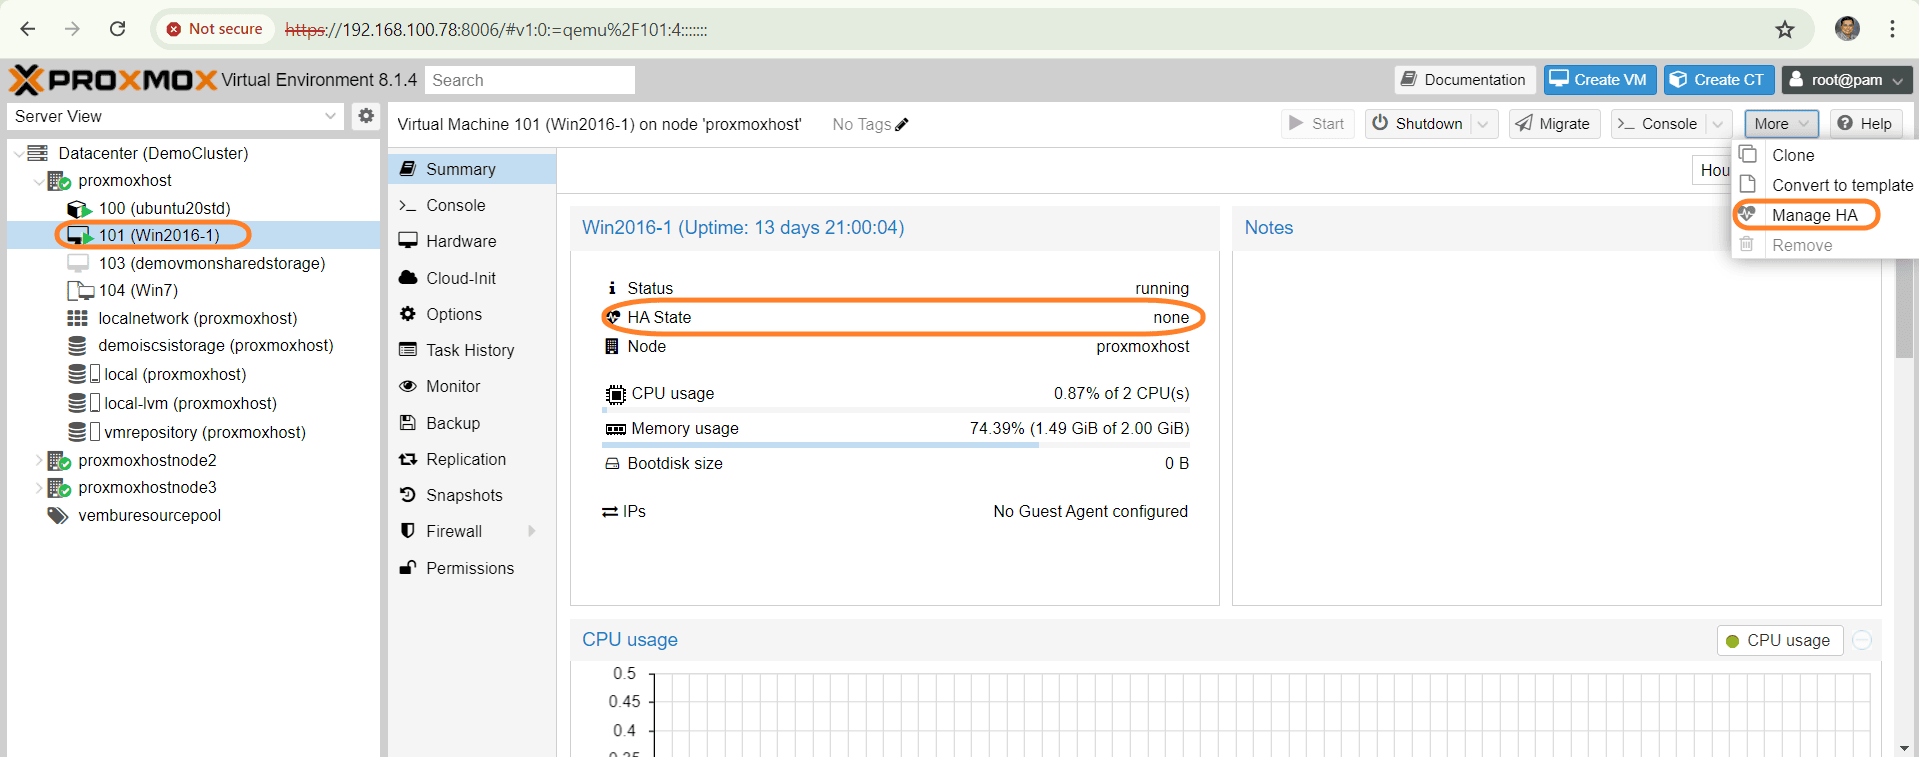
- Click on “High Availability” (HA) in the menu, available at the top right corner
- Click the “Add” button and choose the resource you want to manage with HA (VM or container)
- Configure any additional settings specific to the resource (optional)
- Click “OK” to save the configuration and enable HA for the chosen resource
This screenshot highlights the location of the “High Availability” option within the Proxmox VE web interface.
After clicking “Enable HA” a new window opens which shows the below configuration options
- VM: VM ID for the VM or container to enable HA. You can’t edit it
- Max. Restart : Maximal number of tries to restart the service on a node after its start failed. The default is 1, you can increase the count
- Max.Relocate : Maximal number of service relocate tries when a service fails to start. The default is 1, you can increase the count
- Group : The HA group identifier
- Request State : refers to the desired operational state that the HA manager will attempt to maintain for a specific resource (VM or container) within the cluster.Default state is “started”

Here’s a breakdown of the Request State options:
Started: This is the default option and instructs the HA manager to ensure the resource is always running. If the resource encounters a failure on its current node, the HA manager will automatically initiate failover and start it on another healthy node in the cluster.
Stopped: By selecting this option, you tell the HA manager to keep the resource stopped. However, the HA manager will still monitor the resource and attempt to start it on another node if it’s accidentally started on the original node.
Ignored: The resource gets removed from the manager status, and don’t touch the resource anymore.
Disabled / Enabled: By selecting this option, the HA manager tries to put the resource in a stopped state, but does not try to relocate the resources on node failures.
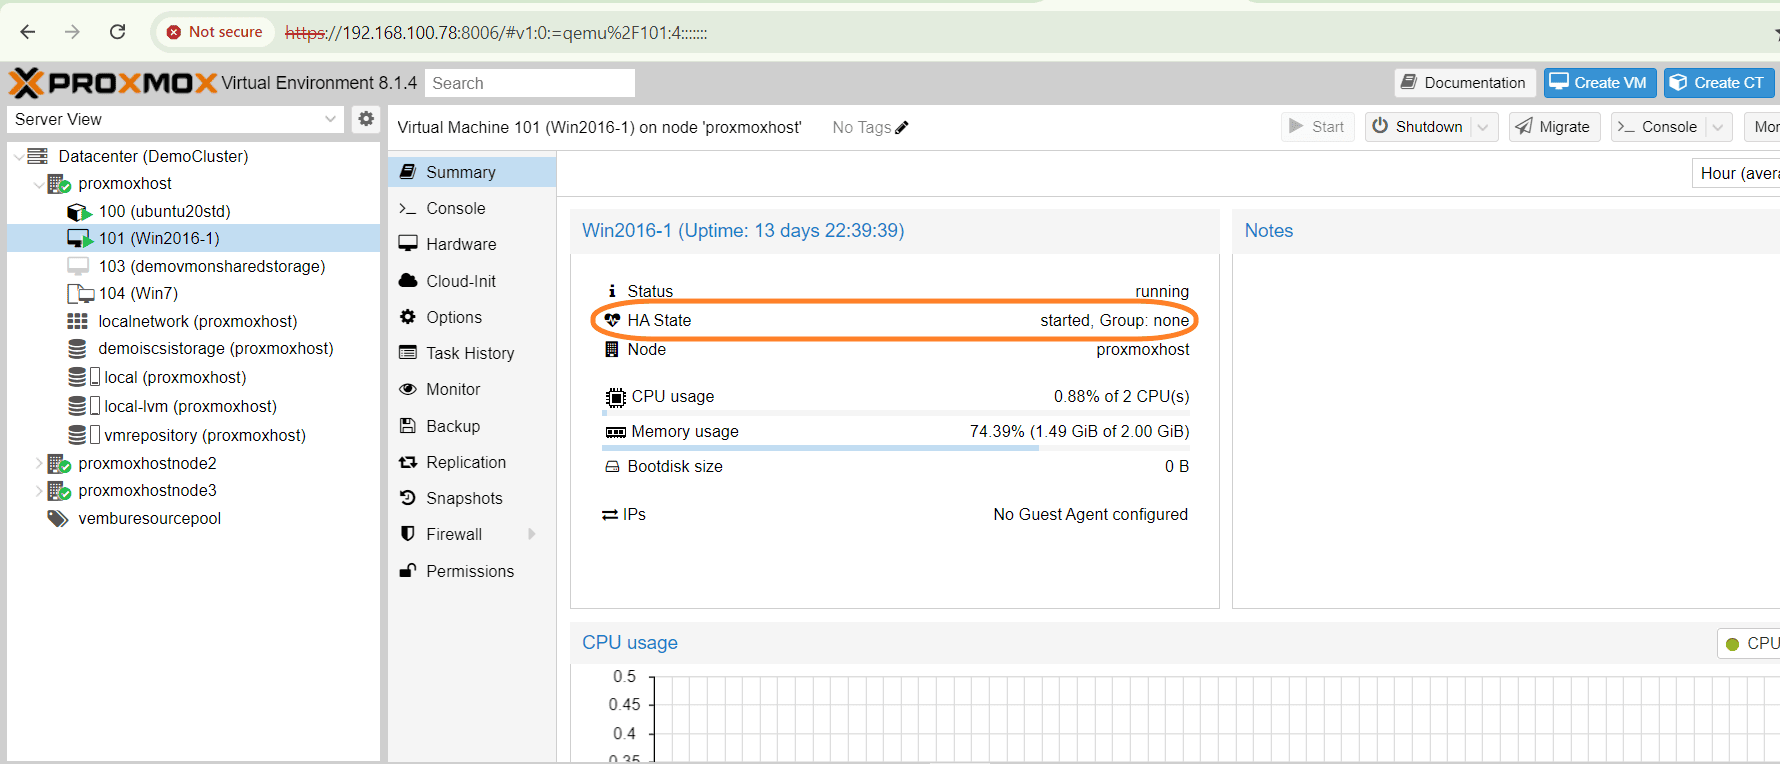
Verifying the HA state after Enabling HA
Using the Proxmox VE command line tool
The first step involves enabling HA for a resource by adding it to the HA configuration using the command-line tool. Below command line
# ha-manager add vm:150
adds the vm with ID 150 to the HA resource configuration
# ha-manager set vm:150 –state started
starts the resources and keep them running
And you can view the actual HA manager and resource state with the below command
# ha-manager status
You can also initiate resource migration to other node using the below command
# ha-manager migrate vm:150 node5
Here node5 is the name of the proxmox VE node where you want to migrate the VM 150
Proxmox VE utilizes online migration to keep VMs running during the HA failover process. This approach involves transferring all used memory over the network, which can be time-consuming. In some scenarios, stopping the VM and restarting it on the new node using the relocate command might be a faster alternative.
# ha-manager relocate vm:150 node5
Finally, you can remove the resource from the HA configuration using the following command:
# ha-manager remove vm:150
Note : For all the above configuration replace the string vm with ct for container configurations
Conclusion
In conclusion, enabling High Availability (HA) for Proxmox VMs and containers is a crucial step towards ensuring the reliability and performance of your virtualized environment. By following the step-by-step guide provided in this article, you can establish a robust HA setup that minimizes downtime and enhances fault tolerance for your critical workloads. Remember, investing time and effort in setting up HA for your Proxmox environment is a proactive approach that pays off in terms of improved system availability and resilience.
Read More:
Proxmox Virtualization Series: Deploying a VM from Template using Clone Method in Proxmox – Part 16
Follow our Twitter and Facebook feeds for new releases, updates, insightful posts and more.

Leave A Comment