
What is AWS Glacier?
AWS Glacier is a cloud-based storage service provided by Amazon Web Services (AWS), designed for long-term data archival and backup. It offers a cost-effective and highly durable solution for storing data that you don’t need to access frequently but must retain for compliance, regulatory, or business continuity purposes. Glacier provides secure, scalable, and reliable storage, making it an ideal choice for organizations looking to minimize storage costs while ensuring data resilience over extended periods.
Read more about AWS Glacier key features, use cases, data retrieval strategies, data transfer costs & more in this blog: AWS for Beginners: Overview of AWS Glacier : Part 39
Setting up AWS Glacier involves several steps, including creating an AWS account, setting up a Glacier vault, and configuring access policies. Let us get started.
Step 1: Create an AWS Account
If you don’t already have an AWS account, you need to create one. Go to the AWS website (https://aws.amazon.com/), click “Create an AWS Account,” and complete the registration process.
Step 2: Access the AWS Management Console
Once you have your AWS account, log in to the AWS Management Console.

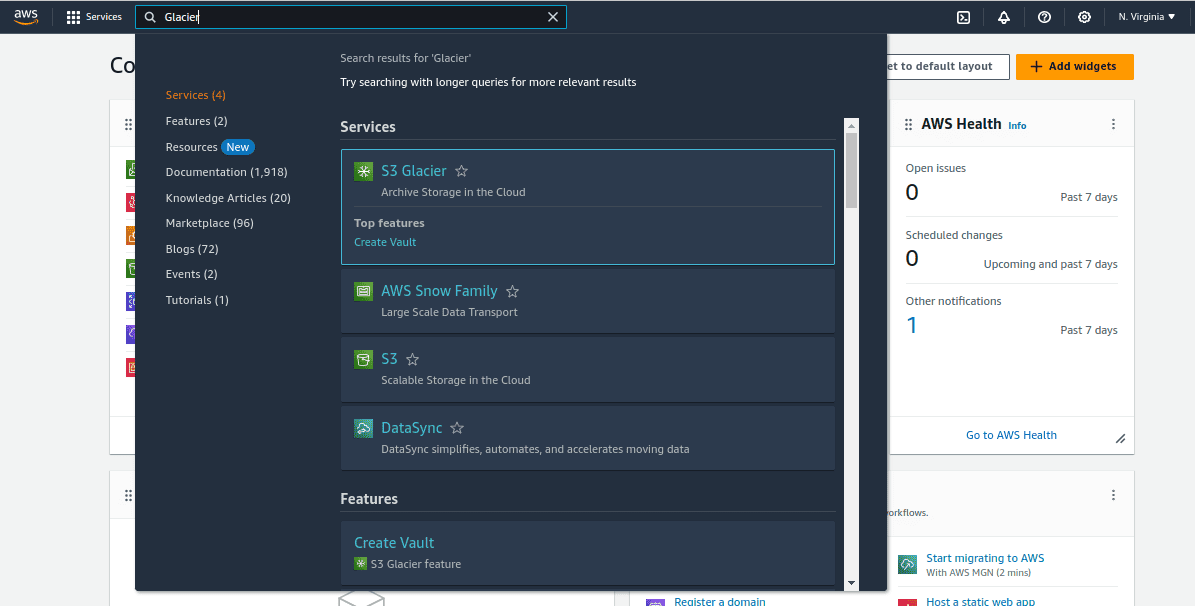
Step 3: Access AWS Glacier
In the AWS Management Console, you can search for services. Type “S3 Glacier” in the search bar or navigate to the “Storage” section, and you’ll find “S3 Glacier” listed there.
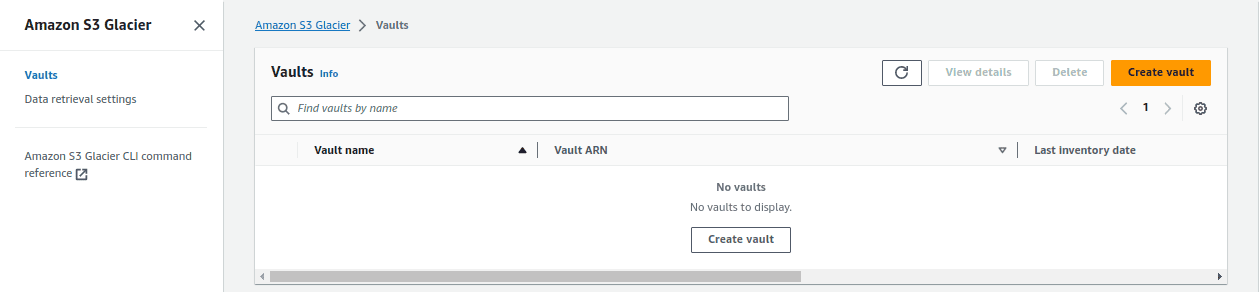
Step 4: Create a Glacier Vault
In the AWS Glacier dashboard, Click on “Create vault.”
Give your vault a name that’s unique within your AWS account. This name will be used to identify your vault.
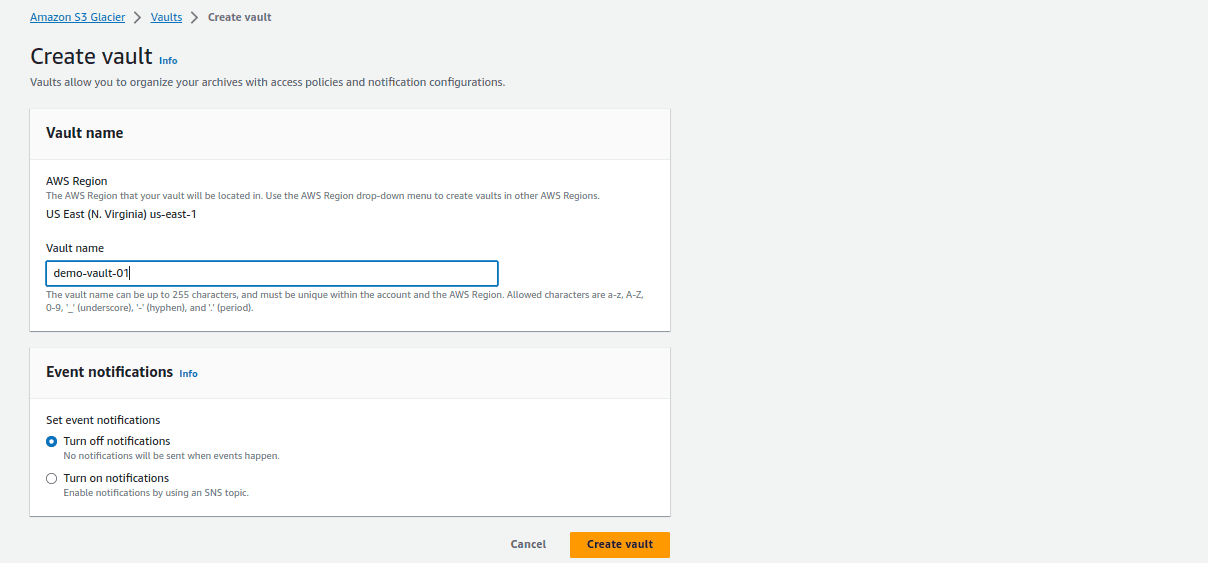
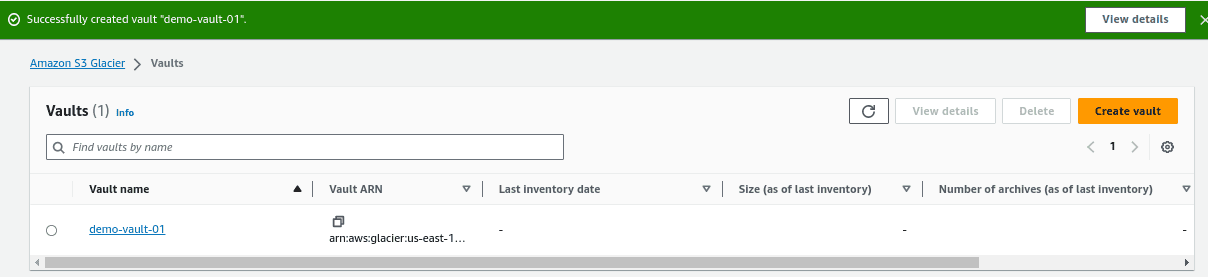
Click “Create vault“. Once the vault is created, you will find the vault listed in the Glacier console.
Step 5: Configure Access Policies
By default, the vault has no access policies, meaning it’s private. To manage access to your vault, you can create an access policy. Click on the vault you’ve create and then go to the “Vault policies” tab.
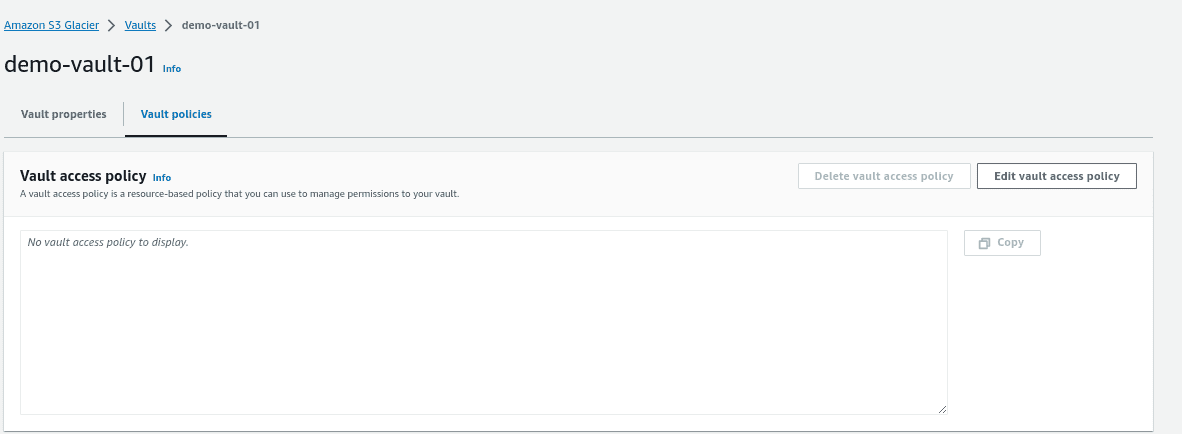
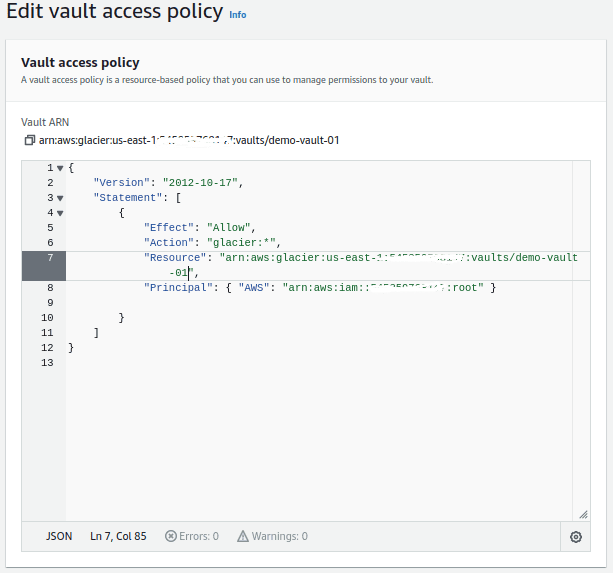
You can create a custom access policy using AWS Identity and Access Management (IAM) or use the “Amazon Glacier All Access” policy, which grants full access to the vault. Click “Save changes”
Step 6: Uploading Data
To upload data to your Glacier vault, you can use various methods. One common way is through the AWS command-line interface (CLI).
Ensure you have the AWS CLI installed, and then use the following command to upload data:
aws glacier upload-archive –account-id – –vault-name YOUR_VAULT_NAME –body /path/to/your/file
Replace YOUR_VAULT_NAME with the name of your vault and /path/to/your/file with the path to the file you want to upload.
Step 7: Retrieving Data
To retrieve data from Glacier, you can initiate a retrieval job using the AWS CLI or SDKs. There are three retrieval options: expedited, standard, and bulk. The choice of retrieval option affects the speed and cost of data retrieval.
aws glacier initiate-job –account-id – –vault-name YOUR_VAULT_NAME –job-parameters ‘{“Type”: “archive-retrieval”, “ArchiveId”: “YOUR_ARCHIVE_ID”, “Tier”: “Expedited”}’
Replace YOUR_VAULT_NAME with the name of your vault, YOUR_ARCHIVE_ID with the archive ID, and “Tier” with the desired retrieval option (“Expedited,” “Standard,” or “Bulk”).
It’s important to note that there are costs associated with data retrieval from AWS Glacier, and these costs vary based on the retrieval option selected. Expedited retrieval is the most expensive, followed by standard retrieval, and bulk retrieval is the least expensive but the slowest. Be sure to consider your budget, timing requirements, and the nature of your data access needs when choosing the appropriate retrieval option for your use case.
That’s a basic overview of setting up AWS Glacier. Keep in mind that Glacier is designed for long-term data archiving, and it’s important to understand its pricing structure, retrieval times, and how to manage your data effectively to optimize costs. Additionally, always adhere to AWS security best practices to protect your archived data.
AWS Glacier Select: Query and retrieve specific data from archives without restoring the entire archive
AWS Glacier Select is a powerful feature that allows you to query and retrieve specific data from archives stored in AWS Glacier without the need to restore the entire archive. This can be extremely beneficial in scenarios where you only require a subset of the data within an archive, which can save time, reduce costs, and enhance efficiency.
Here’s how AWS Glacier Select works:
- SQL Query Support: AWS Glacier Select employs SQL (Structured Query Language) expressions to filter and retrieve data from within an archive. You define an SQL query that specifies the data you want to extract
- Columnar Format: The data stored in Glacier is in a columnar format. This format enables AWS Glacier Select to read and process only the columns and rows that match your query, rather than having to retrieve and restore the entire archive
- Cost-Efficiency: By using Glacier Select, you minimize the volume of data you need to retrieve and pay for. Instead of paying for the full retrieval cost of an archive, you pay only for the data that matches your query, which can result in significant cost savings
- Faster Retrievals: Since Glacier Select retrieves only the relevant data, it reduces the time required to access your information. You can quickly obtain the specific data you need without waiting for the entire archive to be restored
- Use Cases: AWS Glacier Select is particularly useful for scenarios such as compliance audits, data analytics, and extracting specific records from large archives. It’s especially valuable when dealing with massive datasets where the majority of the content may not be immediately required
How to specify archive ID in AWS S3 Glacier select query to retrieve data
In AWS Glacier Select, you do not specify the archive ID directly within the SQL query. Instead, you use a two-step process to retrieve data from a specific archive:
- Initiate a Select Job: First, you initiate a select job using the AWS Glacier Select API, which includes specifying the SQL query and the archive from which you want to retrieve data. The archive you want to query is identified by the vault name and the archive ID within your vault. This step typically looks something like this:
AWS CLI:
aws glacier initiate-job –account-id – –vault-name YOUR_VAULT_NAME –job-parameters ‘{“Type”: “select”, “Parameters”: {“InputSerialization”: {“csv”: {}}, “OutputSerialization”: {“csv”: {}}, “ExpressionType”: “SQL”, “Expression”: “SELECT * FROM archive WHERE …”, “OutputLocation”: {“S3”: {“BucketName”: “YOUR_BUCKET_NAME”, “Prefix”: “output/”}}}}’
In this command, replace:
- YOUR_VAULT_NAME with the name of your Glacier vault
- “Expression” with your SQL query (replace “…” with your actual query. For example: SELECT * FROM archive WHERE error_level=’CRITICAL’)
- “OutputLocation” with the Amazon S3 bucket where the query results will be stored
Python Boto3:
import boto3
glacier = boto3.client(“glacier”)jobParameters = {
“Type”: “select”, “ArchiveId”: “ID”,
“Tier”: “Standard”,
“SelectParameters”: {
“InputSerialization”: {“csv”: {}},
“ExpressionType”: “SQL”,
“Expression”: “SELECT * FROM archive WHERE error_level=’CRITICAL'”,
“OutputSerialization”: {
“csv”: {}
}
},
“OutputLocation”: {
“S3”: {“BucketName”: “OUTPUT_S3_BUCKET_NAME”, “Prefix”: “1”}
}
}
- Check the Job Status: After initiating the select job, Glacier will process the job, and you can check the status of the job to see when it’s completed. Once the job is finished, you can retrieve the results from the specified Amazon S3 location
In this way, you don’t specify the archive ID directly within the SQL query. Instead, you identify the archive you want to query when initiating the job, and AWS Glacier Select processes the query for that specific archive.
Conclusion
Setting up AWS Glacier provides a powerful and cost-effective solution for long-term data archiving and backup within the Amazon Web Services ecosystem. By following the steps outlined in the setup process, including creating an AWS account, creating a Glacier vault, and configuring access policies, you can establish a secure and reliable environment for preserving your data for extended periods.
In today’s data-centric world, where data retention, compliance, and data recovery are critical, AWS Glacier setup empowers you with a dependable platform for preserving and accessing your digital assets, while simultaneously keeping costs in check. With Glacier’s seamless integration with the broader AWS ecosystem and its strong focus on security and durability, it remains a valuable tool for businesses and organizations with long-term data storage requirements.
Follow our Twitter and Facebook feeds for new releases, updates, insightful posts and more.

Leave A Comment