Quick Bites:
- Guest clustering in Hyper-V enables the creation of highly available environments for critical applications by allowing virtual machines to form clusters
- This blog outlines the steps to create a Hyper-V guest cluster, covering the setup of host virtual machines, configuration of shared storage with VHD Sets, addition of dedicated network connections, and installation of Windows Failover Clustering feature
- It emphasizes the implementation of anti-affinity rules to ensure fault tolerance by keeping cluster nodes on separate physical hosts
- Overall, the article provides a comprehensive guide for setting up and managing Hyper-V guest clusters within a parent Hyper-V environment, enhancing application uptime and resilience
In the previous post, we took a look at the basics of what Hyper-V guest clustering is exactly, why it is used, components, and requirements of this type of solution.
By using guest clustering in a production environment, businesses can have the ultimate configuration for high availability of applications and not just the virtual machine itself inside a single fault domain. Guest clustering can provide tremendous benefits in terms of uptime and general availability of absolutely critical production workloads.
Table of Contents
- Steps to Create a Hyper-V Guest Cluster
- Create the Guest Cluster Host Virtual Machines
- Adding a Dedicated Guest Cluster Network Connection
- Configuring Anti-Affinity for Guest Cluster Virtual Machines
In this second post of the series, we will take a look at steps to create a Hyper-V guest cluster and see how this can easily be done inside a Hyper-V cluster environment.
Steps to Create a Hyper-V Guest Cluster
When looking at the steps required to build a Hyper-V guest cluster, they involve what we will refer to as “nested clustering” essentially of a Windows Failover cluster running inside the physical Hyper-V Windows Failover Cluster that is providing compute, memory, and storage resources for the Hyper-V guest virtual machines.
To build the guest cluster inside the “hosting” Hyper-V hosts, you need:
- (2) guest virtual machines that will serve as the guest Hyper-V cluster hosts
- A shared VHDX disk or VHD Set that will serve as shared storage between the hosts
- A Cluster network
- Installation of the Windows Failover Cluster feature, testing, and building the cluster
- Anti-affinity rules to keep the guest cluster hosts on separate physical Hyper-V hostscc
Let’s take a look at how we can go about setting up these requirements for use with the Hyper-V guest cluster to run highly available applications that are extremely resilient to a physical Hyper-V host failure.
Create the Guest Cluster Host Virtual Machines
In the case we are showing here, I am loading up (2) Windows Server 2019 Datacenter hosts that are being loaded inside a Hyper-V Cluster of (3) nodes.
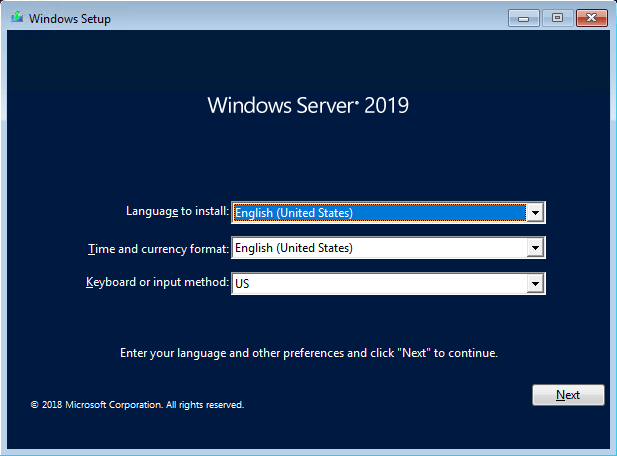
After loading the new Windows Server 2019 nodes as guest virtual machines, I run through a few things as normal:
- Windows Updates on both VMs
- Configuring time zone
- Joining the lab domain
Adding a VHD Set to Windows Server 2019
As discussed in the previous post, the VHD Set or VHDS shared disk configuration is the preferred way of configuring guest cluster shared disks moving forward since Windows Server 2016.
Let’s see how this can easily be done with Windows Server 2019.
Note*** In the following walkthrough we are simply adding a single shared disk. Your clustered application may require different disks and layouts than what is described. The general concepts are the same however.
To do this, we connect to the “parent” Hyper-V cluster nodes that are running the guest virtual machines. Highlight the guest virtual machine and under Actions click New Hard Disk.

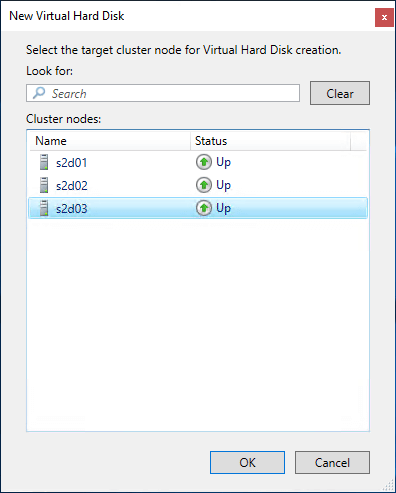
Next, you select the node you want to be the owner of the new hard disk clustered resource.
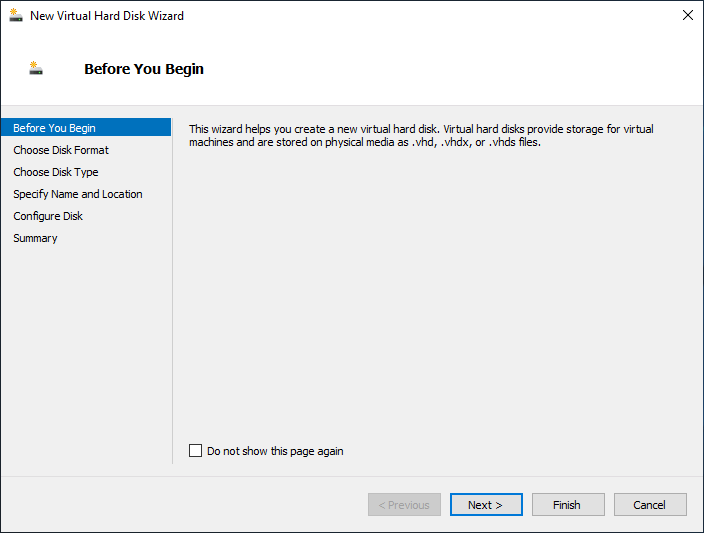
The New Virtual Hard Disk Wizard launches.
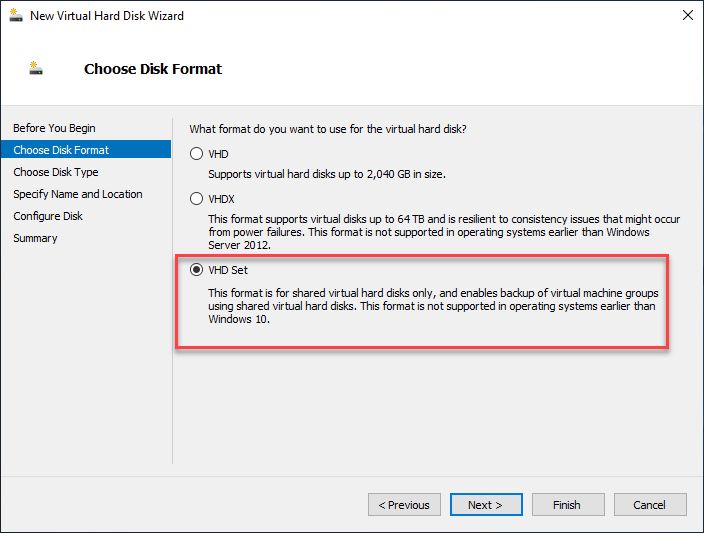
Select the VHD Set option for the Disk Format.
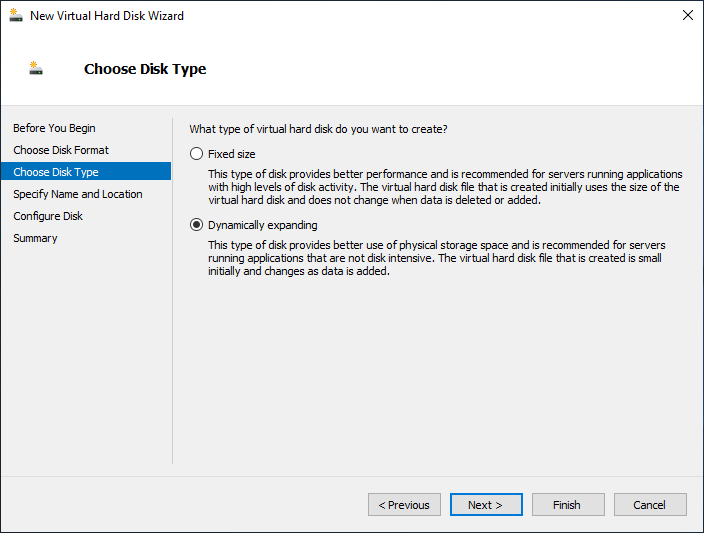
Next, choose the Disk Type you want to use for the new Hard Disk. Here I am simply leaving the default Dynamically expanding which is “thin provisioned” compared to the Fixed size or “thick provisioned” disk.
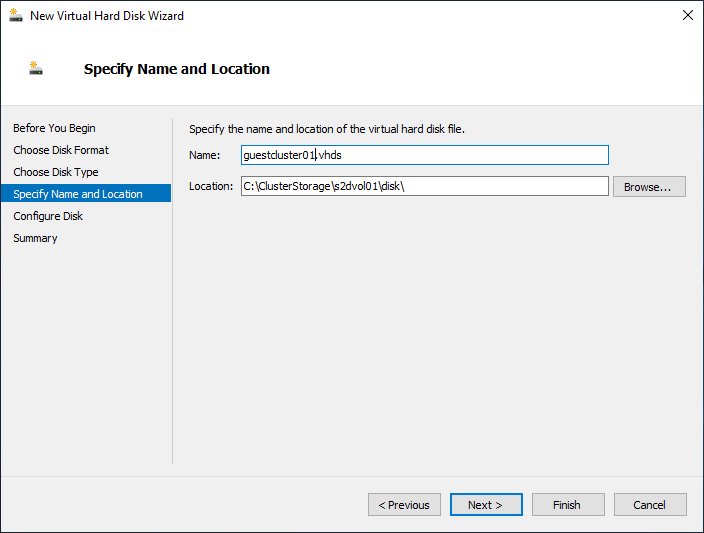
Next, we specify the Name and Location of the new VHD Set. As you can see below, I am selecting the shared S2D storage configured on the parent Hyper-V environment.
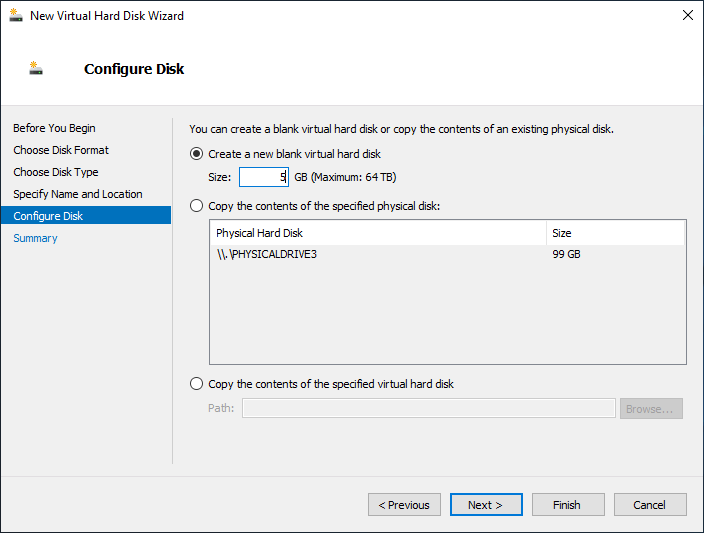
On the Configure Disk screen, you can set the size of the new VHD Set disk.
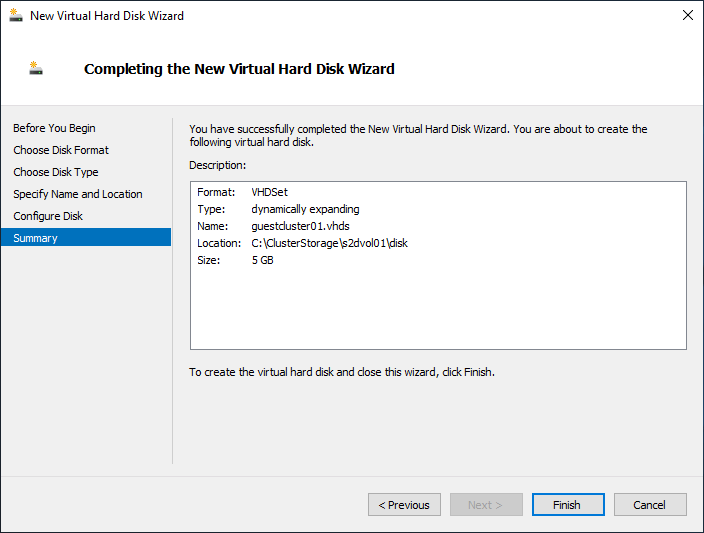
Finally, we reach the Summary screen to review the settings for the new VHD Set disk.
Now that the VHD Set disk is created, it can be added to the guest clustered virtual machines using PowerShell.
- Add-VMHardDiskDrive -VMName “< your Guest VM >” -ControllerNumber “< your controller number >” -ControllerLocation “< your controller location >” -Path “< path to the VHD Set disk >” -SupportPersistentReservation

After running the PowerShell command to add the new VHD Set disk file to the VMs, you can see the new SharedDrive in the properties of the guest virtual machine in Failover Cluster Manager.
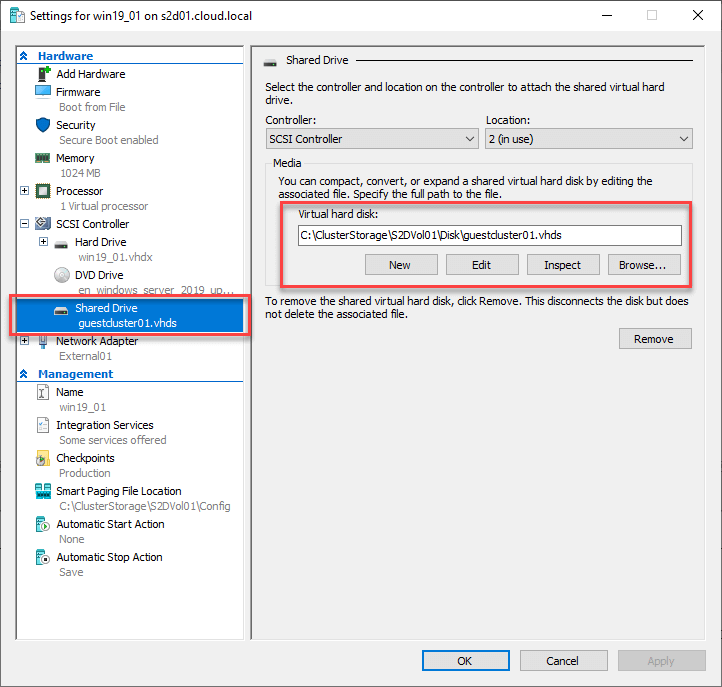
Online, initialize, format, and assign a drive letter to the new shared VHD Set disk.

Adding a Dedicated Guest Cluster Network Connection
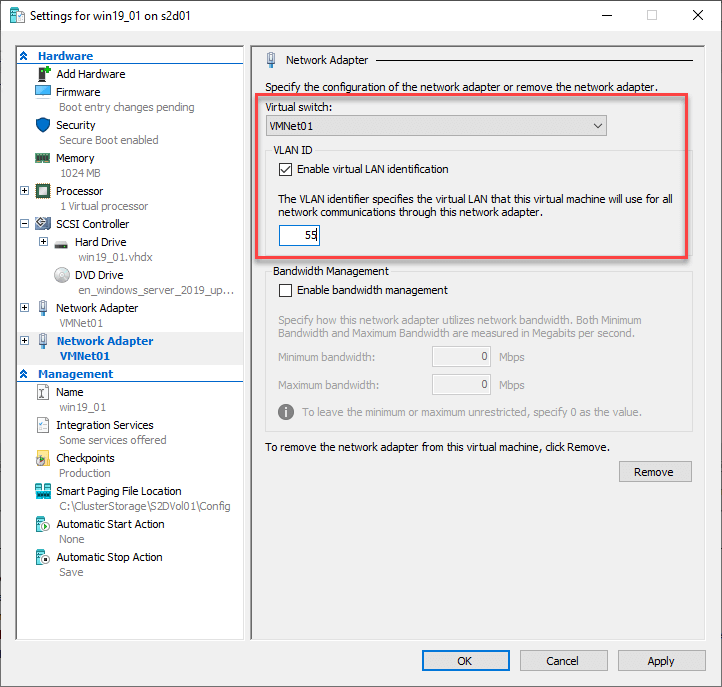
The cluster network is an important part of the Windows Failover Cluster configuration as it allows a dedicated connection for cluster traffic. For the guest cluster, I am simply adding a new virtual NIC adapter with a VLAN tag dedicated to cluster traffic.
Once the new network adapter is added to the guest VM used for guest clustering, the connection can be addressed with a dedicated IP address to be used for cluster traffic. Keep in mind, the underlying physical network switch will need to have traffic tagged for the ports uplinking the physical Hyper-V hosts managing the guest cluster virtual machines.
Install Windows Failover Clustering Feature on Guest Cluster VMs, Test and Build the Cluster
Next, we need to install the Windows Failover Clustering Feature on Guest Cluster VMs. This is a simple PowerShell one-liner to install the Feature and the Management Tools:
- Install-WindowsFeature -Name Failover-Clustering -IncludeManagementTools
This will need to be run on all the guest cluster virtual machines to install the feature. A reboot will be required as well.
After the reboot of both the guest virtual machines that will participate in the guest cluster, you can test the cluster for viability.
- Test-Cluster < node1 >,< node2 >

To actually build the cluster, run the command:
- New-Cluster -Name < cluster name > -node < node 1 >,< node 2 > -staticaddress < Cluster IP Address >

You should now be able to connect to the guest cluster with the Failover Cluster Manager.

Configuring Anti-Affinity for Guest Cluster Virtual Machines
You want to ensure the hosts that make up the guest cluster are separated onto different physical Hyper-V hosts. This is to make sure that if a physical Hyper-V host goes down, it will only take down one of the guest cluster virtual machines. This is easily configurable via a few lines of PowerShell code.
Here, we populate the AntiAffinity Class Name with a custom value and assign it to both virtual machines.
$GuestClusterAntiAffinity = New-Object System.Collections.Specialized.StringCollection
$GuestClusterAntiAffinity.Add(“Separate Guest Cluster Nodes”)
(Get-ClusterGroup –Name win19_01).AntiAffinityClassNames = $GuestClusterAntiAffinity
(Get-ClusterGroup –Name win19_02).AntiAffinityClassNames = $GuestClusterAntiAffinity

Checking the Anti-Affinity rules set up for each cluster group (virtual machine).

Now, both virtual machines should effectively stay separated in the parent Hyper-V cluster they are running on.
Concluding Thoughts
While somewhat detailed, the steps to create Hyper-V guest cluster configurations running under a parent Hyper-V environment are fairly straightforward. All of the details that you need to consider with a physical Windows Failover cluster are involved with the “nested” guest cluster configuration. This includes the requirements for shared storage, cluster network, etc. The benefits as described include higher availability to applications hosted in the Hyper-V environment. With the guest cluster configured, applications will have zero downtime as the application will failover between guest cluster nodes inside the Hyper-V environment. With the Anti-Affinity rules, you ensure the guest cluster nodes are always running on separate Hyper-V hosts to prevent taking down all resources with a single parent host failure.
Related Posts:
Hyper-V Guest Clustering – Part 1 – Overview and Requirements
Hyper-V Guest Clustering – Part 2 – Steps to Create a Hyper-V Guest Cluster
Beginner’s Guide for Microsoft Hyper-V: How to Create Hyper-V Cluster – Part 15
Hyper-V High Availability and Failover Clustering
Hyper-V Cluster NIC Teaming
Follow our Twitter and Facebook feeds for new releases, updates, insightful posts and more.


Leave A Comment