
Azure cloud storage provides many great features and capabilities for organizations storing critical data. Like other cloud storage providers, Azure blob storage has tiers of storage that can be used to store different data types more cost-effectively. Adding automation to these tiers to transition data between them adds extra value. Understanding how to automate and transition your data using lifecycle policies in Microsoft Azure is also covered on the AZ-104 exam. Let’s look at configuring blob lifecycle management in Azure cloud storage.
What is a Lifecycle Management policy?
The Azure Blob storage lifecycle management policy is a way to use automated rules to transition blob data from one tier of Azure storage to another. You can also use the lifecycle rules to expire data once it reaches the end of the data lifecycle.
First, the lifecycle policy is applied to the base blob, and then, optionally, it is applied to the blob versions and snapshots.
Rules define actions
The rules you configure with the lifecycle policy define distinct actions to take on certain conditions being met. The following are the rule actions you can take depending on the condition met:
- Days since the Azure blob was created
- Days since the blob was modified
- Days since the blob was accessed (this depends on the enable last access time tracking being turned on)
The action is carried out on the specified blob storage based on these conditions being met and showing as true.

Real-world example
A common real-world example of the lifecycle policy is moving a blob from the hot tier storage to the cool tier storage if the modify date is over 30 days.
This means that the rule action will move the Azure Blob 30 days after it has been modified.
Prerequisites
You need to be on a V2 storage account. If you are not, you won’t see the option for Lifecycle management. You will also see this informational message under the storage account settings configuration.
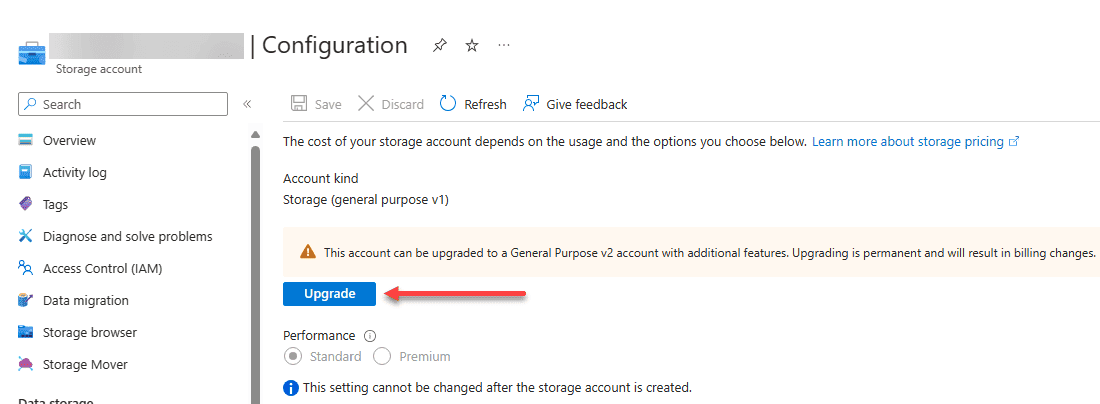
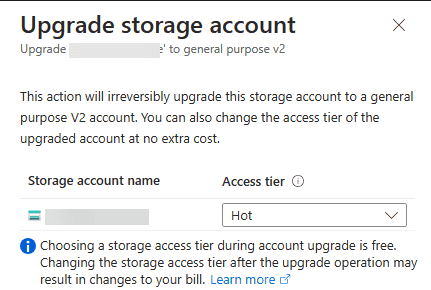
Click upgrade, select the access tier, check the “I agree” box, and confirm the upgrade.
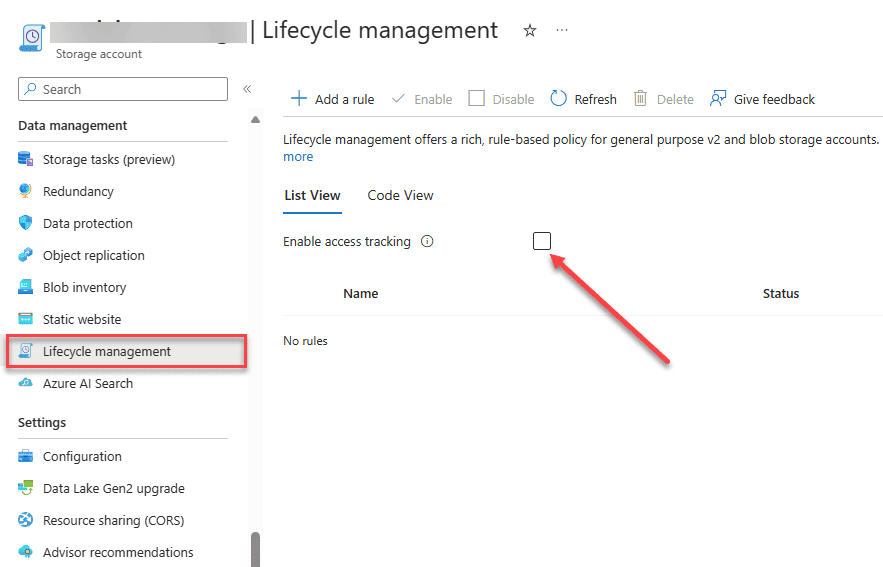
Enabling access time tracking
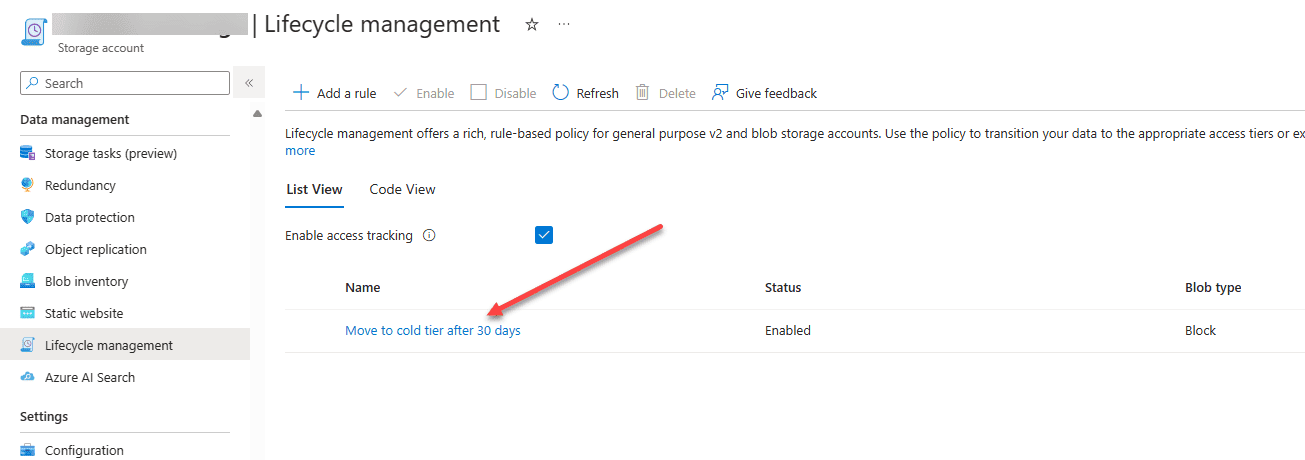
Let’s first look at the required enablement of access time tracking. This feature is needed to execute a rule action for “days since the blob was accessed” to move the storage to a different tier. Once you have upgraded the storage account to a “v2” storage account (if needed), you can then navigate to your storage account Data management > Lifecycle management and then check the box for Enable access tracking.
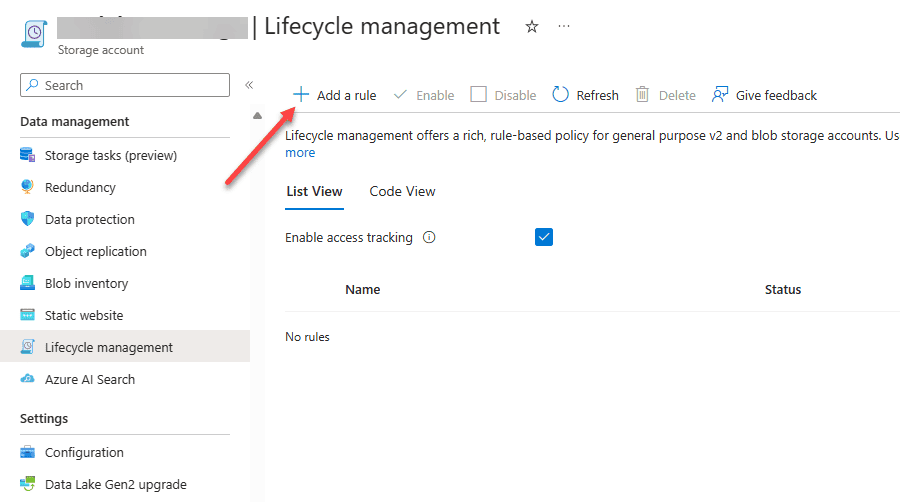
Adding lifecycle management rules
Navigate again to the lifecycle management menu and click the + Add a rule link.
It will launch the Add a rule wizard. You will need to fill in the Rule name and configure the rule scope, blob type, and blob subtype.
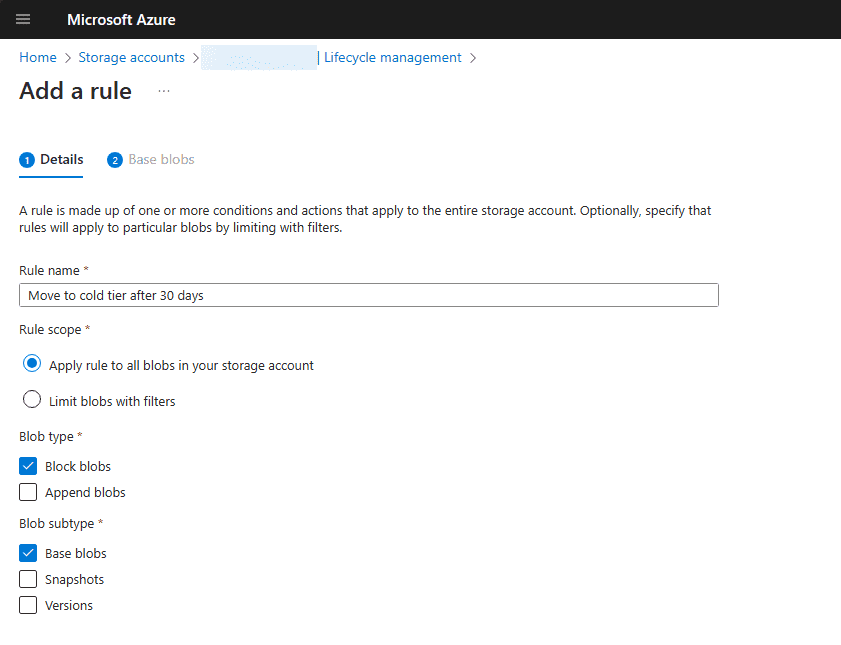
On the second step, you configure the base blobs settings and what you want the rule action to do. First, you will see the option for Base blobs and the choices are:
- Last modified
- Created
- Last accessed
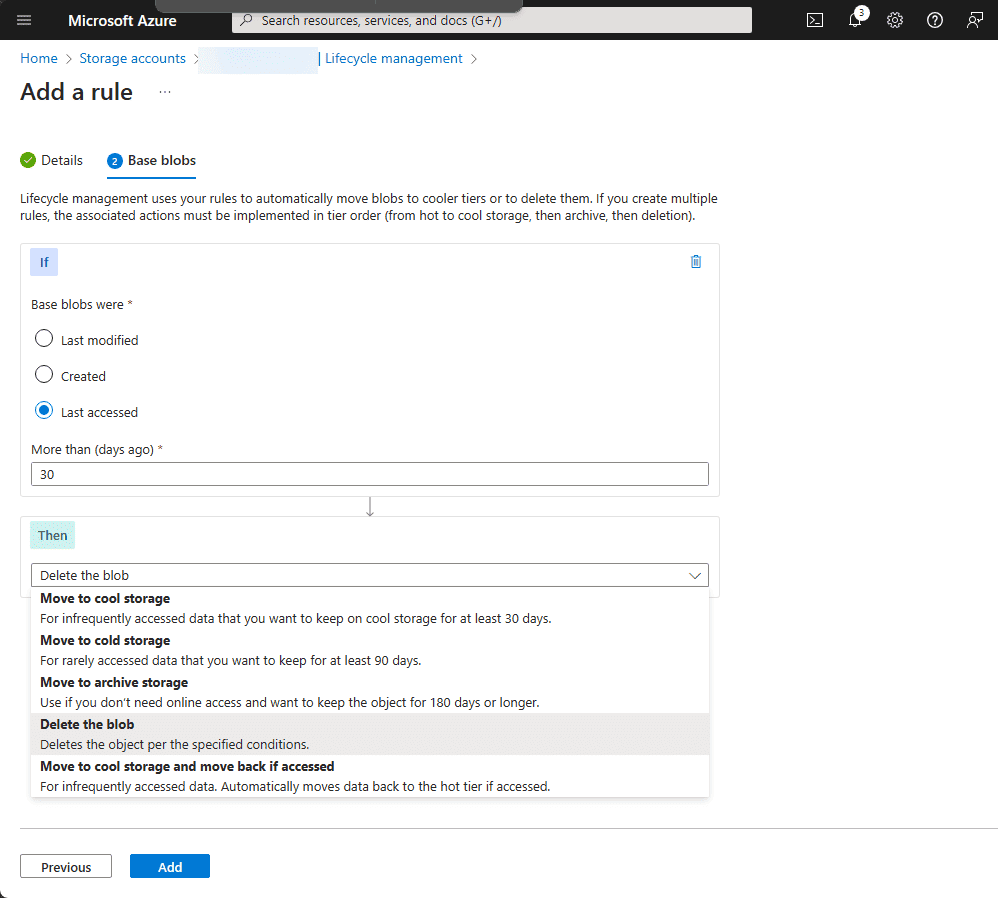
Below, we have chosen last accessed and entered our number of days. Then, we configure what we want the rule action to do:
- Move to cool storage
- Move to cold storage
- Move to archive storage
- Delete the blog
- Move to cool storage and move back if accessed
Make your selection and click add.
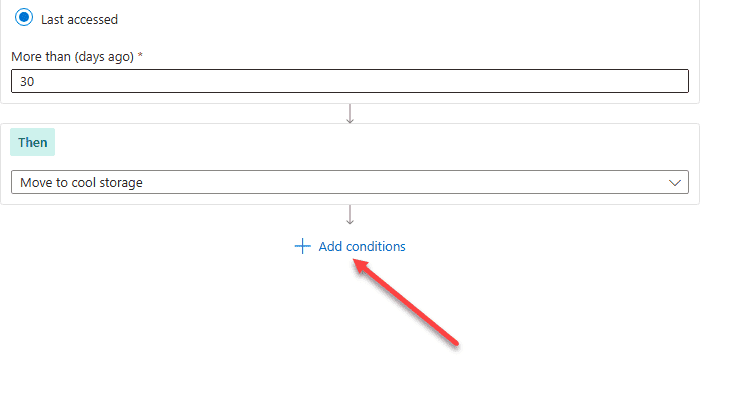
As a note, you can also stack conditions. Click the “+” sign to add additional logic.
Once you have the condition configured as you want, click the Add button. You will then see the new rule action listed in your lifecycle management for the storage account.
Wrapping up
Azure lifecycle management for blob storage allows organizations to configure and use Azure blob storage even more cost-effectively. Moving infrequently accessed data to cool or cold storage can save on storage costs while keeping frequently accessed data on the most performant hot tier. Be sure to understand lifecycle management, use cases, and how this is configured for the AZ-104 exam.
Read More:
Microsoft Azure Administrator: AZ-104: Configure Snapshots and Soft Delete for Azure Files – Part 34
Follow our Twitter and Facebook feeds for new releases, updates, insightful posts and more.

Leave A Comment