Introduction:
In our previous blog “A Beginners Guide to Microsoft Team – Part 1“, we discussed how to create a Team, a Channel, and make other people join a Team in Microsoft Teams.
In this Part 2 blog, we will look into how to use Microsoft Teams to work effectively and collaborate with your team members. Here we can see various tasks such as how to initiate a conversation with your team member(s), how to start a live meeting, how to schedule a meeting, how to create or upload a file for collaboration, and how to sync with OneDrive contents, etc.
Task 1: Starting a conversation with Team members
When you create a Microsoft Team, there will be a “General” channel. It is the first and default channel.
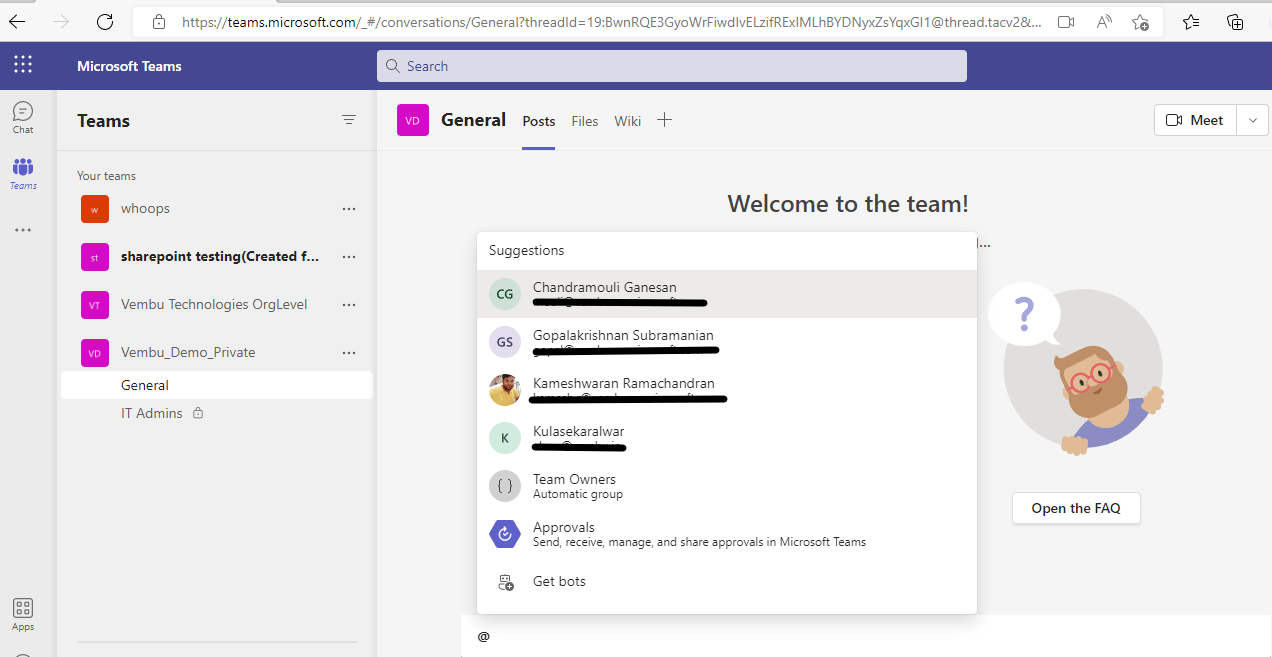
This “General” channel will be the common place where you start the conversation with the members of that channel. On clicking the “New conversation” button available on the lower left side of the channel page, one can start conversations with the team members.
You can also pick a particular member by choosing the @ symbol to mention the person in the conversation. During the conversation, you can use emojis, giphy from the gallery, stickers, and even insert a link to Microsoft Stream, a video-sharing service. All your conversations will appear on the “Posts” tab of the channel.
Task 2: Create, Upload files or Sync files from OneDrive for collaboration
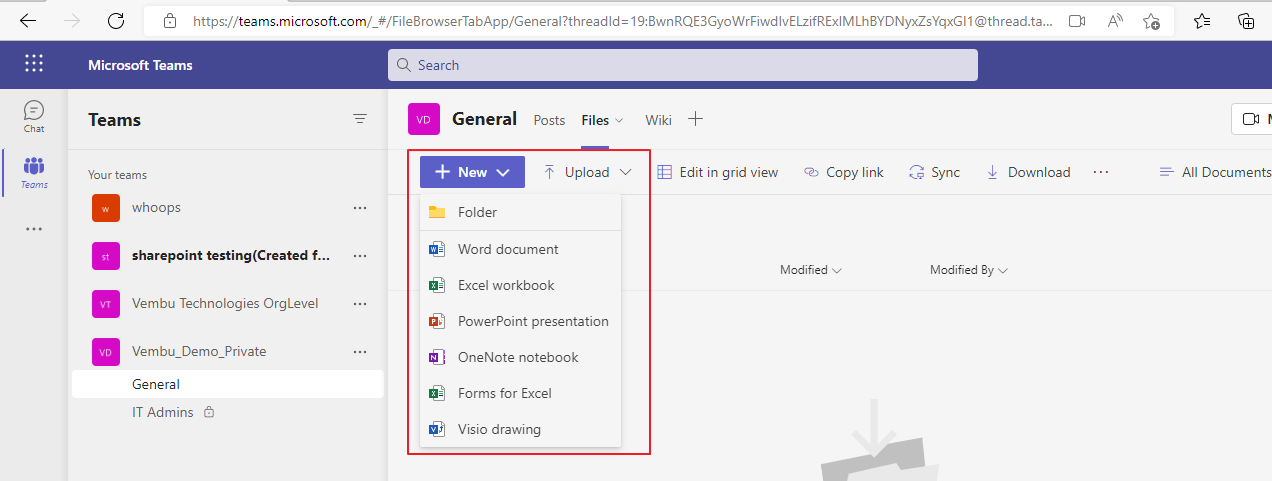
Any team member can create files or upload files from his computer, and it is stored on Team’s drive. You can create a new Word document, Excel workbook, PowerPoint presentation, OneNote notebook, Forms for Excel, and Visio drawing.
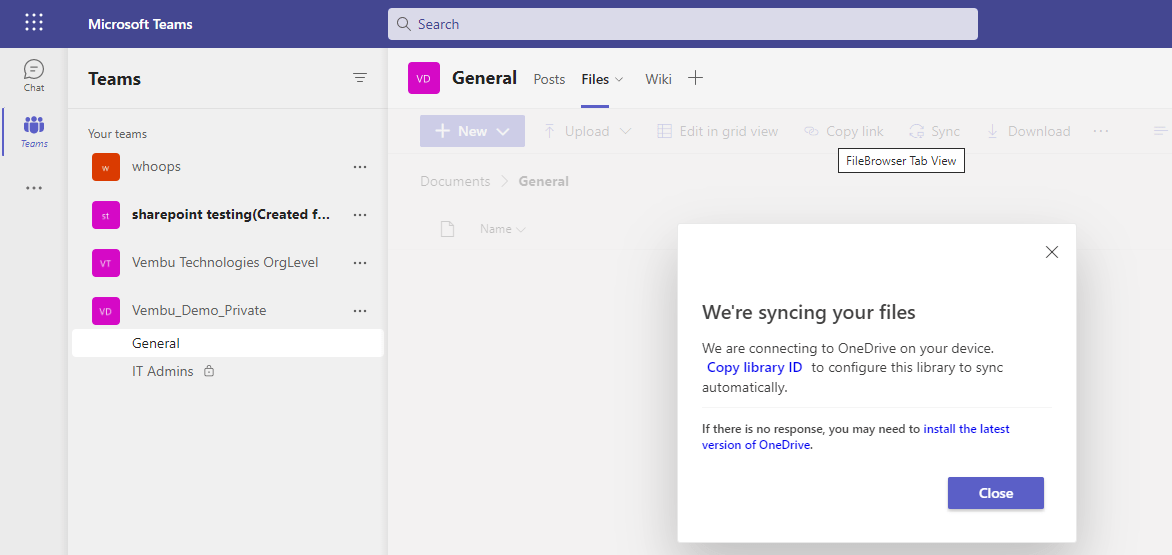
You can also sync the OneDrive files & folders content to the Team drive for collaboration. On clicking the “Sync” button, the Team’s portal connects your M365 OneDrive, after providing the OneDrive account credentials, the files will be synced to the Team Drive.
Task 3: Instant audio & video meetings with team members
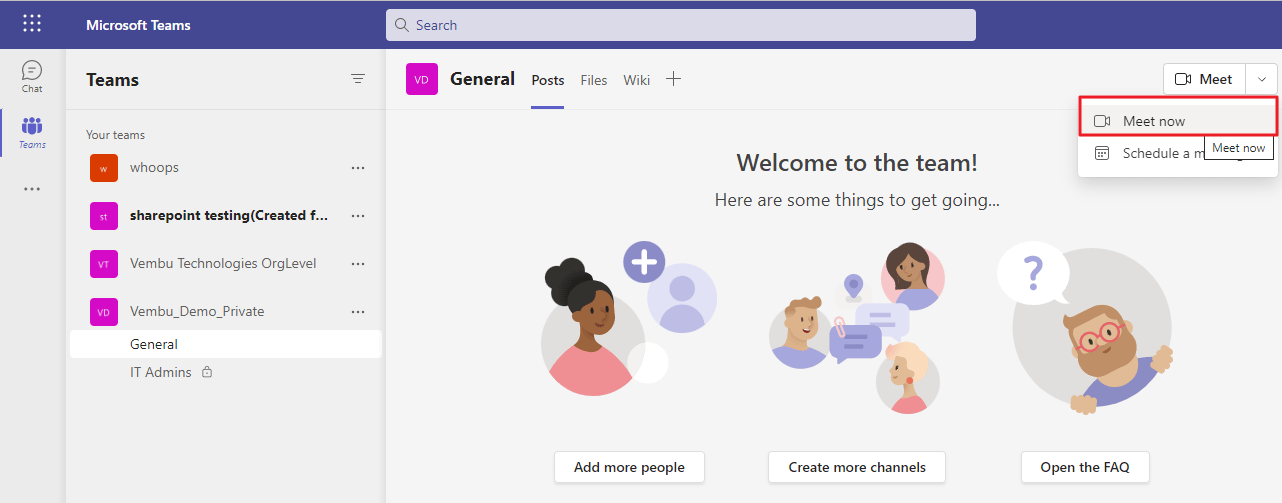
You can initiate an on-demand instant meeting while doing conversations with the members in the channel. For this, use the drop-down menu on “Meet” (available in the top right corner) and choose “Meet Now”.
A new Microsoft Team meeting window will open in a new browser tab, and your default audio & video device (usually your laptop webcam & headphone device) will be used for voice and image capturing. Here you have the provision to camera off & mute your microphone. Even you have the option to change the background of your sitting place.
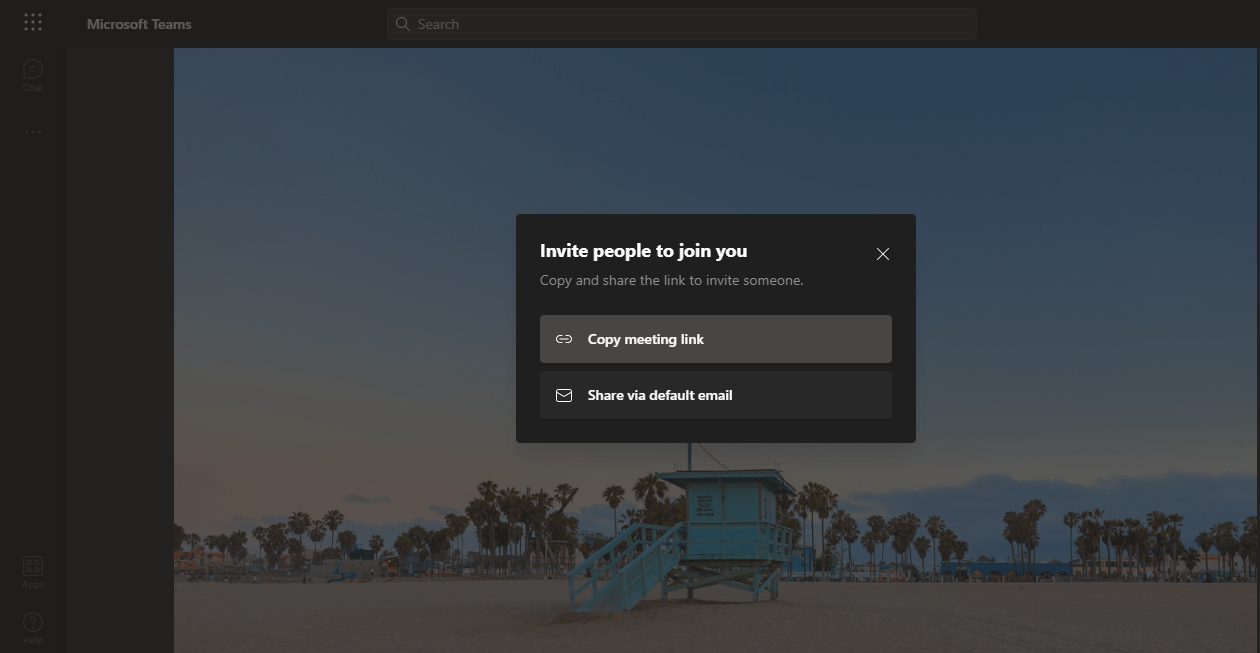
Once you click the “Join now “ button, you are ready to host the meeting, and you can invite the people to join the video meeting. You can either copy & share the meeting through the link or can invite via email.
After the meeting, you will be able to download the attendance report in the “Posts” tab.
Task 4: Schedule a meeting with your team members
You can schedule a meeting in Microsoft Team by choosing “Schedule a meeting” from the drop-down “Meet” menu. A new window will open, and the user should provide details about the meeting such as a name for the meeting, users to be added to the meeting, and the content for the email invite. Below screenshot shows a sample video meeting sent to the two users.
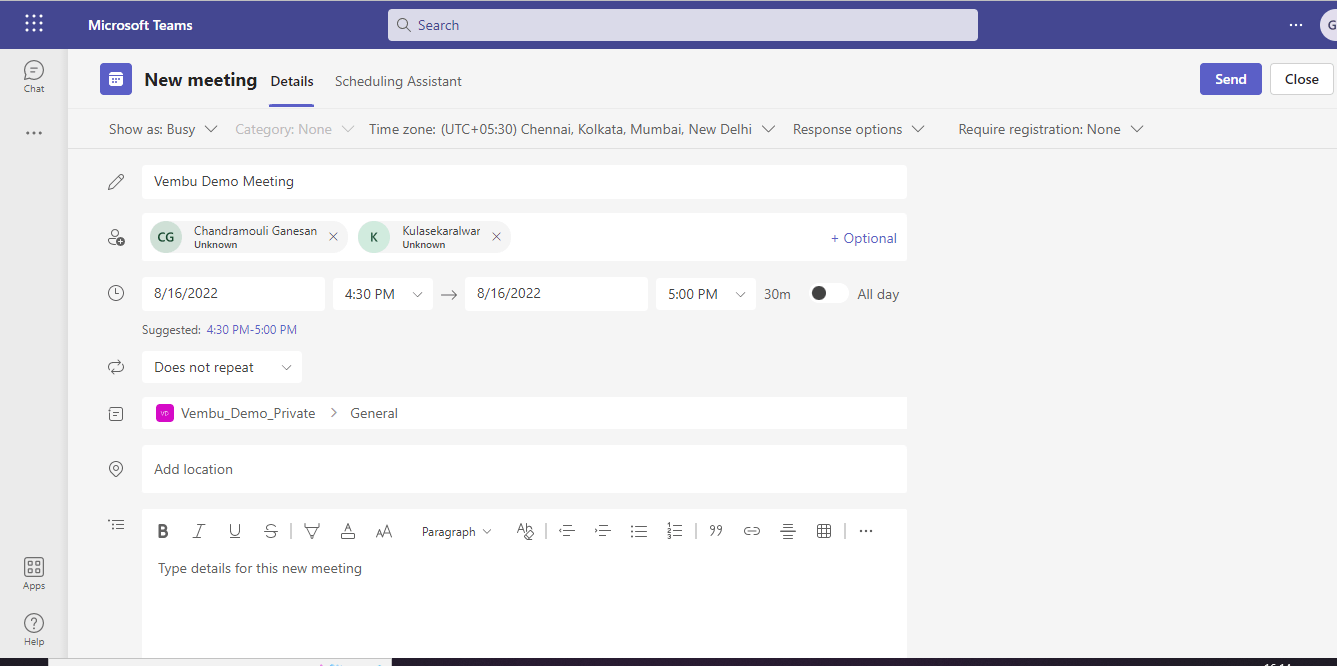
Also, you can provide the Date and time of the meeting and the meeting frequency. It can be of Only once, Daily at the given time, on Weekdays, Monthly, or Yearly. Here “Does not repeat” means the meeting happens only one time. Click “Send” to invite your team members.
Task 5: Creating a Wiki in Microsoft Team
Microsoft Teams has an internal Wiki tool that allows you to manage and collect information seamlessly. It is a smart-text editor that doubles the communication space machine where you draft, edit and chat all in one place.
Microsoft Team wiki has two parts namely page and section. Users have to provide a name for the Wiki and can create multiple sections under it. It is a knowledge base for internal users, and it can vary according to the nature of the company.
Task 6: Adding Tabs to your channel
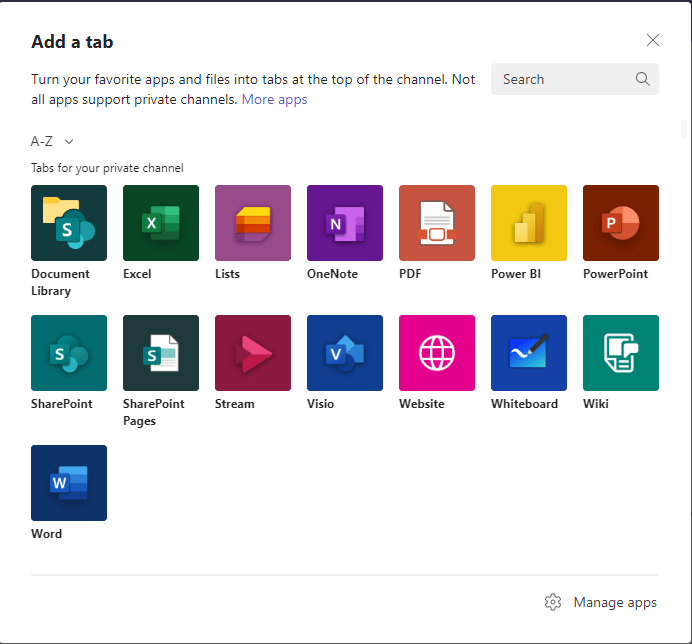
Tabs are Teams-aware web pages embedded in Microsoft Teams. It is a user-friendly option to segregate the user’s collaboration activities easily. Users can include custom tabs with the frequently used app to embed their own web content in the Team channel.
According to the Microsoft documentation, here are lists of tab features in the Team channel.
- If a tab is added to an app that also has a bot, the bot is also added to the team
- Awareness of Microsoft Azure Active Directory (Azure AD) ID of the current user
- Locale awareness for the user to indicate language that is en-us
- Single sign-on (SSO) capability, if supported
- Ability to use bots or app notifications to deep-link to the tab or to a sub-entity within the service. For example – an individual work item
- The ability to open a task module from links within a tab
- Reuse of SharePoint web parts within the tab
The below screenshot shows the available apps and files that turn into a tab at the top of the channel.
Task 7: Working with Microsoft Team General settings
Users can access more advanced settings/features such as privacy settings, notification settings, setting app permissions, changing language and theme settings here.
On the top right corner of your team page, you can see a gear icon, on clicking it opens the settings page. Here are the options available:
General – Here you can choose the theme for your team page, choose chat density, change language settings for apps and keyboard, schedule out of office, set automatic replies, and enable suggested replies in chat.
Accounts – Users can manage and sign out their Microsoft 365 accounts here.
Privacy – Here you can set the “do not disturb” status, can block a user for chatting, set read receipt for chat messages, and enable to participate in Team’s survey
Notifications– Here you can set email for any missed activities, enable or disable the notifications for chat, meetings, calls, etc.
App permissions – Here you can enable or disable the media access for the applications Excel, OneNote, PowerPoint, and Word. Here the media access includes camera, speakers, and microphone attached to your devices.
Captions and Transcripts – Users can enable or disable the settings for Transcription, which automatically identify the user in meeting captions and transcripts.
Files – Settings for file opening preference. When you open the Word, Excel, and PowerPoint files, you can choose the opening preference either in the Microsoft Team apps itself or in a separate browser window.
Calls – Here you can set the call answering rules, set up a voicemail, and type of ringtone.
Conclusion:
Microsoft Teams is designed to provide an easier way for small groups of people to communicate and collaborate. A product like Teams is not just meant for collaboration but also to get your work done in a smarter way. Microsoft Teams offer everything that a business team member wants, starting with free real-time chat-based communication, document sharing across peers, providing a secure online meeting room, etc. With a moderate knowledge of management skills, one can easily set up and thrive the skills easily.
Follow our Twitter and Facebook feeds for new releases, updates, insightful posts and more.


Leave A Comment