This article will guide you in creating different types of Virtual Switches on your Hyper-V host and configuring VMs to use the newly created Virtual Switches according to your requirements. The steps provided apply to Windows Server 2022, Windows Server 2019, and Windows Server 2016.
Hyper-V Virtual Switches: Network Management for Your Virtual Machines
Running multiple virtual machines (VMs) on a Hyper-V server requires a way for them to communicate with each other and the outside world. That’s where Hyper-V virtual switches come in. Think of them as virtual network hubs that connect your VMs and manage network traffic.
What is Hyper-V Virtual Switch Manager?
Imagine a central hub controlling how your virtual machines (VMs) talk to each other and the outside world. That’s essentially what Hyper-V Virtual Switch Manager does. It’s a built-in tool in Hyper-V that lets you create and manage virtual switches. These virtual switches act like software-based network switches, connecting your VMs and directing network traffic.
Here’s the key takeaway: Hyper-V Virtual Switch Manager helps you:
- Connect VMs: Allow VMs to communicate with each other for sharing resources or data
- Access External Networks: Give VMs access to your physical network so they can connect to the internet or other devices
- Control Network Traffic: Manage how data flows between VMs and external networks, potentially improving security and performance
Types of Virtual Switches
Hyper-V lets you create virtual switches in three different modes.
- External Switch
- Internal Switch
- Private Switch
External Switch
The External Switch lets your virtual machines connect to the internet and other physical machines on your network.
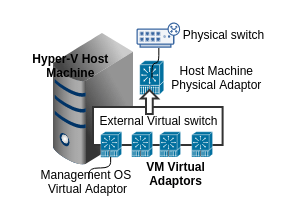
Internal Switch
Instead of connecting VMs to the entire network, an internal switch creates a dedicated connection just between the VMs and the physical machine running Hyper-V. This allows them to communicate directly with each other and the Hyper-V host for management purposes, but they won’t have access to the internet or other devices on your main network.
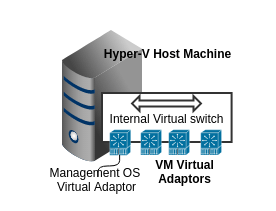
Private Switch:
VMs on a private switch can only communicate with each other. They’re entirely cut off from the physical network adapter, the internet, and even the Hyper-V host machine itself.
Note:
- Private switches are the most isolated option, offering maximum security but also requiring additional configuration for management access
- If your VMs need internet access or communication with the Hyper-V host, consider using an external or internal switch instead
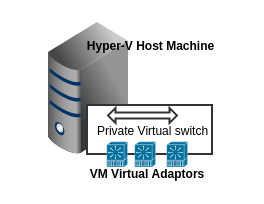
Creating Virtual Switch using Hyper-V Manager
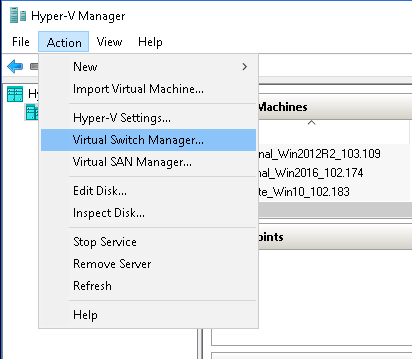
- To create a Virtual Switch, go to Hyper-V Manager and click Action – > Virtual Switch Manager
- The Virtual Switch Manager lets you choose the type of virtual switch you want to create (External, Internal, or Private)
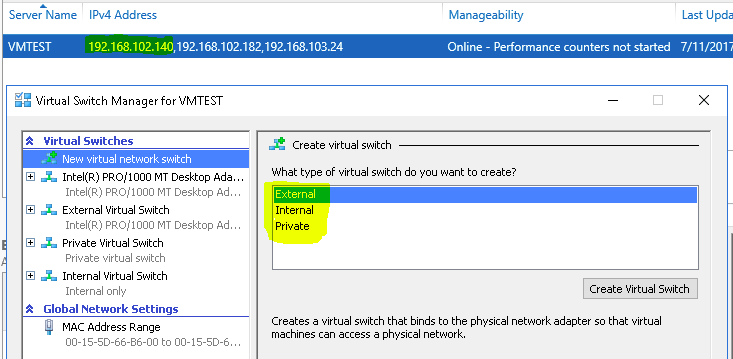
Note: Hyper-V Virtual Switch only supports Ethernet, and does not support any other wired Local Area Network (LAN).
Creating an External Virtual Switch
An External Switch lets virtual machines on your Hyper-V host access other devices on your network, including those within specific VLANs (Virtual Local Area Networks) or on a standard switched network. This essentially gives your VMs internet access and allows them to communicate with other computers.
- On your Hyper-V Manager, click Action -> Virtual Switch. Select External as the virtual switch type and then click on Create Virtual Switch
- Next screen is the virtual switch property page that lets you change the Name of the Virtual Switch, add notes and choose the connection type. Select one of the Network Adapters and Click OK to proceed further
- Saving the new External Switch configuration might cause a temporary network outage due to switch reconfiguration. Click “Yes” to confirm and proceed
- You can see a new virtual switch created under the Virtual Switches section. You can click on the available virtual switches and check their properties
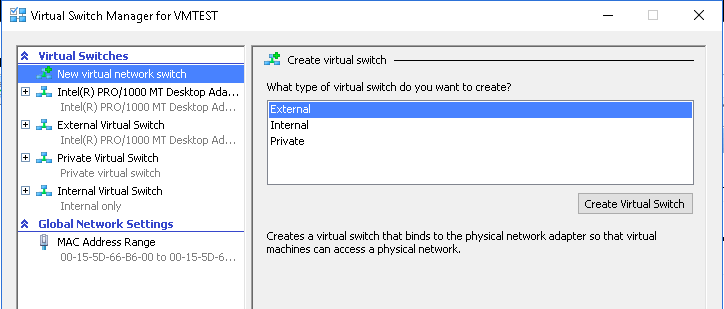
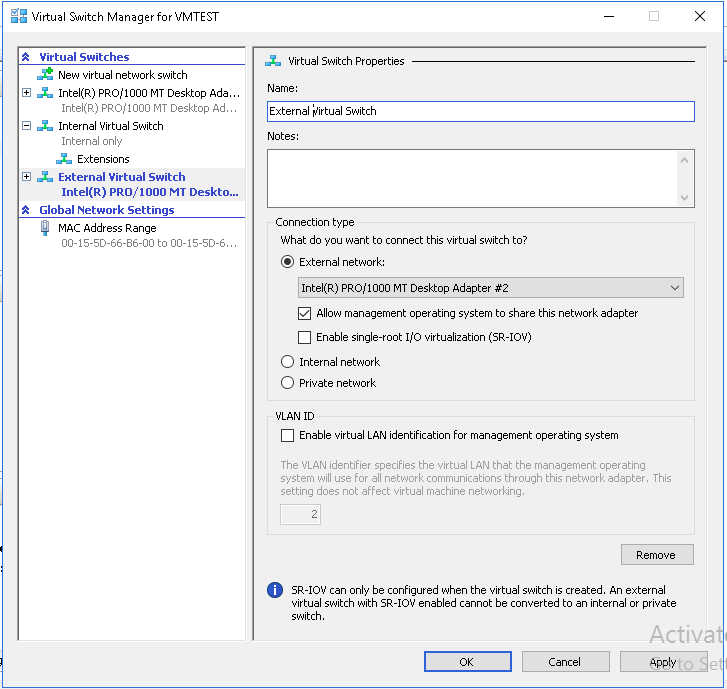
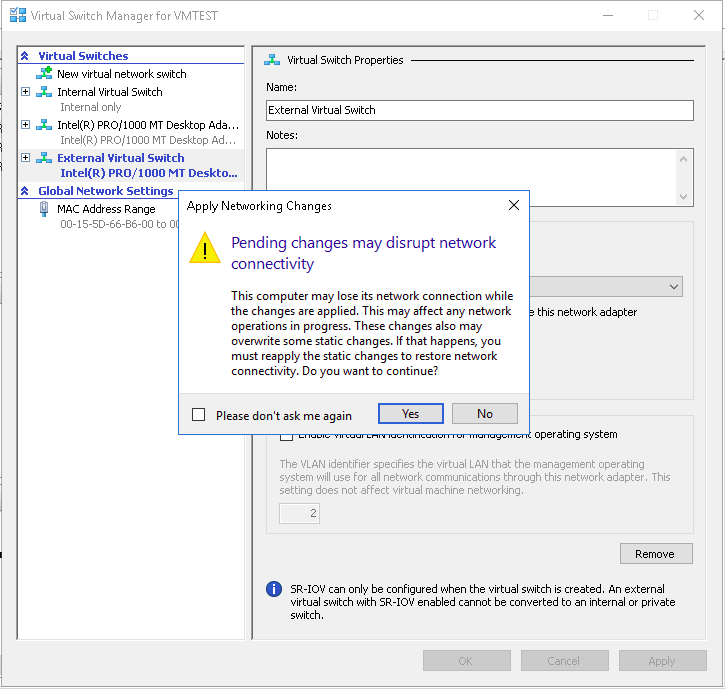
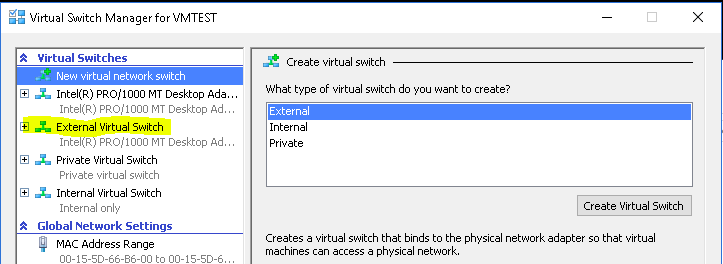
Note: To create an External Switch you must have one dedicated physical Network card in the Host machine.
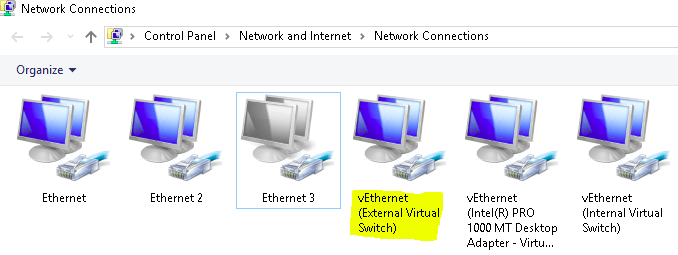
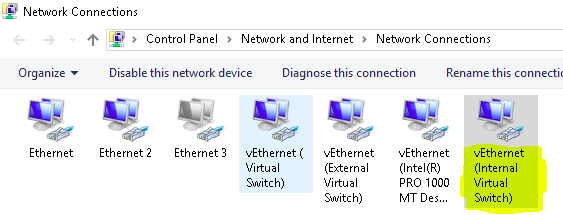
After creating the External Switch, you can see a new virtual adapter created in the Network Connections of your Control Panel.
Configure VM to use External Virtual Switch
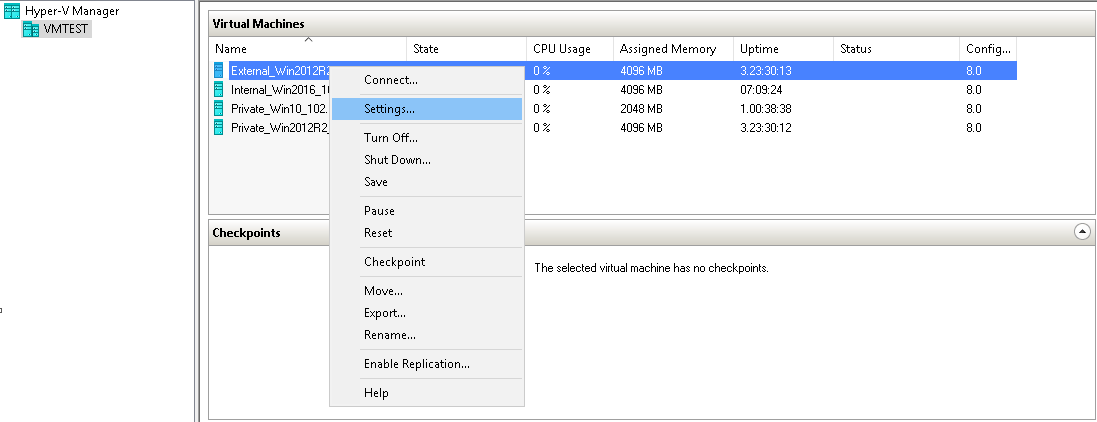
- In Hyper-V Manager, right-click the virtual machine you want to change the network connection for and select “Settings.”
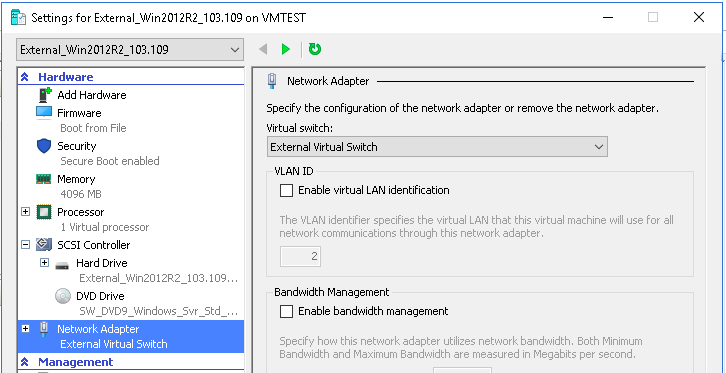
- In the settings page, click on Network Adapter under the Hardware list (left pane). You can see the newly created external virtual switch in the dropdown of the Virtual Switch
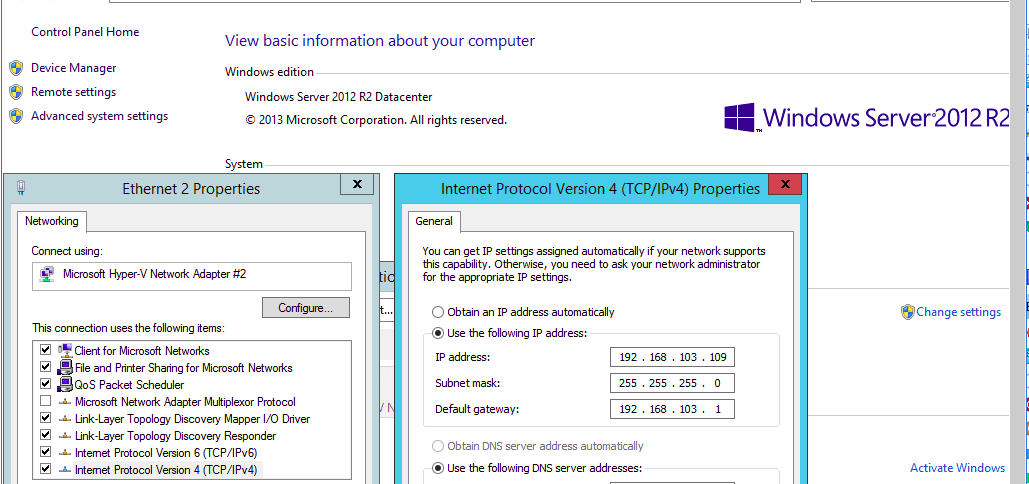
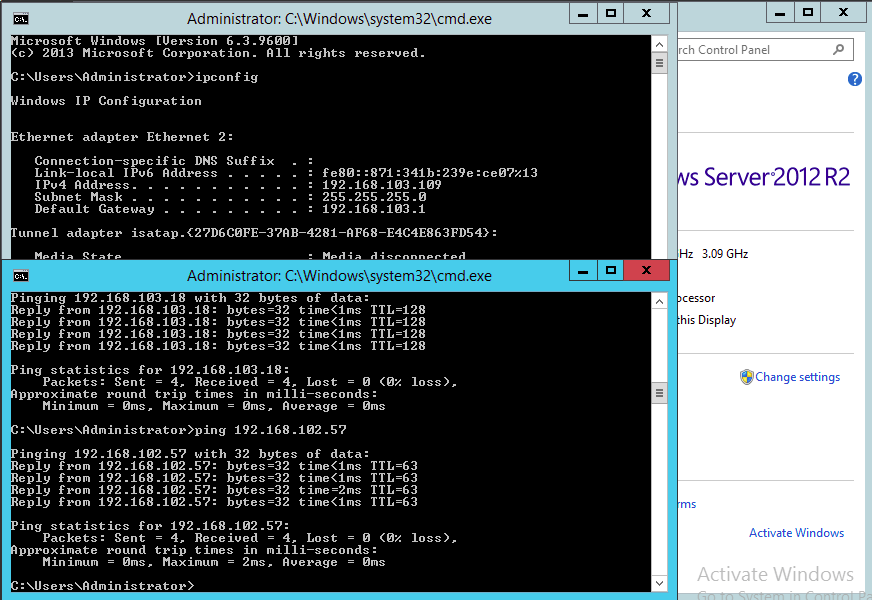
- Now connect to your virtual machine and configure the IP address. In our example, the physical machine IP address is set to 192.168.102.XXX and the VM IP address is set to 192.168.103.XXX
- With the external switch configured, your virtual machine can now access the internet and potentially ping external IP addresses
Creating an Internal Virtual Switch
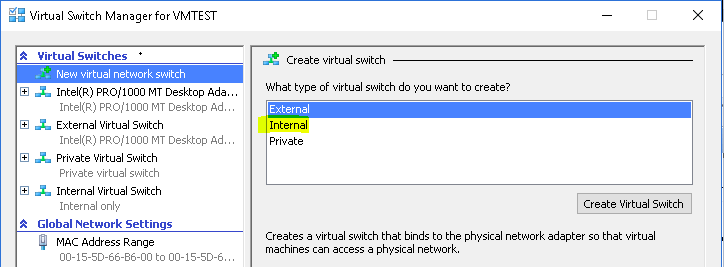
- On your Hyper-V Manager and click on Action > Virtual Switch Manager. Select Internal as the virtual switch type and click on Create Virtual Switch
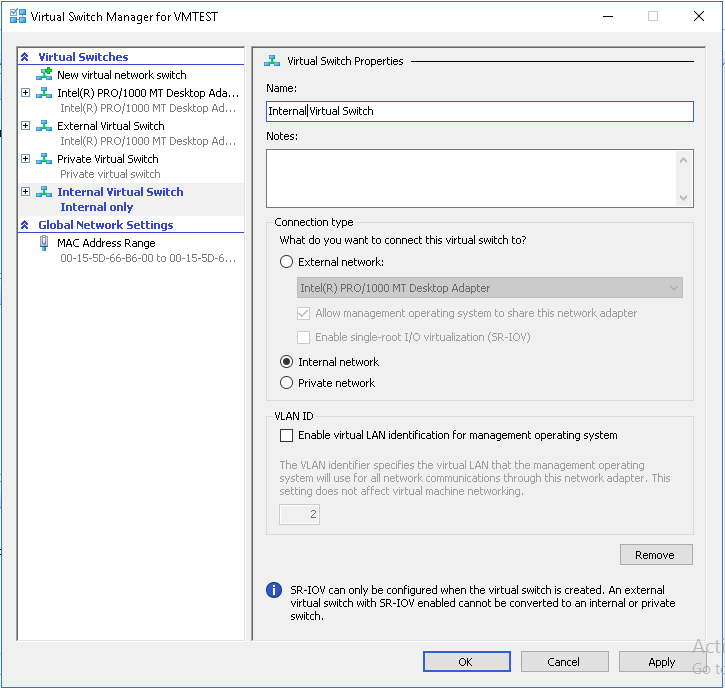
- In the virtual switch property page, you can change the Name of the virtual switch, add notes also choose the connection type. Click OK to create a new internal virtual Switch
- Once you have created the Internal switch, you can now see the new virtual adapter in Network Connections of your physical machine’s Control Panel as below
Configure VM to use an Internal Virtual Switch
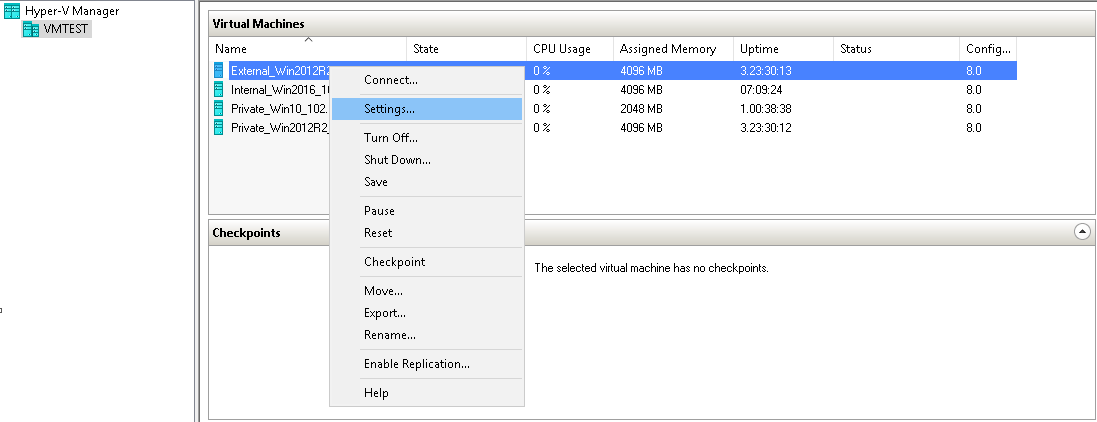
- In Hyper-V Manager, right-click the virtual machine you want to change the network settings for and select “Settings.”
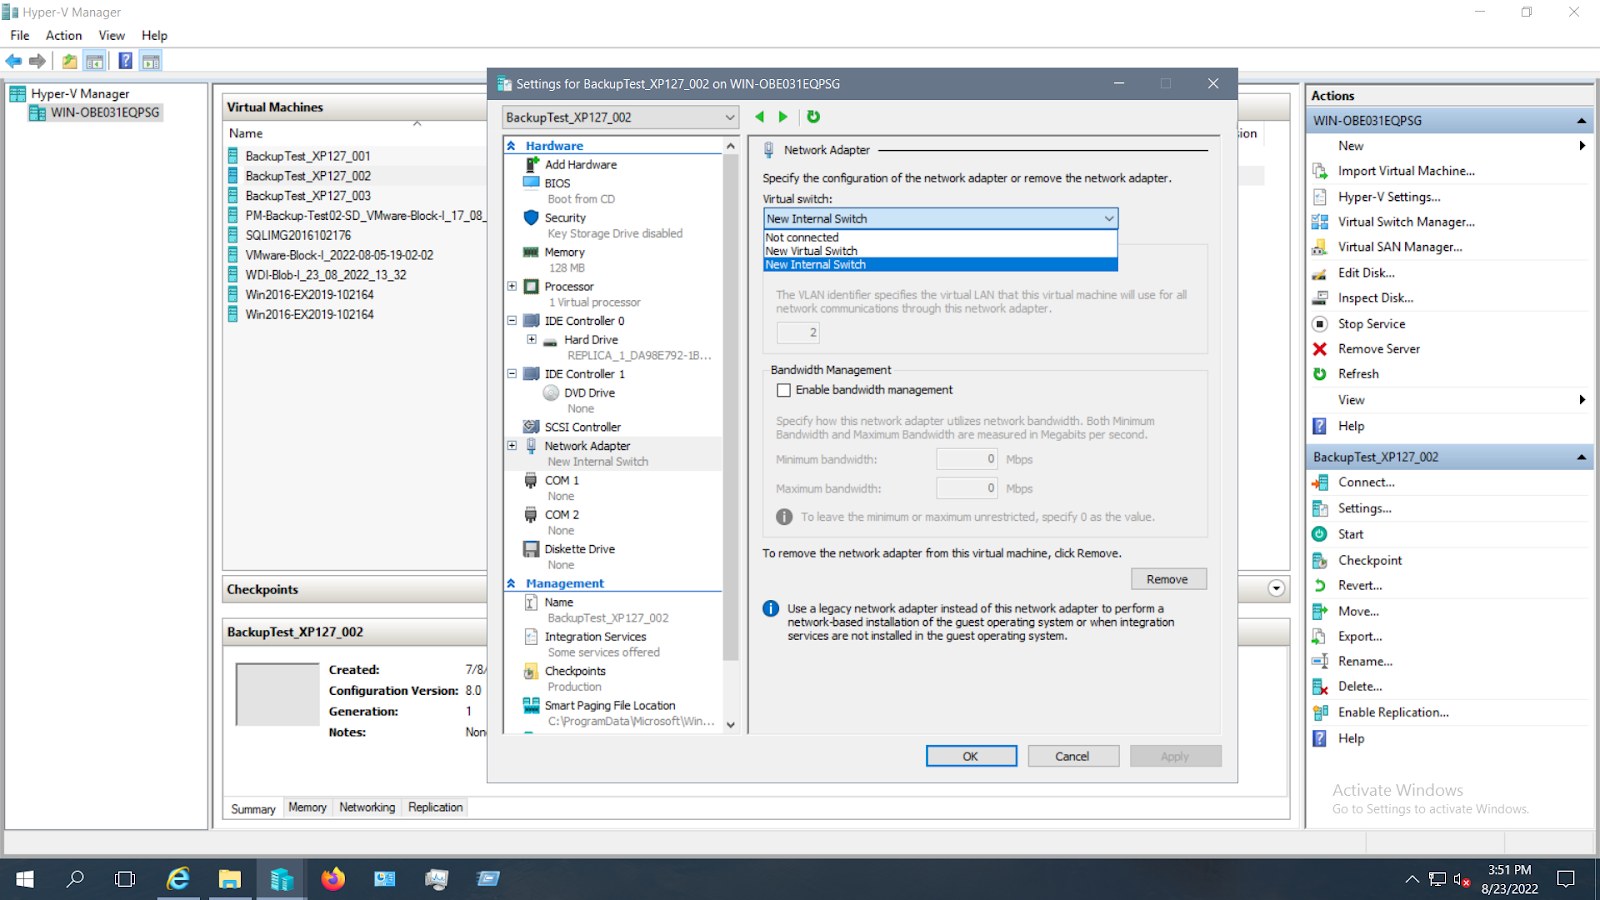
- In the Settings page, click on Network Adapter in the Hardware list (left pane). You can see the newly created internal virtual switch in the dropdown of the Virtual Switch
- For Internal Switch, the IP address of the physical machine’s Network Adapter and VM Network Adapter must be in the same series. In the below example, the IP of the physical machine is 192.168.102.182, and the IP of VM is 192.168.102.174
- In the below screenshot, we are able to ping the VM from Physical Host
Creating Private Virtual Switch:
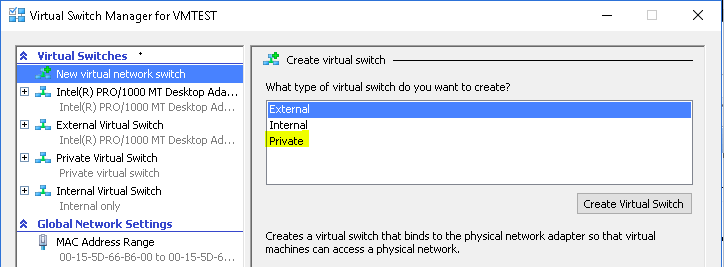
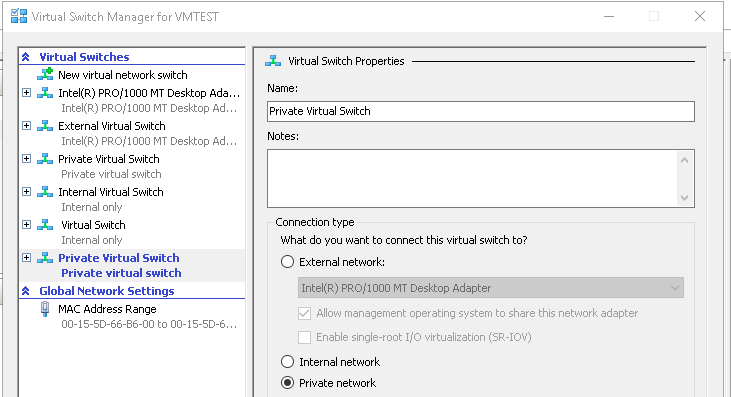
- On your Hyper-V Manager and click Action > Virtual Switch Manager.Select Private as the virtual switch type and click on Create Virtual Switch
- In the virtual switch property page, you can change the Name of the virtual switch, add notes and choose the connection type. Click OK to create a new private virtual Switch
Configure VMs to use Private Switch
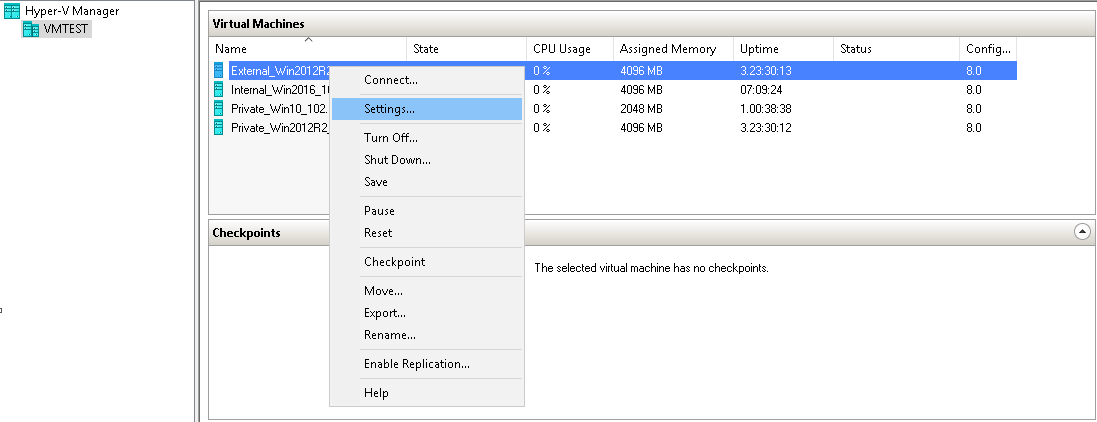
- In Hyper-V Manager, right-click the virtual machine you want to change the network settings for and select “Settings.”
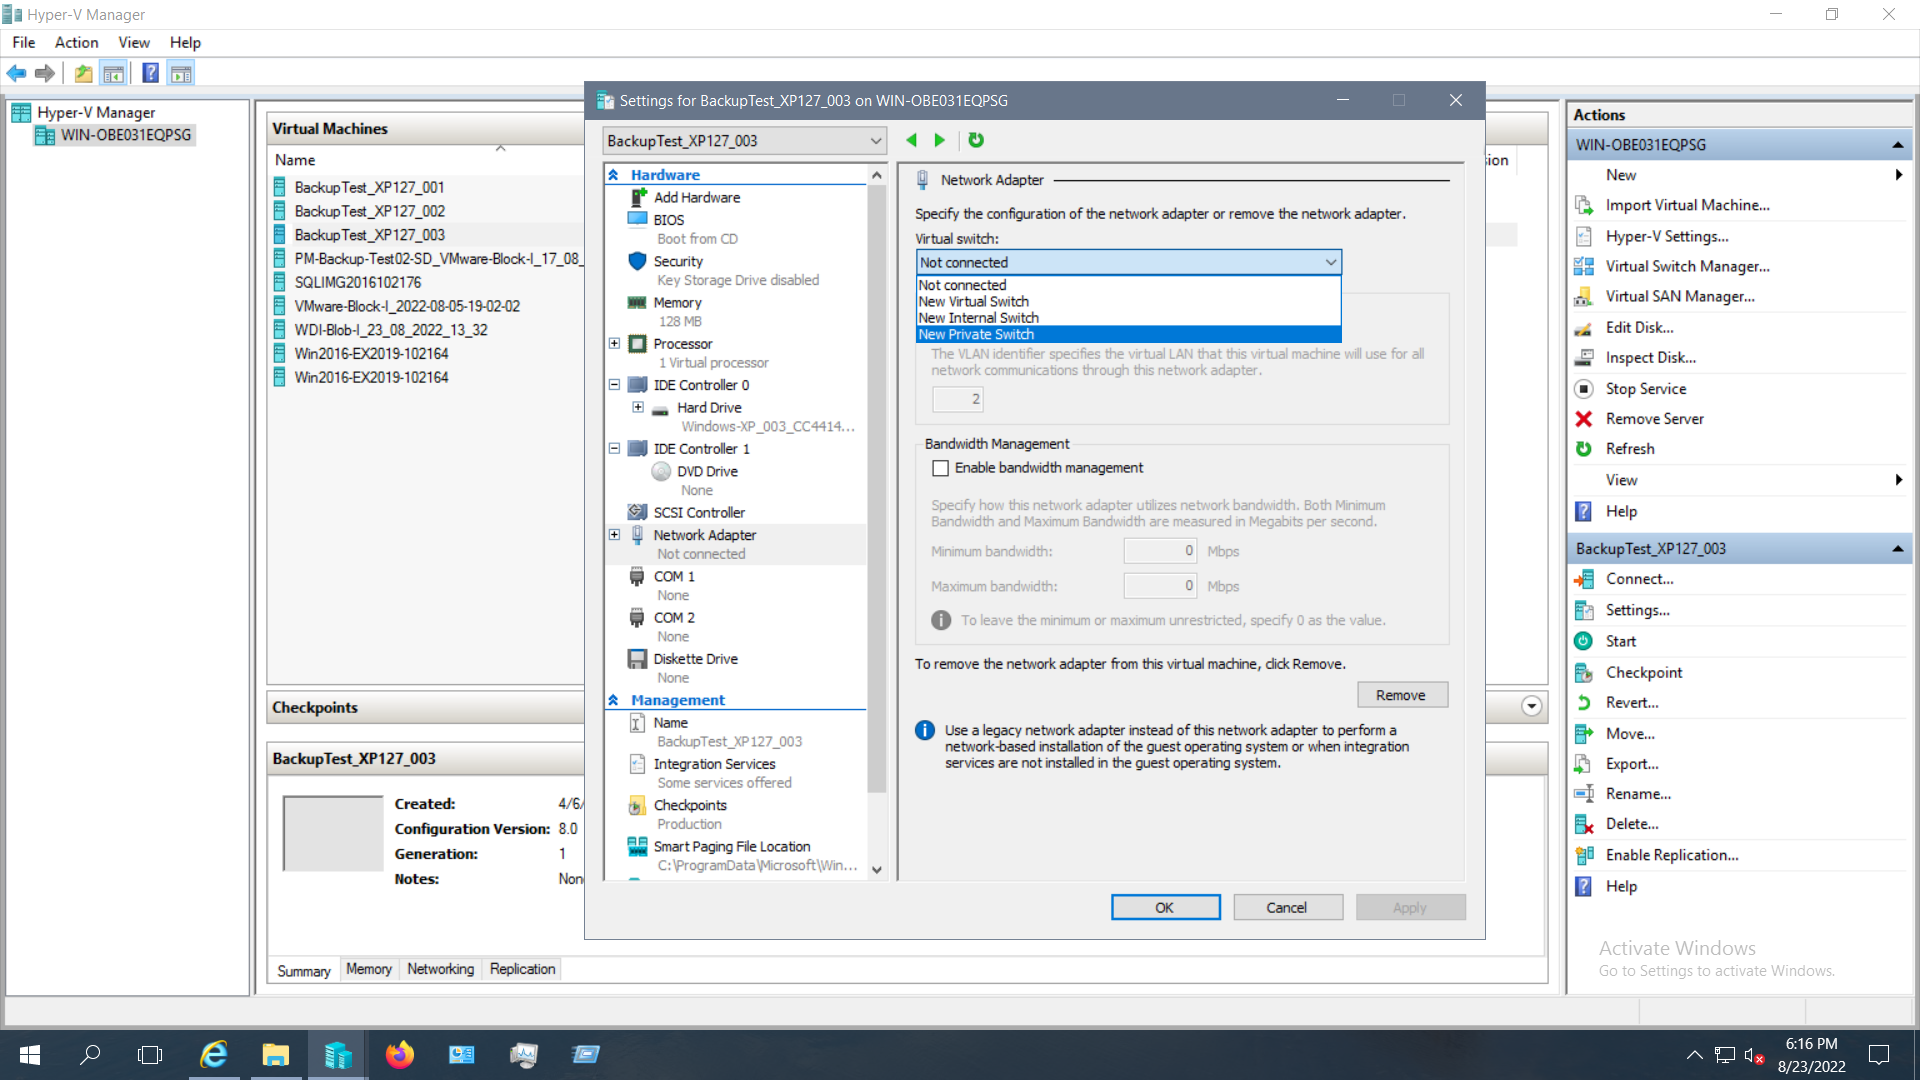
- In the Settings page, click on Network Adapter in the Hardware list (left pane). You can see the newly created private virtual switch in the dropdown of the Virtual Switch
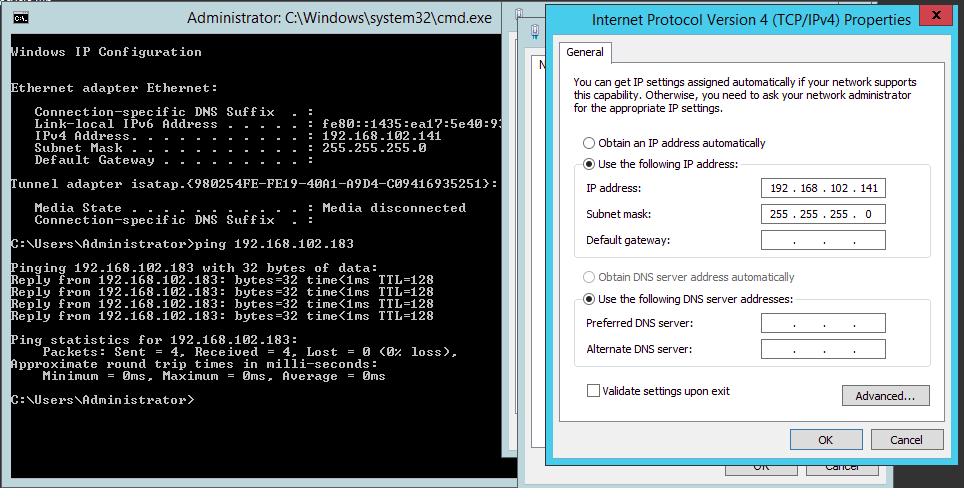
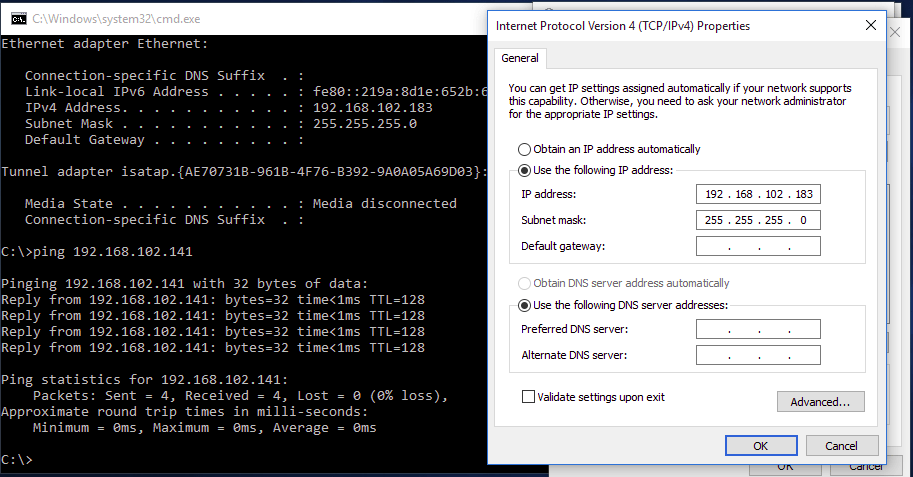
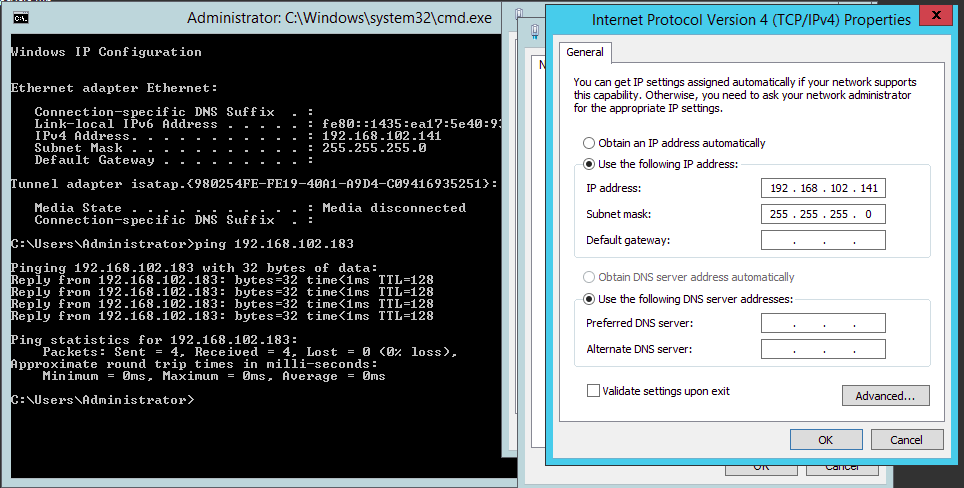
- Here, we have created two Virtual machines to demonstrate the Private Switch configuration.
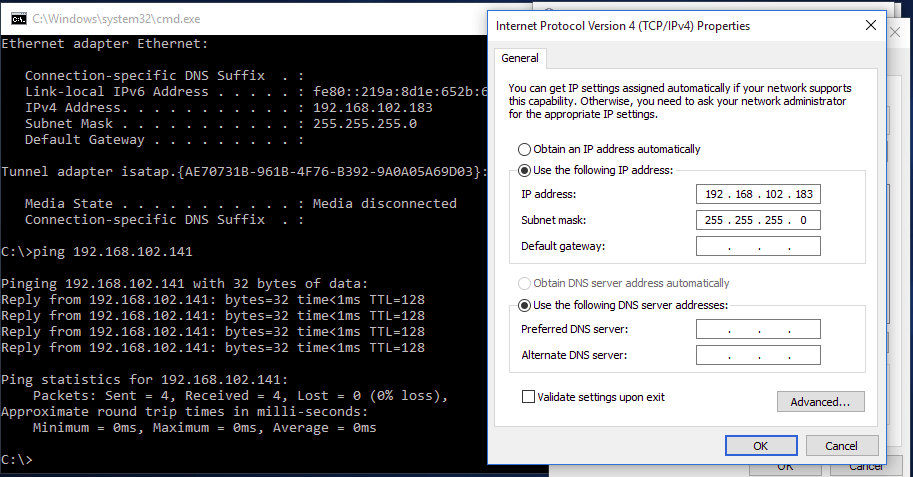
VM1 IP address: 192.168.102.183
VM 2 IP address: 192.168.102.141
As it is a Private Switch configuration, DNS is not required - Once IP addresses are assigned, you are able to ping the IP address of one VM from another
- In the below screenshot, we are able to ping VM1 from VM2
- In the below screenshot, we are able to ping VM2 from VM1
Secure your Hyper-V VMs
with BDRSuite’s reliable backup solution. Start your free trial today and experience complete data protection.
Ready to embark on this captivating adventure? Download BDRSuite today and experience peace of mind with its industry-leading backup solution.
Want to explore more? Unravel the secrets of Hyper-V backup with BDRSuite and discover the power of seamless data protection!
Wrapping up
It is very simple to configure a Hyper-V Virtual switch. With three operational modes and flexible VLAN tagging capabilities, Hyper-V virtual switches offer a customizable solution for managing your virtual network traffic. Explore the different modes (internal, external, and private) to find the best fit for your specific needs.
Follow our Twitter and Facebook feeds for new releases, updates, insightful posts and more.


can i create 2 VLAN using Hyper-V Virtual Machines ( ex. VLAN 10 and VLAN 20)
Thanks for your Comment.
Yes, you can create but you must have two physical nics for the vlan ids accordingly