This is the last part of the article on the Migration of physical machines to the VMware virtual environment.
In the first part of the series, we looked at the basics that need to be understood before migrating your workloads from physical to virtual. In the second part, we looked at VMware’s free migration tool – VMware vCenter Converter Standalone, and how to perform P2V migration using it.
In this last & third part of the series, we’ll look at a powerful solution – Vembu BDR Suite that offers data protection as well as ensures seamless cross-platform migration.
Vembu BDR Suite Overview:
Vembu BDR Suite is a comprehensive backup & DR solution designed to protect the data across physical, virtual and cloud workloads.
Vembu BDR Suite offers:
- Agentless Backup & Replication for VMware VMs
- Host-level backups for Hyper-V VMs on the cluster, SMB & CSV
- Disk-Image Backup for Physical Windows Servers & Workstations
- FIle & Application Backup for Windows, Linux & Mac
- Disaster Recovery – Backup to offsite, cloud & tape
Vembu BDR Suite is available in different editions (Free/Standard/Enterprise) to make it ideal for businesses of all sizes and types.
Vembu BDR Suite Free Edition, exclusively for businesses that couldn’t spend on data protection expenses due to budgetary constraints. This edition contains all the basic features that are necessary for complete data protection and is free forever.
Vembu also offers an exclusive package – Vembu BDR Essentials, specifically for small & medium businesses who wish to protect their data with enterprise-level features but don’t want to spend extravagantly. This package is suitable for businesses with VMware & Hyper-V environments having upto 10 Sockets or 100 VMs.
Along with Backup & Disaster Recovery features, Vembu BDR Suite also supports the migration of your workloads across different hypervisors and platforms. The best thing is, cross-platform (P2V, V2P) and cross-hypervisor (V2V) migration feature is available in all the editions of Vembu BDR Suite.
Now, let’s look at the step by step process of how to perform P2V migration (Physical to VMware environment) using Vembu BDR Suite.
P2V migration with Vembu BDR Suite
Using Vembu BDR Suite, you can download the image of your backed up physical machines in different virtual formats – VHD, VHDX, VMDK, Flat-VMDK and RAW. These file formats are used to convert a physical as a virtual machine.
I’ve tested this by converting one of my physical 2012 SQL servers to VMware Platform and it worked perfectly.
Let’s look at this process in a detailed manner:
Step 1: Download and Install Vembu BDR Suite
Step 2: Perform the image-backup of your physical machine
- Add your physical host providing administrative credentials
- Choose disk/volumes
- Enable App-Aware process, if you have any VSS aware applications – Exchange, SQL.
- Set the scheduling & retention Policies
Check out this video tutorial for a detailed backup configuration.
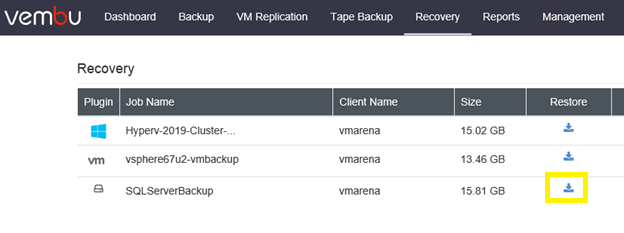
Step 3: Once the backup is complete, navigate to the Recovery tab, Here you can view the available backups.
Click on the restore icon alongside the physical machine backup that you would like to convert as a VM.
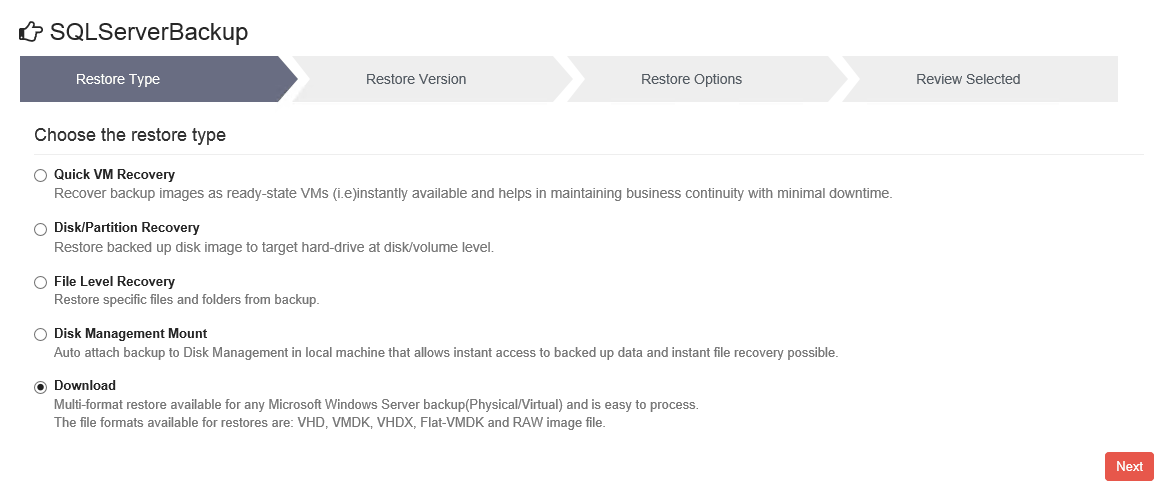
Step 4: Select the restore option – Download and Click Next
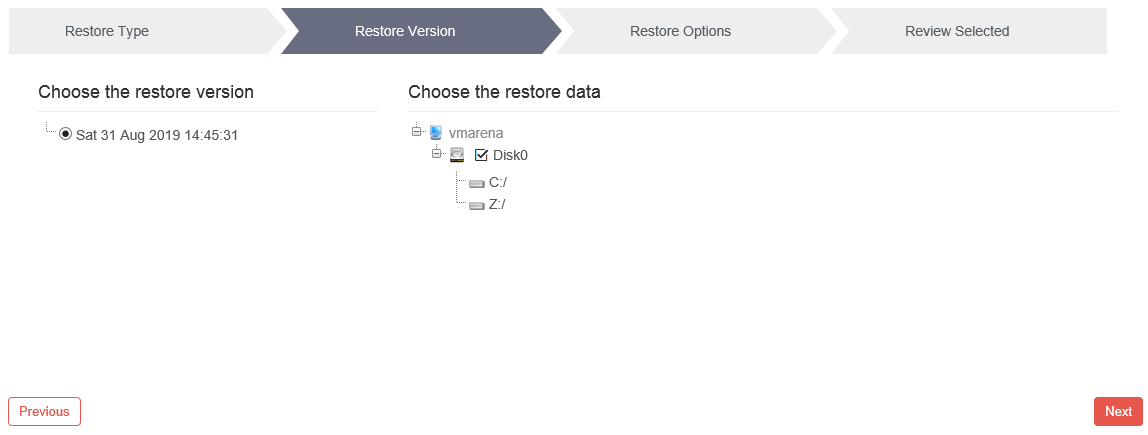
Step 5: Choose the version of backup data you want to download for the migration from the listed restore points and Choose the disks that you want to download, then Click Next
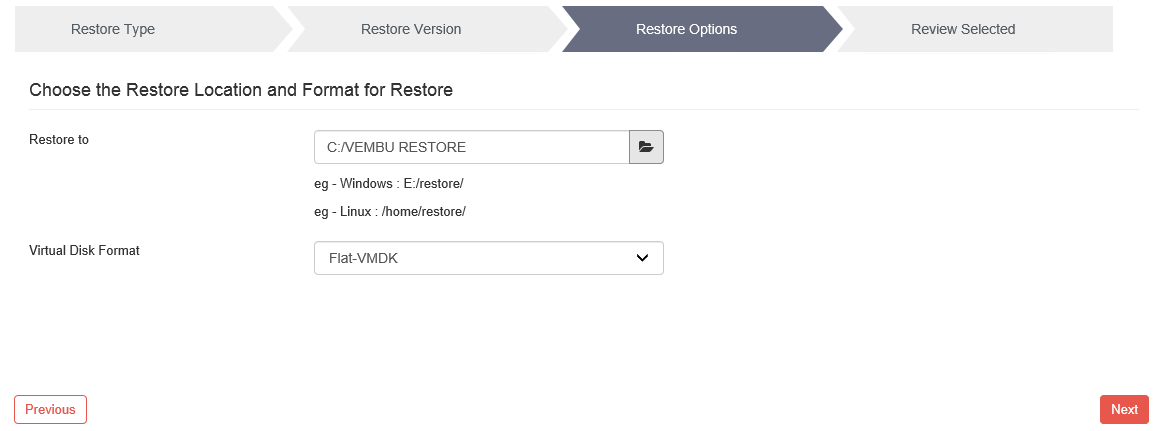
Step 6: Choose the virtual format based on the target hypervisor where you are going to migrate your physical machine. Also, provide the restore location where to download the virtual disk format and Click Next
Note: Here we are migrating to VMware vSphere platform, so choose the Flat-VMDK format
Step 7: Review the restore configuration and Click Restore Now
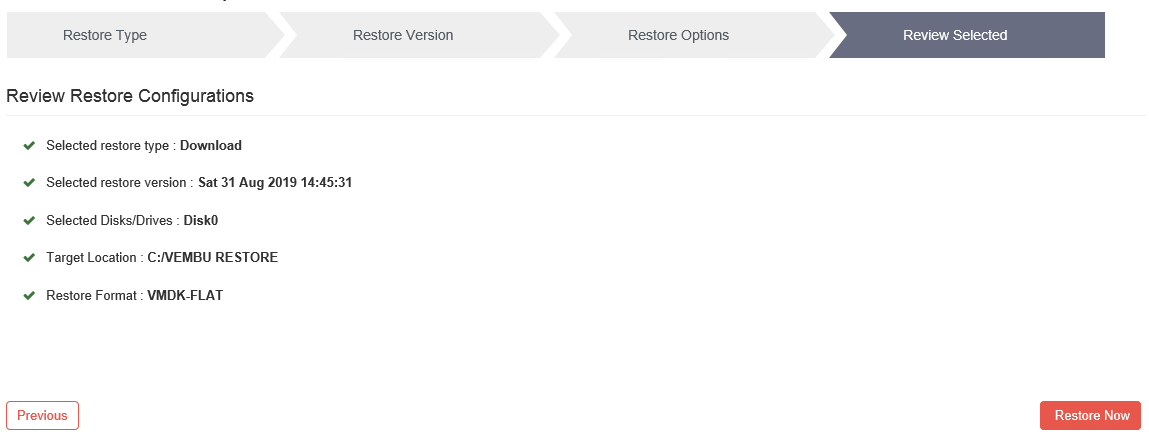
Step 8: Click OK to confirm and start the download

Step 9: From the recovery option, you can monitor the progress of the restore by clicking the Job Status option

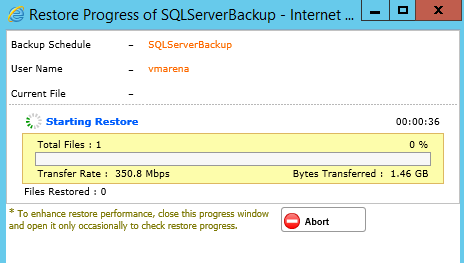
Also, you can verify the downloaded file from the path you have provided earlier.

Step 10: Next, Browse the Datastore on the ESXi host and Upload the Flat-VMDK and VMDK file.

Step 11: Login to the ESXi host. From Virtual Machines option, click on create/register VM for new VM creation
Note: If your ESXi host is part of vCenter you can perform this from vCenter Server also.
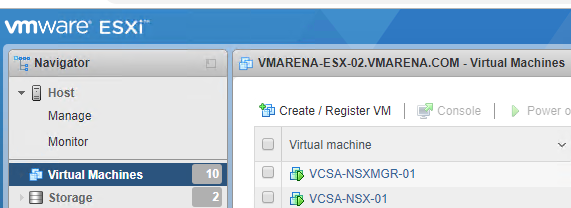
Step 12: Select the Creation type – Create a new virtual machine and Click Next
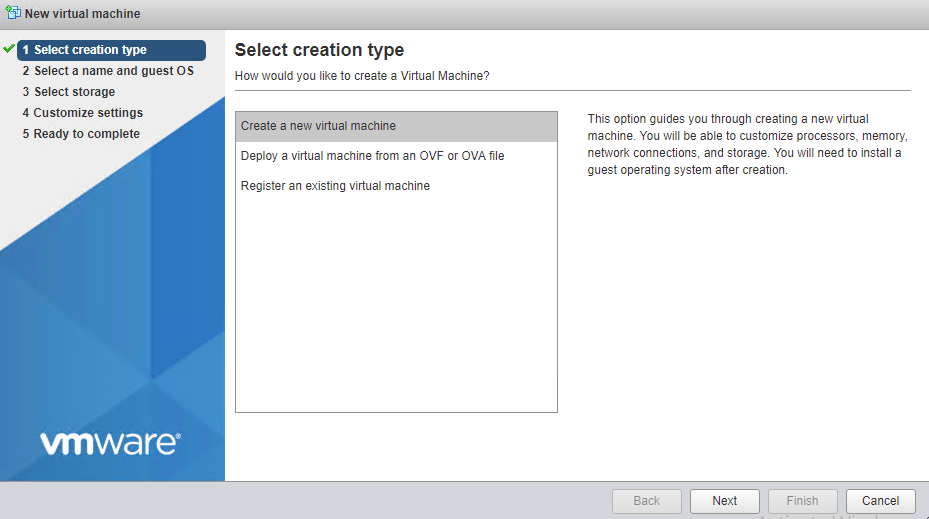
Step 13: Provide a Name to the Virtual Machine, Select Guest OS compatibility, OS Family, Guest OS version and Click Next
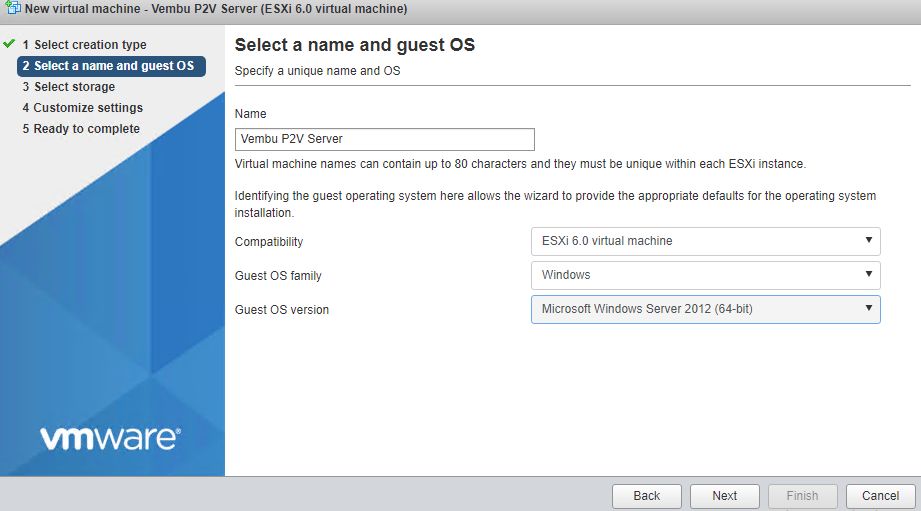
Step 14: Select the Datastore and click Next
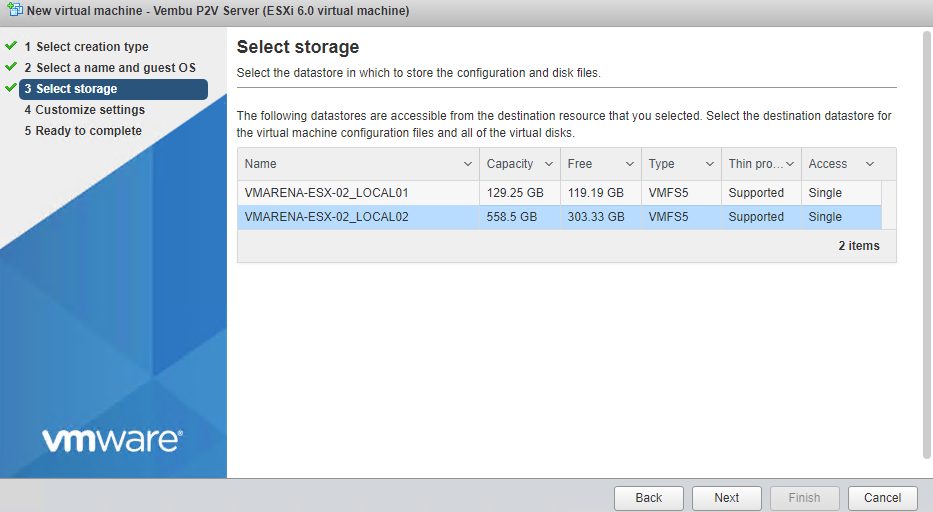
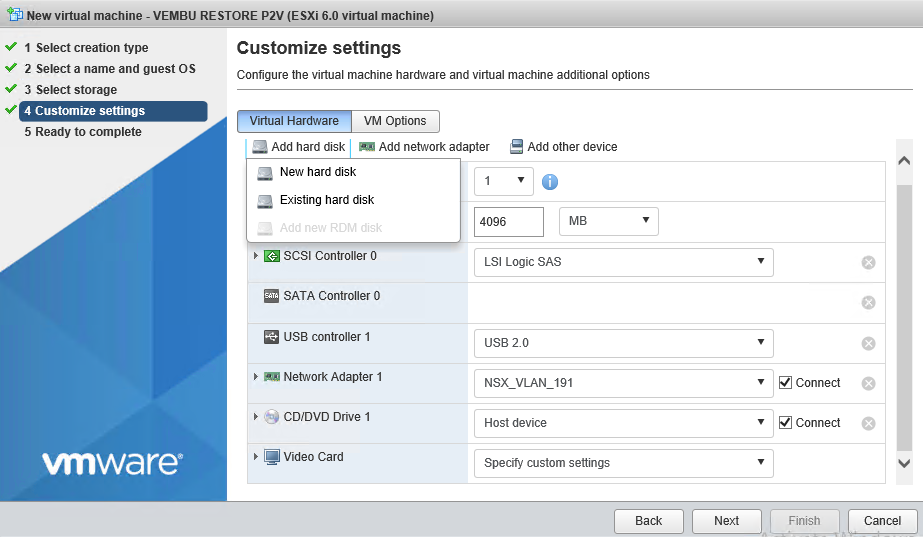
Step 15: From here you can remove the default 40 GB Hard Disk1 and add the downloaded vmdk file using add hard disk.
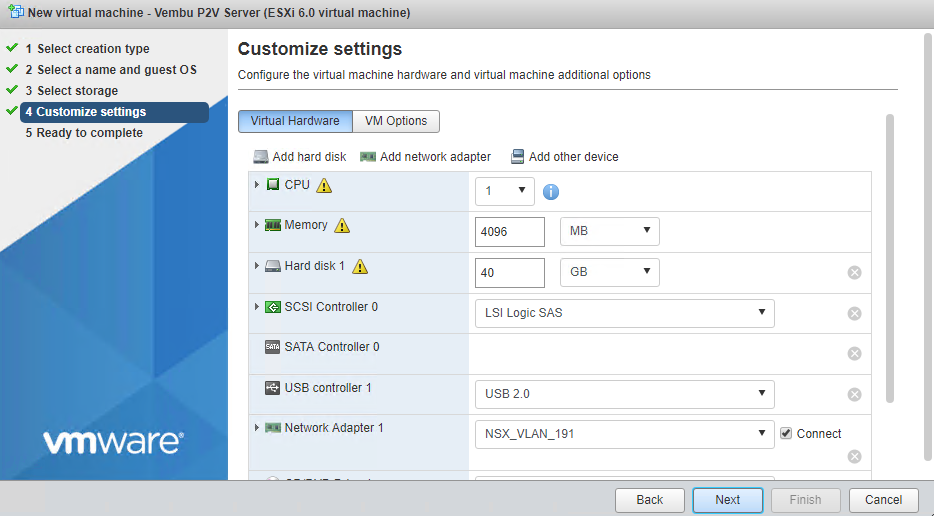
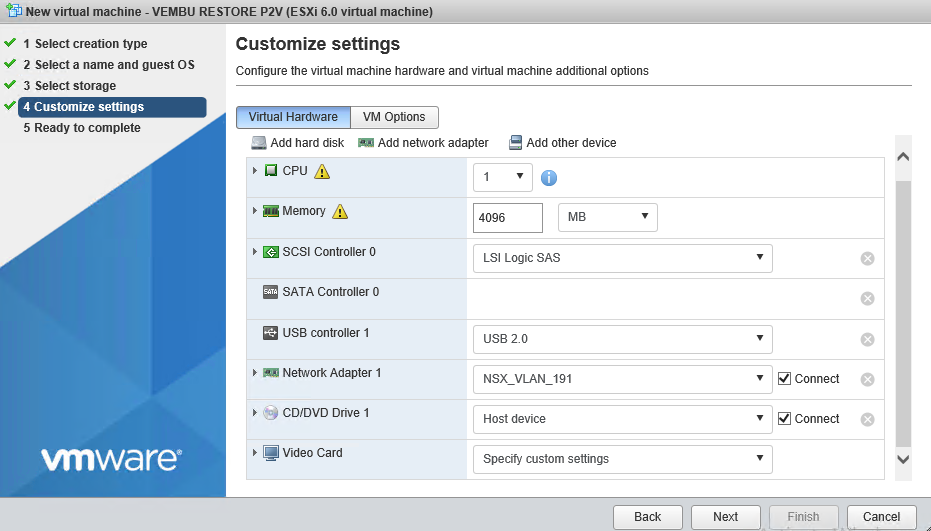
Step 16: Click on Add hard disk and select the Existing hard disk
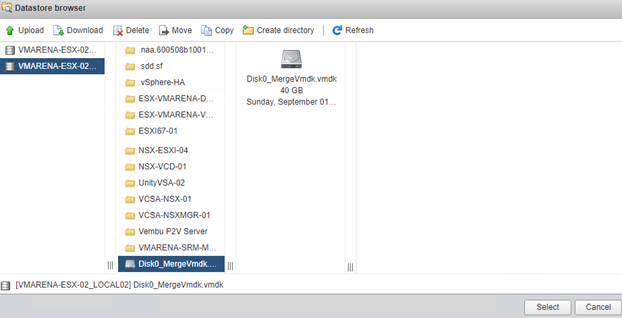
Step 17: Browse the uploaded file and Select
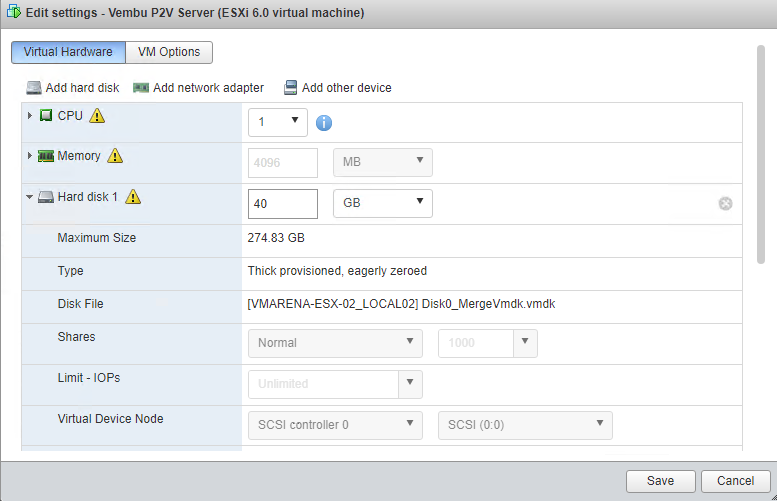
Once the Drive is attached, Click Save
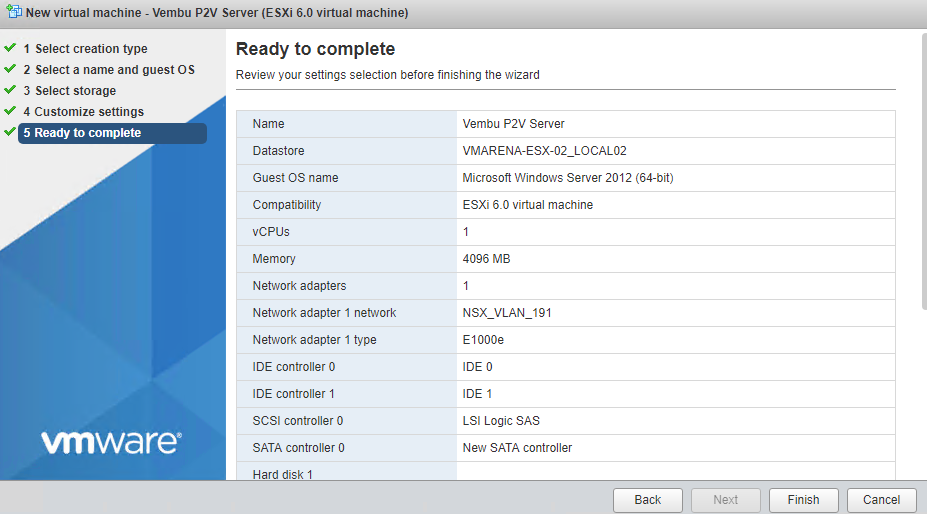
Step 18: Verify all the details and click on Finish
Step 19: Now the physical server is migrated as a virtual machine and you can Power ON.
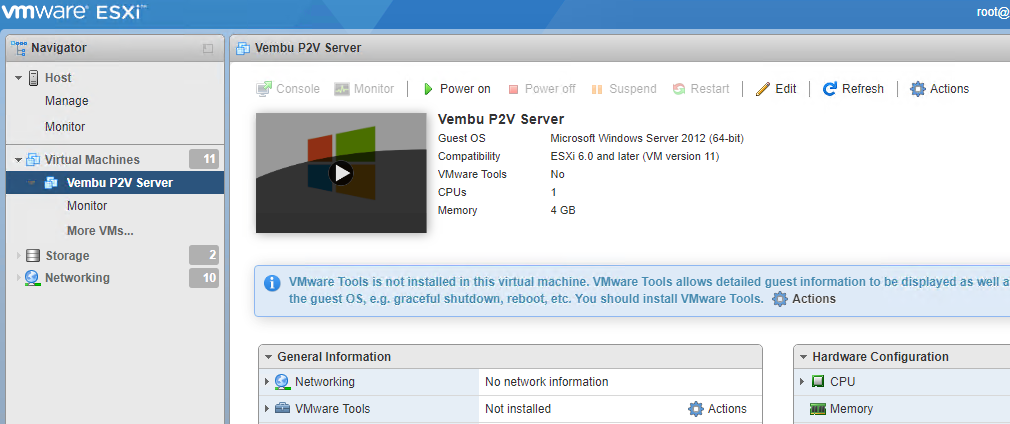
After powering on the server it will be the same as your physical server, IP, Hostname and the application will be running perfectly.

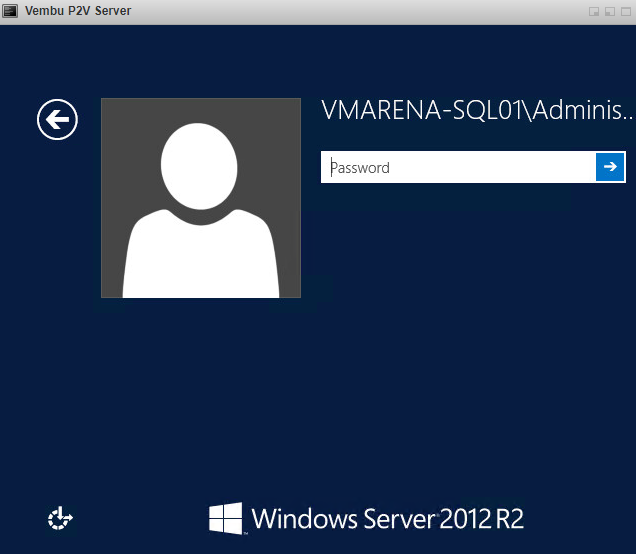
Step 20: Open the Console and Login now to the server.
Follow our Twitter and Facebook feeds for new releases, updates, insightful posts and more.


Leave A Comment