Powershell natively embeds a lot of cmdlets that allow you to do a wide variety of things out of the box. However, another thing that Powershell allows you to do is to interact with REST APIs with the built-in cmdlet Invoke-RestMethod. Note that you could also use Invoke-WebRequest but the former one makes it easier.
There are lots of reasons why you would need to use an API in Powershell:
- The product you implemented doesn’t provide a Powershell module, vRealize Log Insight is a good example of it
- The module provided by the vendor does not offer cmdlets for some of the features but exposes them in the API
- Gather information from online services
Some APIs can be harder to interact with than others, especially if they don’t provide a good documentation or require authentication or certificate check mechanisms.
In this article, we will use a simple public API to get comfortable with how it works and hopefully give you ideas of other cool things you could do with it.
Our use case here will be to build a function that displays the weather of a city with the temperature in the unit you selected. We will use the public API provided by openweathermap.org. This API is great because it is easy to use, the documentation is brilliant and it offers a lot of possibilities. So once we complete our basic function you can go on and build yourself a meteorological centre in Powershell!
Get an API key
An API key is a string that is associated to a user account on the provider’s website. Not all web services require an API key but most do and it is the case for openweathermap.org. Fear not though as using a key is the easiest way to authenticate against an API.
Note that securing the API key doesn’t matter here as we are just messing around but in a real enterprise scenario, it is really important that you secure it and make sure no one else has access to it. A key should be associated to a user. Just like you wouldn’t give your AD account credentials to a colleague to send an email on your behalf or restart a server, you need to keep your secret.
An example of a scenario where the key must be secured could be a script that interacts with the REST API of the SAN storage array of your company, you can easily see how things can go wrong pretty badly should someone get a hand of your key (authenticator)…
Anyway, let’s get stuck in with our weather fun.
- First, create an account on openweathermap.org and log in
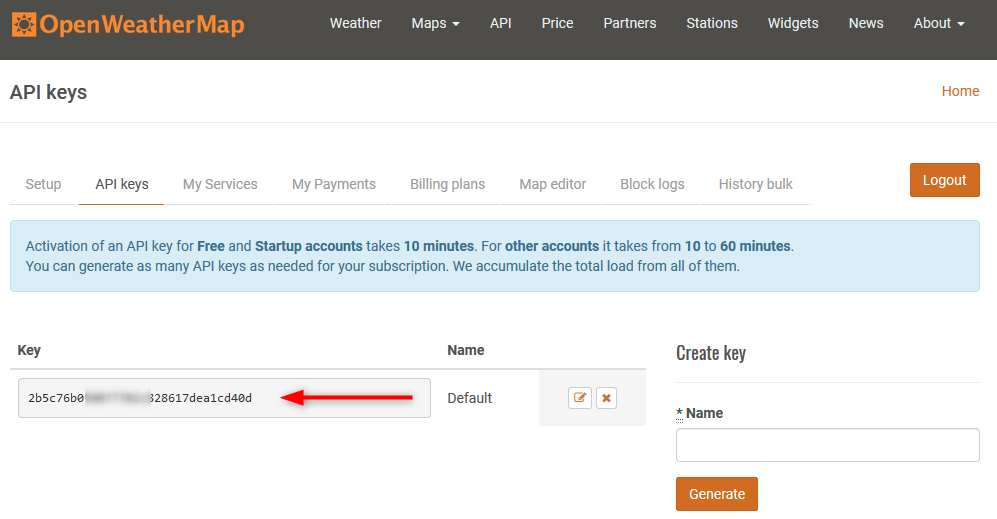
- Click on the API Keys tab and store the API key somewhere
Look for the API documentation
How to authenticate
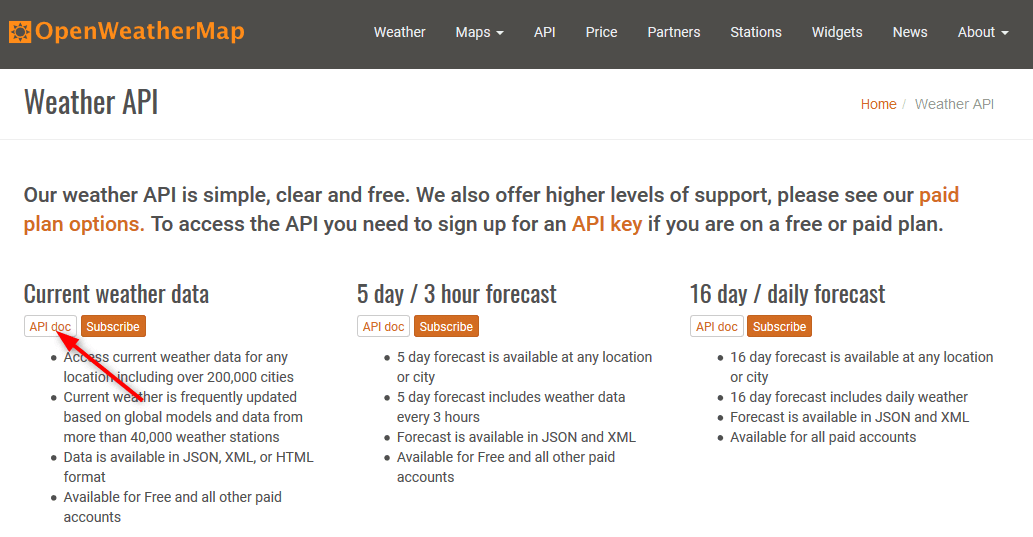
Knowing how every single API in the world works is not something you get at birth, so when you start working with a new one you will have to look for the documentation to understand how it works, what it can do and how to make API calls.
- Find the doc on how to make API calls with the key. You usually also get valuable information on how to use the API correctly to get the best results
- Here we learn that the key should be appended to &APPID= and placed in the API call
- Let’s say our API key is 2b5c76b0500ZZZZZZZZZZZZZea1cd40d. it means all of our API calls will need to have : &APPID=2b5c76b0500ZZZZZZZZZZZZZea1cd40d
For the sake of simplicity, I choose to always place it at the end of the URL I use to make the calls.
How to use the API
Now that you know what to do with your API key, let’s find out how to get the weather of a city. If you look at the documentation you will see that there are a lot of things you can do with this API, hell you can even get the air pollution! In our case we are interested in the current weather of a city.
After you land on the Current Weather Data documentation page, this is where you realize how good a job the guys did with the documentation. There are plenty of examples on how to make calls and it will give some really interesting info like:
- Different ways to make a call
- What values to expect from a given field or where to find different types of IDs
- What the output looks like
- The different formats you can get the output in
- How to change the units (Celsius, Fahrenheit, Kelvin)
You can go pretty far with this kind of great documentation but we’ll stick to our basic city temperature function here.
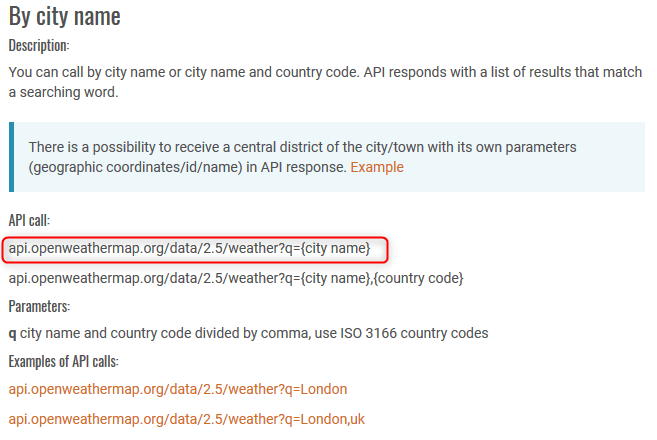
Let’s take the first example to call the weather by city name:
api.openweathermap.org/data/2.5/weather?q={city name}
By default the API will tell the temperature in kelvin but we want to be able to choose the unit. Although it is easily convertible with basic math, there is a documented built-in way to return it in Celsius or Fahrenheit so we might as well use it. If we want to return the temperature in Celsius we will need to specify &units=metric in the call.
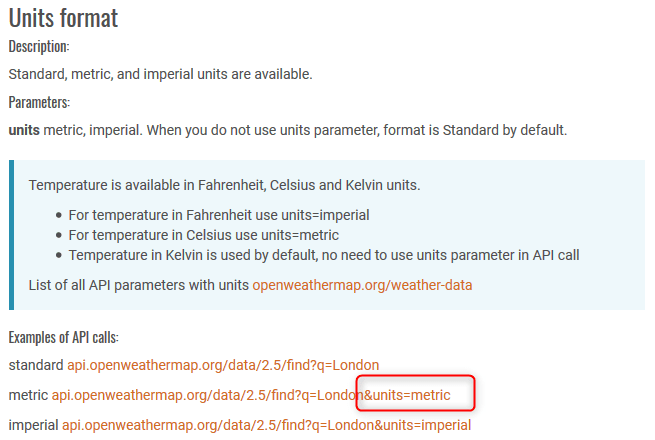
api.openweathermap.org/data/2.5/weather?q={city name}&units=metric
I will use my home town Grenoble in France for this example. Now remember from the previous chapter that you need to append your API key to the call.
api.openweathermap.org/data/2.5/weather?q=grenoble&units=metric&APPID=2b5c76b0500ZZZZZZZZZZZZZea1cd40d
Replace the API key by your own and paste the url in your web browser. You will receive an answer from the API in which you can find the information we were after.
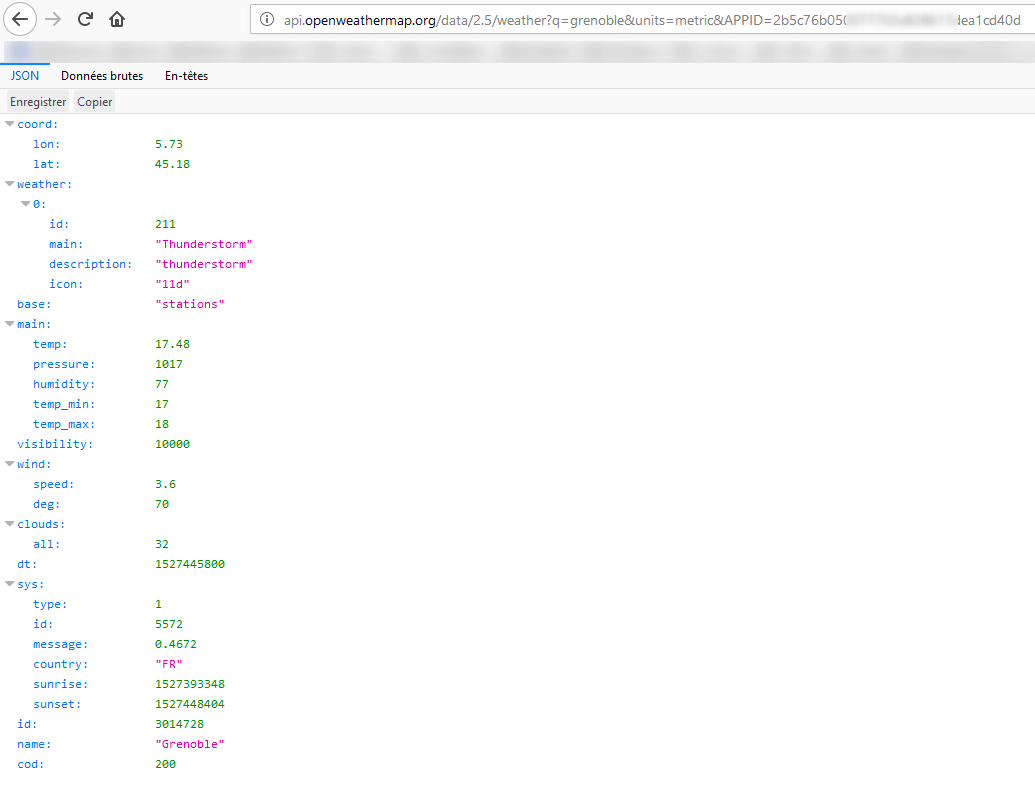
Now this is great but we want it in Powershell with only one command. Good thing because we’ve done the hard part.
Powershell integration
Make a REST API call and look for properties
You will use the Invoke-RestMethod which is kind of an equivalent of curl in linux. For this call we will only need to specify the method which is GET and the URI that we defined above.
- Run the following command in Powershell to place the result of our call in a variable that we can dissect later on
$APIResponse = Invoke-RestMethod -Method Get -Uri “http://api.openweathermap.org/data/2.5/weather?q=grenoble&units=metric&APPID=2b5c76b0500ZZZZZZZZZZZZZea1cd40d”
Now if you display the content of the variable you will find the same information we saw in the web browser ordered in properties of the powershell object.

Once you get this far with an API you’re golden. All you have to do is to explore the object and pick the properties you want to display with your function. In our case we want the city, the temperature and the weather. You can already see where they are in the screenshot.
City:$APIResponse.name
Temperature: $APIResponse.main.temp
Weather: $APIResponse.weather.description
Now that we know how to call the API and where to look for the properties we’re after, we just need to turn this into a function. This is actually the easiest part of the whole process and probably the most satisfying one.
Write the Powershell function
I am not going in great details about how to write a function as the script speaks for itself. I also think that reading and trying to understand what a script does and how is the best way to actually understand it. This will be an easy one which makes it a good example to get acquainted with APIs in Powershell. Though I recommend that you try to build the function yourself before reading further as an exercise. You can still come back here if needed.
Here is the function, as you can see it is very simple but it works.
Function Get-Weather {
param(
[parameter(mandatory=$true)] [string] $City,[Validateset(“Celcius”,”Farenheit”,”Kelvin”)] [string] $Unit = “Celcius”,
[parameter(mandatory=$true)] [string] $APIKey
)Switch ($Unit) {
“Celcius” {$ApiUnit = “metric”; $U = “c”}
“Farenheit” {$ApiUnit = “imperial”; $U = “F”}
“Kelvin” {$ApiUnit = $false; $U = “K”}
}if ($ApiUnit) {
$APIResponse = Invoke-RestMethod -Method Get -Uri “http://api.openweathermap.org/data/2.5/weather?q=$City&units=$ApiUnit&APPID=$APIKey”
} else {
$APIResponse = Invoke-RestMethod -Method Get -Uri “http://api.openweathermap.org/data/2.5/weather?q=$City&APPID=$APIKey”
}
[pscustomobject]@{
City = $APIResponse.name
Temperature = [string]$APIResponse.main.temp + $U
Weather = $APIResponse.weather.description
}}
And the function in action. Thanks to the validateset parameter property you can autocomplete the unit parameter with tab. If not specified it will default to Celsius.
Exercise
If you want to practice the use of REST APIs, the function we just wrote will be a good basis for exercising. Here are a few ideas on how you could improve it:
- Display the weather based on latitude and longitude coordinates
- Display local time of the city you’re targeting with the API of timezonedb
- Get the weather of where you are using IP geolocation using the API of ip-api.com
These are just a few ideas but it will be a good exercise to do on your own.
Conclusion
And there you have it, a working Powershell function that gets you the weather in Powershell via a public REST API. Again we are merely scratching the surface of what can be achieved here. Even though we are fooling around by pulling the weather data it gives you some guidance on how to proceed to use an API and write functions that will be useful in a professional environment.
Though if you want to keep messing with public APIs, You can check out this website that indexes a whole lot of them: https://www.programmableweb.com/apis/directoryFollow our Twitter and Facebook feeds for new releases, updates, insightful posts and more.


Leave A Comment