Windows Server Backup is the free backup tool provided by Microsoft in Windows Server. It has been around for several Windows Server versions, including the latest, Windows Server 2019. For basic backup and restore functionality, the Windows Server Backup utility provides basic backup and restore capabilities for Windows Server administrators.
In the last Windows Server Backup post, we took a look at installation, features, and limitations overall.
In this post, we will focus in a bit closer on the restore functionality and see how this is performed using Windows Server Backup and a few of the options available during the restore process.
Let’s take a look at restoring files using Windows Server Backup.
Why File Restore Ability is Important
Restoring files is generally one of the most common tasks of a backup administrator on a daily basis.
When it comes to disaster recovery, the typical disaster involves files that are accidentally deleted, or the wrong files are intentionally deleted.
Another extremely common scenario that can involve data loss is a user who performs a “Save” operation instead of a “Save As” operation. If data was deleted from a document or spreadsheet and the document or spreadsheet is saved, the deleted data is gone. These are two very common examples of how data can be deleted on a daily basis in common scenarios.
This type of disaster recovery, while seemingly trivial, can interrupt business-continuity if the right file or an extremely important file is inadvertently deleted.
Let’s see how Windows Server Backup can be used to restore files from a backup taken of a Windows Server.
Restoring Files Using Windows Server Backup
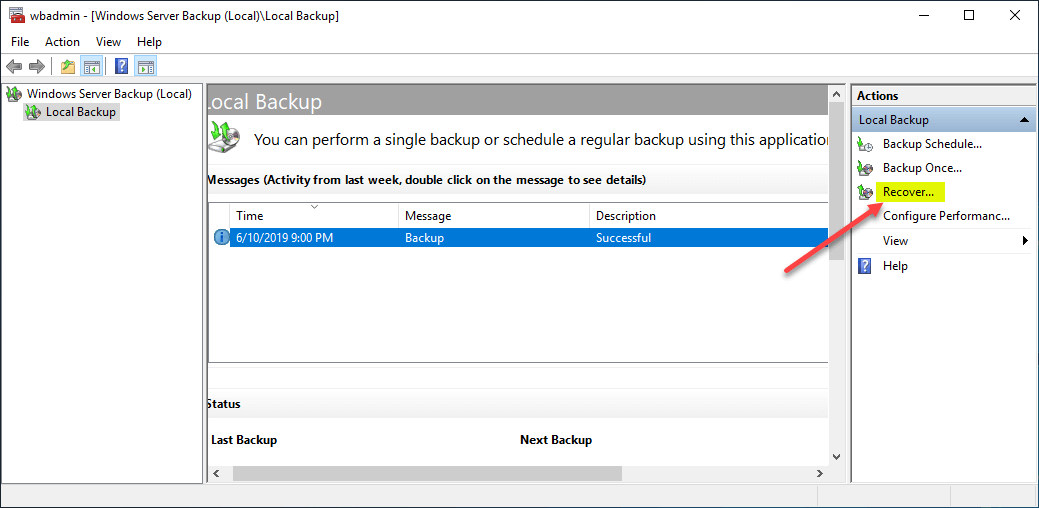
Launch the Windows Server Backup utility by running the command, wbadmin.msc.
Under the Actions pane, click the Recover option.
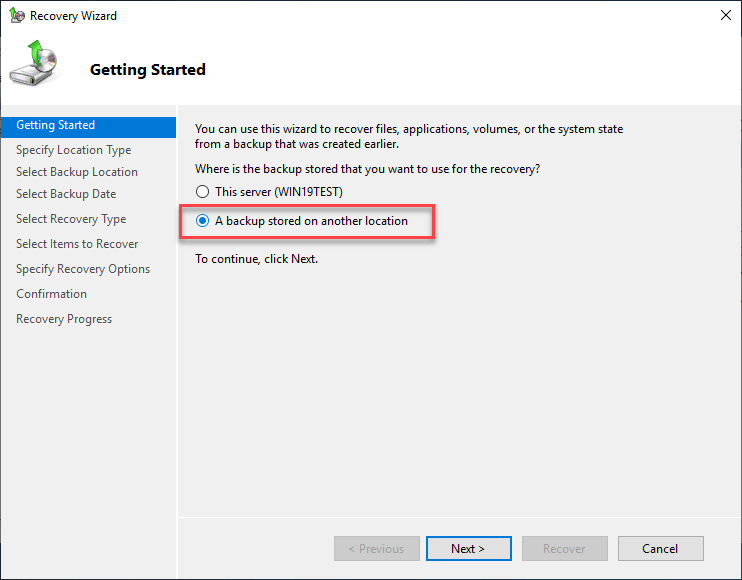
Under the Getting Started screen, choose where the backup is stored that you want to use for the recovery process. The options include:
- This server
- A backup stored on another location
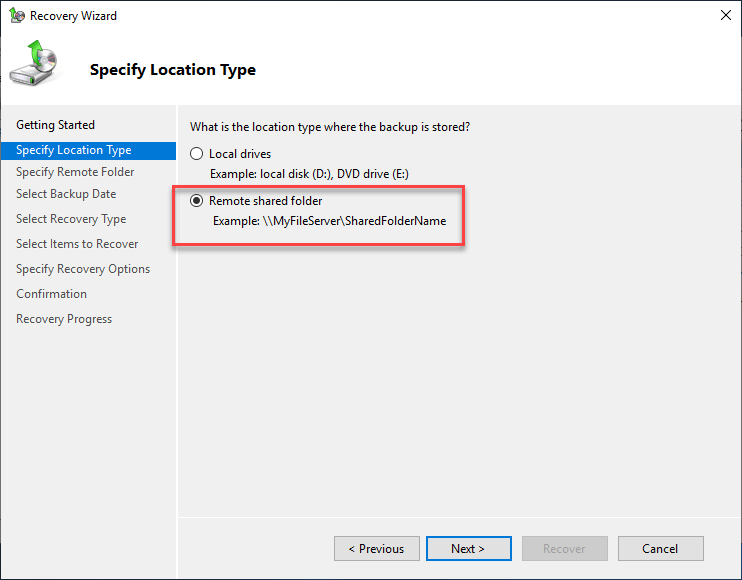
Next, Specify Location Type. This includes the following options:
- Local drives
- Remote shared folder
The Remote shared folder syntax is found in the UNC format. This mirrors the format used and needed to target for a backup location when creating a backup in Windows Server Backup.
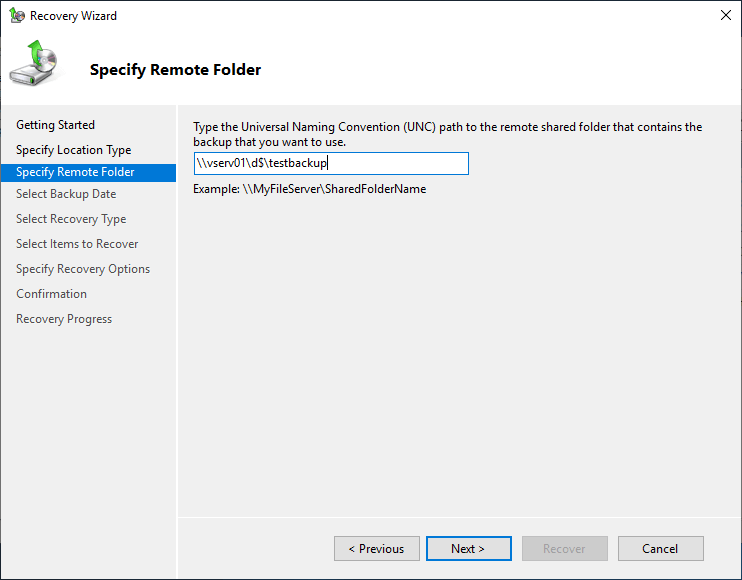
On the next screen, Specify Remote Folder, here you enter the UNC path containing the backup file.
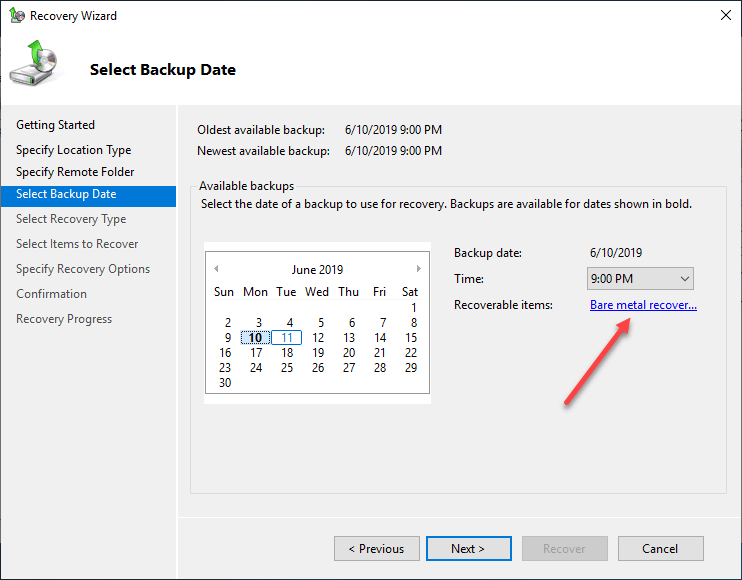
On the Select Backup Date, select the date of the backup you want to restore. A note here to remember, the network location can only store one backup at a time. When you write a backup over the network from Windows Server Backup, the previous backup is overwritten.
On this screen as well, you can click the Bare metal recovery option to see the items that are recoverable via the Bare Metal Recovery process. You can perform a bare metal recovery by booting from the Windows Server installation media and choosing to Repair your computer.
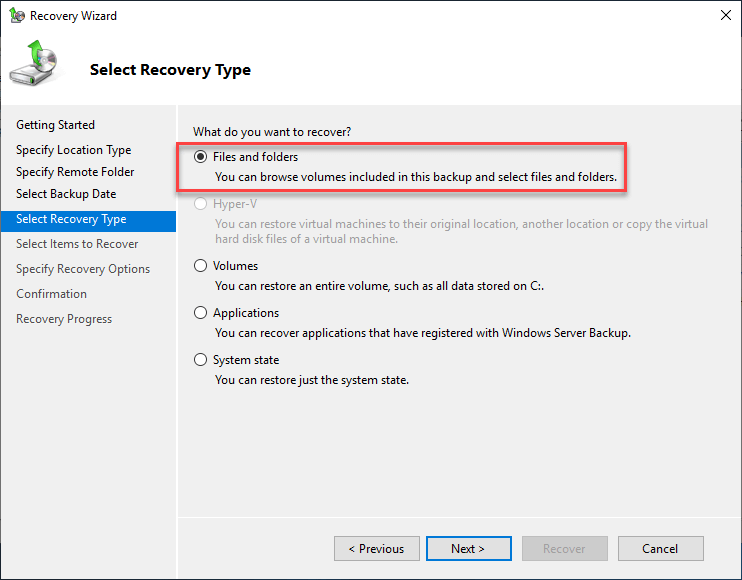
Select the Recovery Type. Under the Recovery Type screen, you have the following options:
- Files and folders – You can browse volumes included in this backup and select files and folders
- Hyper-V – You can restore virtual machines to their original location, another location or copy the virtual hard disk files of a virtual machine
- Volumes – You can restore an entire volume, such as all data stored on C:
- Applications – You can recover applications that have registered with Windows Server Backup
- System State – You can restore just the system state
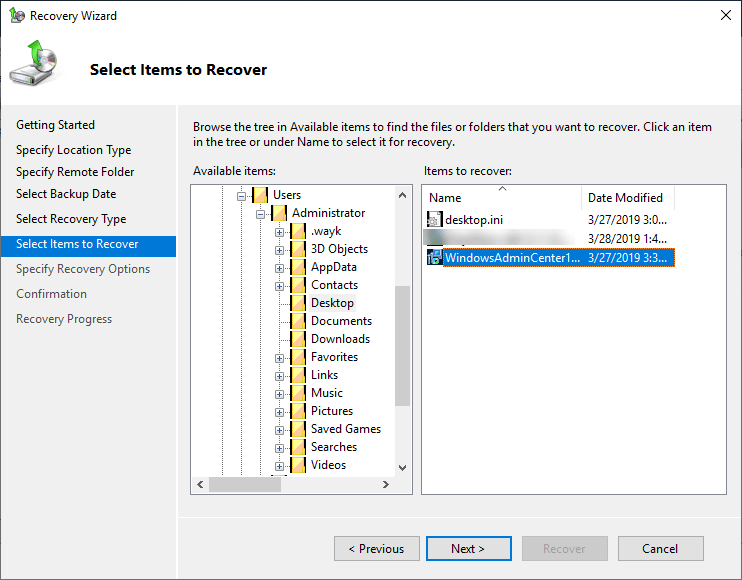
Next, Select Items to Recover. Here we are selecting a particular file that needs to be recovered from the backup file taken the night before.
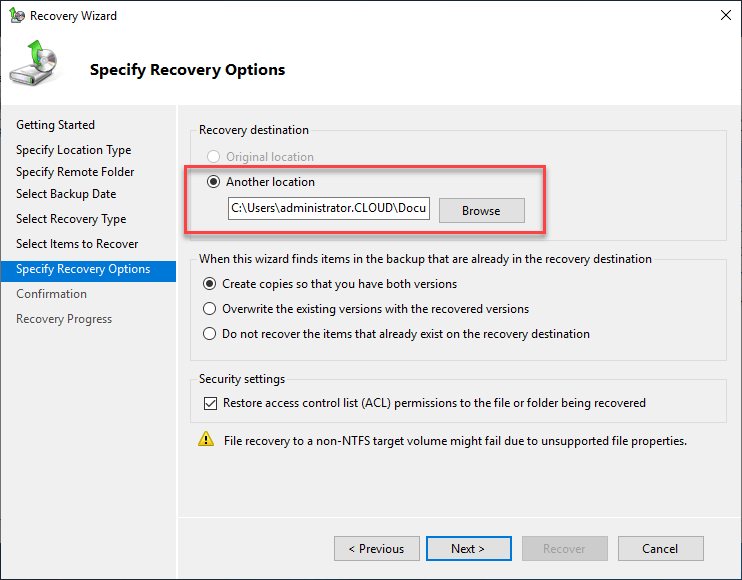
Specify the Recovery Options. In the recovery options, you select the Recovery destination and how you want to handle conflicts or files that already exist. Security settings such as ACL permissions can be preserved as well for the restored files.
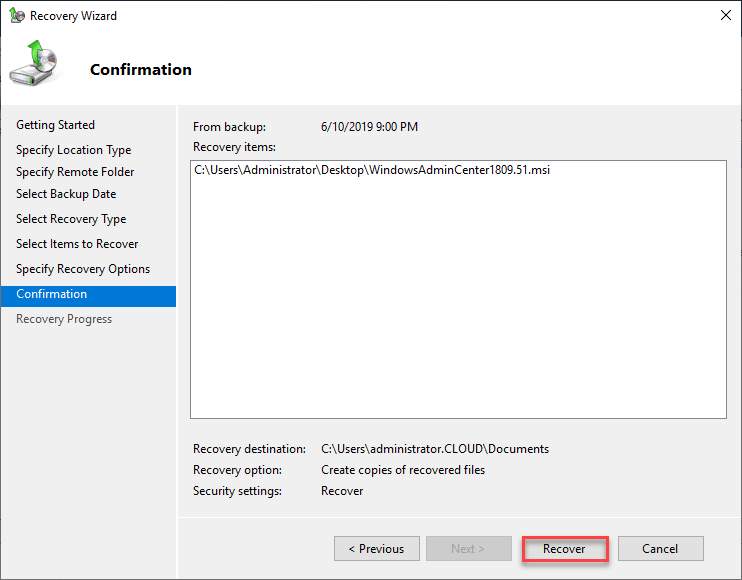
Finally, Confirm the configuration options selected in the Recovery Wizard. Click the Recover button to begin the restore process.
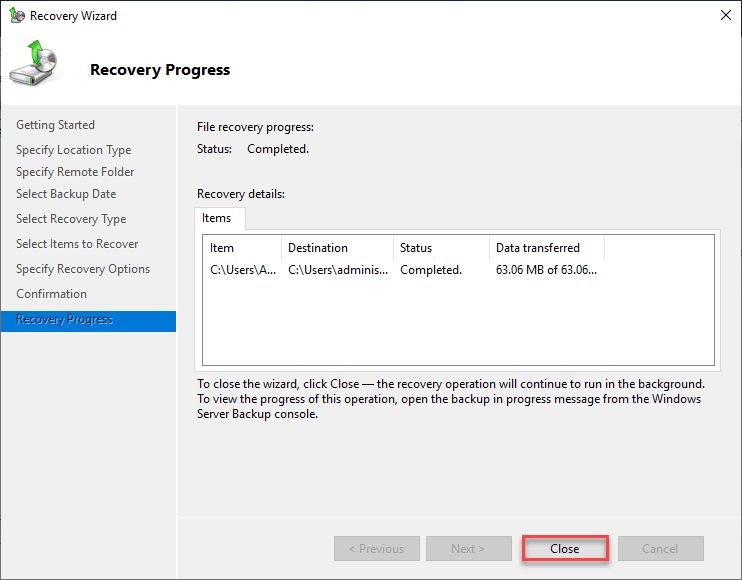
The Recovery process will progress and then complete. Once you see the recovery progress status show as completed, click the Close button.
Windows Server Backup Restore Limitations
Windows Server Backup has some basic recovery options that allow recovering data in various circumstances. While it is perhaps adequate in some circumstances, there are limitations that have already been touched upon.
Windows Server 2012 introduced the ability to backup and recover Hyper-V virtual machines. However, there is no option here for other hypervisors such as VMware, etc. The Hyper-V restore options are limited to full VM restores or volume restores on the Hyper-V host so no granular VM-level file restores.
While WSB can backup VMs running on CSVs, there isn’t really interaction with Hyper-V at the “cluster” level or via the “cluster name” since it can really only backup the VMs running locally on that particular host.
Vembu BDR Suite Free Edition Superior Recovery
If you are looking for a solution for much more powerful recovery options and hypervisor support, Vembu BDR Suite Free edition allows you to backup not only Windows Server but also Windows Server virtual machines running inside Hyper-V, VMware, and physical machines with Windows, Linux, and Mac Operating Systems.
Additionally, you can perform granular VM-level file restores, store unlimited backups across the network in your Vembu BDR Suite repository, and also have granular application item restores.
Vembu also provides an extremely powerful and easy migration tool built into the product that allows instantly downloading different hypervisor file types via the recovery wizard. This makes moving Windows Servers between virtualized platforms extremely easy and pain-free.
When seconds and minutes count, Vembu BDR Suite Free allows quick VM recovery that provides instantly booting a Windows Server on VMware, Hyper-V and KVM environments.
Experience modern data protection with this latest Vembu BDR Suite v.4.0.1. Start your 30-day FREE TRIAL Now!
Follow our Twitter and Facebook feeds for new releases, updates, insightful posts and more.


Leave A Comment