A look into VMware Cloud Director Named disks
VMware Cloud Director has been around for a long time now and used to be known as vCloud Director. It offers an extra layer of management to offer self service portals to tenants with resource allocation, billing and more which encompasses compute, storage, networking with NSX-T and modern apps with Tanzu through the CSE plugin (Container Service Extension).
Table of Contents
- What are Named disks?
- What are named disks for?
- Named disks and Kubernetes CSI
- Creating Named Disks
- Wrap up
As you probably know, virtual disks in vSphere cannot be managed in a standalone way. As in, you don’t create a disk which appears in the inventory, instead you create a disk for a specific VM. If you detach the disk from the VM, the files will still be in the datastore but they are no longer tracked. Meaning if you forget about it no one will know that it’s there (check out First Class Disks for info on how this was addressed).
What are Named disks?
In VMware Cloud Director, it is possible to create disks that are readily available to be attached to a VM at any point in time, these are called Named Disks, which used to be called Independent Disks in older versions of vCloud Director. Named disks are standalone virtual disks that you can create in an OVCD (Organization virtual datacenter). With the right set of permissions, you can manage disks by creating, updating, deleting and more importantly connecting them to VMs.
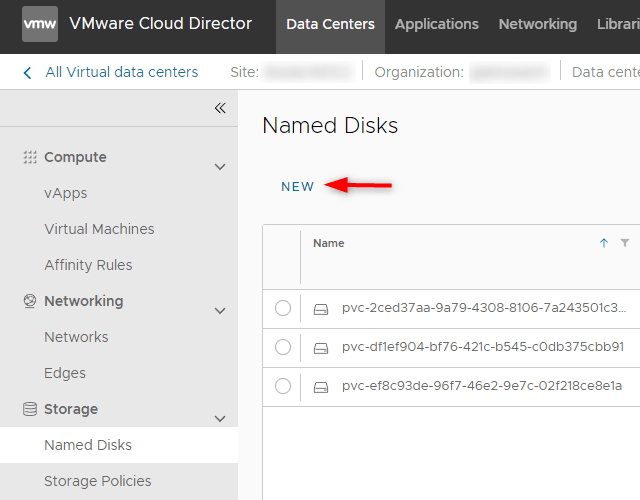
A named disk, it is associated with an OVDC, meaning it is VM-agnostic. Once a disk is provisioned in a VDC, its owner or an admin can attach it to any virtual machine in said VDC. As you can see below, three virtual disks exist in this environment and each is connected to 1 virtual machine.

What are named disks for?
First off you might wonder, “why would I want to create a standalone disk in the first place?”. Which is a fair question since a disk isn’t much use unless it is attached to a virtual machine.
The original description defined by VMware for independent disks is the following:
“The use of independent disks with the vCloud Director allows updating virtual machines without impacting the underlying data. The feature is designed to enable users to create virtual disks that can be attached to and detached from virtual machines.”
However, the purpose of Named Disks has evolved with the rise of Kubernetes. Named Disks are heavily leveraged by Kubernetes clusters running in VMware Cloud Director through the Container Storage Interface (CSI) driver. The main use cases for the CSI driver are Container Service Extension (CSE) and Cluster API Provider for VMware Cloud Director (CAPVCD).
Named disks and Kubernetes CSI
If you don’t know what a CSI is, in a nutshell, it is a driver that interacts with a third-party storage system to provision disks that will be made available to pods in Kubernetes. There are tons of CSI drivers like Synology, AWS EBS, Azure Blob, vSphere…
Below is an overview of what happens when we use the Named Disks CSI in Kubernetes:
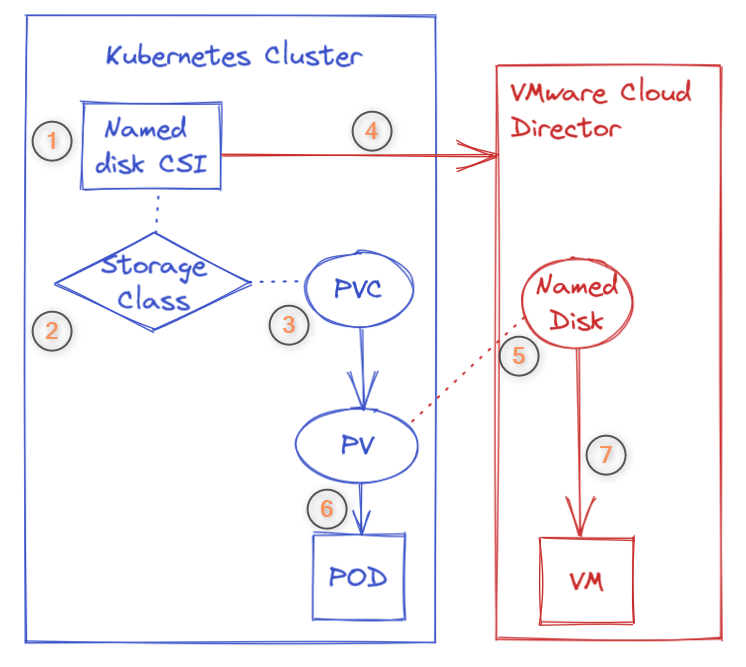
- The operator installs the Named Disks Container Storage Interface (CSI) driver in the Kubernetes Cluster and configures it to work with the VCD instance
- The operator creates a StorageClass that references the CSI driver
- The operator creates a PersistentVolumeClaim to request a disk using the StorageClass
- The CSI driver makes the request to VCD to create a Named Disk
- VCD creates a Named Disk which is attached to a persistent volume in Kubernetes
- The operator attaches the persistent volume to a Pod
- The CSI driver orders VCD to attach the named disks to the VM on which the pod is running
As you can see, Kubernetes persistent volumes for stateful apps is the perfect use case scenario for VMware Cloud Director Named disks. If you’re interested in this, I will go into more details about this process in this blog and what happens behind the scenes in the vSphere stack.
Creating Named Disks
As you would expect from a VMware UI, creating Named Disks is very easy and intuitive.
- Go to Data Centers > Select your vDC > Storage > Named Disks > Click New
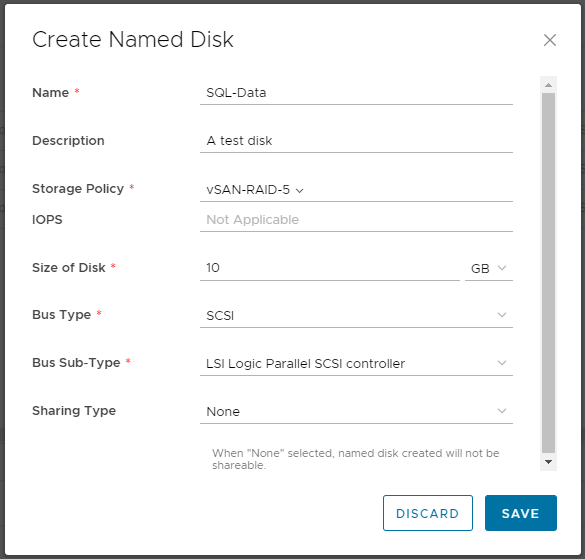
- Fill in the fields as per your requirements. You will find this familiar if you are used to vSphere as you can select a storage policy, BUS type, BUS sharing…
- At this point, the disk is provisioned. You can now attach the disk to a VM by clicking Attach

- Select a virtual machine from the list and click Attach
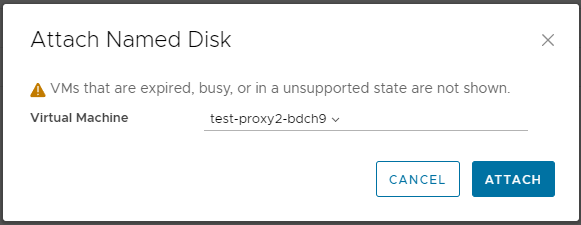
- The disk is now attached to the VM and ready to be used. The process is then the same as if you added a disk in vSphere, you will need to format the disk in your guest OS…
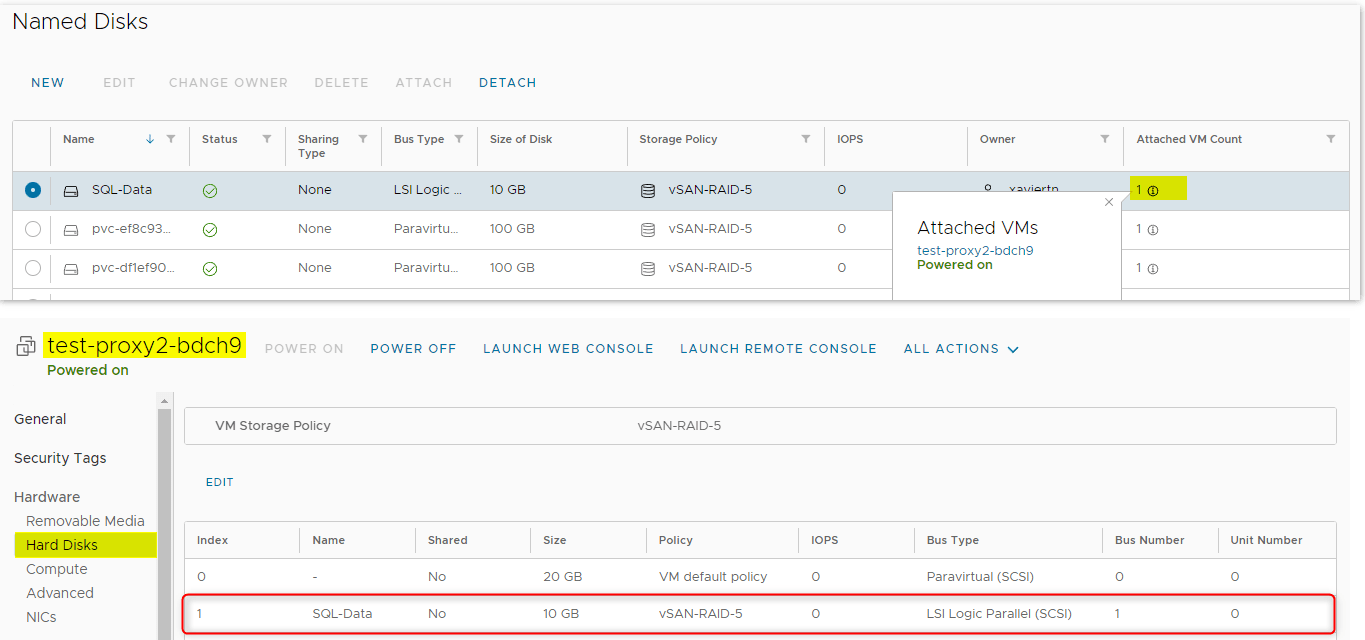
To get rid of the disk, the process is much the same in the other direction. Select the disk, click detach and then you will be able to delete it.
Wrap up
VMware Cloud Director is a very powerful tool for MSPs to sell capacity to tenants and efficiently isolate environments with NSX-T’s multi-tier architecture. The last few years were quite transformative for VCD with Container Service Extension (CSE) reaching maturity and the CAPVCD team making good progress on the development front.
However, the Kubernetes CSI driver is not the only use case for Named Disks as many customers also use it to ensure data integrity and availability during migrations, upgrades or clustering scenarios.
Do you know, you can take a free backup of your VMware VMs using BDRSuite. Try out of a free full-featured trial here
Related Posts:
What’s New in VMware Cloud Director 10.4
10 Points Worth Considering Before Installing VMware vCloud Director
Follow our Twitter and Facebook feeds for new releases, updates, insightful posts and more.


Leave A Comment