In our previous post, we have discussed an overview of the content library. In this article, we will look at how to configure content libraries in vCenter 6.7 Update 2.
Local Content Library
A local library contains files that are only available to a single vCenter Server instance and it is accessible only in the vCenter Server instance where you create it.
Local library can be published externally with authentication so that users from other vCenter Server systems can subscribe to it.
Create a Local Content Library
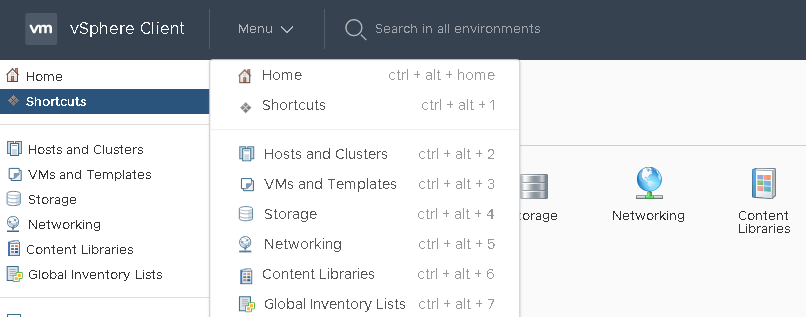
Login to vCenter Server using vSphere HTML Client and navigate to Home > Content Libraries Or Click on Menu and select Content Libraries
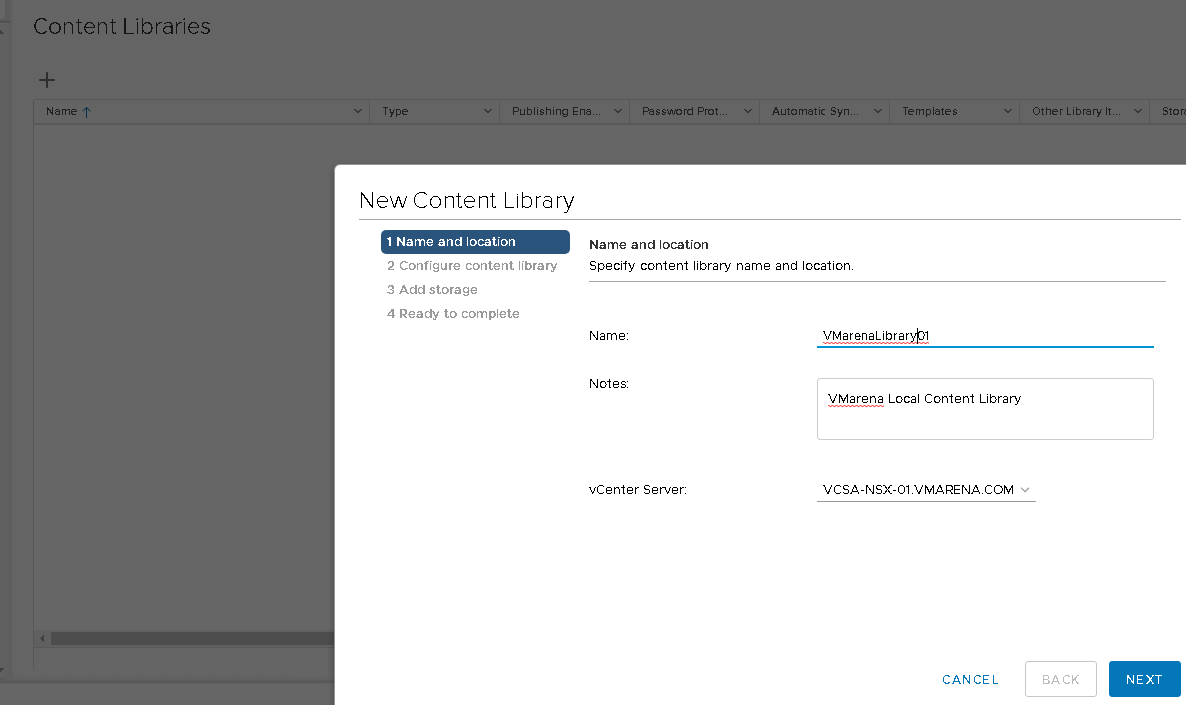
Click the “ + “ Symbol to Create a new content library and from new content Library Window Provide a Name for the Library and Notes if required and Click Next
Note: Adding Notes will help you to explain the scope of the library, in this case, I’ve not provided.
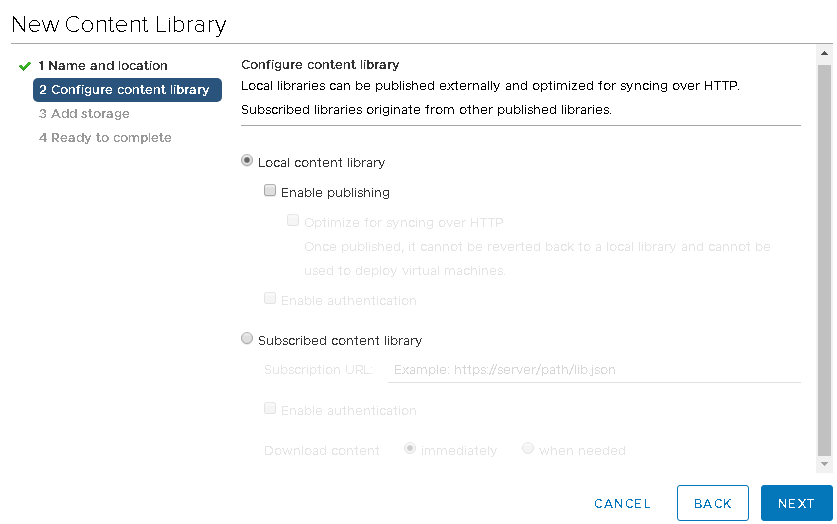
Select the type of Content Library to create by choosing Local and Click Next
Note: You can select the enable publish while creating time or once Library is created, in this case, I’m doing it after library creation
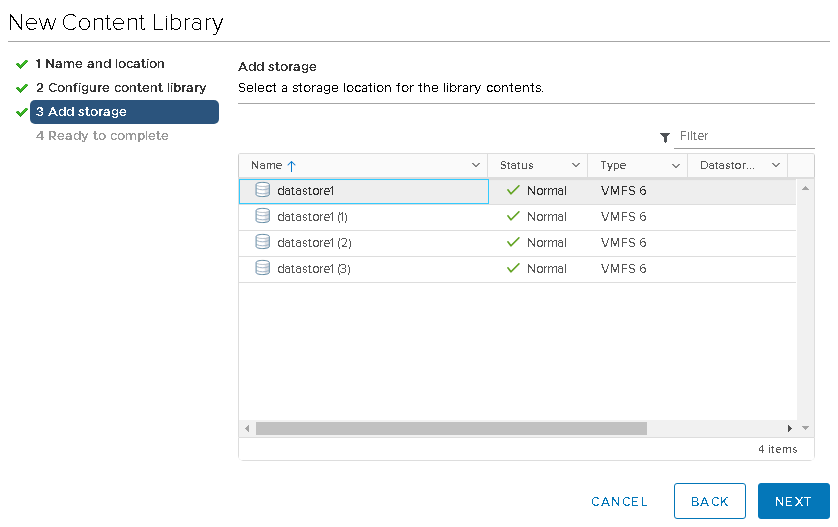
Select the storage (datastore) to store the library’s content and click Next.
Click Finish to create the Content Library.
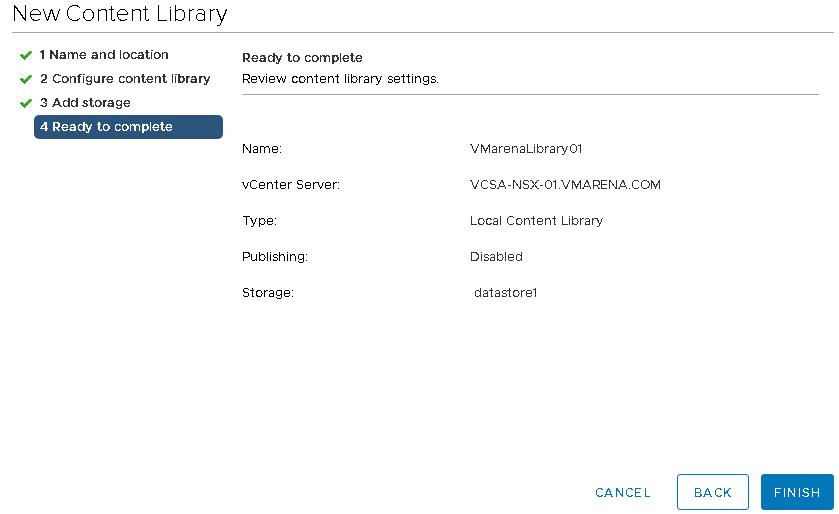
The created library will be displayed on the page.

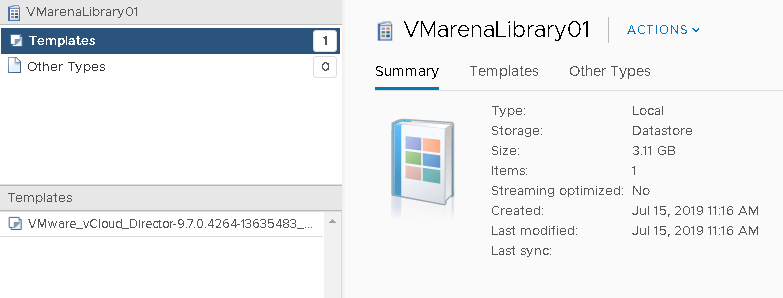
Open the content library to check the details such as type, size, contents, etc.
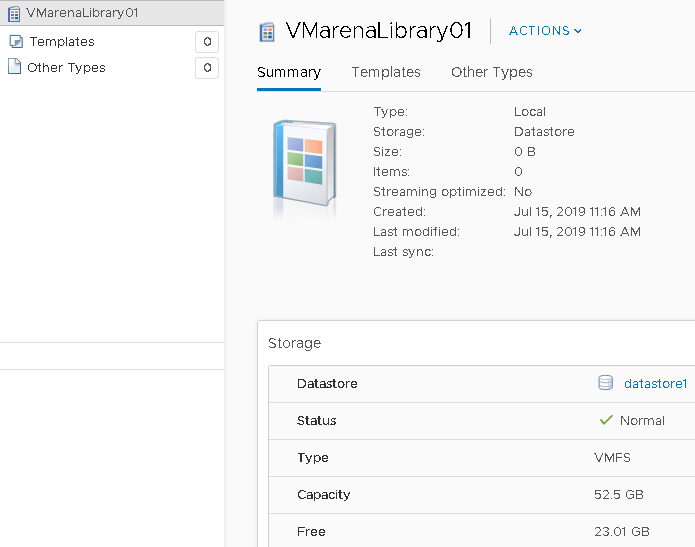
Import Contents to Content Library
Right-click on Created Library and Select import Item from the listed actions.
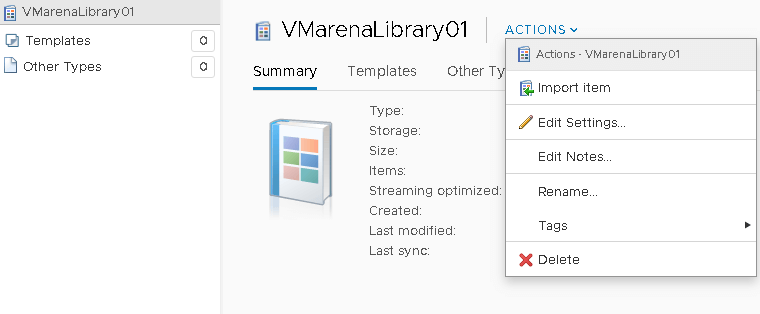
From the Source section, select the option URL or Local File, since we import the OVA from the local system. Then, browse and upload the file. On the destination section, enter item name and a description in the notes or use the default value generated automatically
Click on Import
- URL: You have to provide the path to the Web-server where the item is available
- Local File: File from the local system
Note: To import an OVF template, first select the OVF descriptor file (.ovf). then it will prompt to select the other reference files in the OVF template. Reference files might include files such as .vmdk and .mf.
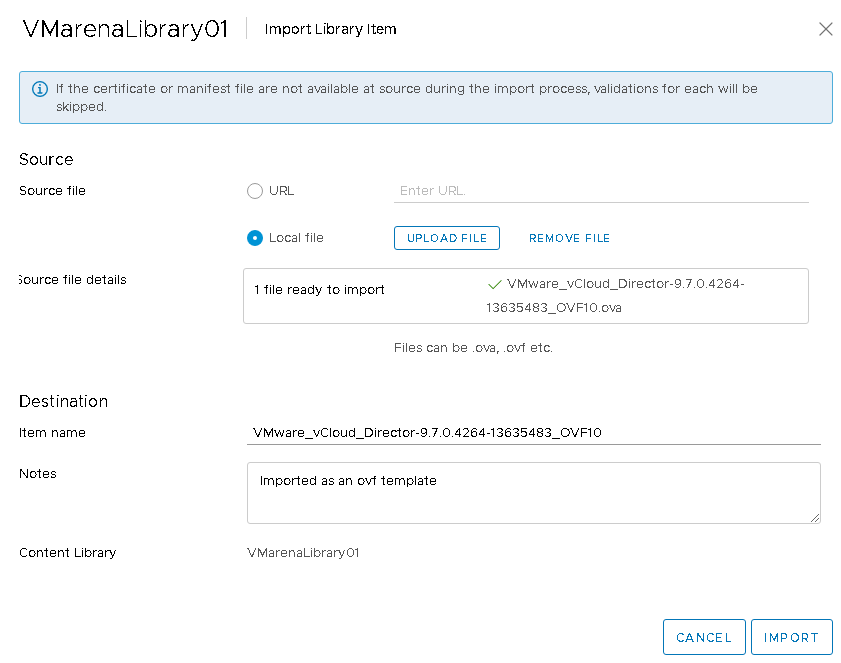
In the next page, Click proceed anyway to start the import
Note: There may be a warning which says about self-signed certificate, you can continue the import ignoring this
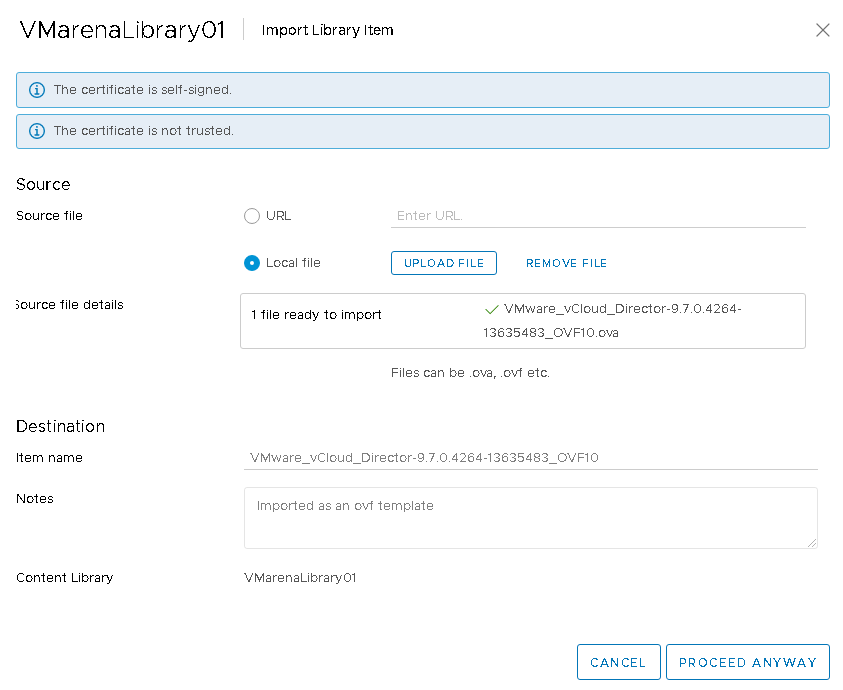
You can monitor the progress importing in recent task status, once the import is completed, you can see the content in the Library under templates.
Change Library Content settings
You can Edit, Rename or Delete a Content Library at any time, for modifying the configuration settings from Actions Click on Edit Settings
Note: Also you can right-click on the library and select Edit Settings

Enable the content sharing by clicking on Enable Publishing checkbox.

Also, Enable the user authentication to access the content from externally through the Authentication checkbox and click OK to enable the new configuration.
Note: URL and password should be provided to users to subscribe to the library.
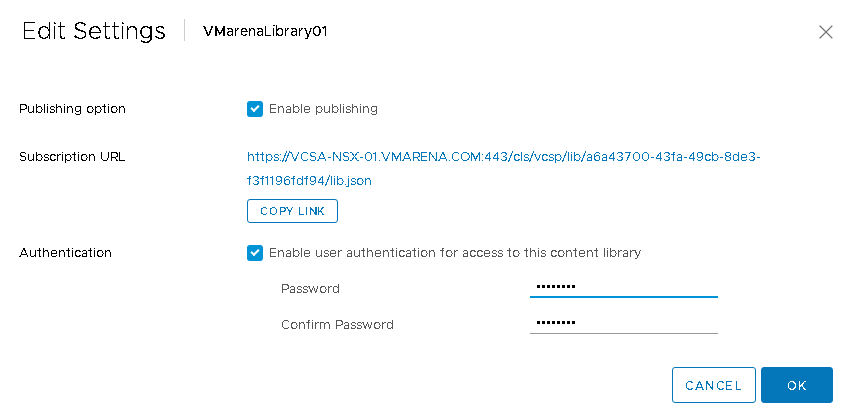
Now from the Content Library page, you can view the new configuration changes details.

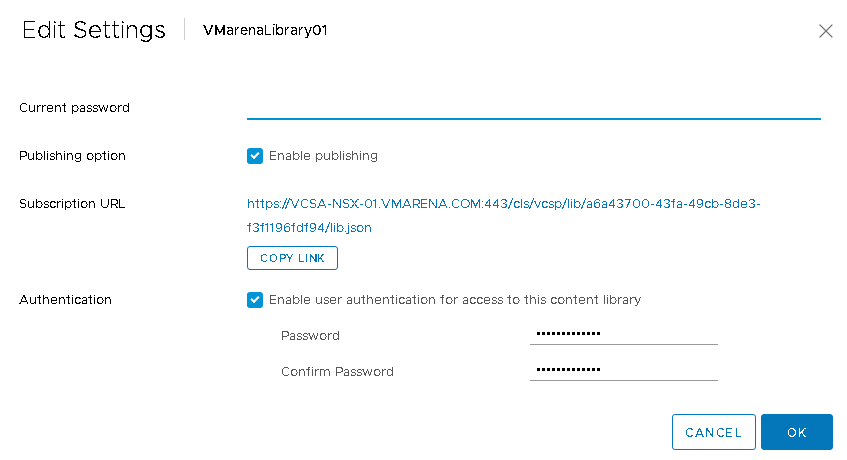
Also, if you want to modify the Library Settings, you have to enter the password you have configured initially.
Conclusion
This article explains the procedures to create new content Library in vCenter 6.7 update2 and the additional configuration required to publish it and access externally with authentication.
In the next article, we will take a look at the procedures to create subscribed Content Library.
Follow our Twitter and Facebook feeds for new releases, updates, insightful posts and more.


Leave A Comment