Read on:
VMware for Beginners – Overview of vSphere: Part 1
VMware for Beginners – vSphere Installation Requirements: Part 2
VMware for Beginners – How to Install vSphere: Part 3
VMware for Beginners – vSphere Networking : Part 4
In the last articles, we discussed VMware and vSphere. What is it, how to install it, and what are the requirements, and in the last article, we discussed vSphere networking.
In this article, we will discuss vSphere Datastore. As in the vSphere networking article, we will only discuss the basics from an ESXi host perspective. We will discuss more advanced networking and Datastore after we have our vCenter installed.
First, we will start to discuss the ESXi host boot device system partition.
vSphere System Boot device Partitions
Between vSphere 6.x and 7.x there was a change in the partition lay-out.
These partitions are stored in the device where we install our ESXi host. As we explained earlier, it can be in a SD/USB card(as we discussed previously, it is supported, but it will be unsupported after vSphere 8.x) or a Local Disk.
This is the previous vSphere 6.x partitions lay-out, and now the new vSphere 7.x.
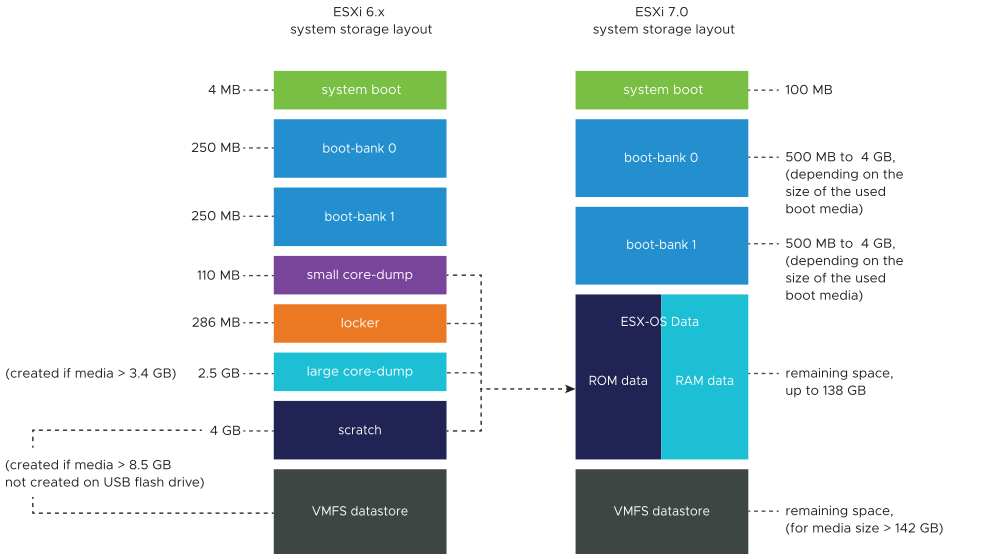
VMware changed the partition lay-out to be more flexible and to support other VMware and 3rd party solutions.
Boot bank partitions are now bigger, consolidate the system partitions, and are now expandable. They are providing more flexibility to manage our vSphere boot device partitions.
A quick look into each boot device partition:
- System Boot – Stores boot loader and EFI modules – File system type is FAT16
- Boot-bank 0 – System space to store ESXi boot modules – File system type is FAT16
- Boot-bank 1 – System space to store ESXi boot modules – File system type is FAT16
- ESX-OSData – Acts as the unified location to store additional modules – File system type is VMFS-L
VMS-L is a new partition created to consolidate /scratch partition, locker partition for VMware Tools, and core dump destinations. The size of your ESX-OSData will always depend on your device size. It can be created up to 138 Gb size.
Note: Since ESX-OSData has a lot of IO requests(for example, logs, VMFS global traces, vSAN Entry Persistence Daemon (EPD) data, vSAN traces, and real-time databases), this is the only partition that you should not use on SD/USB cards. You should always create ESX-OSData partitions on a persistent storage device(like local disks) that are not shared between ESXi hosts.
System boot and Boot-bank partitions should only be the ones that are created and running on the SD/USB Cards.
During vSphere install, and after all partitions are created, the remaining space of your device(if it is local disks or another persistence device) can be used to create a Datastore to store Virtual Machines.
ESXi 7.0 System Storage Links
The subsystems that require access to the ESXi partitions access these partitions by using the following symbolic links:
ESXi 7.0 system storage symbolic links.
- Boot-bank 0 – /bootbank
- Boot-bank 1 – /altbootbank
Persistent data
- /productLocker
- /locker
- /var/core
- /usr/lib/vmware/isoimages
- /usr/lib/vmware/floppies
Non-persistent data
- /var/run
- /var/log
- /var/vmware
- /var/tmp
- /scratch
Note: All system storage inside Persistent data and Non-persistent data belong to the ESX-OSData. And those are the ones that should not be running on your SD/USB Card but instead on a persistent storage device.
A quick view of our vSphere installation.
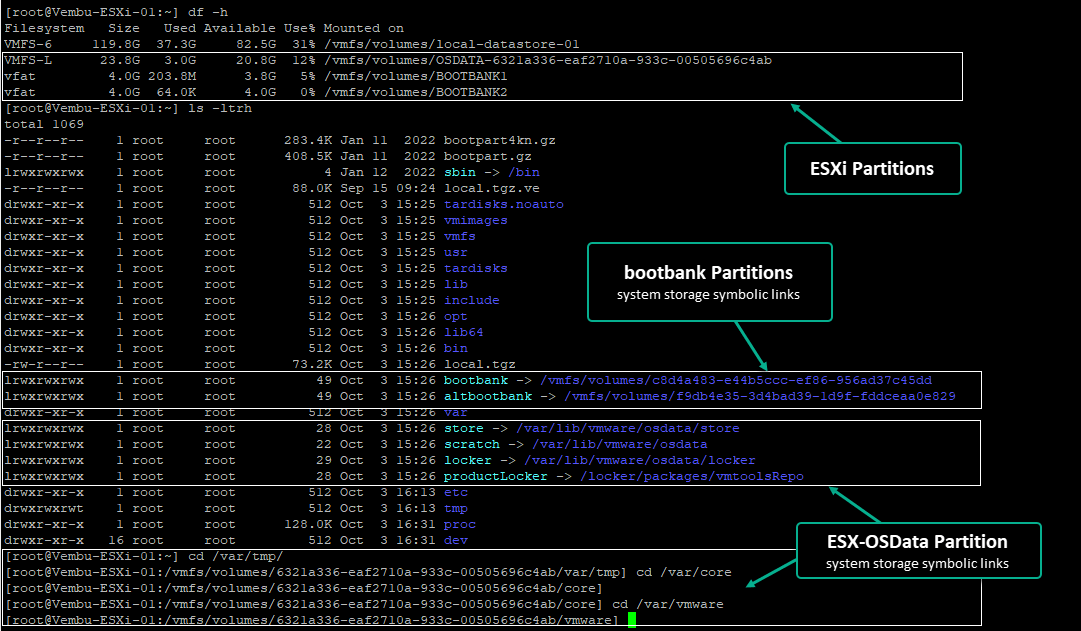
After a quick review of ESXi partitions, we can start creating our first Datastore (to store Virtual Machines) in our vSphere.
First, we check what storage devices we have free in our vSphere to create a Datastore.
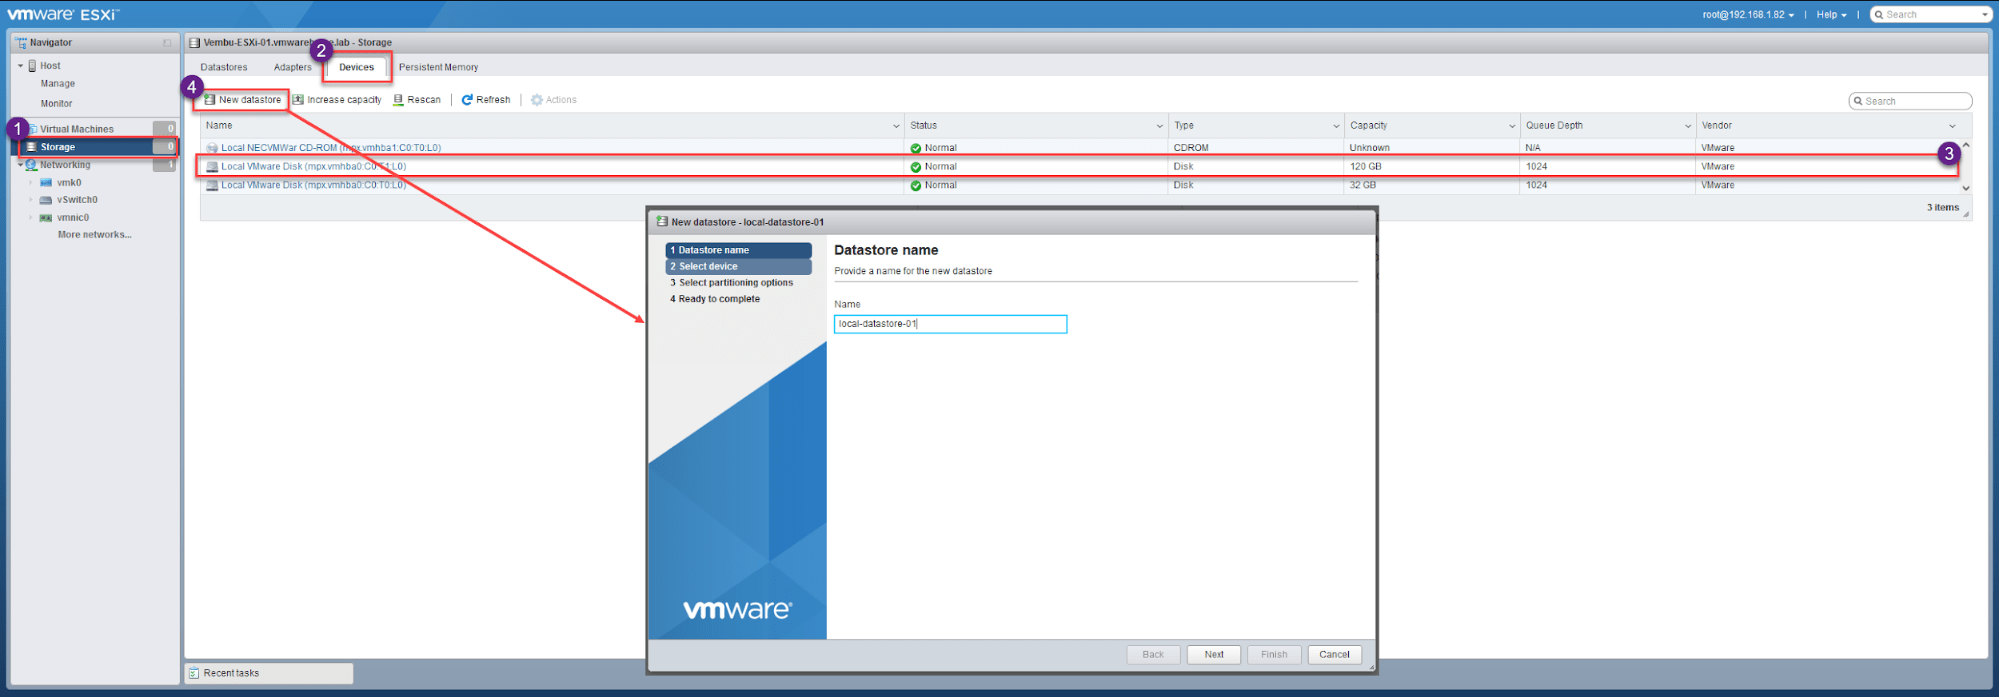
Login with your root account to the vSphere host web client, go to Storage option, Devices tab.
As we can see in the next image, we have 3 devices. The first is a cdrom device, the second is a local disk with 120Gb size, and then a third is 32Gb (this is our device where we have our ESXi installed).

To confirm that your 32Gb storage device is the ESXi installation storage, click on the device, and you will have detailed information about the device.
As we can see, we have ESXi partitions here, so we should not touch this device.

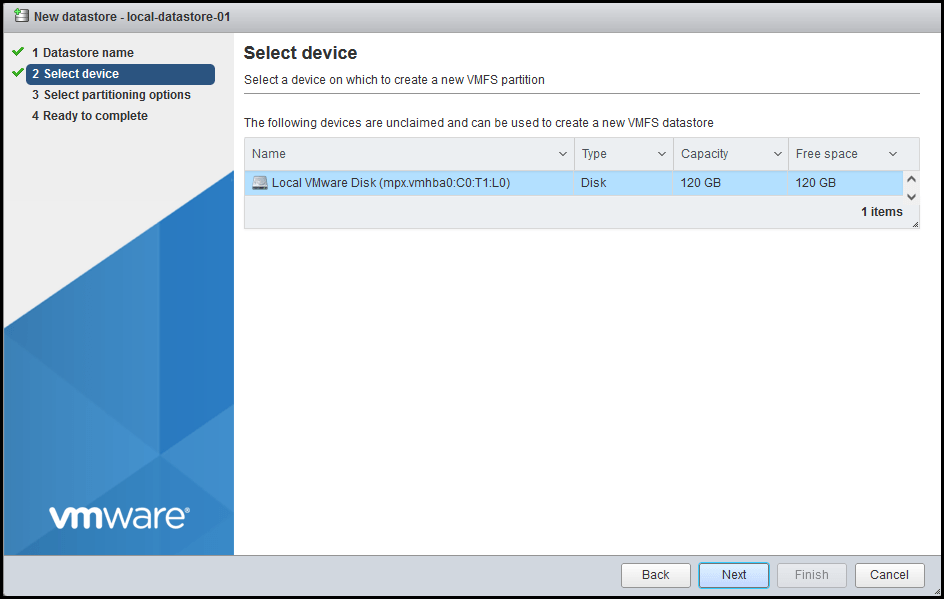
So we will use the local disk device with 120Gb. Again, you can click and check if it is empty. After you are sure there are no partitions, you can continue.
How to create a Datastore:
In the Storage option, Devices tab, click New Datastore and give it a name.
Note: The name needs to be unique so that when we add this host to a vCenter doesn’t conflict with other ESXi hosts Datastores names. I will name it local-datastore-01
Next, select the device you want to create this new Datastore. In our case is the 120Gb disk.
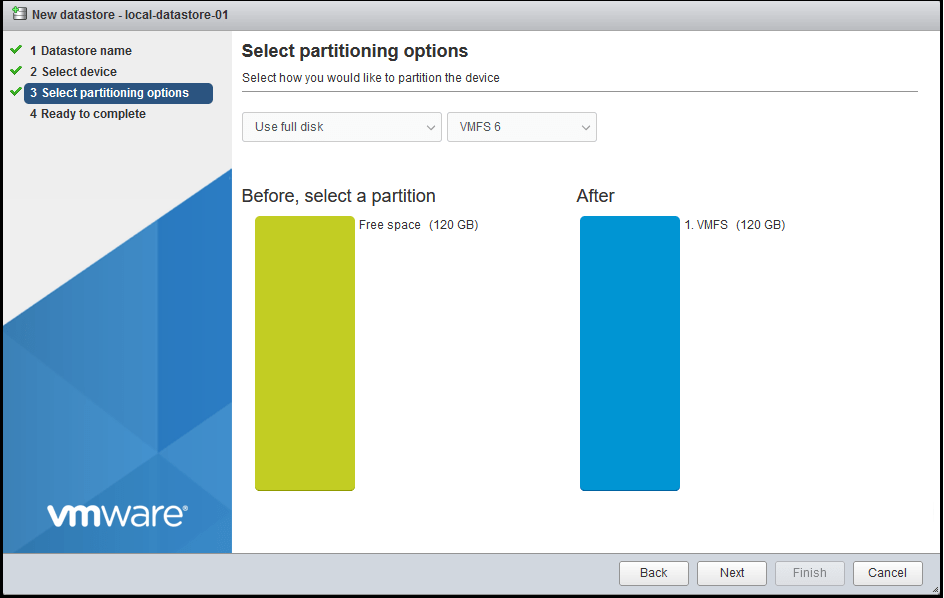
Select to use the full disk and click Next
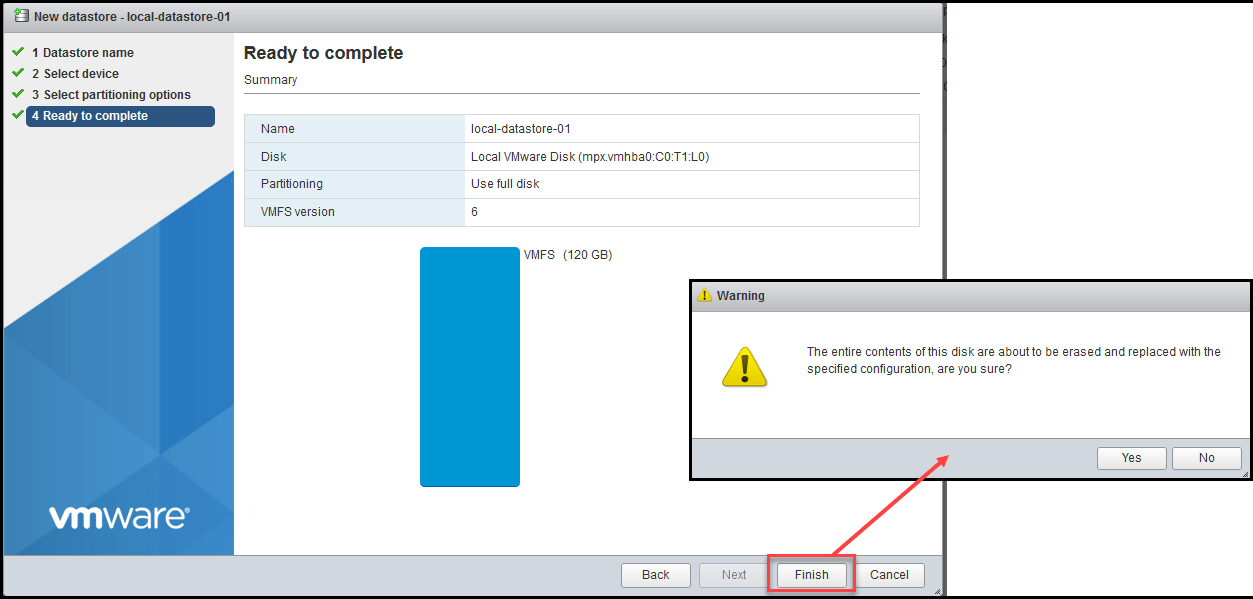
Double check the information, if all is good, click Finish
Note: All data or partitions present in this disk will be deleted. So before creating a Datastore, always double-check if this is the right one. Many disasters do happen in companies when administrators select the wrong disk or storage device.
Now we have our first Datastore in our vSphere.
To check our newly created Datastore, go to Storage option, Datastores tab.
Here we can see our new Datastore. If you click the Datastore name, you see all the system information(size, free space, UUID, and location) about this Datastore.

So now we have a Datastore to store our Virtual Machines, we can start creating Virtual Machines and install Guest System Operation on those Virtual Machines.
In the next articles, we talk about how to create Virtual Machines, and in the next one, we start creating central management for ESXi hosts by installing VMware vCenter.
Follow our Twitter and Facebook feeds for new releases, updates, insightful posts and more.


Leave A Comment