Since previous versions of the VMware vSphere vCenter 6.5 appliance (VCSA) had no native built-in ability to backup the appliance, this was a much-requested feature. With the release of the new VCSA 6.5 appliance (VCSA), administrators now have the ability to perform backups and restores of the VCSA configuration and database. The VMware vSphere vCenter server is at the core of the enterprise features found in a vSphere environment in the datacenter and must be available to have access to these features and functionality. Additionally, mission critical virtual infrastructure such as Distributed Switch (vDS) configuration is housed in vCenter. Due to the important role that vCenter plays in the vSphere architecture, having good backups is a must! We can utilize the new functionality included with vSphere 6.5 VCSA to backup our VCSA appliance. Let’s take a look at the process to backup the VMware VCSA 6.5 appliance.
Backup VMware VCSA 6.5 Appliance
Before we get into the process of backing up and restoring VCSA, let’s first take a quick look at VCSA vs Windows vCenter. VMware has made it clear with every vSphere release they are distancing themselves from the Windows vCenter roadmap. In fact, recently, VMware made it public on the VMware vSphere Blog that past vSphere 6.5, Windows vCenter server will not be included in the next numbered release. The writing is on the wall – we all need to be migrating to the VCSA appliance. The backup functionality shown will be using the VCSA 6.5 appliance.
Backup VMware VCSA 6.5 to FTP Server
The first thing we need to do is setup a server to target with our VCSA 6.5 appliance backup process. For the purposes of demonstrating the process, we are going to setup a simple FileZilla FTP server to receive the VCSA 6.5 appliance backups. There are three things we need to do in setting up our FTP server:
- Setup a username
- Configure a password
- Setup a directory on the FTP user that will be used to house the backups
Below in our FTP server we are going to add a user by clicking the Add button.
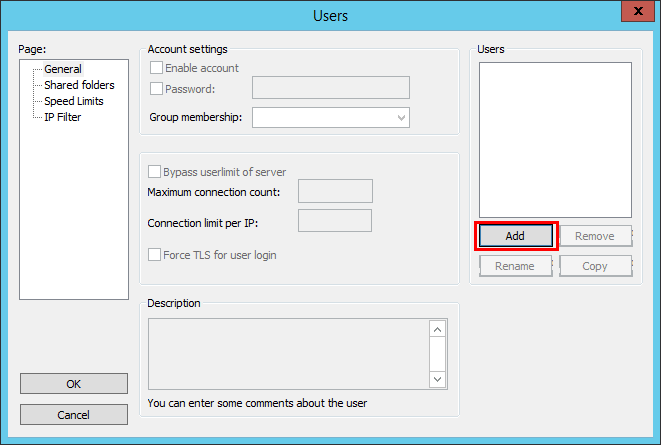
Adding a backup user for connecting to the FTP server
Name the user and add to any groups you want. In this scenario, we don’t really need to utilize groups on our server so we are simply leaving the groups unconfigured.
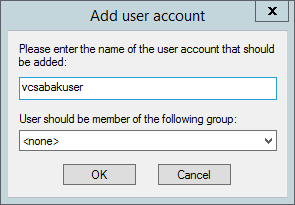
Create the backup user
Back to the General tab, we check the box to set a password for our user.
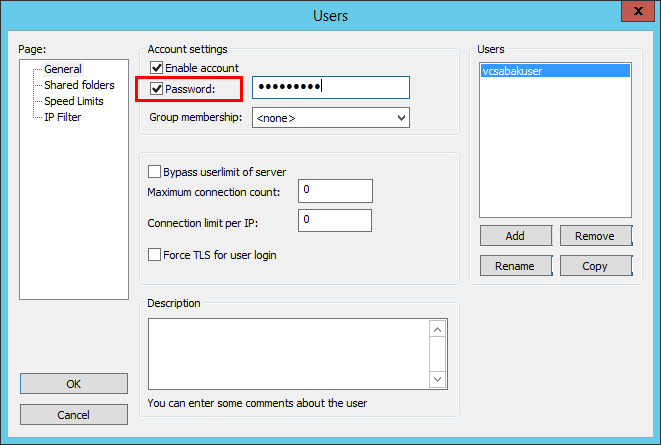
Configuring a password for the backup user
Under the Shared folders configuration, we click the Add button to add a directory path and then under the Files and Directories trees, we can set the permissions the user has on the location. Here we are granting all permissions to our backup user so it can create/delete both files and folders.
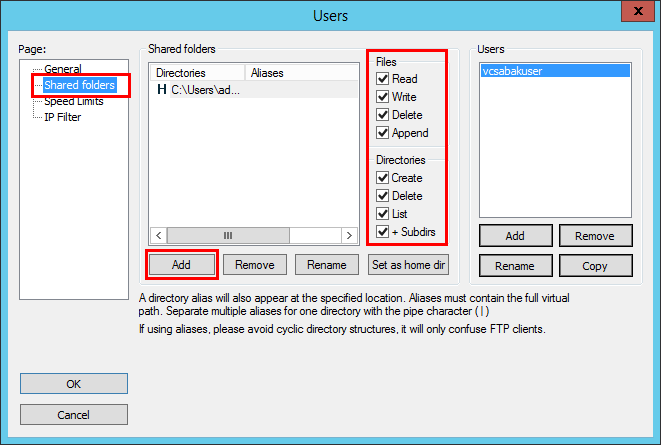
Configuring the FTP directory and assigning permissions for the user
In FileZilla FTP, the preceding steps are all we have to do to get the FTP server up and running so that we can use it as a target for our VCSA backups. Keep in mind, different FTP servers or solutions may require additional steps for configuration before utilizing in the VCSA 6.5 appliance backup process.
Creating the Backup in the VCSA 6.5 Appliance
Now that we have our FTP server configured, we can login to the VAMI administrative interface of our VCSA 6.5 appliance. To get to the VAMI interface, login to https://

Login to the VAMI interface and kick off the backup wizard
This will bring up the Backup Appliance wizard. The first screen has us entering in the backup details of our server that will be targeted for the backup process. There are quite a few options for Protocol that can be used including FTP, HTTPS, HTTP, SCP, and FTPS. We will select the FTP option.
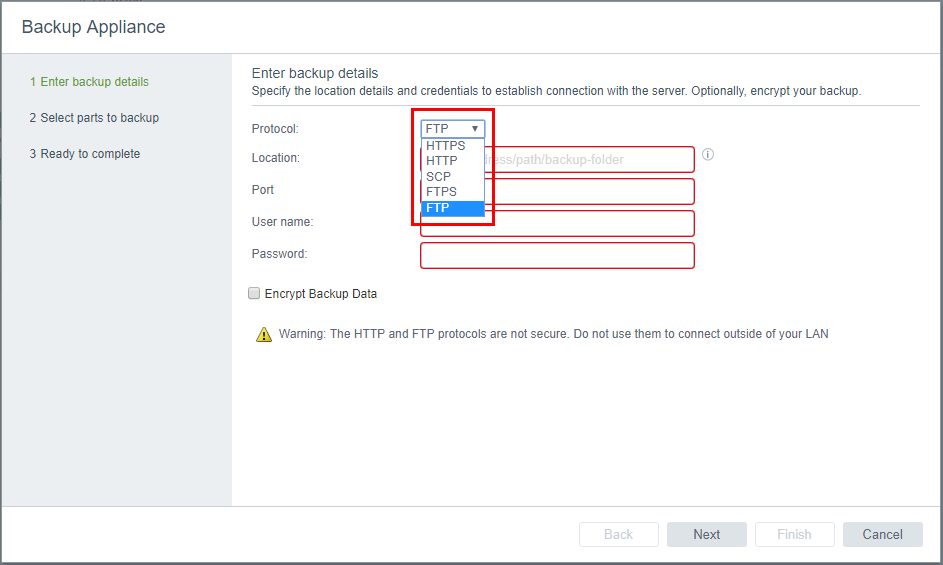
Configuring the backup location for the VCSA 6.5 appliance
Enter the FQDN or IP Address to be used in the Location field. ***Note*** you need to enter a trailing slash here if you are simply targeting the root folder of your FTP server. We enter the user name and password that we configured earlier in our FTP server. Also, we can choose to Encrypt Backup Data by selecting the box. This encrypts the backup data so that it is not readable without the password.
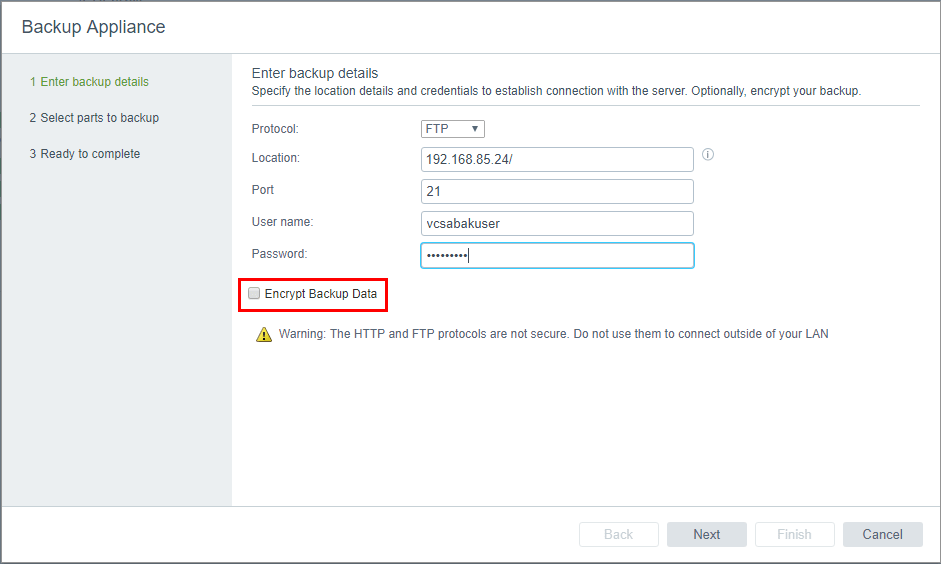
Choose backup encryption options
Below, we have entered the connection information and chosen to Encrypt the data so we have populated the password there as well.
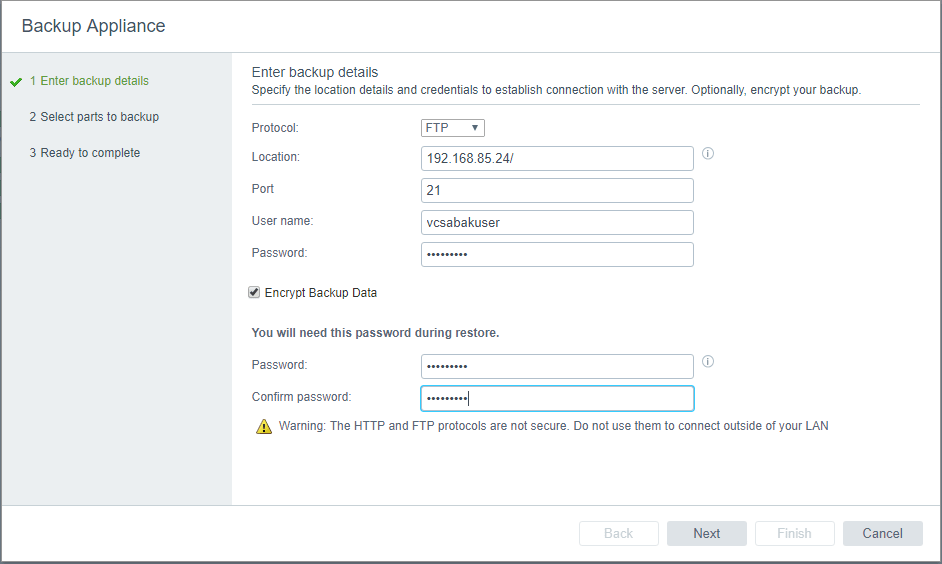
Backup location and encryption options configured
After clicking Next above, we are taken to the Select parts to backup screen. Notice the checkboxes next to the various data parts. By default the common data including inventory and configuration is selected and cannot be deselected. We can however choose not to backup the stats, events, alarms, and tasks. The wizard will show Retrieving size.
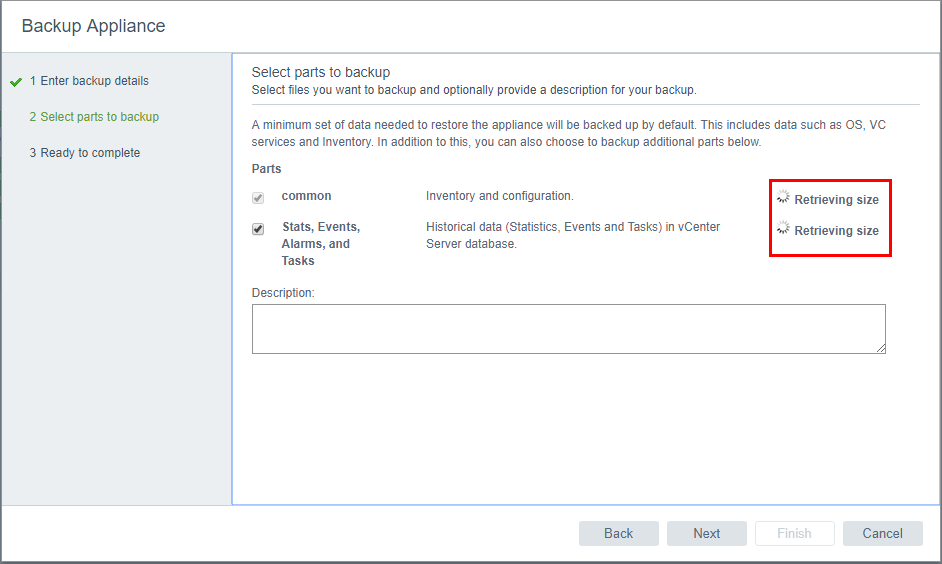
Calculating the backup data size
Once the wizard calculates the data, the respective sizes will be displayed.
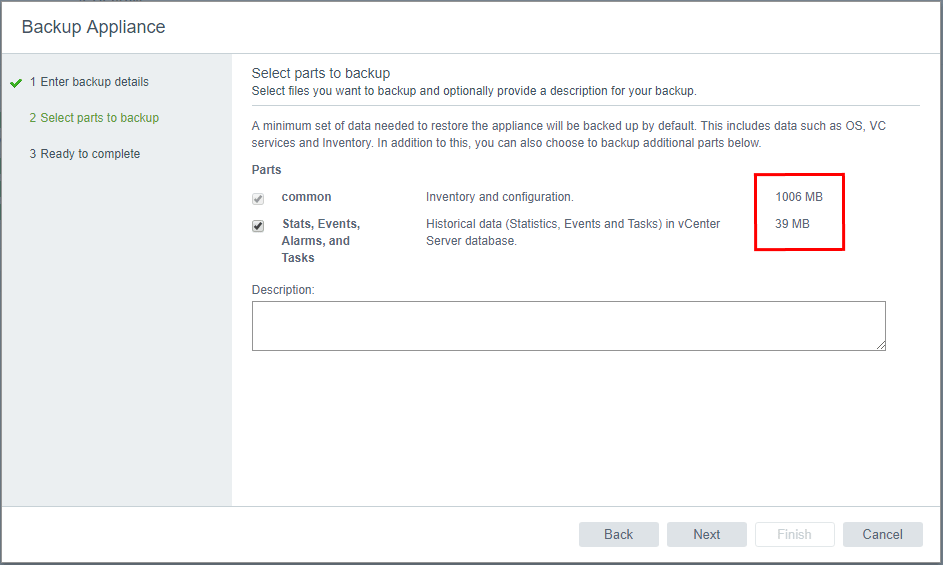
Backup size calculated and process ready to begin
Finally, we are ready to click Finish and begin the backup process.
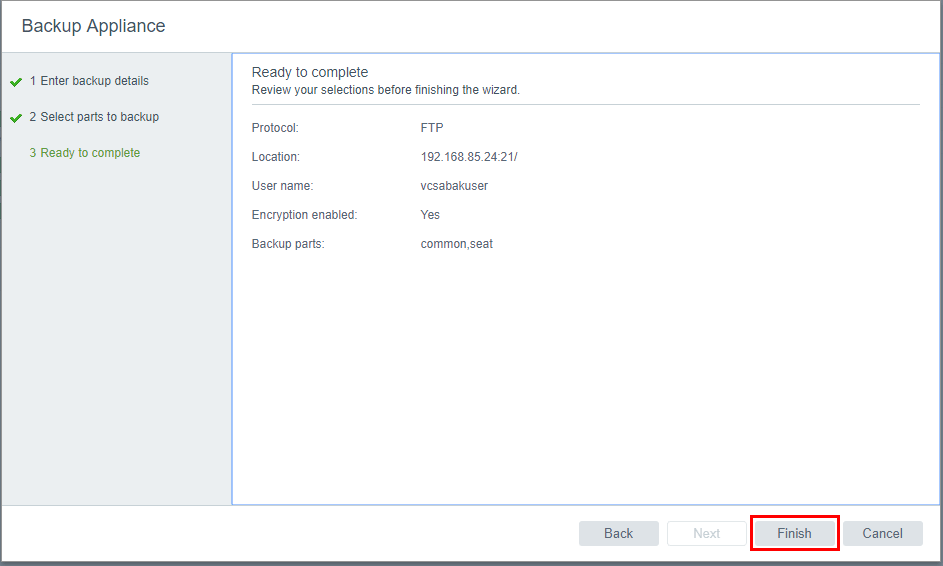
Click Finish to begin the VCSA 6.5 backup operation
The Backup Progress will be displayed in the status box along with the respective tasks that are being performed.
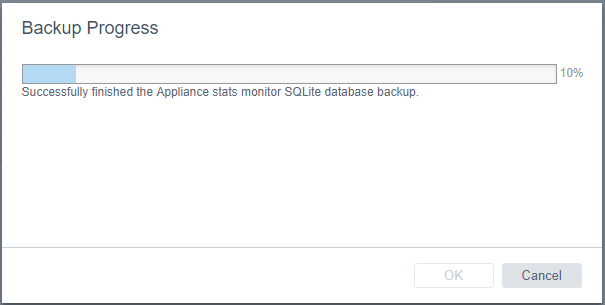
VCSA 6.5 Backup running
If we want, we can go back over to our FTP server and see the files being created in the FTP root directory.
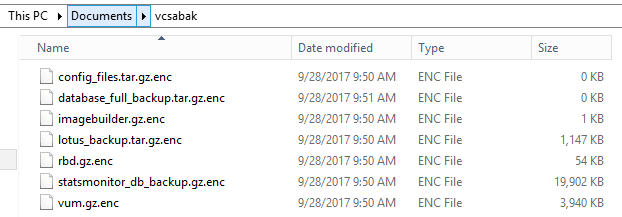
Files are created in the FTP directory by the VCSA 6.5 backup
After just a couple of minutes in the case of the lab VCSA 6.5 appliance, our backup job finished successfully.
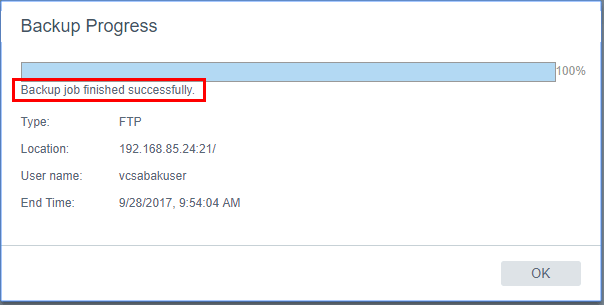
VCSA 6.5 backup operation completed successfully
Scheduling the VCSA 6.5 Backup Process
Unfortunately, with the current backup functionality, there is no built-in way to schedule the backup process to run within the VAMI interface. However, there are already quite a few great posts that explain how to do this with either a PowerShell job or locally on the VCSA appliance using a CRON job to kick off a shell script. While we won’t cover either process in this post, be aware that it is easily doable with a bit of scripting.
Thoughts
There are a number of great benefits to the new vSphere vCenter Server 6.5 appliance including the functionality to backup our vCenter configuration and other data. This gives VMware administrators a great tool for DR purposes when thinking about restoring vCenter in the case of a failure to the VM or a complete site failure. The process to provision a target for the backups is fairly straightforward and can be accomplished by a number of different server solutions available. Creating the first backup of the VCSA appliance involves logging into the VAMI interface and configuring the backup location and other options. Be sure to check out the new backup functionality with VCSA 6.5 sooner rather than later!
Follow our Twitter and Facebook feeds for new releases, updates, insightful posts and more.


Leave A Comment