AWS CodeCommit is a fully managed source control service that makes it easy to host private Git repositories. It provides a secure and highly scalable environment for storing and managing your source code, as well as collaborating with other developers on your team.
With CodeCommit, you can create repositories for your code and control access to them using AWS Identity and Access Management (IAM). You can also use it to manage your code changes with Git, including version control, branching, and merging.
CodeCommit Alternatives
- GitHub Enterprise
- GitLab
- BitBucket
CodeCommit integrates with other AWS services, such as AWS CodePipeline, AWS CodeBuild, and AWS CodeDeploy, to provide a complete continuous delivery and deployment solution. You can also use it with third-party tools and services, such as GitHub and Jenkins.

CodeCommit advantages
- Secure and highly available storage for your source code
- Fully managed service with automatic backups and no hardware to maintain
- Integration with other AWS services and third-party tools
- Easy collaboration with other developers on your team
- Cost-effective pricing based on usage
- Supports standard functionality of Git – Supports Git version 1.7.9 and later
Let’s commit one small application on AWS Codecommit using SpringToolSuite. I have one Spring Boot application which just returns “hi from AWS CodeCommit – v1 ”.
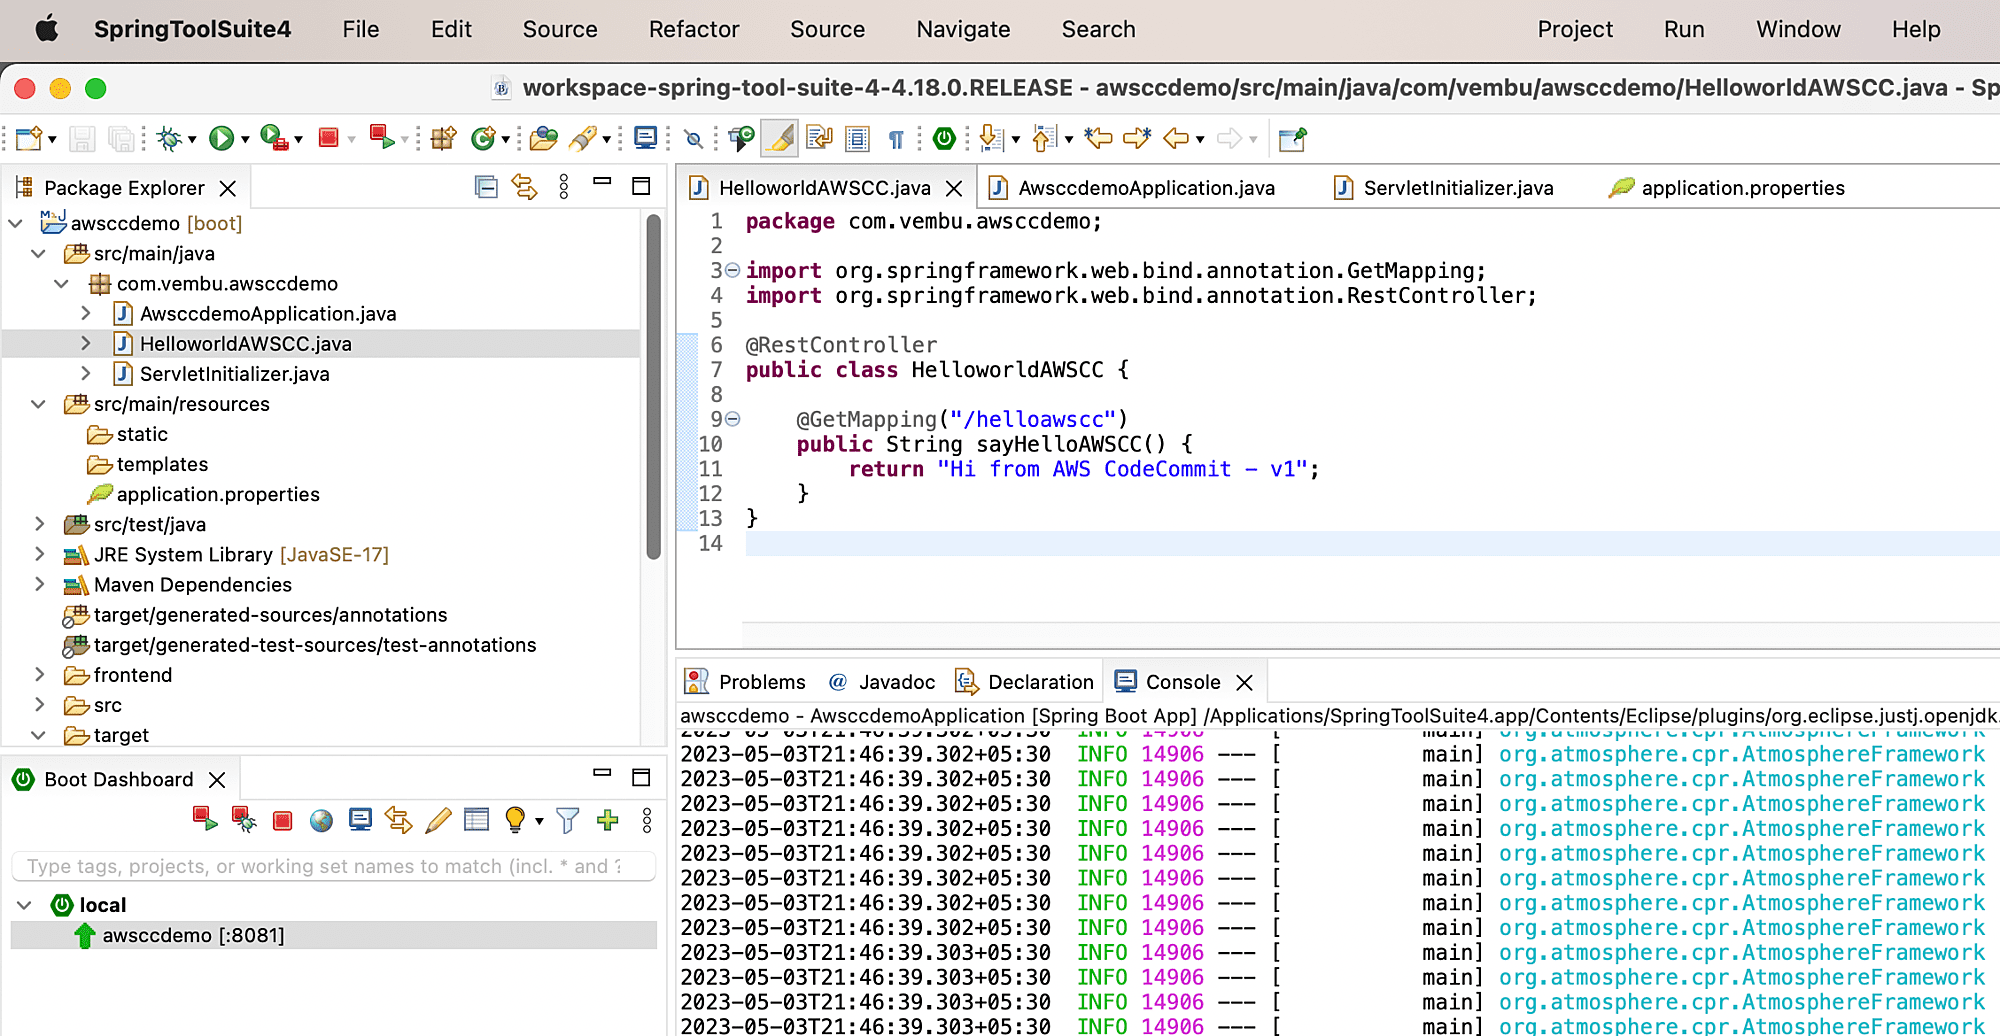
I am using Spring Tools 4 for Eclipse for this demo.
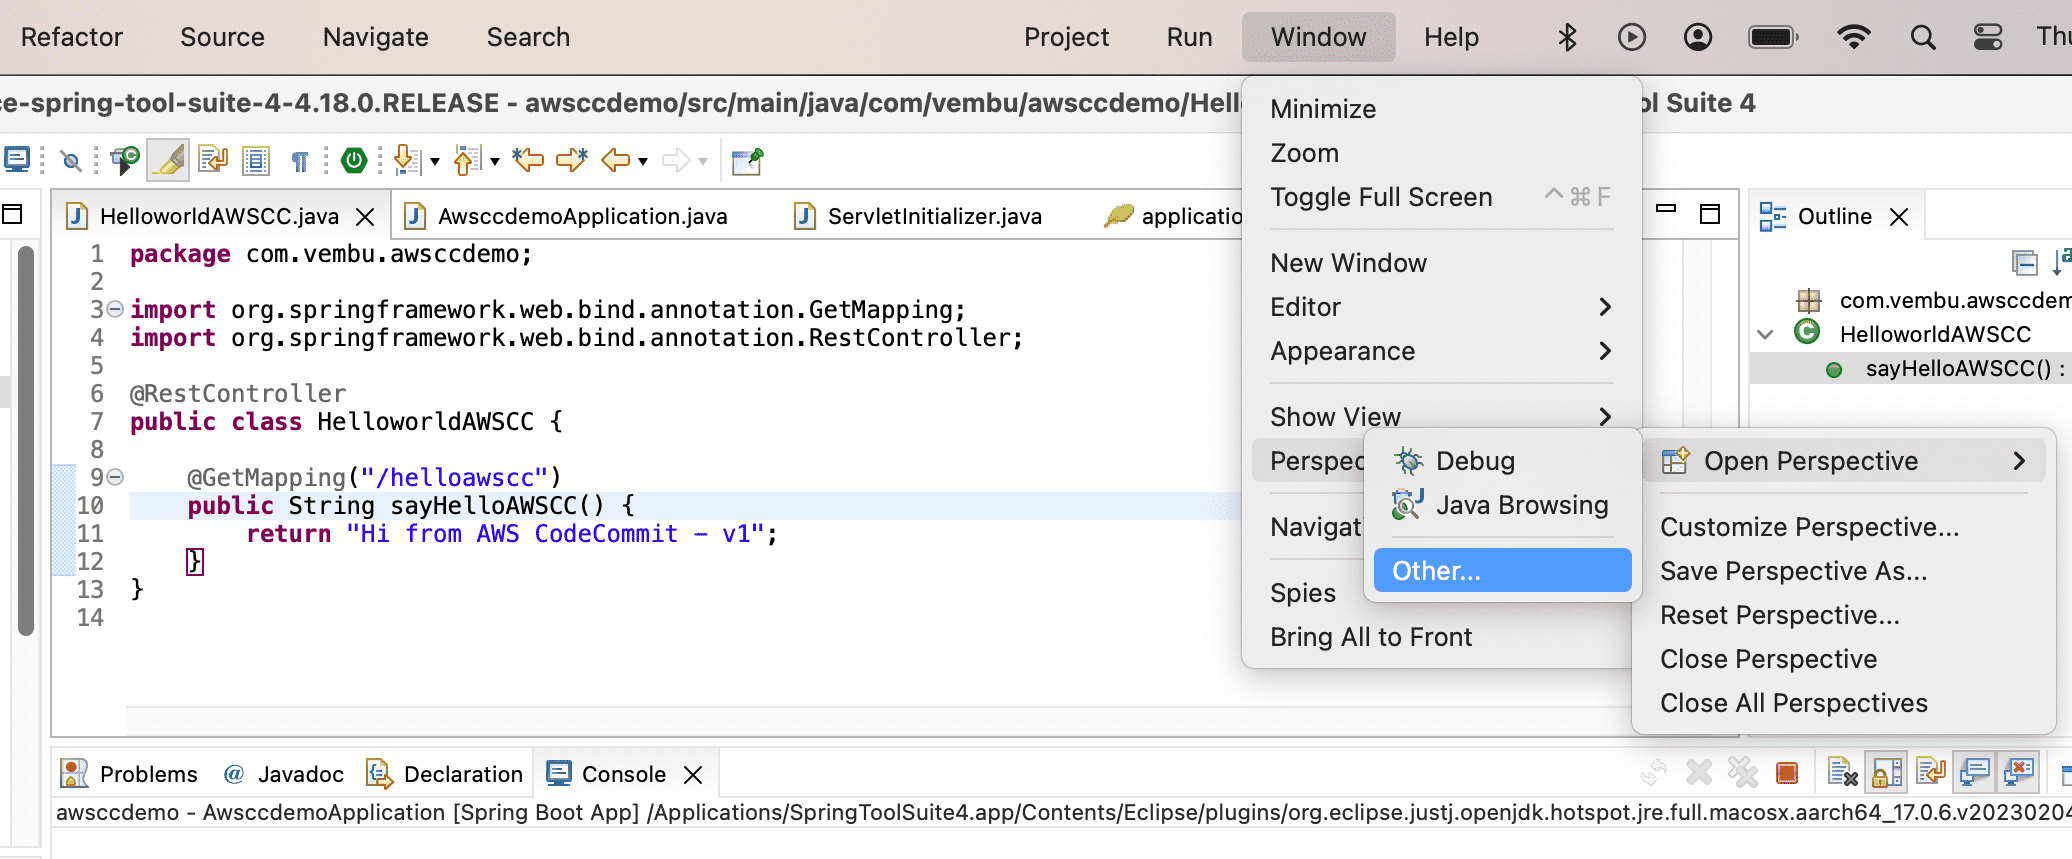
1. From the SpringTools, click on Window and navigate to perspective and select Other.
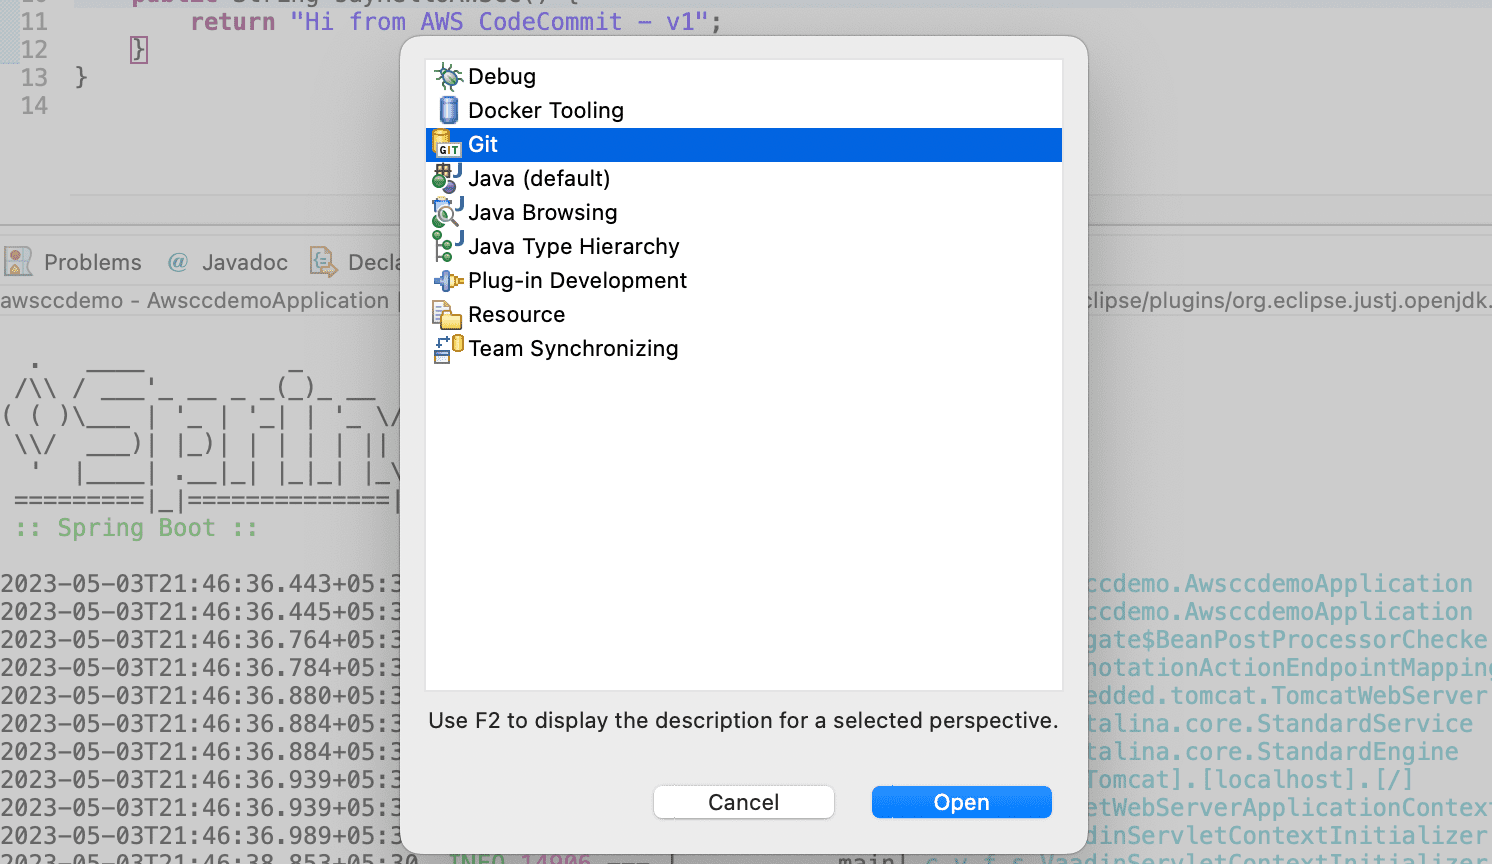
2. Select “git” and click on open to launch window in “git” perspective.
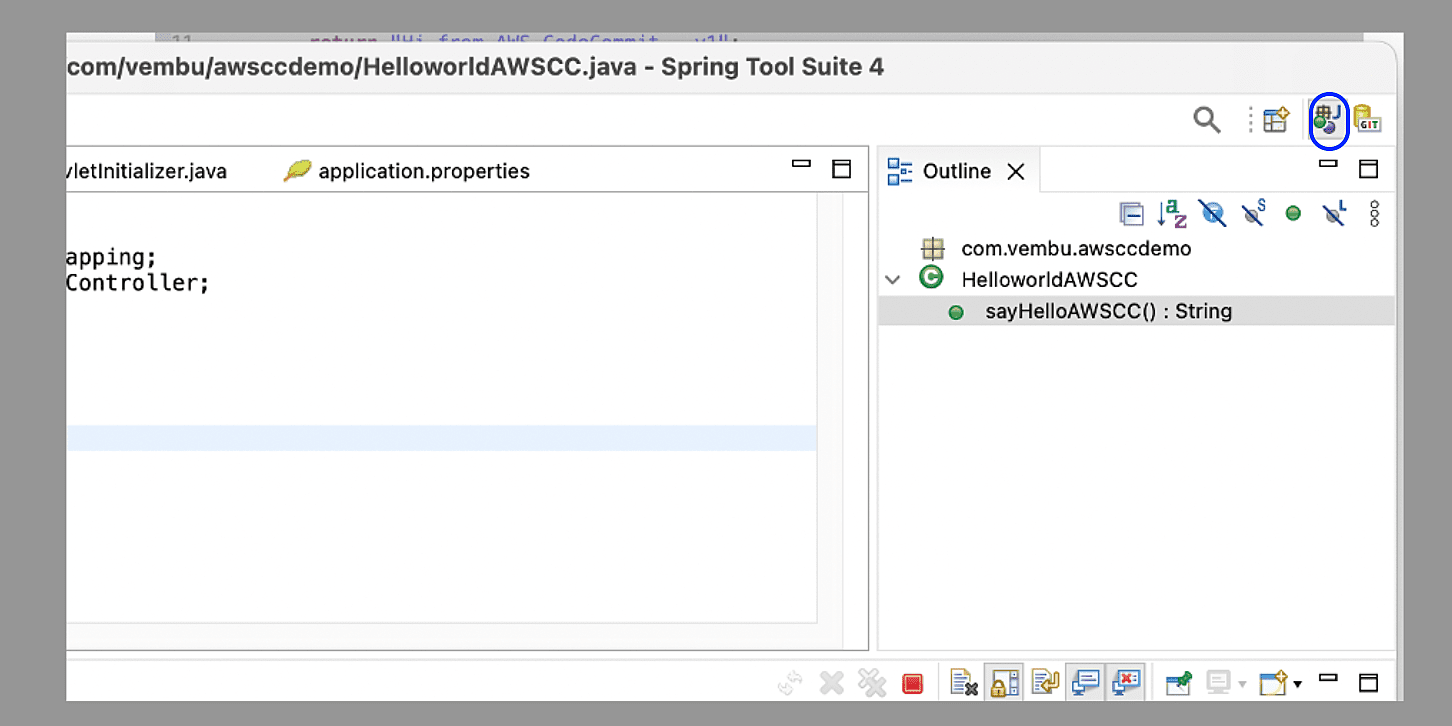
3. Navigate back to “java” perspective by clicking on the top right corner icon.
4. Right click on the project and select “Team”. Click on Share the project.
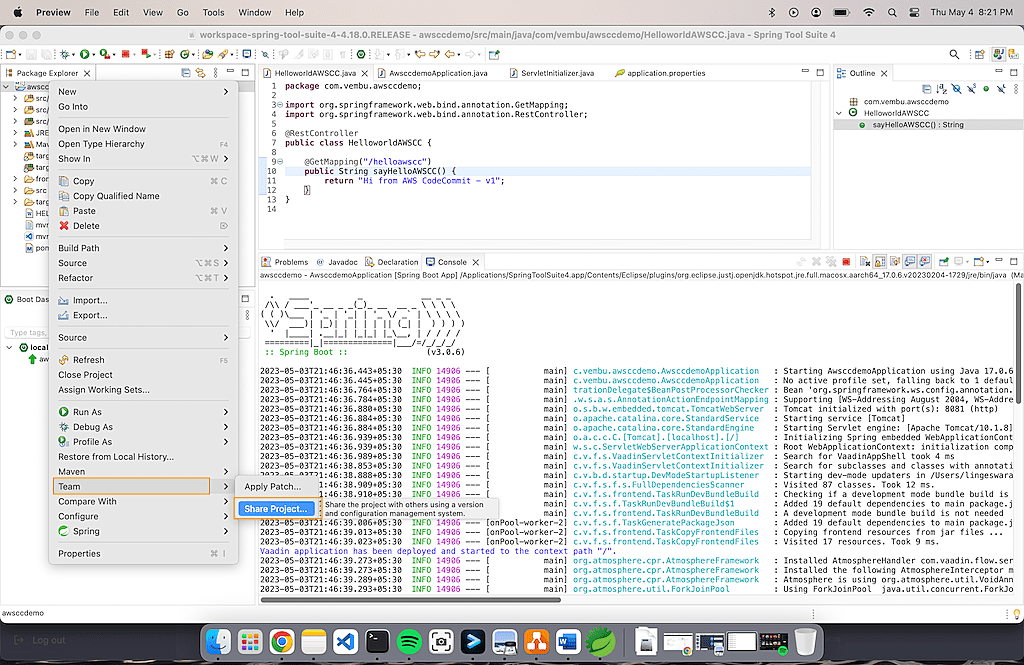
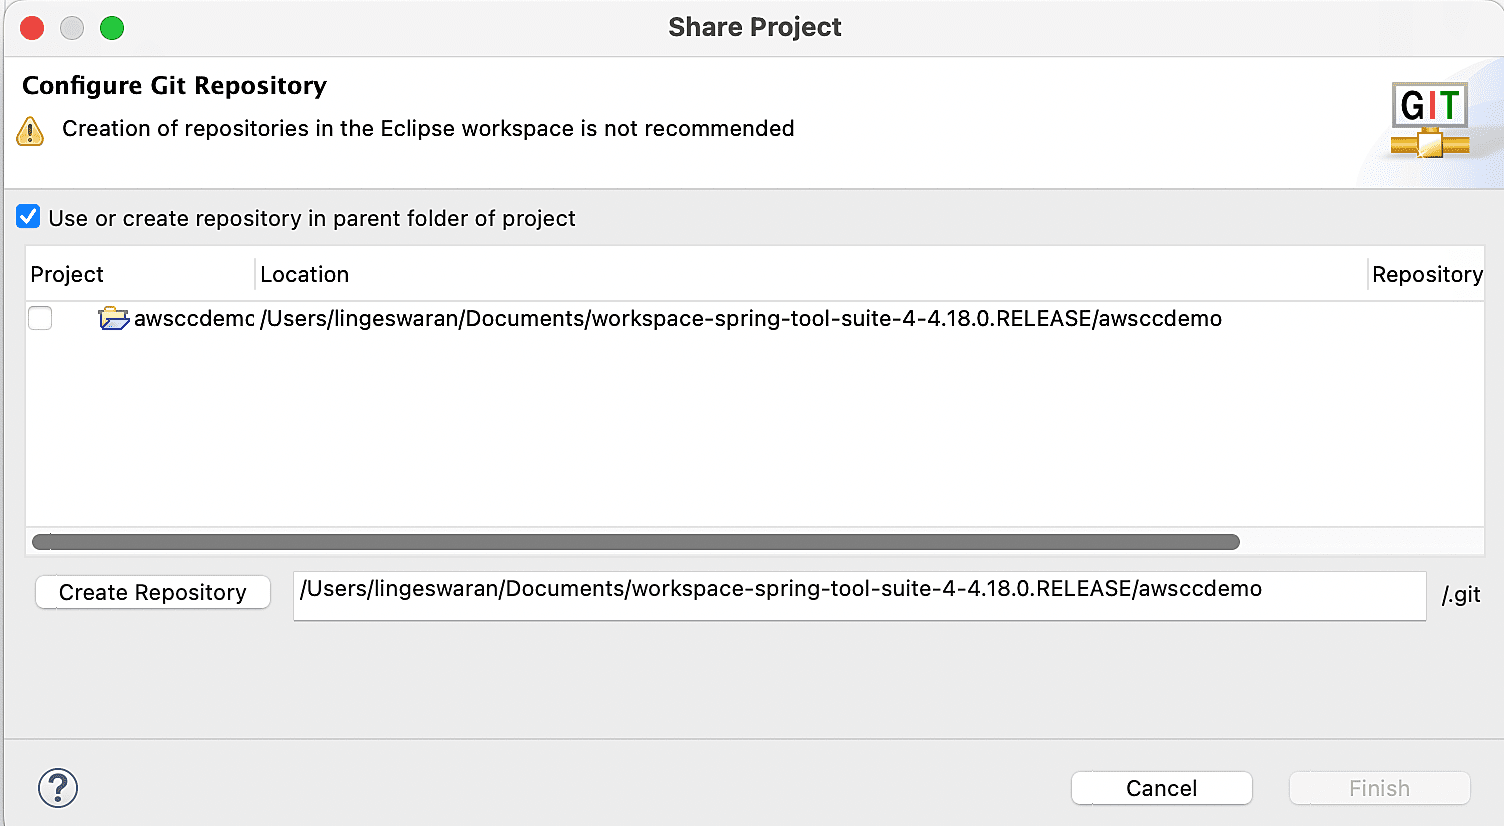
5. Create repository by clicking “Create Repository”. Click on “Finish” to close the wizard.
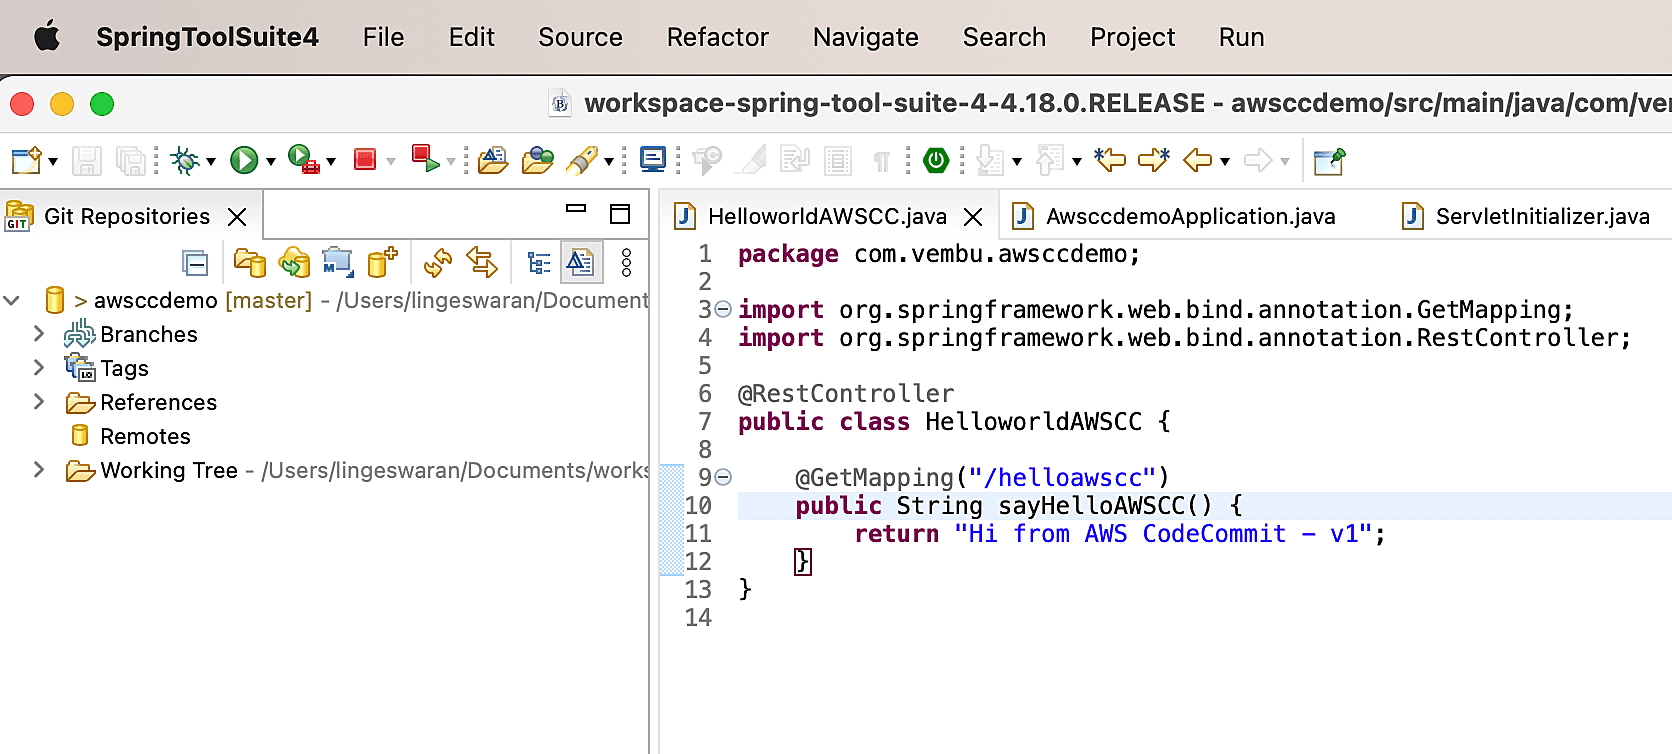
6. Navigate back to “Git” perspective. Refer Step 3 to know how to switch it back to “Git’ perspective. (Small git icon next to Java perspective )
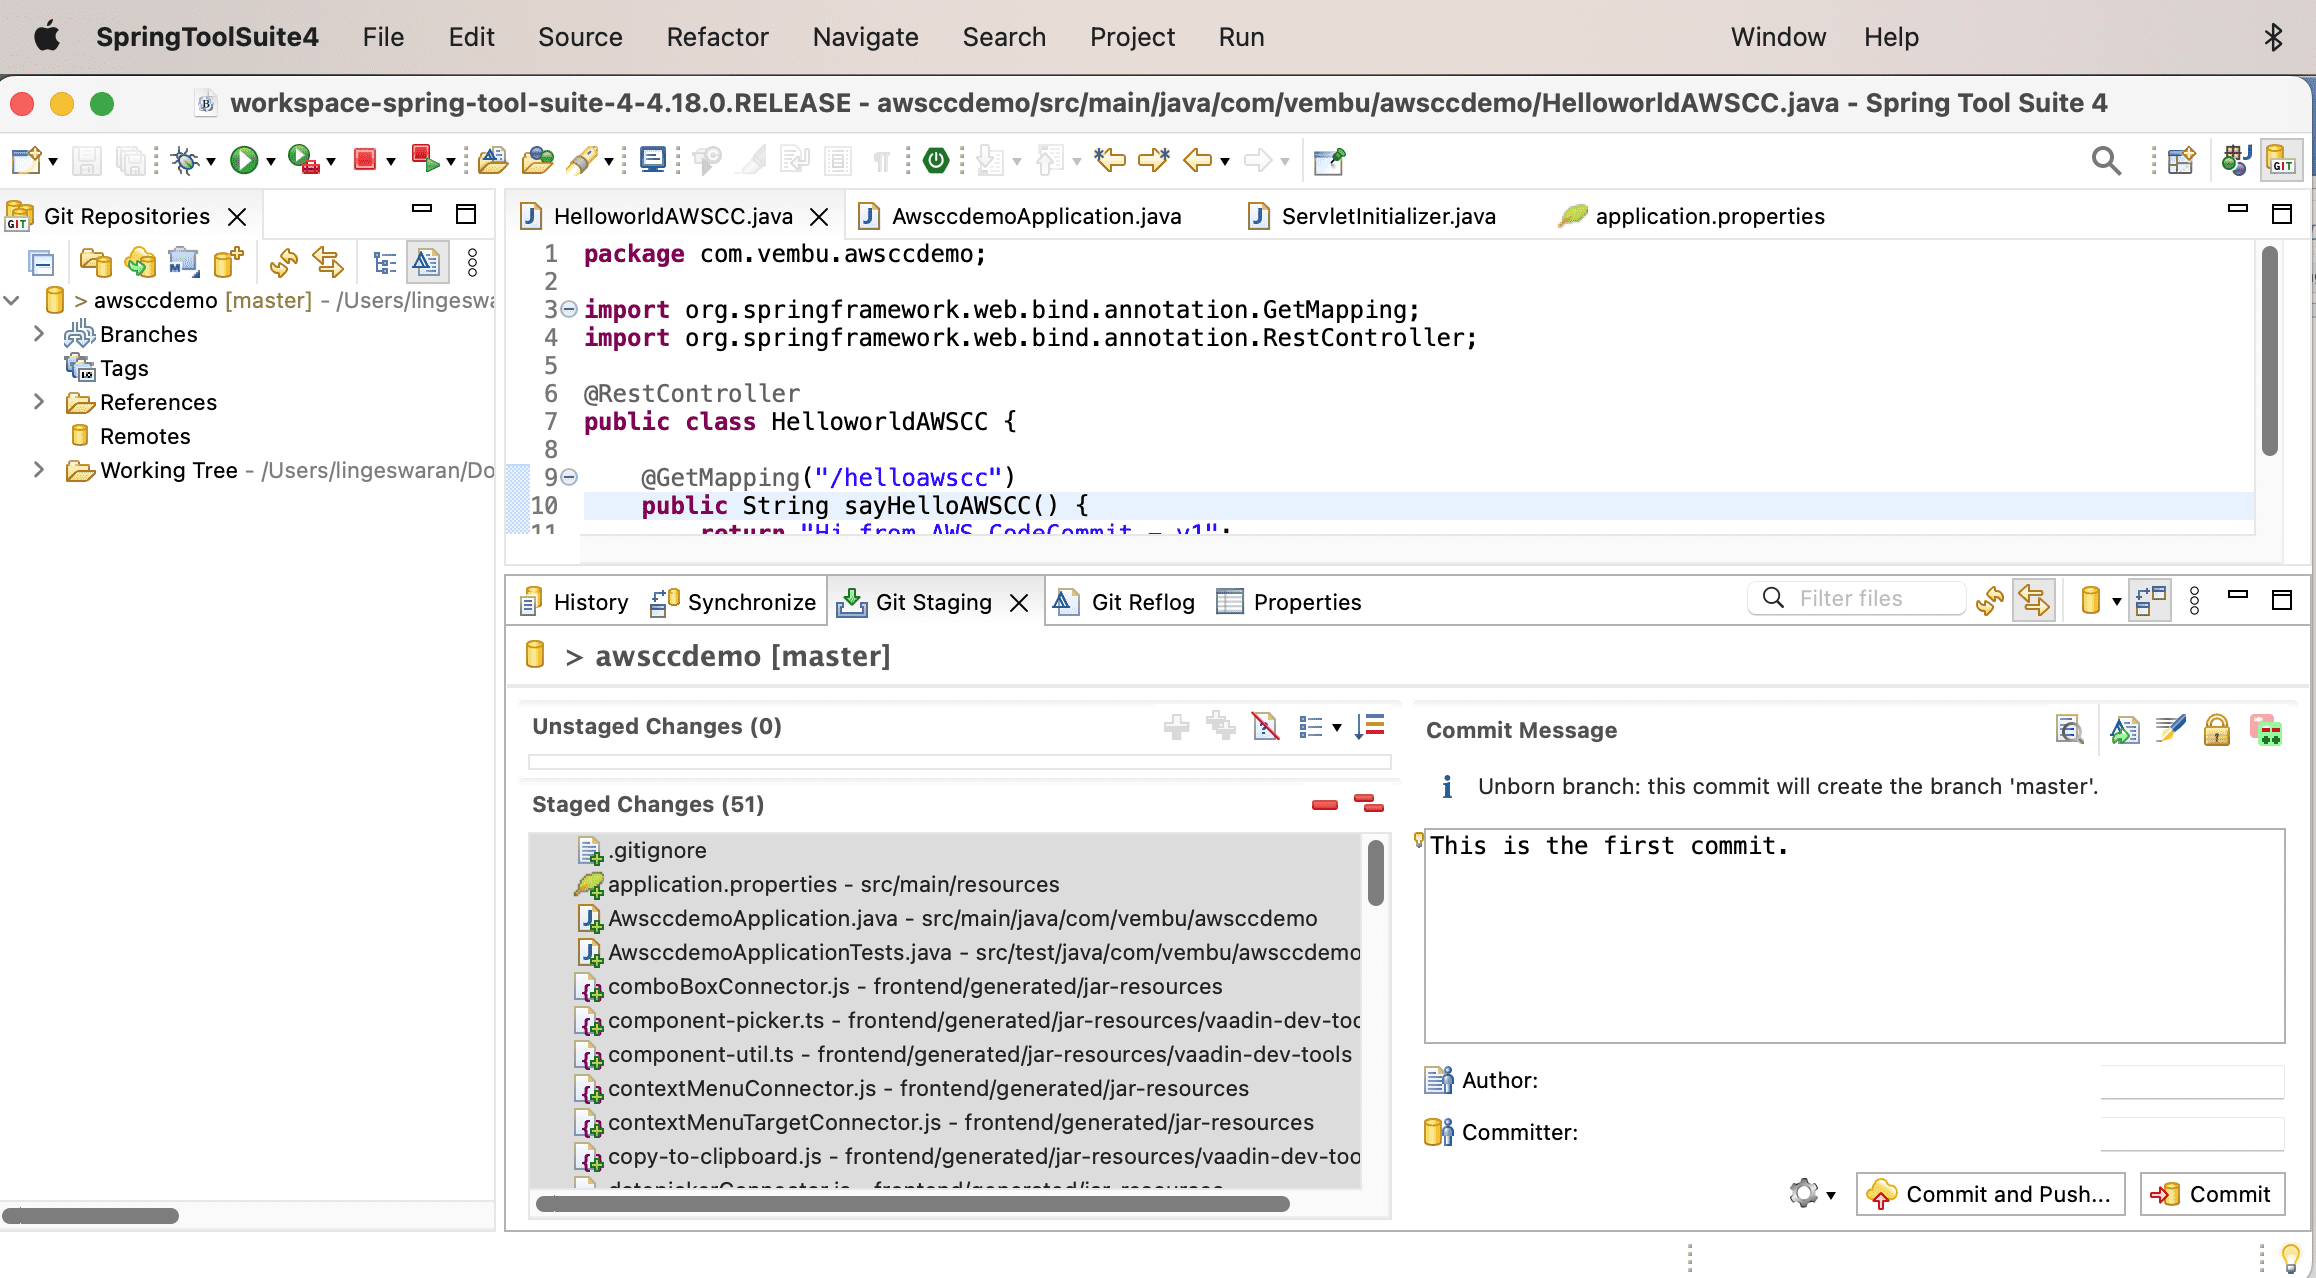
7. Click on “Git Staging” and add icon to add all the files.
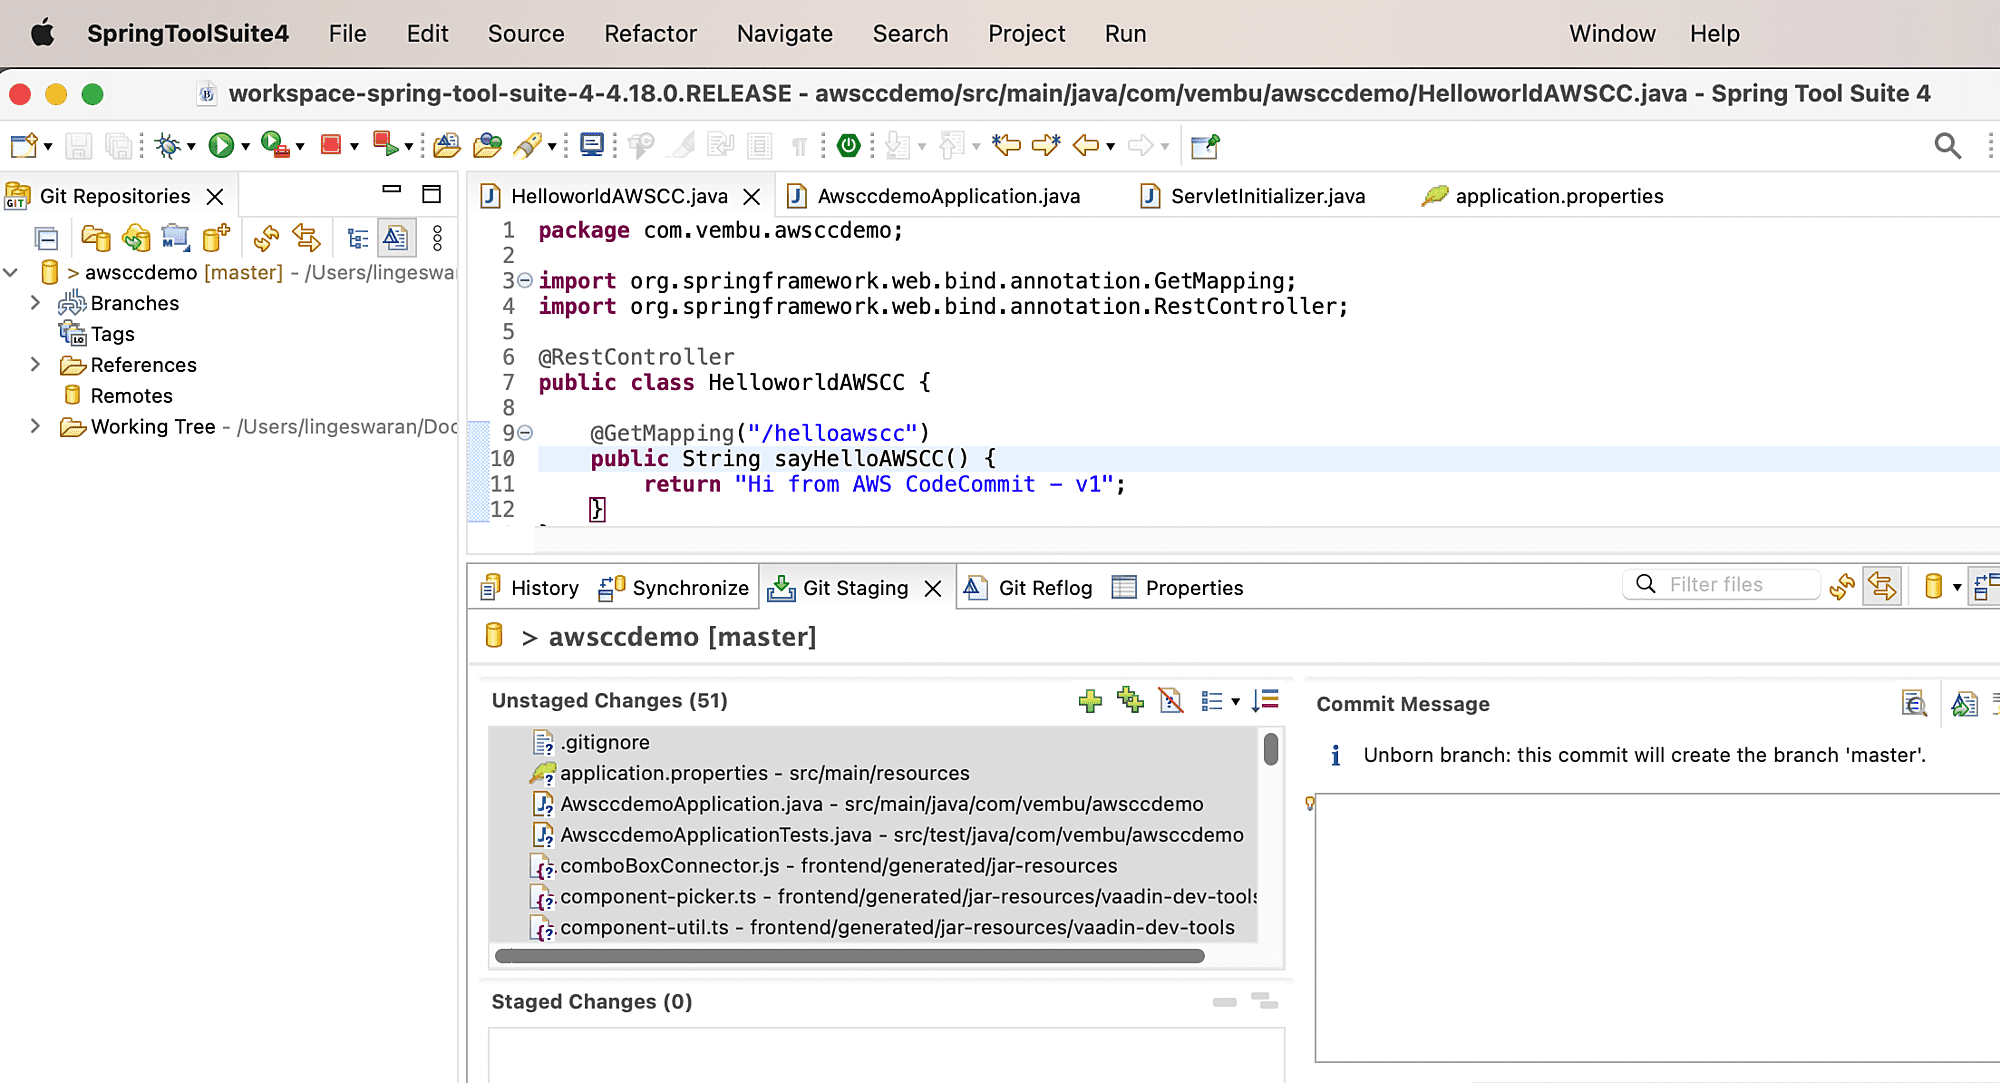
8. Once the files are staged, you can add commit message and click on “commit”.
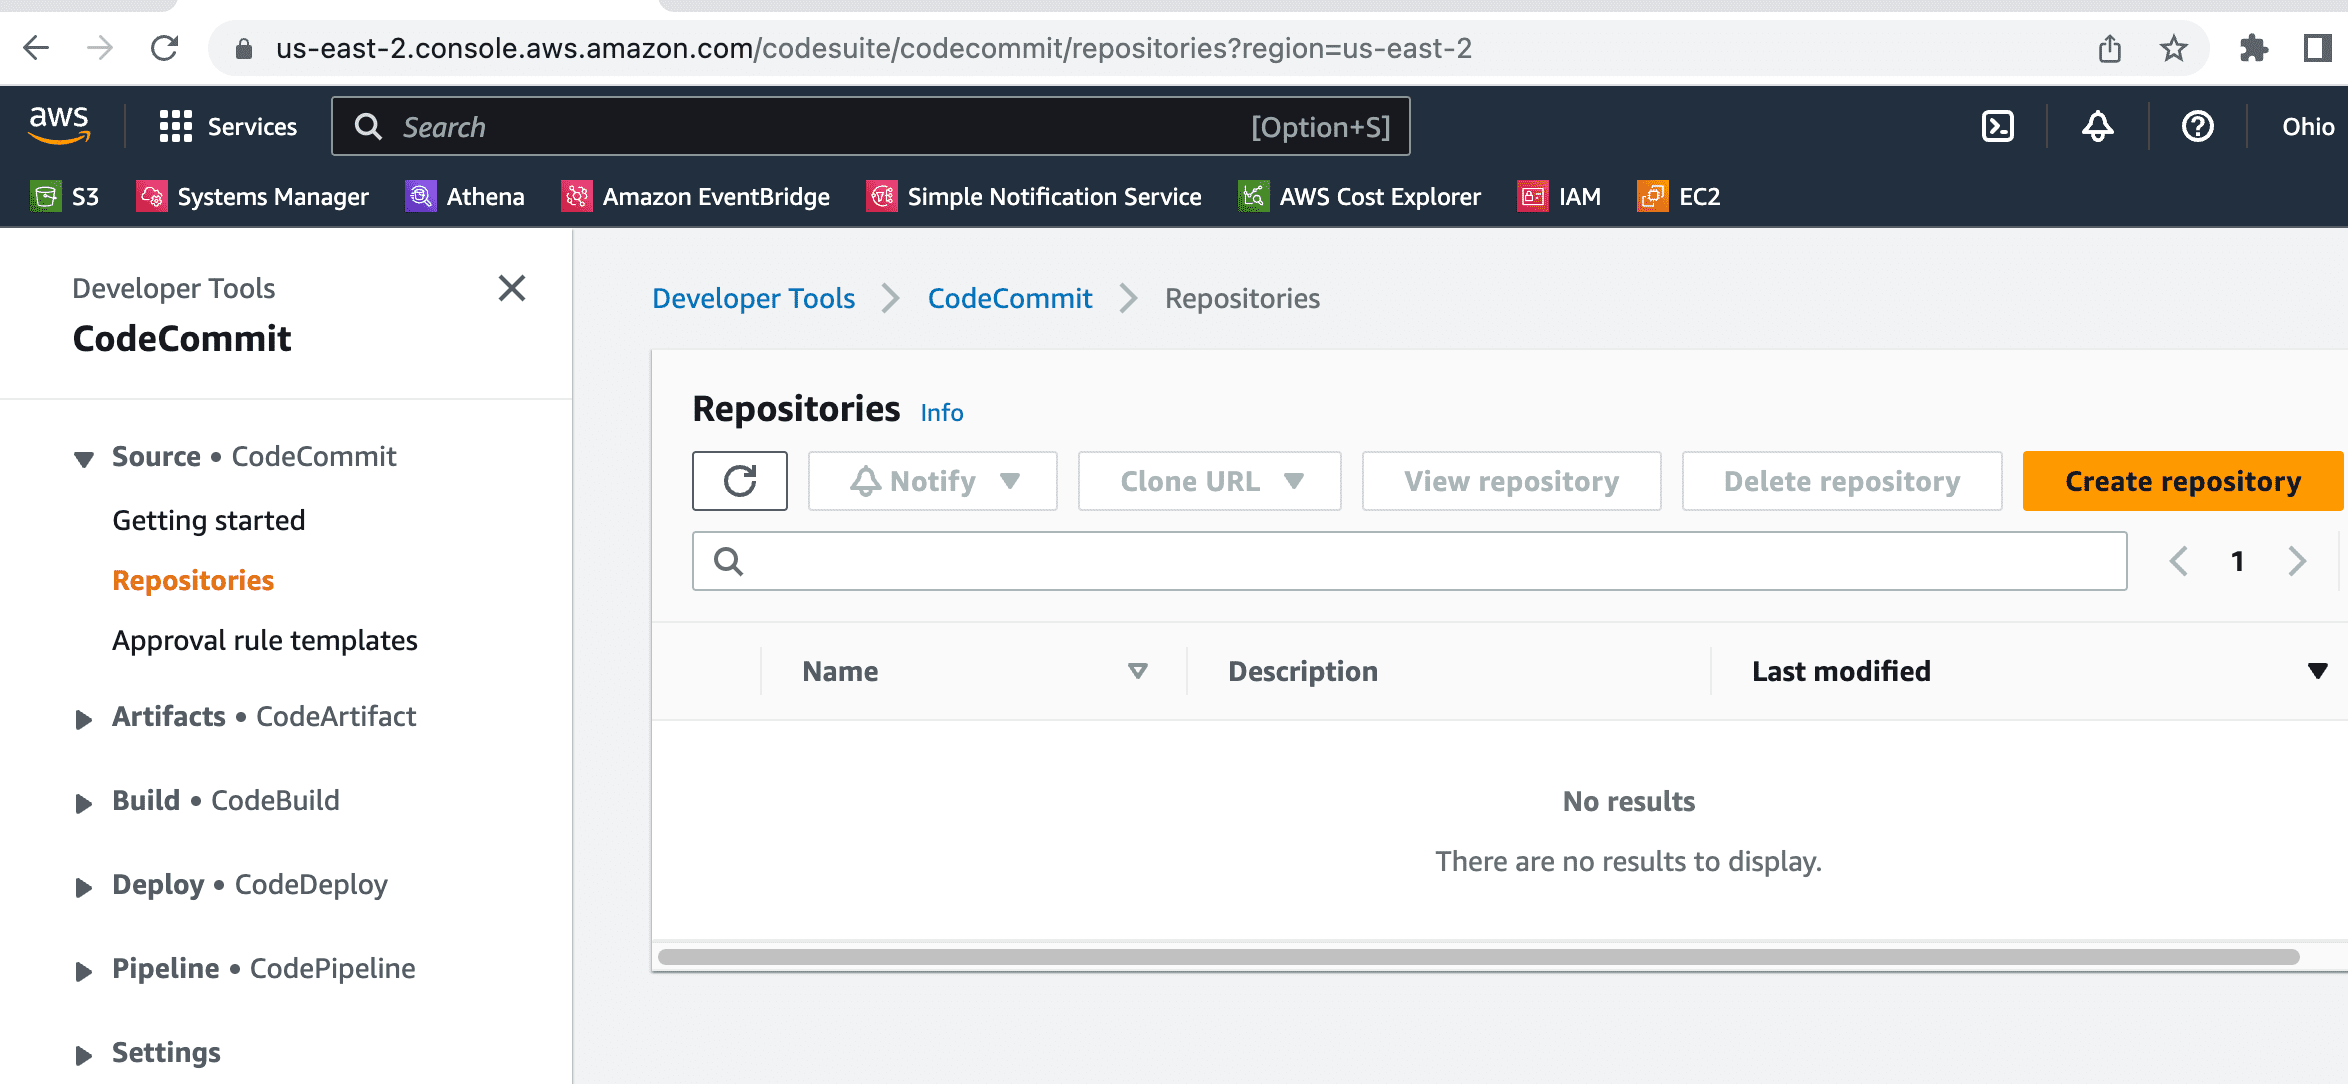
9.Login to AWS console and navigate to “CodeCommit”.
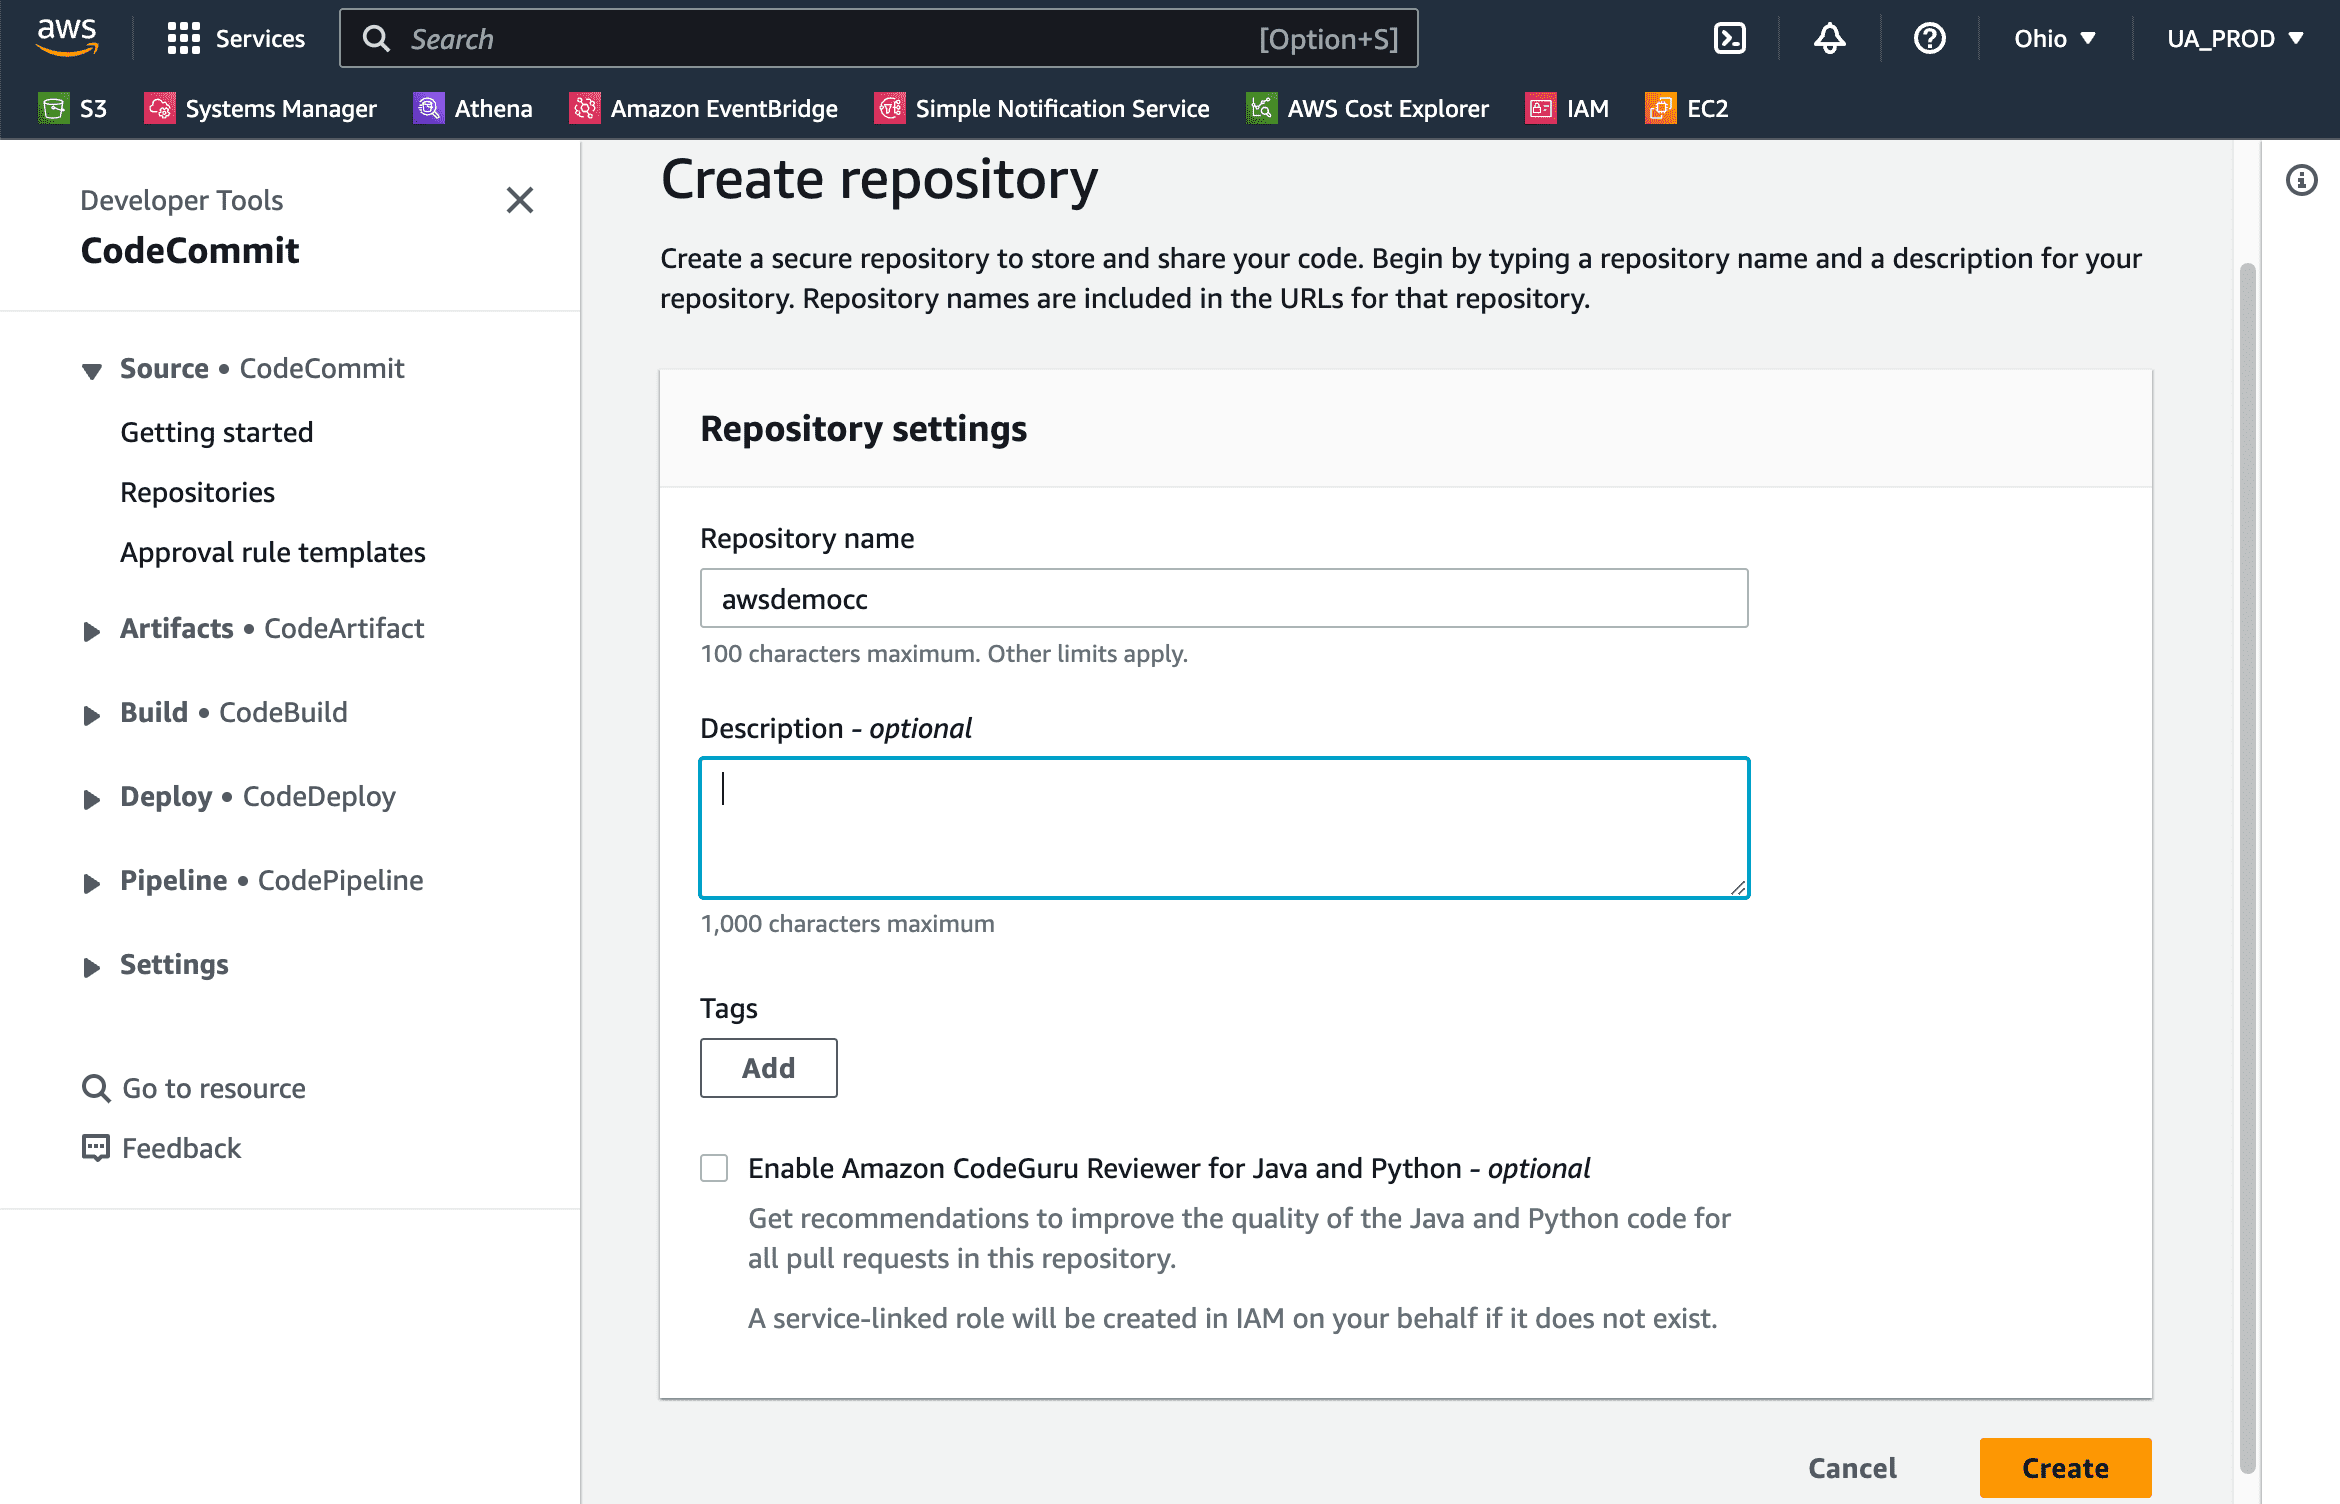
10. Enter the repo name and click on “Create”.
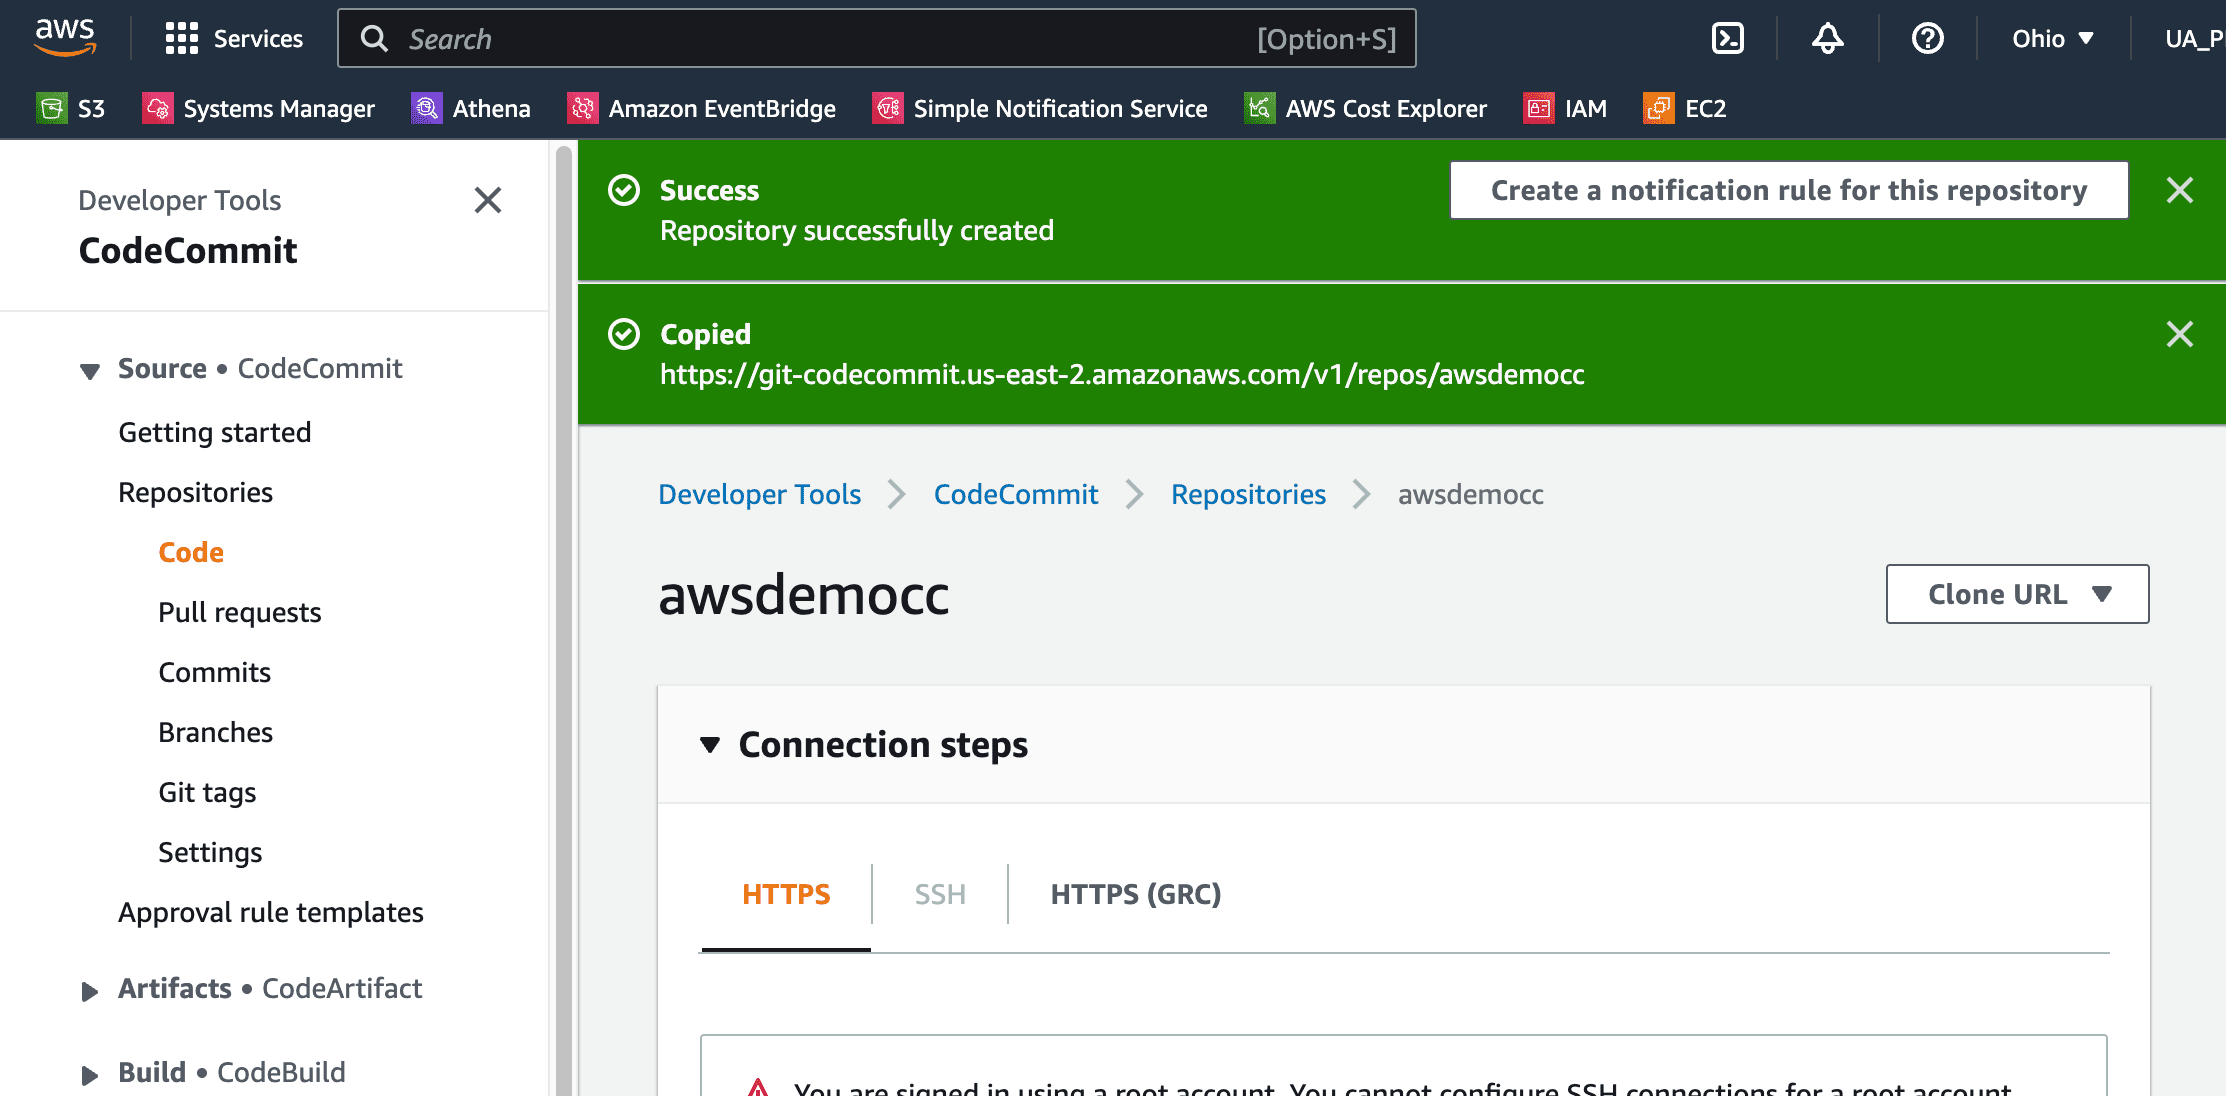
11. Click on “Clone URL” and select HTTPS.
12. Navigate to IAM console and select user to generate the credentials. Click on the user and navigate to “security credentials” .
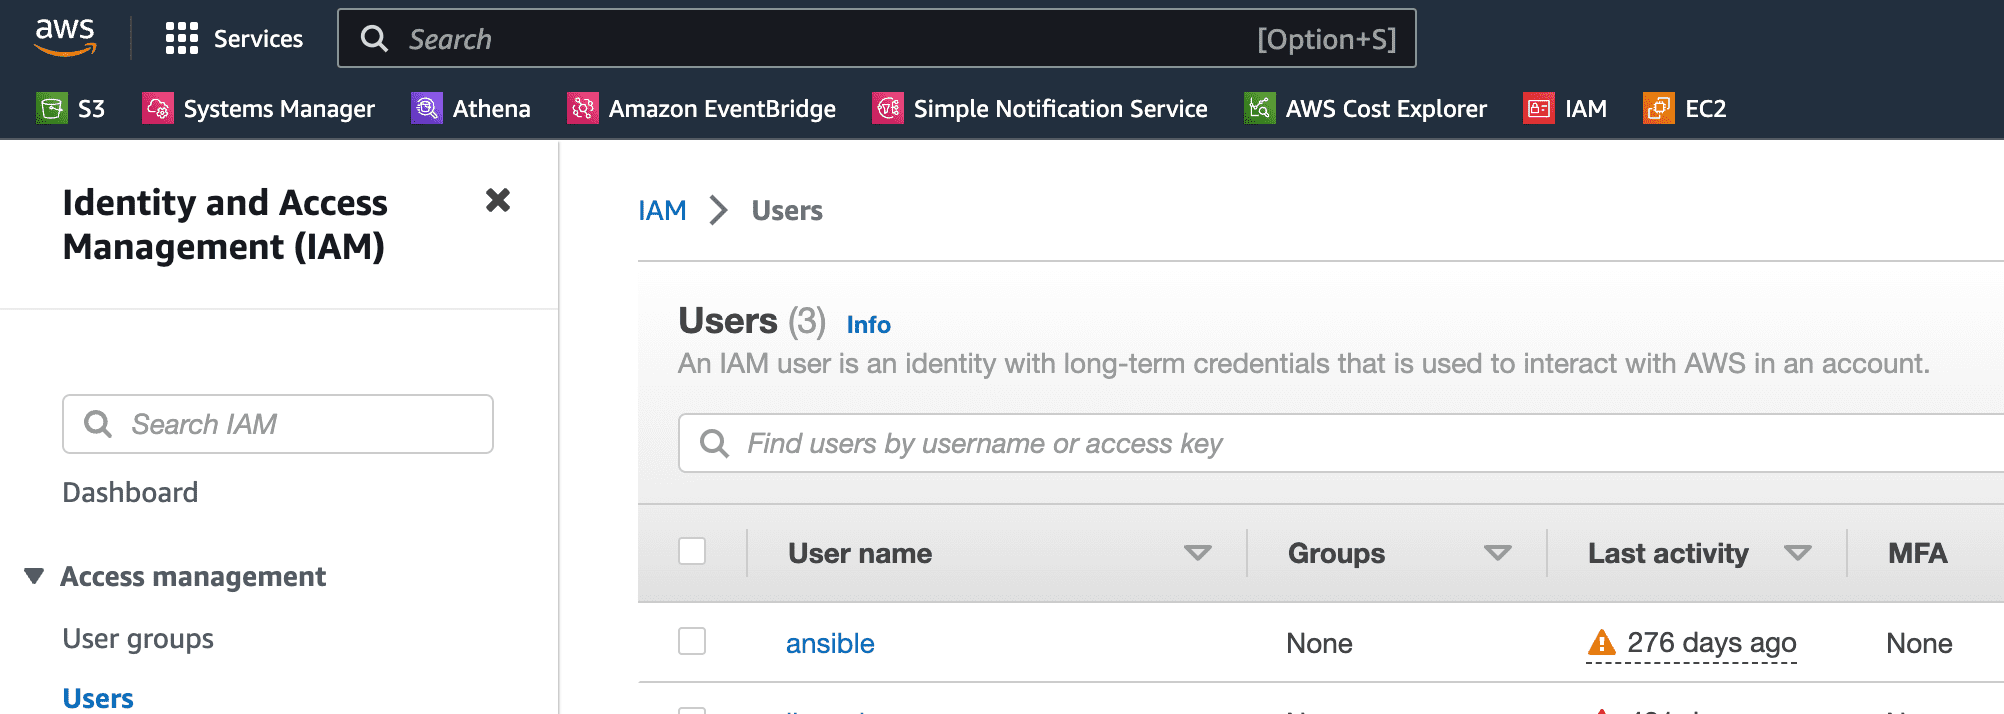
13. Here is the section to generate the credentials for AWS CodeCommit .

14. Download the credentials and keep it safely.
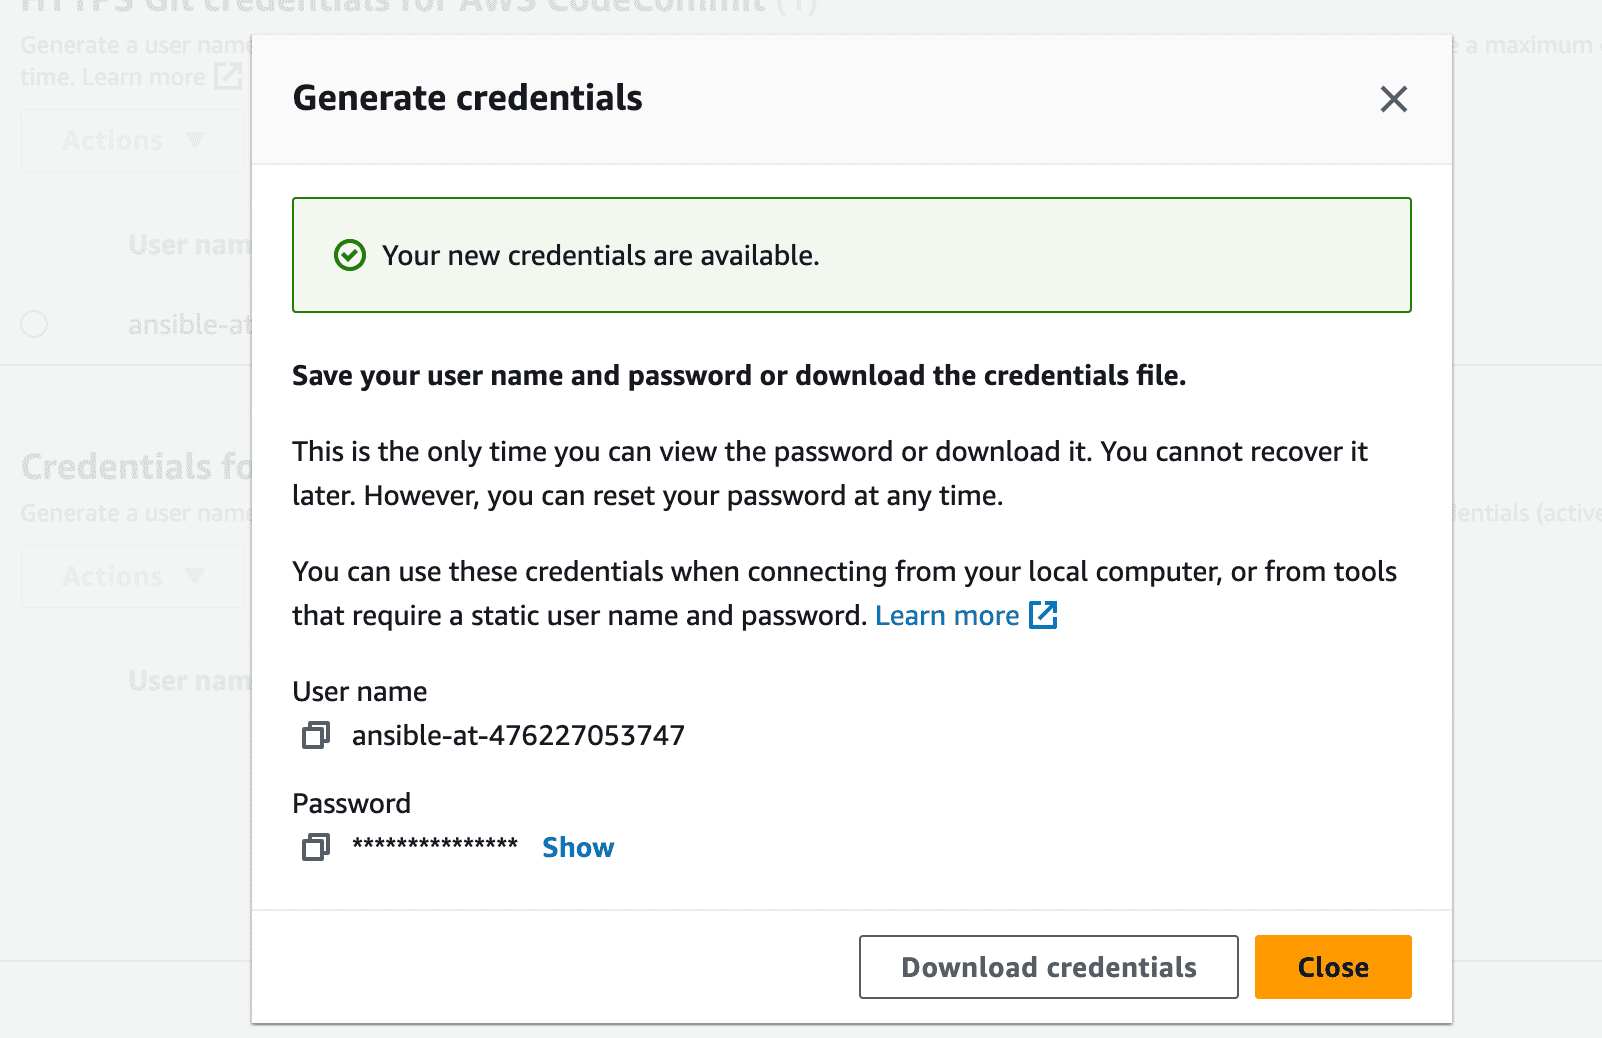
15. Go back to spring tools suite.
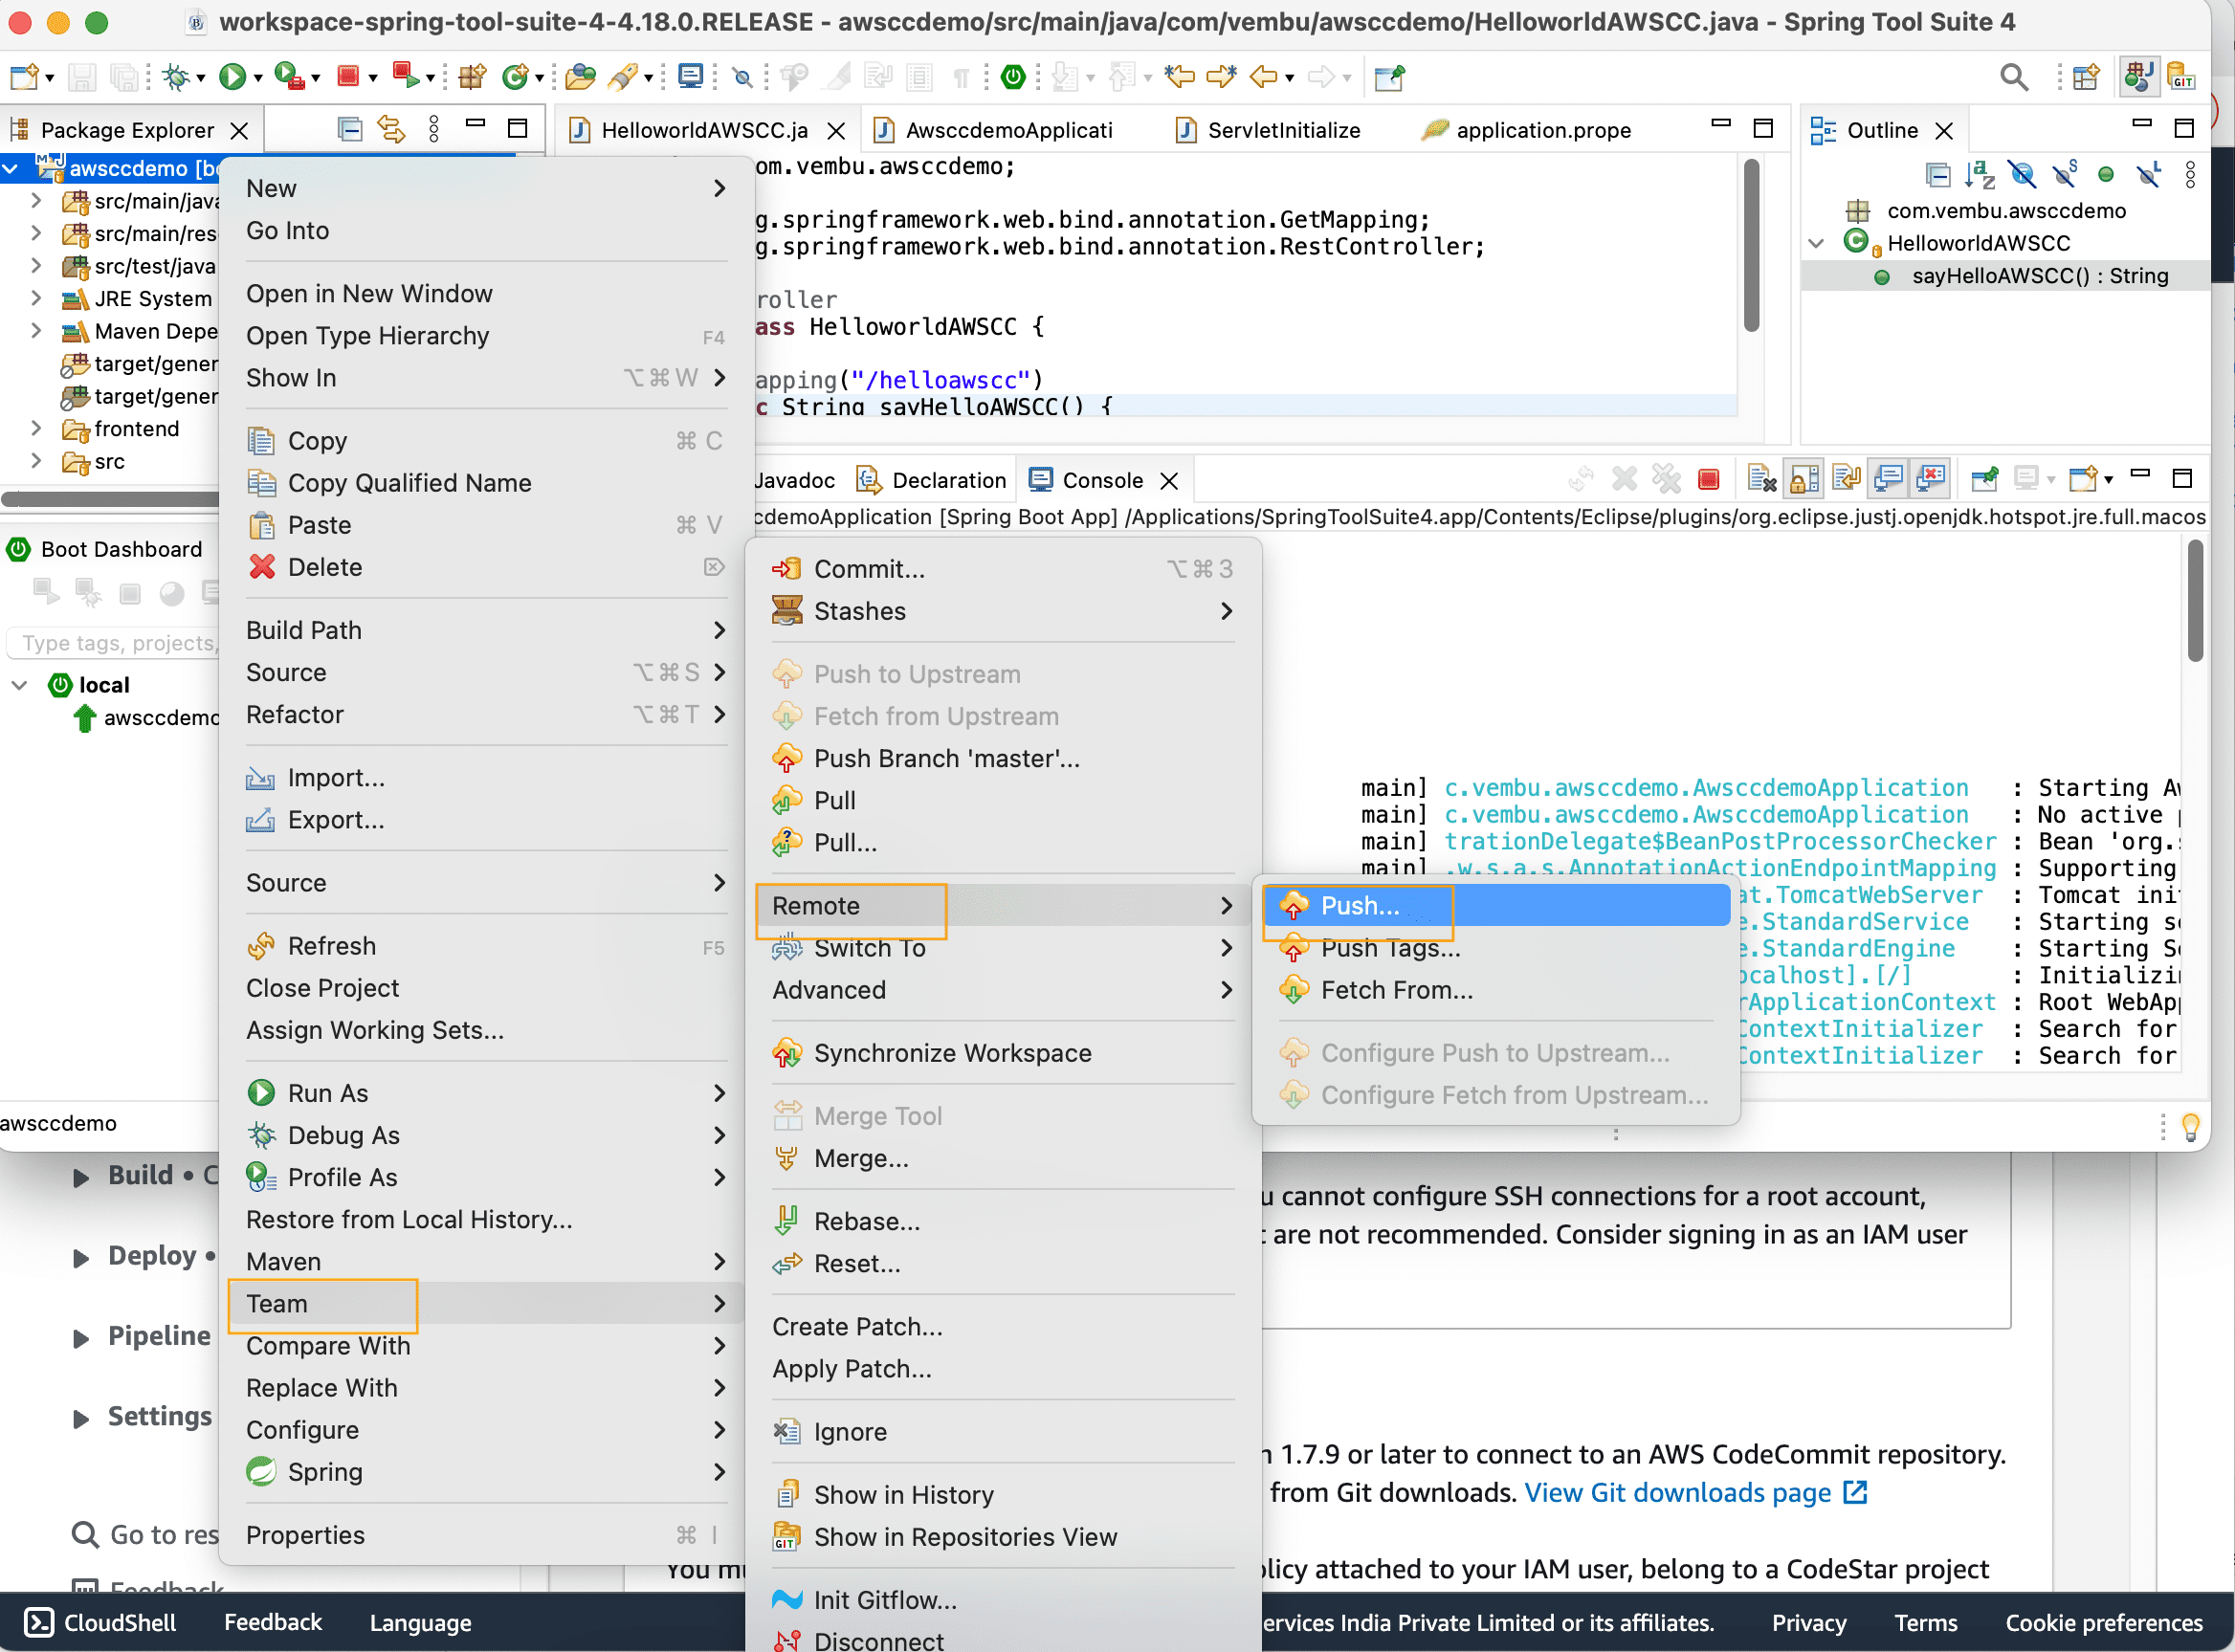
16. On the pop-up window, update the AWS CodeCommit URL and credentials which you have downloaded from AWS .
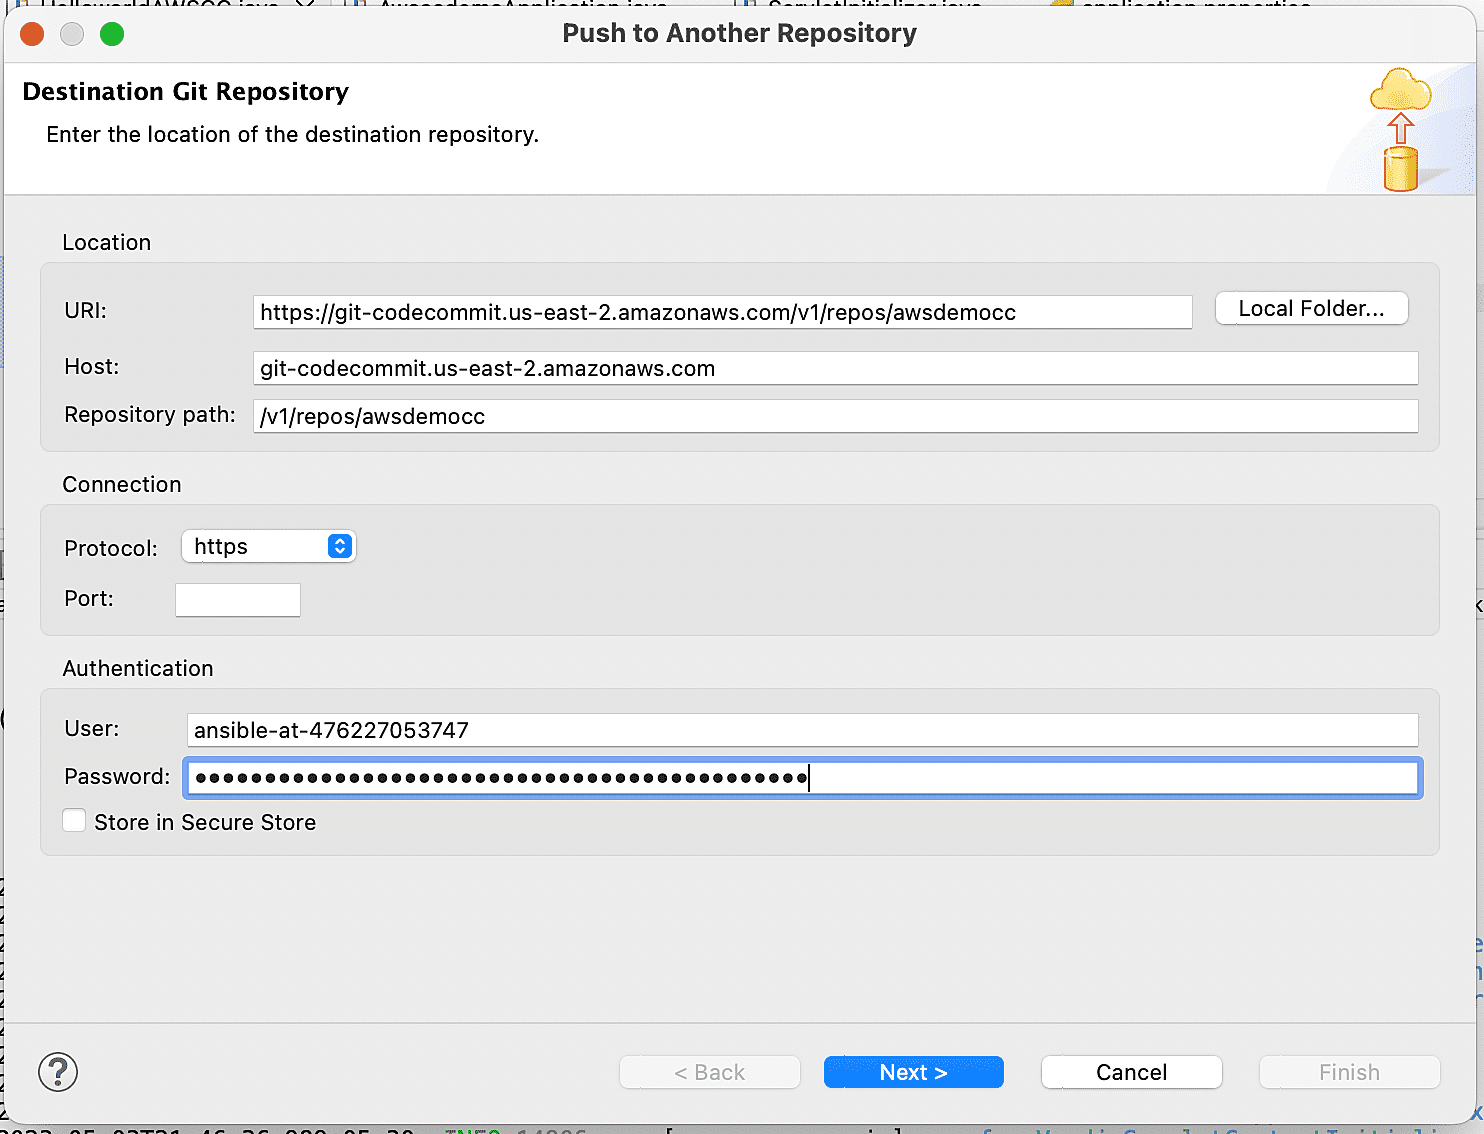
17. Select the source ref and destination ref as master branch and click on finish.
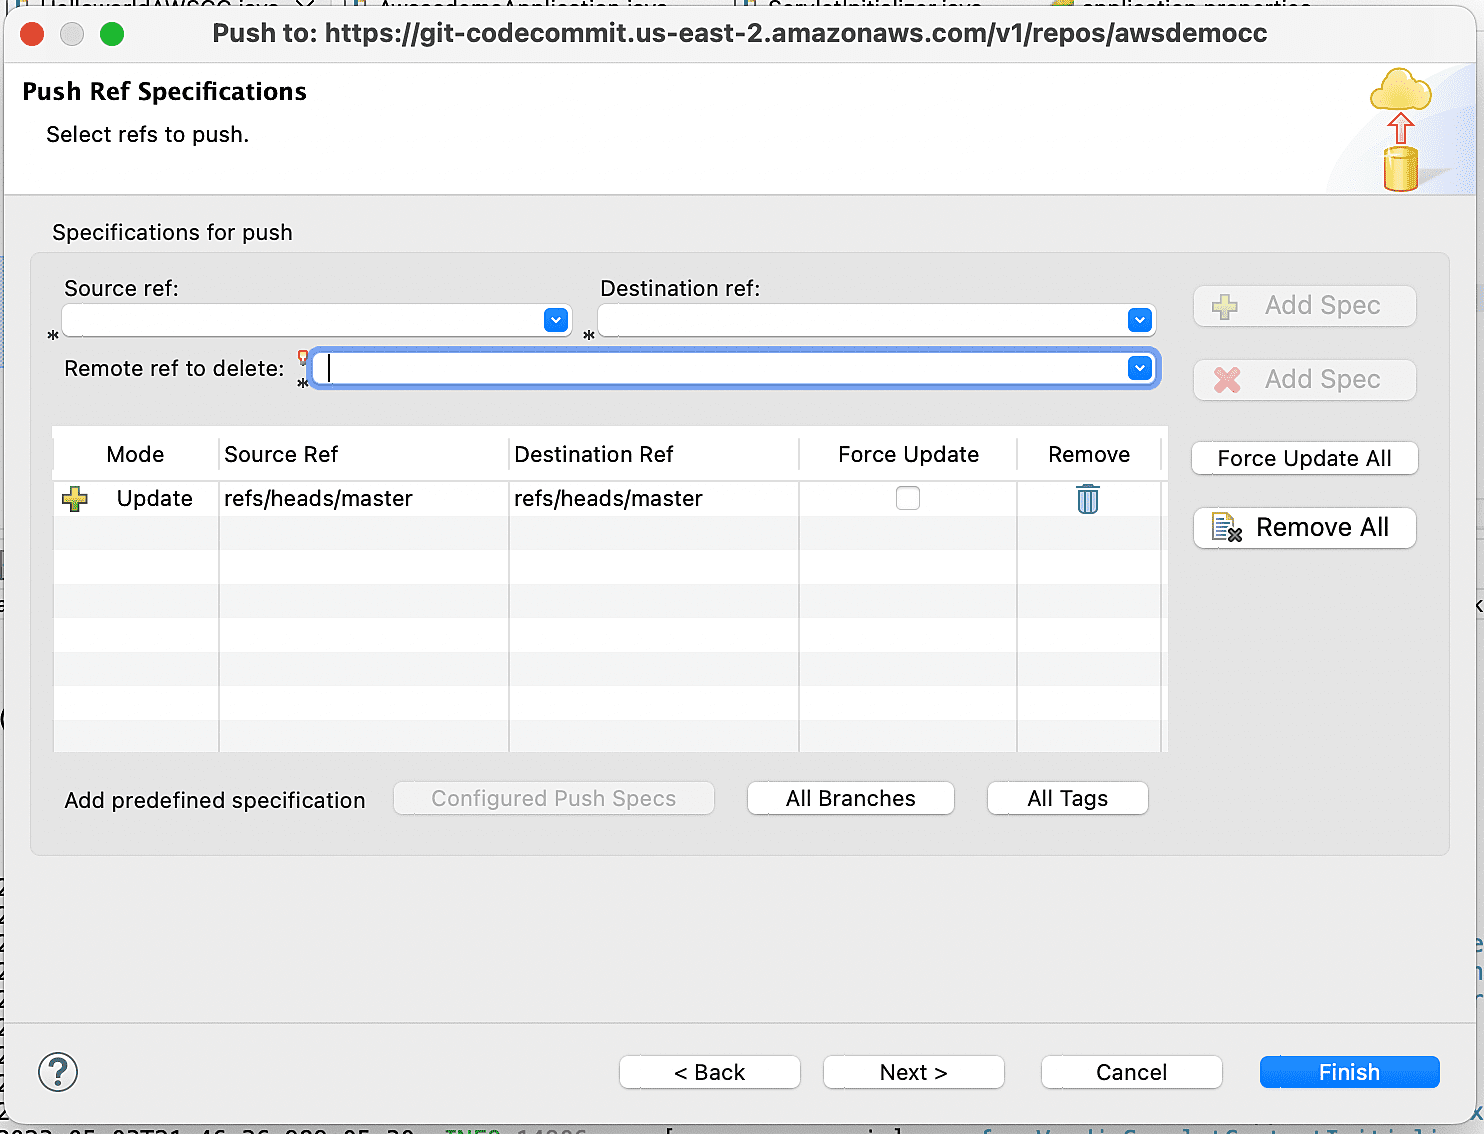
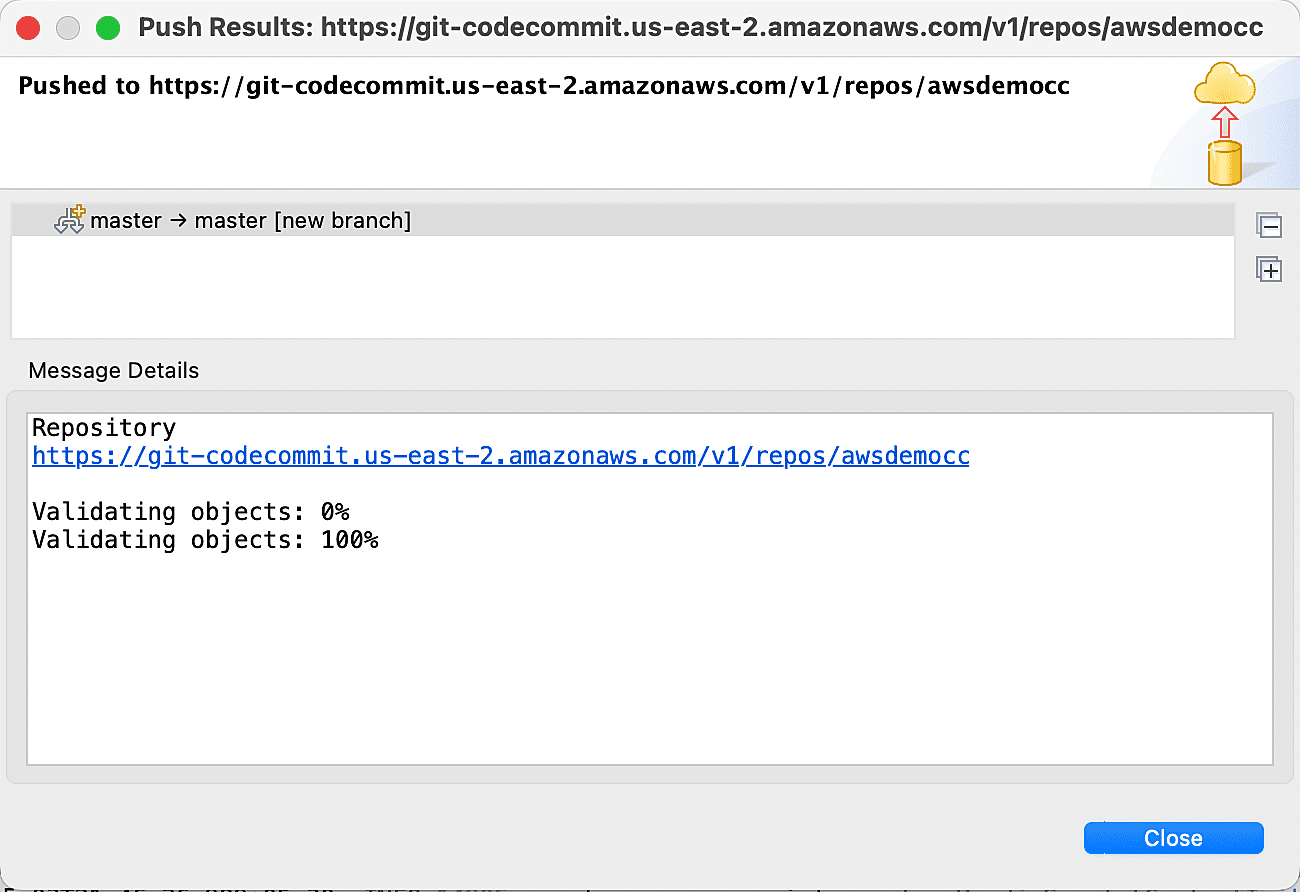
18. Code will be pushed to AWS CodeCommit and you will get the below window.
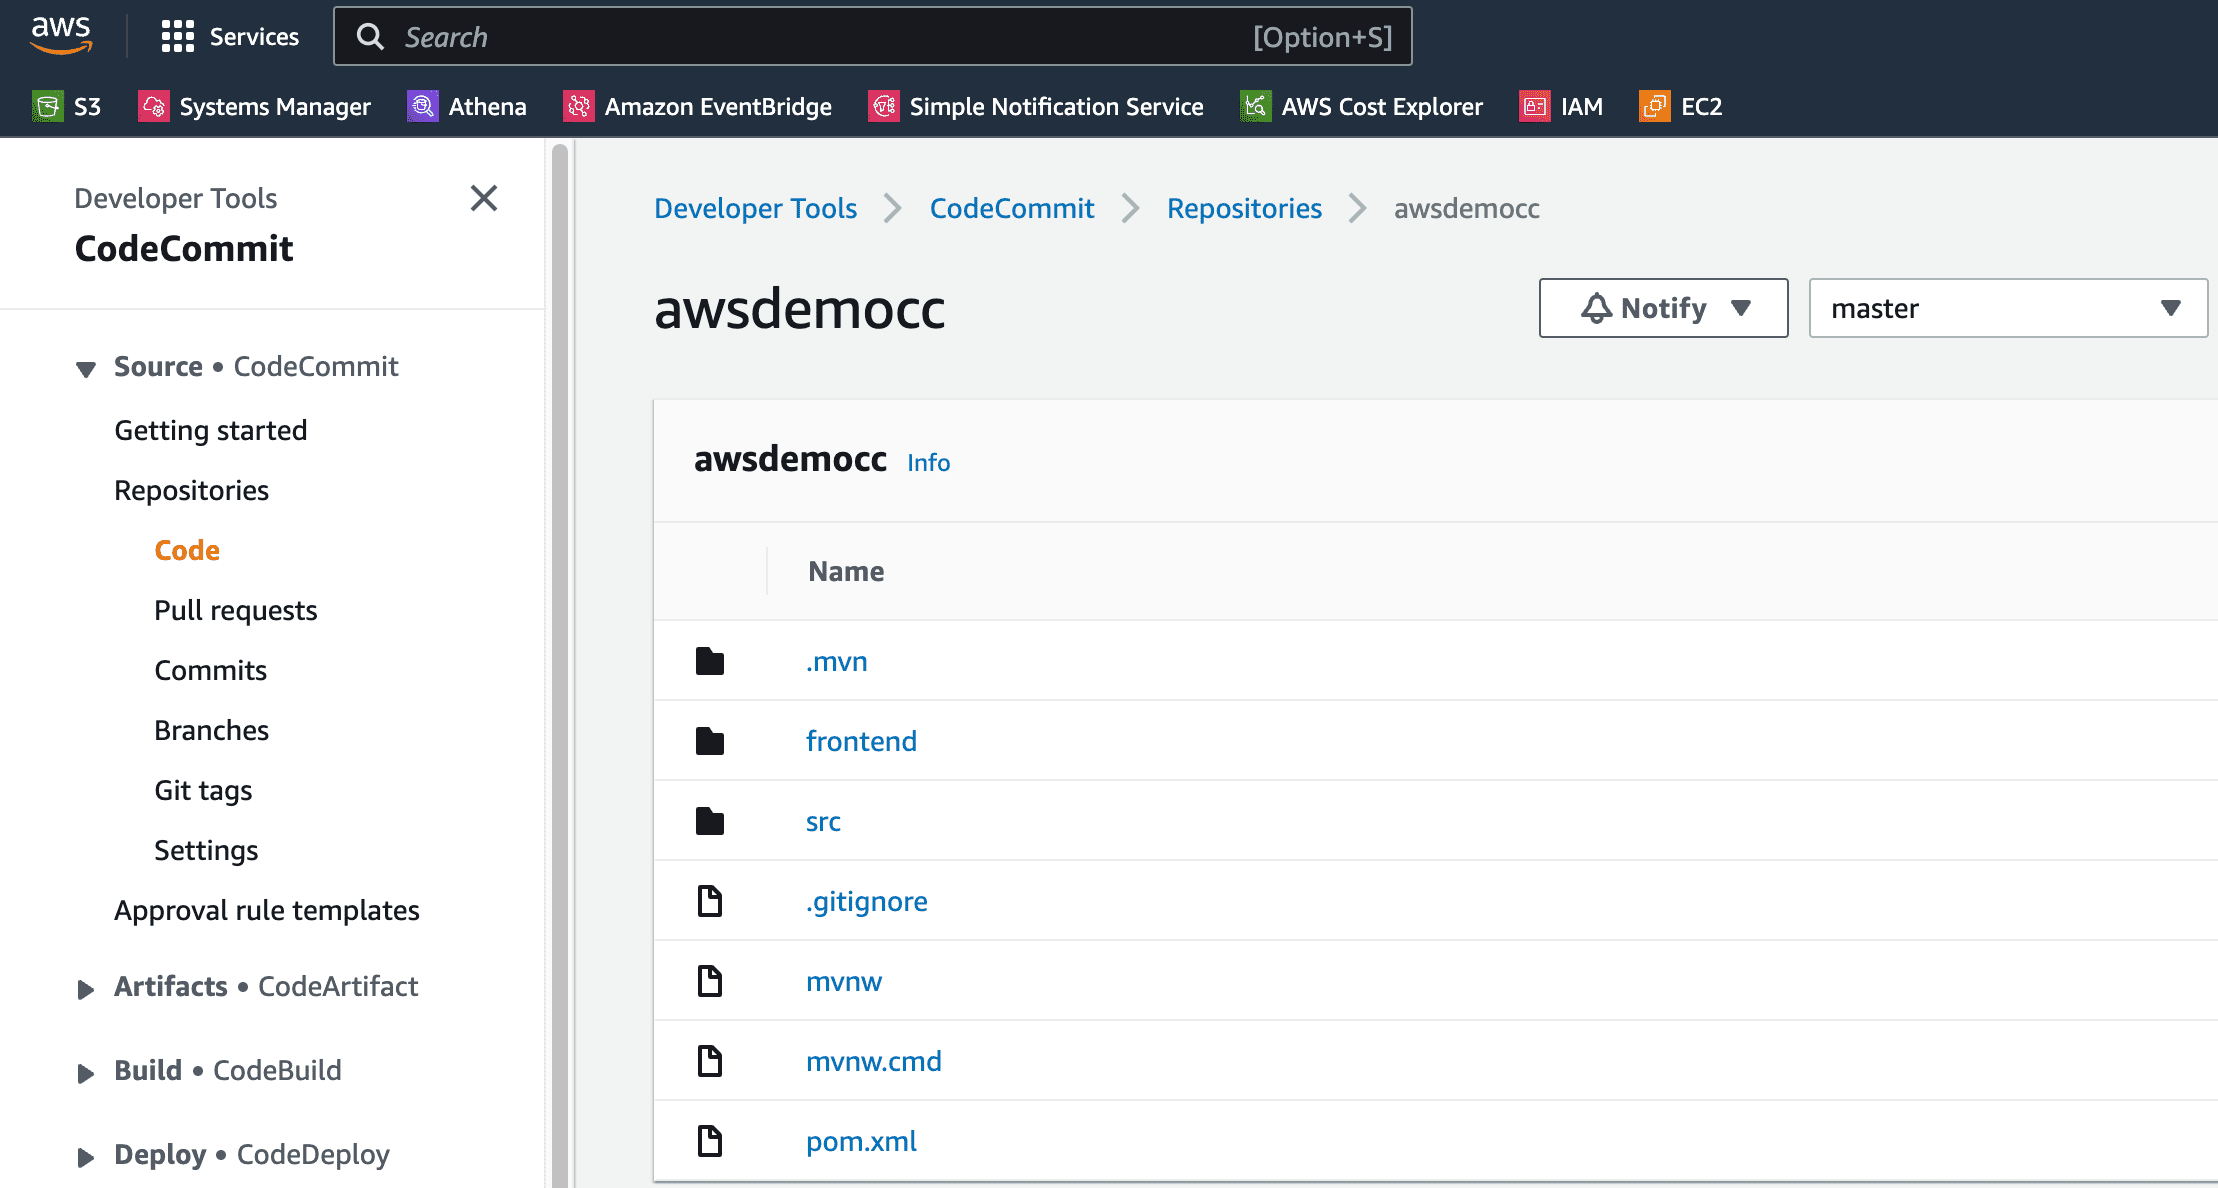
19. Go back to AWS CodeCommit and see the codes which is pushed from Eclipse SpringTools to CodeCommit.
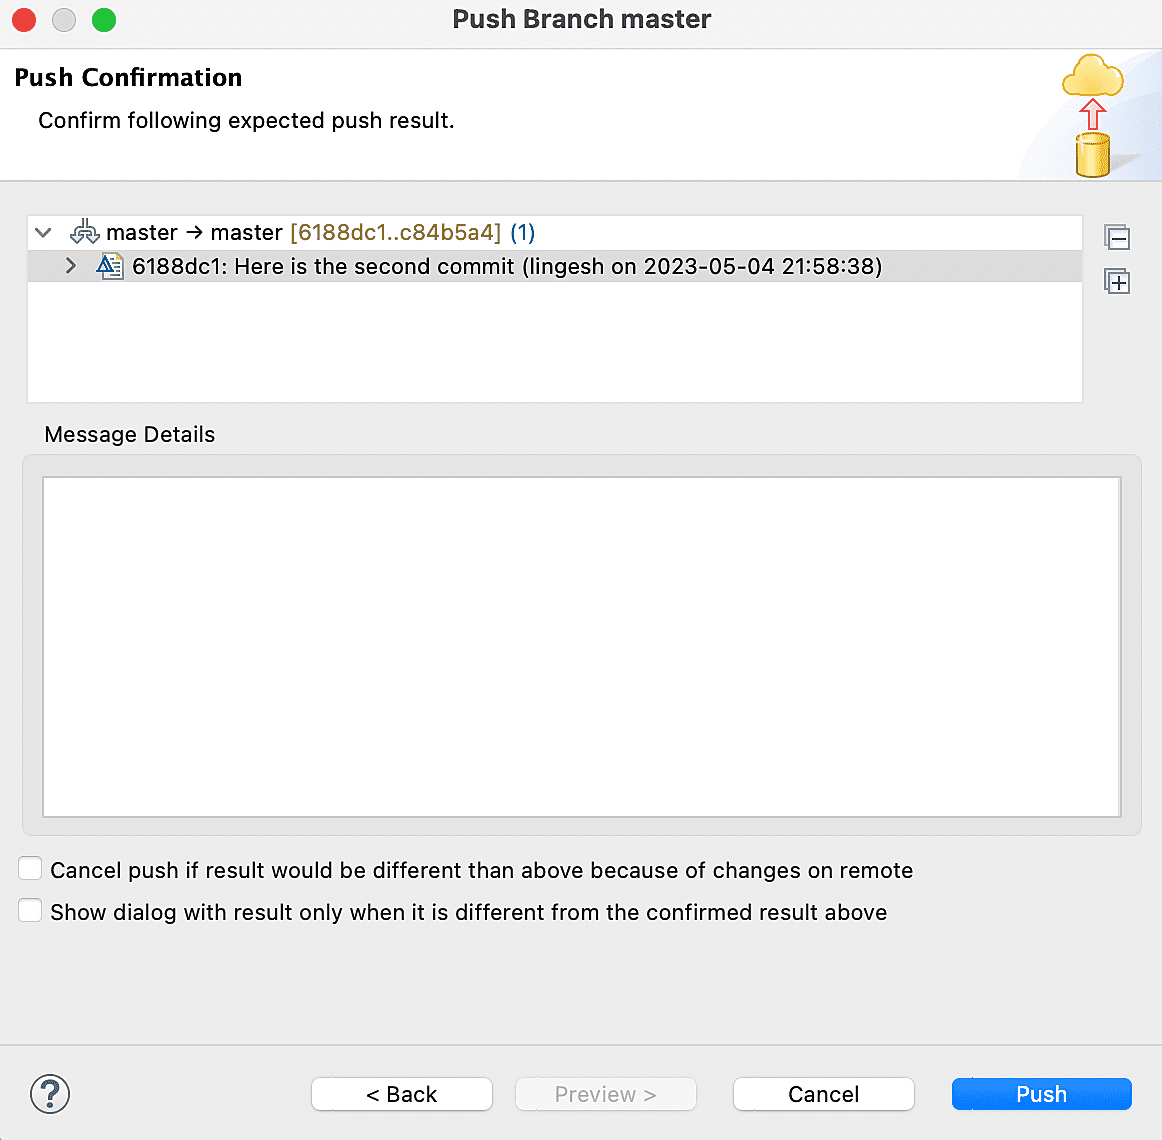
20. You can make changes to the code locally and push to AWS CodeCommit.
Conclusion
Overall, CodeCommit is a powerful and flexible source control service that can help you streamline your software development process and improve collaboration with your team. If the organization size is small to medium and using only AWS services on your environment, AWS CodeCommit is the right tool to use.
Follow our Twitter and Facebook feeds for new releases, updates, insightful posts and more.


Leave A Comment