AWS site to site is a fully managed service that creates a secure connection from your VPC to your on-premises or different AWS site using IPSec tunnels. By using AWS site to site VPN you can connect to your VPC or transit gateway. Every connection automatically creates 2 tunnels for redundancy.
Benefits
- Highly available – by using 2 tunnels
- Secure – Secure using IP Security (IPSec)
- Accelerate Application – by working with Global Accelerator
- Robust monitoring – by using Amazon CloudWatch
Use Cases
- Application Migration
- Secure communication between remote locations
Concepts
- VPN connection: A secure connection between on-premise equipment and your VPCs
- VPN tunnel: An encrypted link where data can pass from the customer network to or from AWS
- Customer gateway: An AWS resource which provides information to AWS about your customer gateway device
- Target gateway: A generic term for the VPN endpoint on the Amazon side of the Site-to-Site VPN connection
- Virtual Private gateway: A virtual private gateway is the VPN endpoint on the Amazon side of your Site-to-Site VPN connection that can be attached to a single VPC
Pricing
Architecture to follow
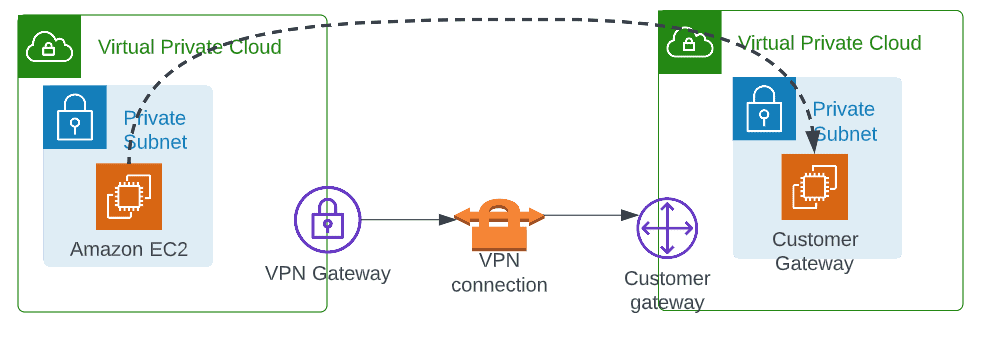
Example to follow
To test this scenario, we will use 2 VPCs. We will create a site-to-site VPN between these 2 VPCs.
Pre-requisite
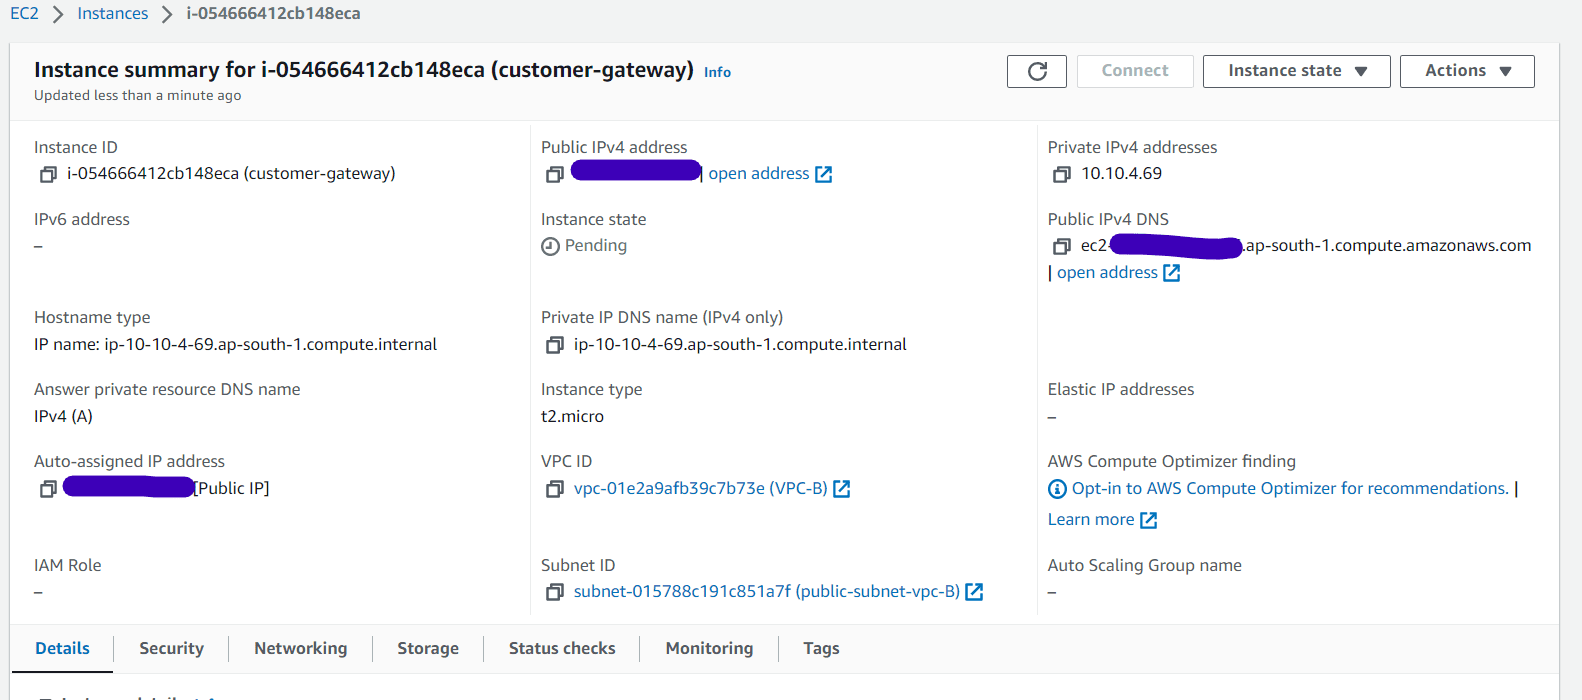
- Create 2 VPCs with private subnets
- Create Ec2 instance in each VPC
- An Ec2 instance in VPC B with public IP
Steps to follow:
Step 1: Creating VPN Gateway
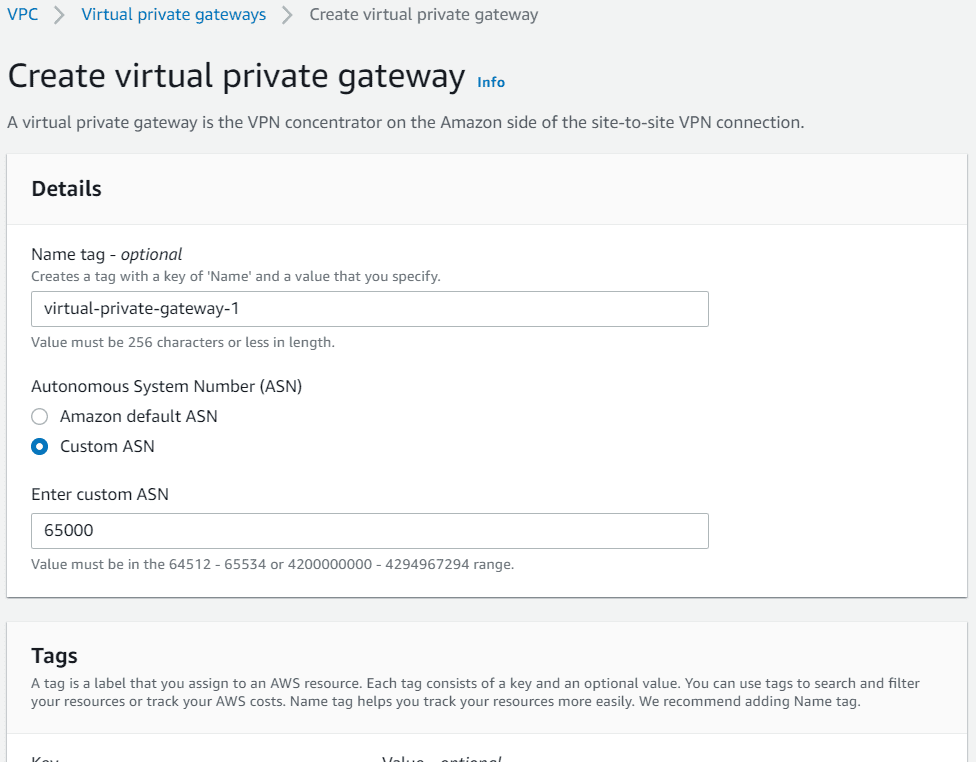
- Navigate to VPN section under VPC, click on create Virtual private Gateway
- Provide a name and click on custom ASN. Provide an ASN between 64512-65534
- Click on Create virtual private gateway
- Now the VPN Gateway has been created but not yet attached to any VPC
- Click on Actions and attach to a VPC
- Now the attachment is also done for VPN gateway


Step 2: Creating Customer gateway
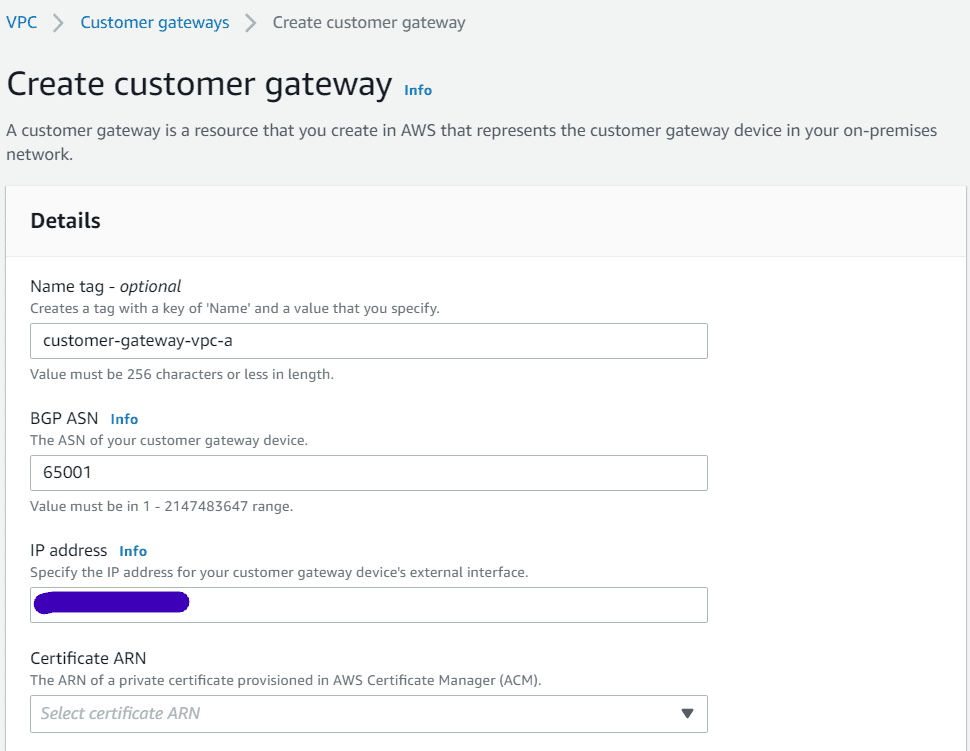
We are going to create customer gateway in VPC A which will be the VPC B Ec2 instance with public IP.
- Navigate to VPN section under VPC. Click on customer gateways
- Provide a name, ASN number of VPC B which is 65001
- Provide the public IP address of customer gateway Ec2 instance created before
- Leave everything else as blank and click on create customer gateway

Step 3: Create site to site VPN connection
- Navigate to VPN section under VPC. Click on site-to-site VPN connections
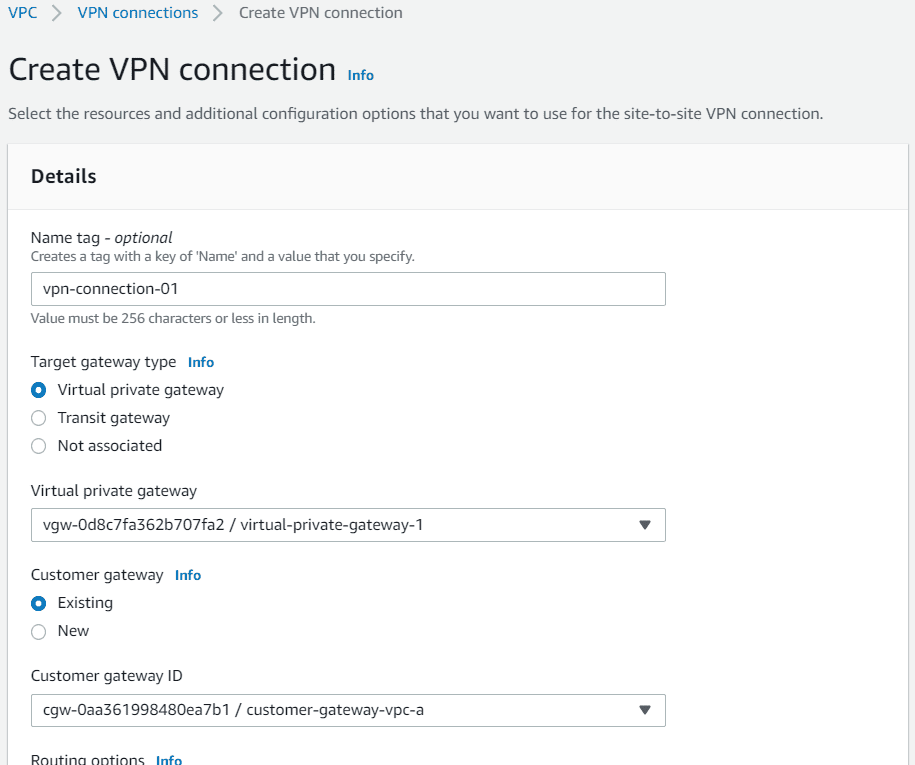
- Provide a name, choose target gateway type as virtual private gateway. Select from the dropdown
- Choose the customer gateway from the dropdown
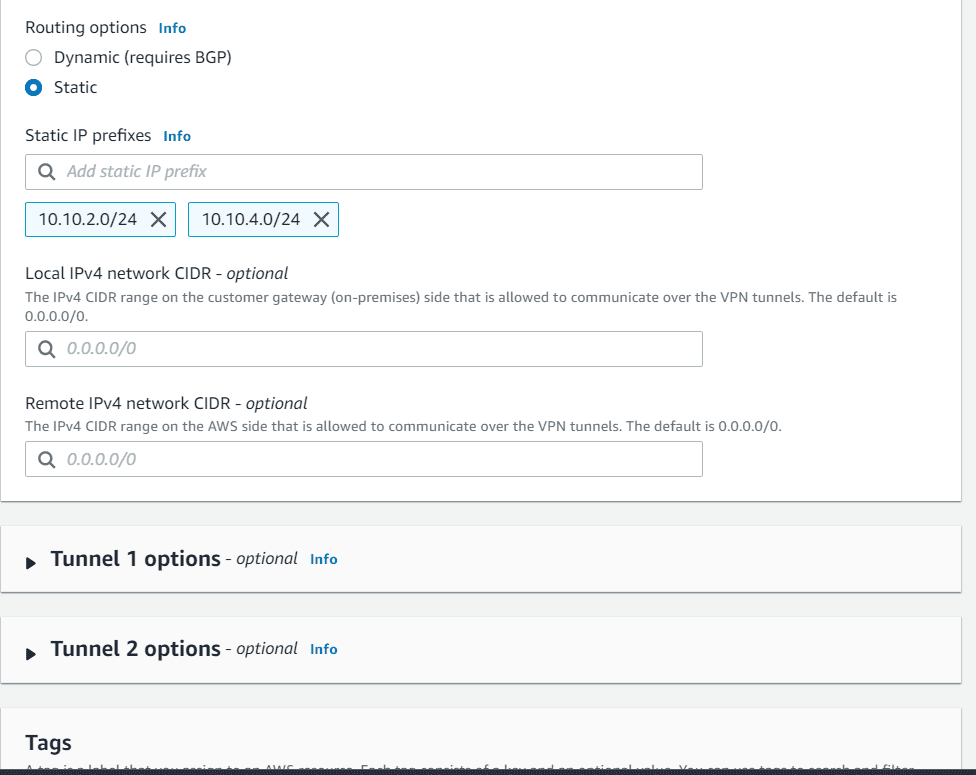
- In Routing options choose static. Add the prefix of VPC B means customer gateway VPC
- Rest keep everything as default. Click on create VPN connection
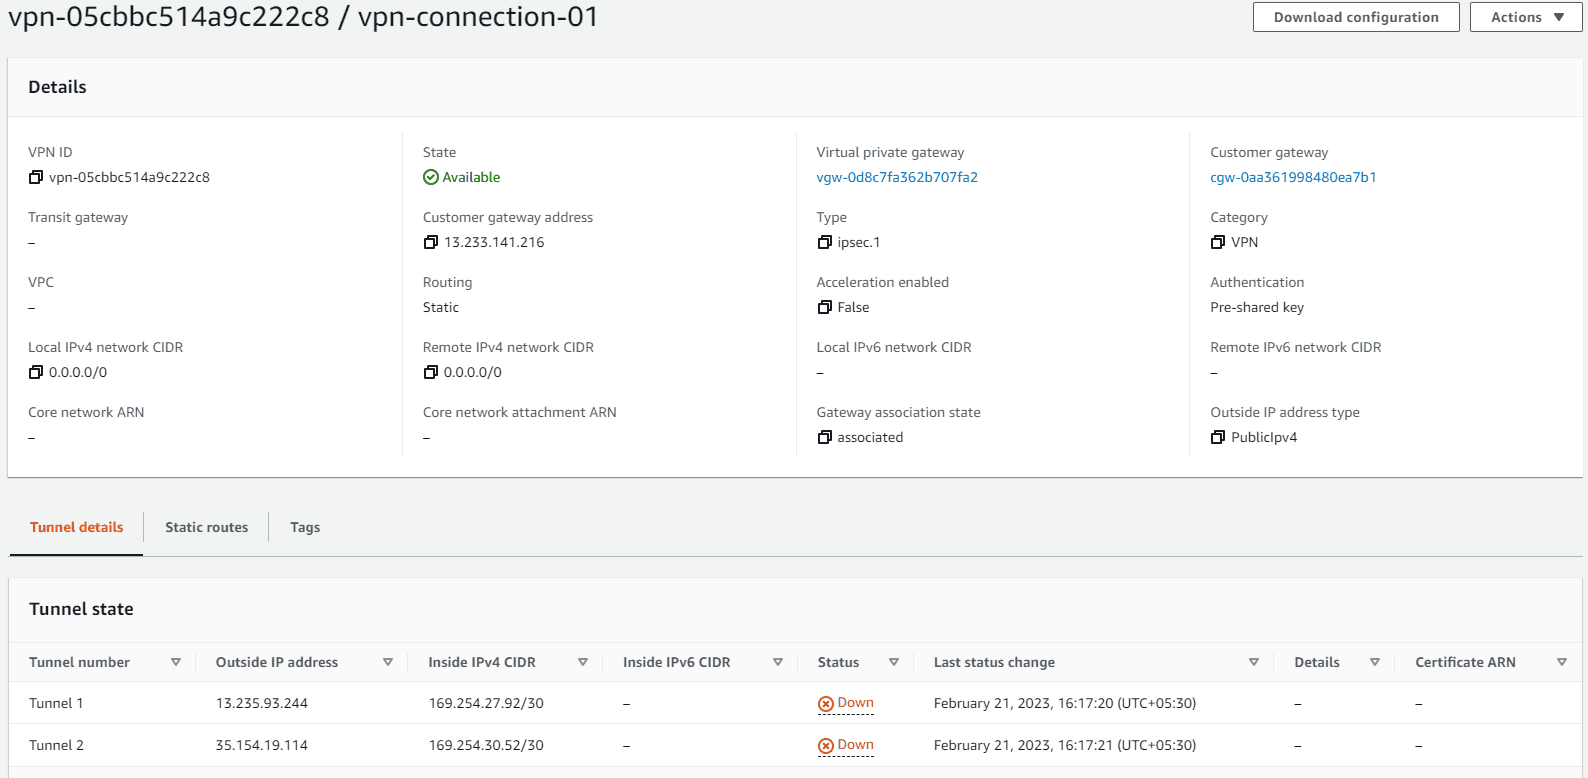
- Now the site-to-site VPN connection VPC A to VPC B has been created
- Now the VPN connection is available but tunnel status is Down. Now we will go to the customer gateway and create the VPN connection from that site
Step 4: Configure Customer Gateway
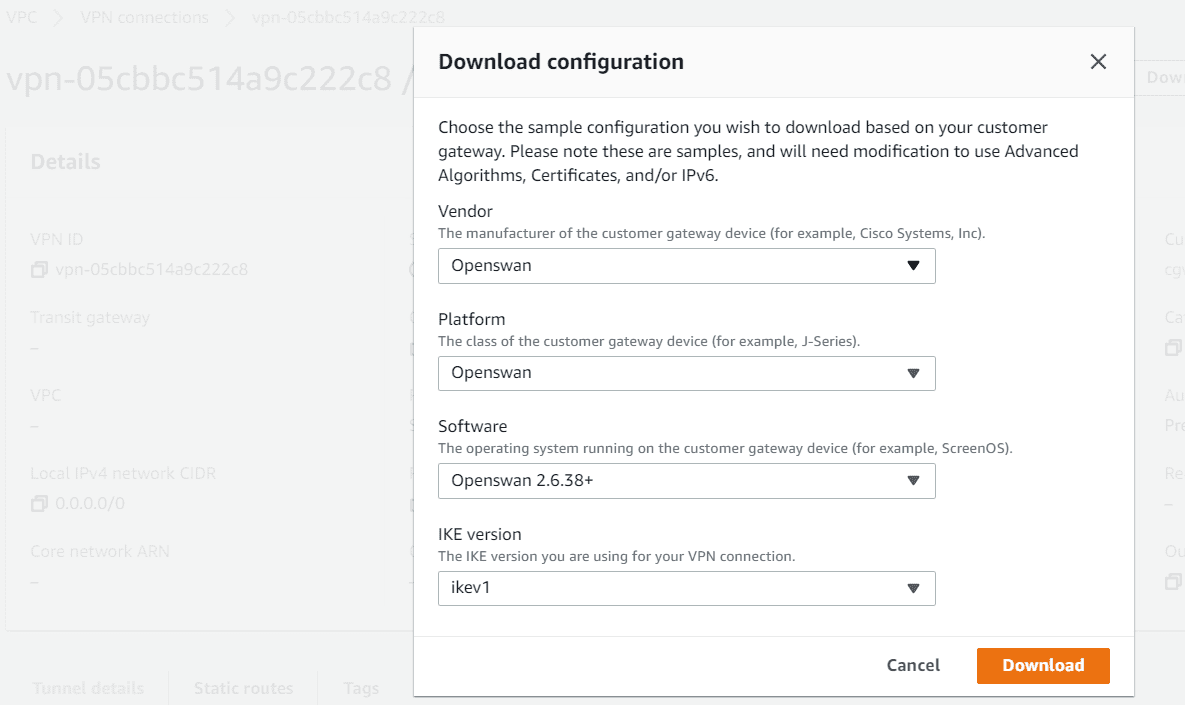
- First download the configuration from the VPN connection. Choose Openswan as vendor for VPN provider
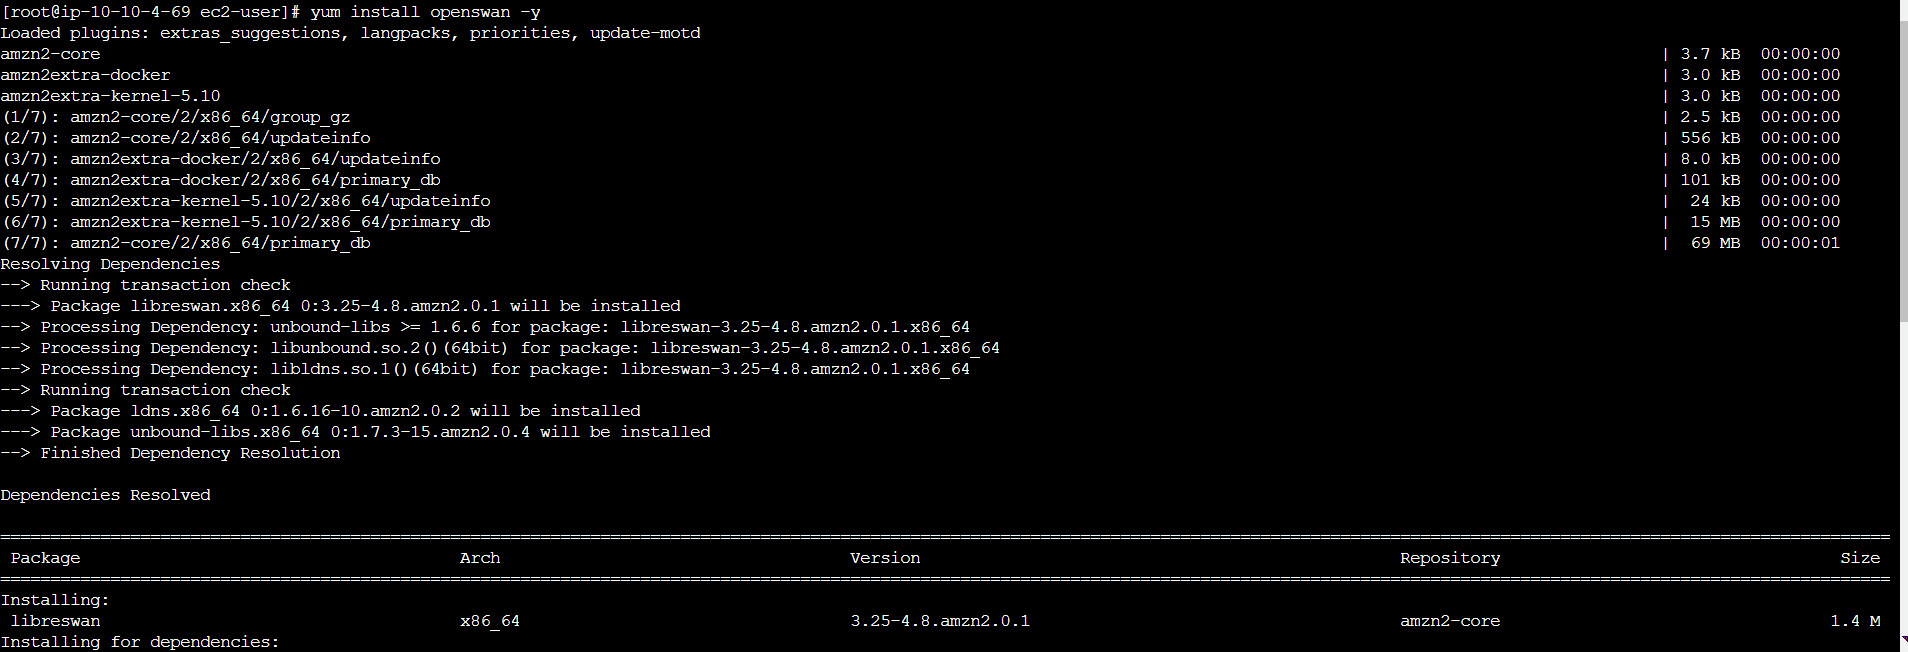
- Now login to the customer gateway and install Openswan
yum install Openswan -y - Open the configuration file downloaded before and follow the steps
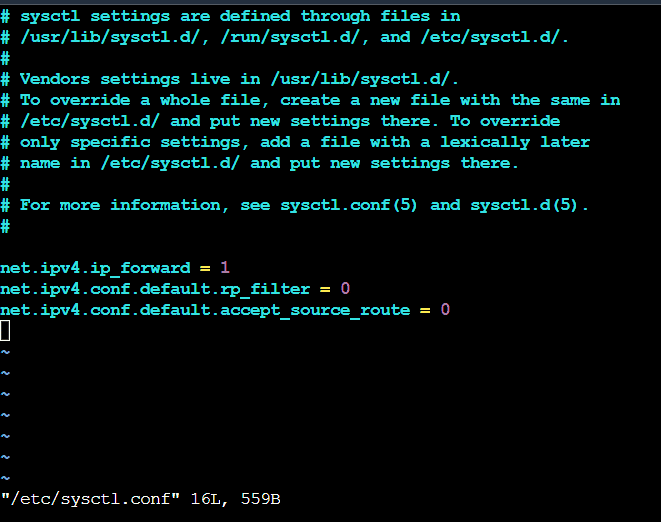
- Open /etc/sysctl.conf and ensure that its values match the following:
- Apply the changes in step 1 by executing the command ‘sysctl -p’
- Open /etc/ipsec.conf and look for the line below. Ensure that the # in front of the line has been removed, then save and exit the file.
- Create a new file at /etc/ipsec.d/aws.conf if doesn’t already exist, and then open it. Append the following configuration to the end in the file:
- #leftsubnet= is the local network behind your openswan server, and you will need to replace the
below with this value (don’t include the brackets). If you have multiple subnets, you can use 0.0.0.0/0 instead - #rightsubnet= is the remote network on the other side of your VPN tunnel that you wish to have connectivity with, and you will need to replace
with this value (don’t include brackets) - Create a new file at /etc/ipsec.d/aws.secrets if it doesn’t already exist, and append this line to the file (be mindful of the spacing!):
net.ipv4.ip_forward = 1
net.ipv4.conf.default.rp_filter = 0
net.ipv4.conf.default.accept_source_route = 0
#include /etc/ipsec.d/*.conf

conn Tunnel1
authby=secret
auto=start
left=%defaultroute
leftid=13.233.141.216
right=13.235.93.244
type=tunnel
ikelifetime=8h
keylife=1h
phase2alg=aes128-sha1;modp1024
ike=aes128-sha1;modp1024
auth=esp
keyingtries=%forever
keyexchange=ike
leftsubnet=
rightsubnet=
dpddelay=10
dpdtimeout=30
dpdaction=restart_by_peer
13.233.141.216 13.235.93.244: PSK “c5XdPTgxftiB7ohnwK3tpuLrp7ThFQQM”

- Once Installed, run
systemctl start ipsec.service - Now the tunnels are up.

Pricing
You are charged for each VPN connection hour that your VPN connection is provisioned and available. You are charged for data transfer out from Amazon EC2 to the internet.
Pricing
Conclusion
AWS Site to site VPN helps connecting from AWS VPCs to on-premise networks. Maximum bandwidth per tunnel can be 1.25Gbps. But multiple tunnels can provide more bandwidth by using Transit gateway ECMP feature. This is very useful for the small organization who can’t afford AWS Direct connect service which provides up to 10Gbps speed.
Read More:
AWS for Beginners : AWS EC2Rescue Tool – Troubleshoot OS issues – Part 48
Follow our Twitter and Facebook feeds for new releases, updates, insightful posts and more.


Leave A Comment