Read on:
AWS for Beginners: How does AWS PrivateLink work? Part 21
AWS Transit gateway is a Network hub that connects to multiple VPCs in a region and your on-premises network. You can create inter-region peering between multiple Transit gateways to form a global network. The data is encrypted automatically and travels within the AWS Global network backbone. It creates a hub and spoke topology with different connections such as VPCs, On-premises, SD-WAN, Direct connect Gateway, peering connection with other Transit gateway, etc.
Architecture to follow
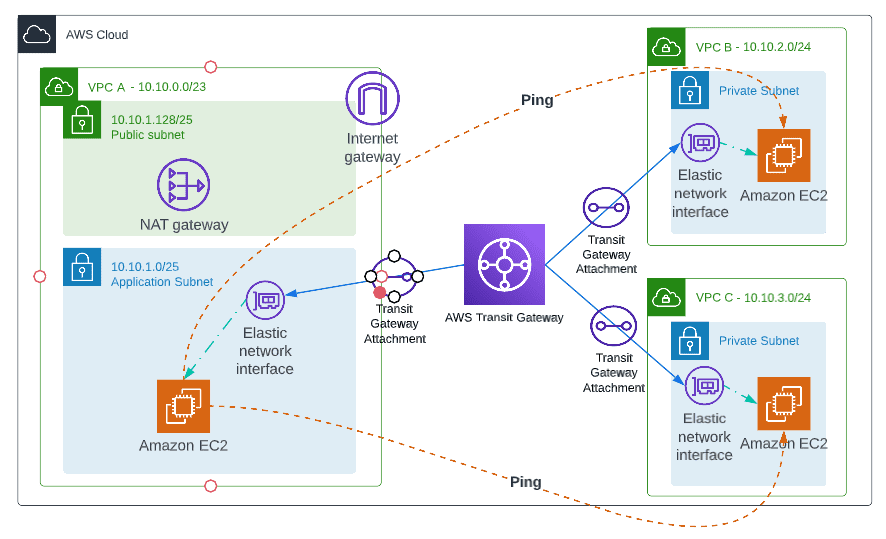
How Transit Gateway works
AWS Transit Gateway connects your Amazon Virtual Private Clouds (VPCs) and on-premises networks through a central hub. It helps to create a simplified network and puts an end to complex peering relationships. Transit Gateway is a highly scalable cloud router solution. Each new connection is made only once.
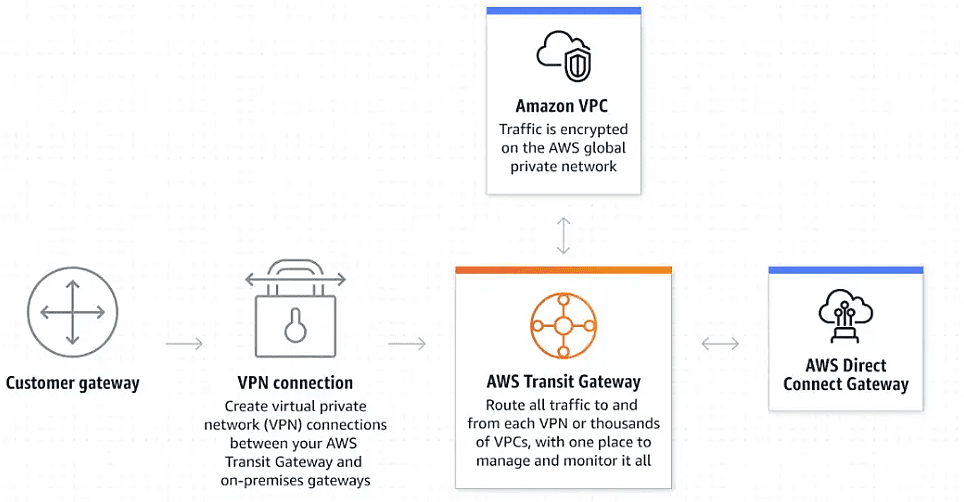
Source: AWS documentation
Prerequisite
- AWS Account with required permission (Client VPN, Certificate Manager)
- 3 VPCs VPC A(10.10.0.0/23), VPC B(10.10.2.0/24), VPC C(10.10.3.0/24)
- 3 Subnets in VPC A, 1 subnet in VPC B, and VPC C
- Internet Gateway in VPC A, Other VPC’s Instance can reach internet over transit gateway
- Nat Gateway in VPC A
- Application Instances in each VPC to check the connectivity between them over Transit Gateway
3 VPCs with CIDR

Subnets for All 3 VPCs

Application Instances in each VPC

Internet Gateway in VPC A

Steps to follow
- Create an AWS Transit Gateway
- Create Transit gateway attachment for VPC A, VPC B, VPC C
- Create a Transit Gateway Route table and make necessary route entries
- Verify connectivity between Application Instances
Deploying Client VPN solution with Transit Gateway
Create an AWS Transit Gateway
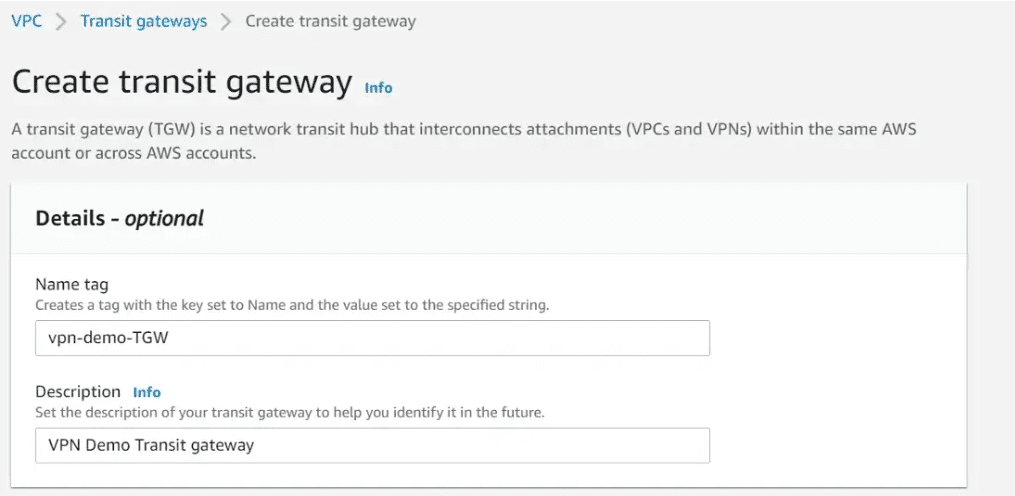
Navigate to the VPC section in the AWS Management Console, and choose Transit gateway from the left navigation panel. Click on create transit gateway

We will provide the name and description of our Transit gateway
In the next section, we will provide the Private Autonomous system number between 64512–65534 or 4200000000–4294967294 ranges. You can keep all other options default.
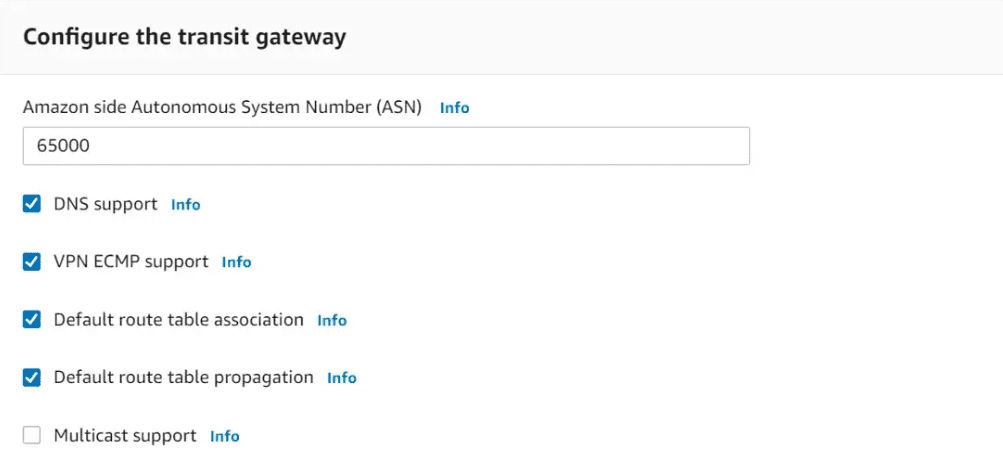
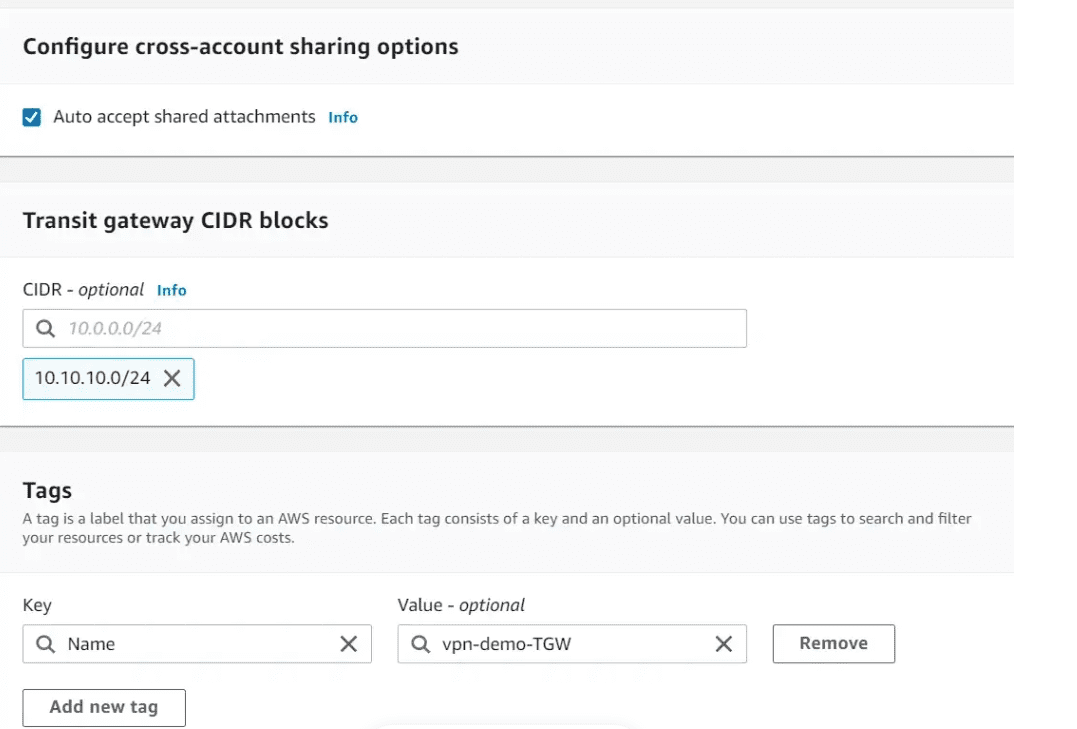
In the next section, tick the Auto accept shared attachments checkbox. Provide a TGW CIDR block. You can specify size /24 CIDR blocks or larger. Add the required tags and click on Create transit gateway.
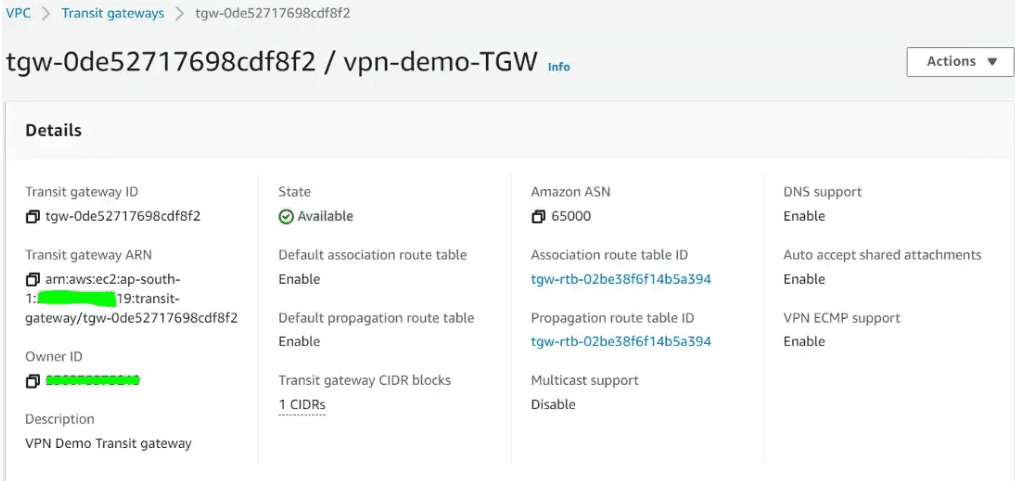
Now the transit gateway has been created and is available.
Create Transit gateway attachments for VPC A, VPC B & VPC C
Navigate to Transit gateway attachments under VPC, Click on create Transit gateway attachments
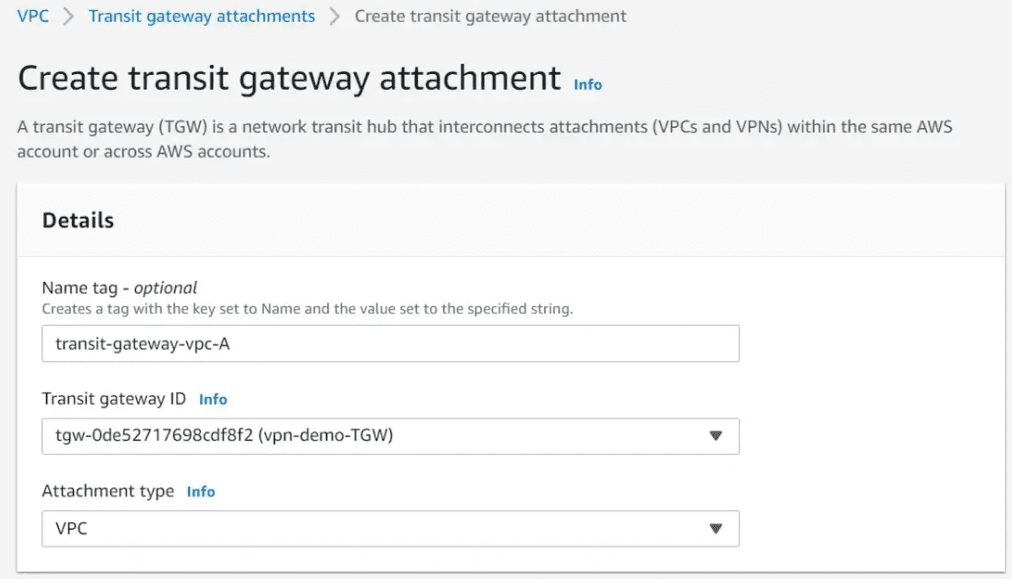
Provide a Name, Choose the TGW created earlier and the attachment type should be VPC.
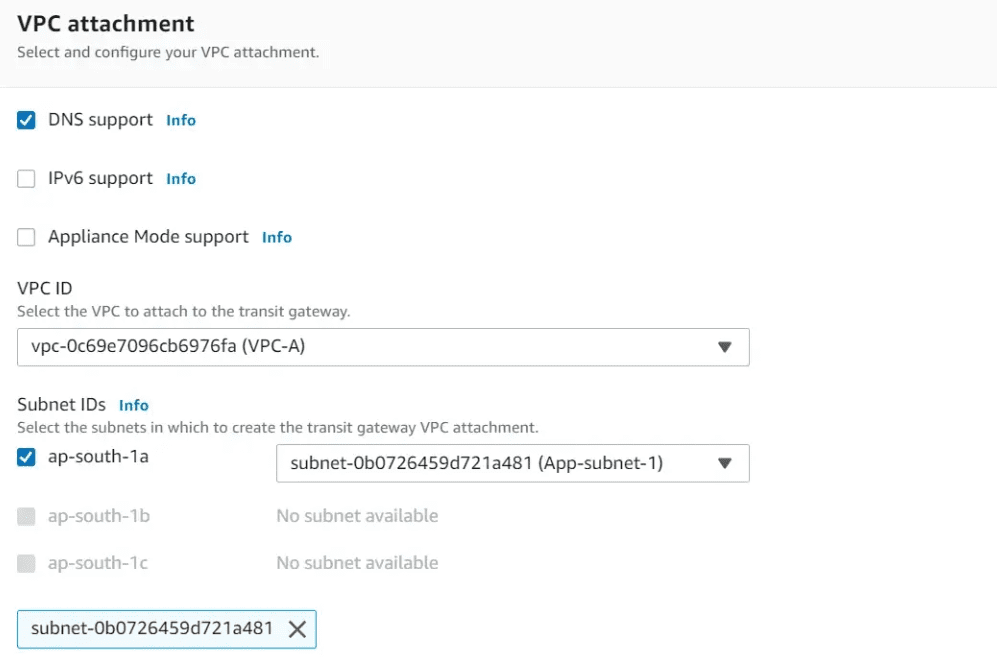
In the next section, choose the VPC (here VPC A) and choose the subnet you want your attachment to create. The transit gateway automatically creates an ENI in the chosen subnet. All other subnets in the same Availability zone can send traffic to the TGW attachment.
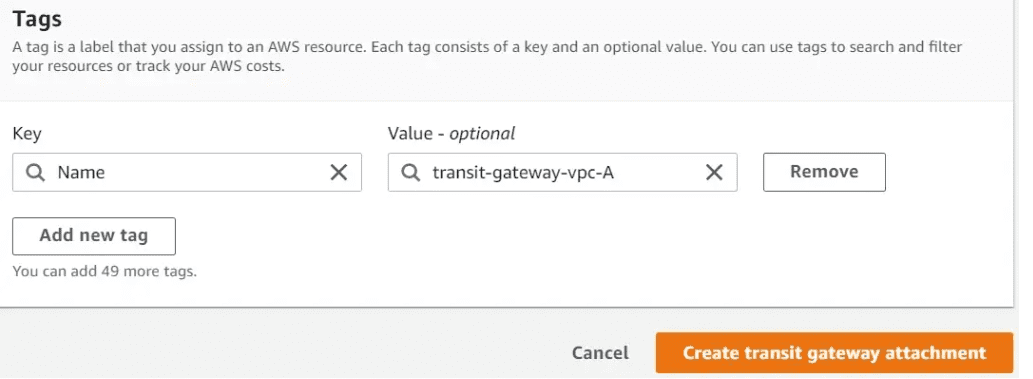
Create the required tags and click on create Transit gateway attachment. This transit gateway attachment will auto-accept because we have chosen to Auto-accept shared attachments during the Transit gateway creation.
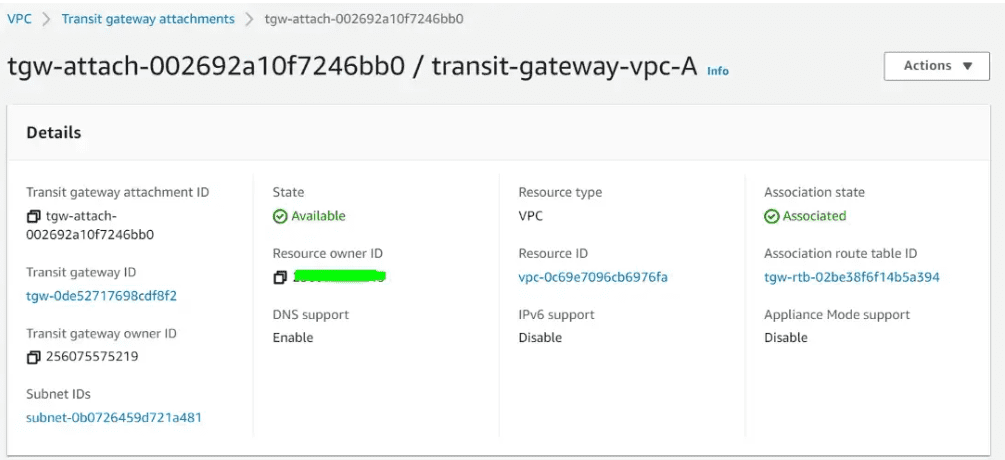
Now the Transit gateway attachment status is Associated.
Let’s follow the same process to create attachments for VPC B and VPC C. All 3 attachments should look like below

Transit Gateway Route table and Subnet Route Table verification
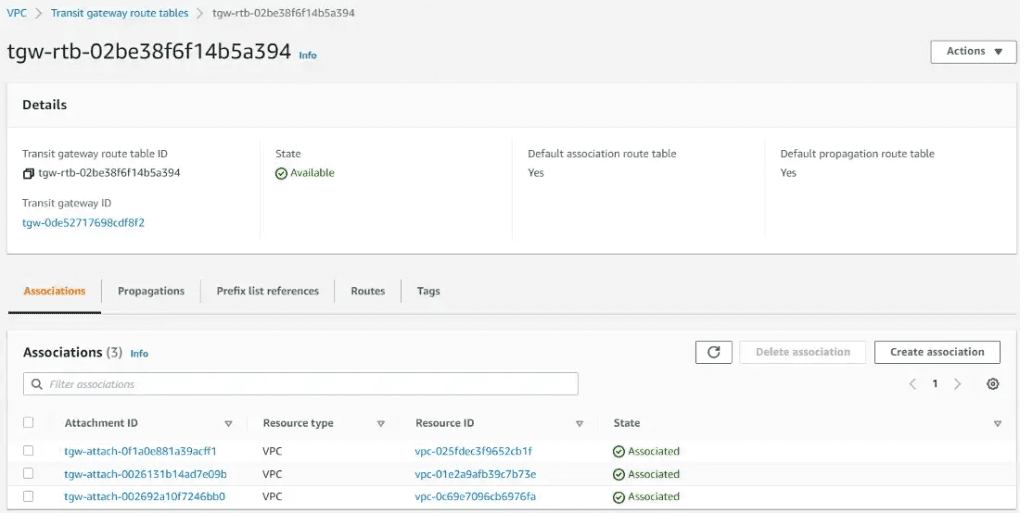
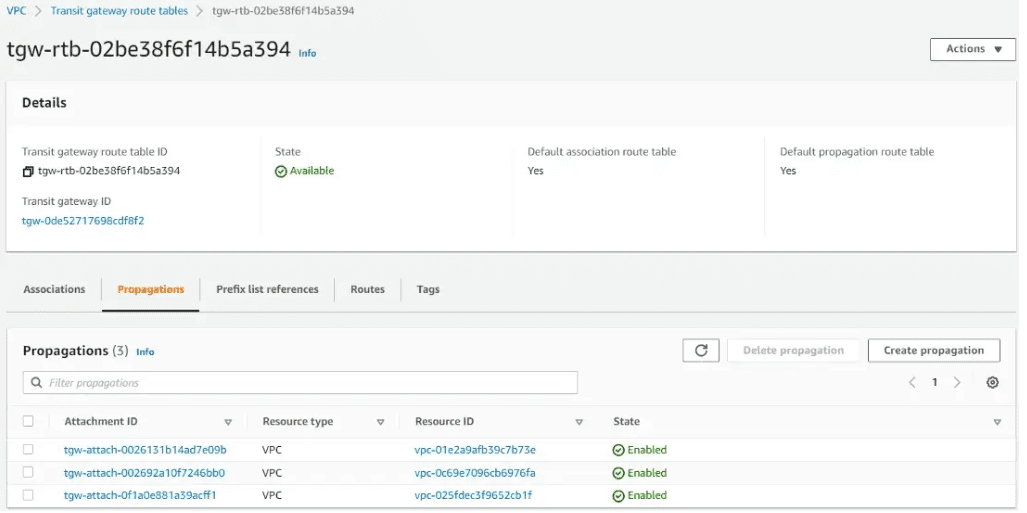
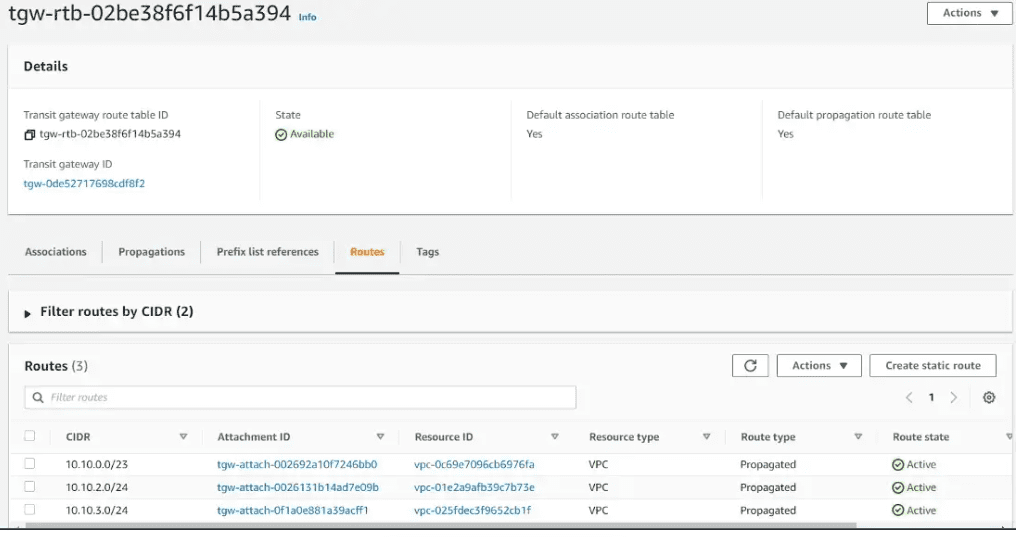
Verify the Transit gateway route table. As we are using the default transit gateway route table, so no changes are required. verify the route associations, route propagations, and routes. Add the respective routes in subnet route tables, next hop as Transit gateway attachment.
Below are the Transit Gateway Route Associations
Below are the Transit Gateway Route Propagations
Below are the Transit Gateway Routes for associated VPCs.
Update the subnet Route Table of each VPC
Navigate the Route table section under VPC console, Click on the VPC A application subnet Route table. Add the Route for VPC B, VPC C CIDR and next hop as transit gateway
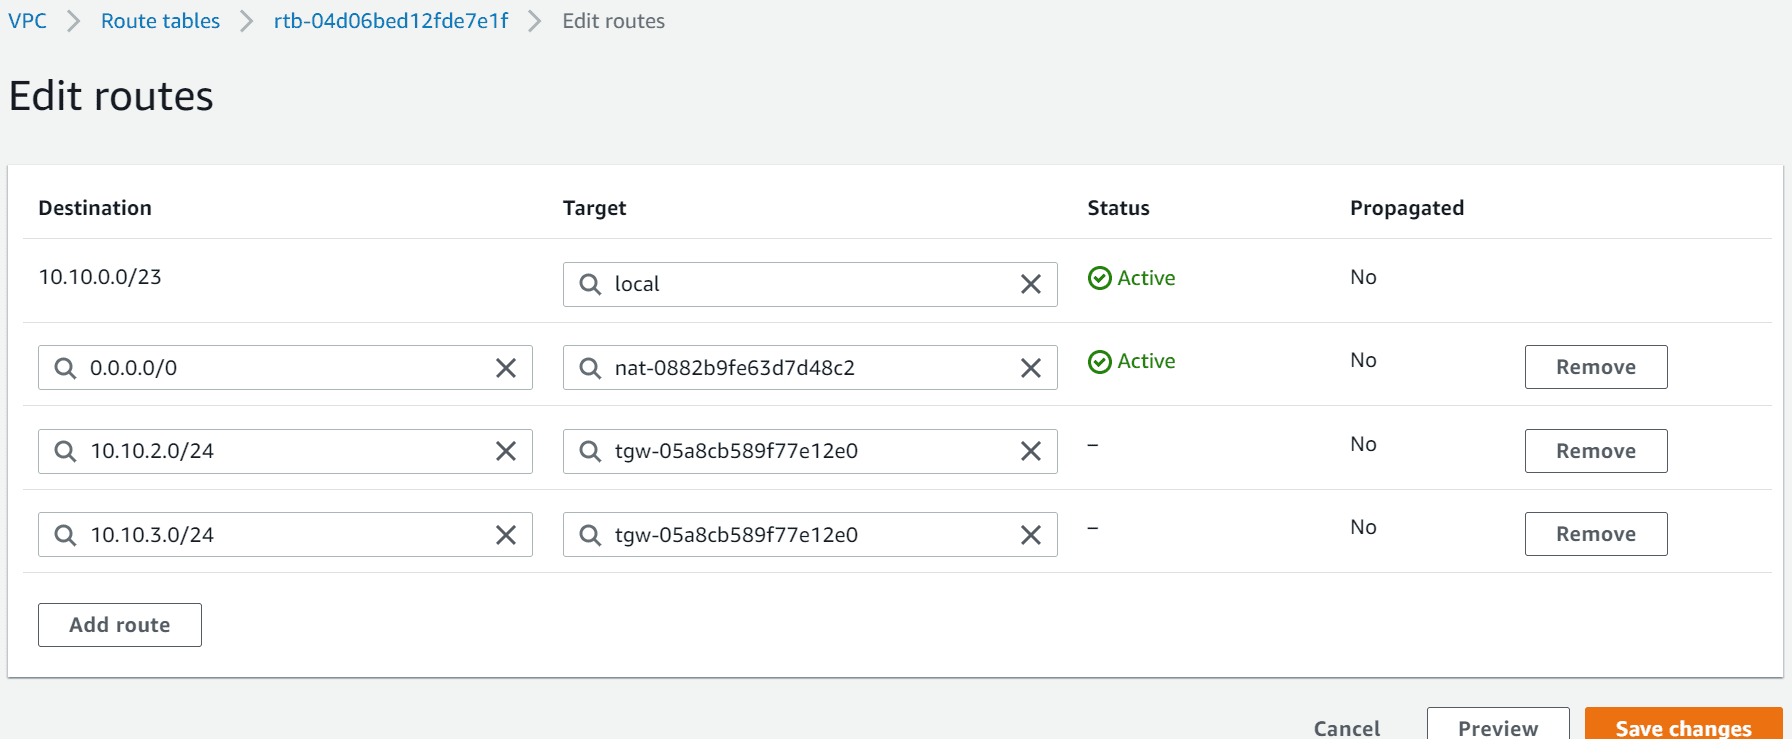
See the Routes for other VPC via Transit gateway attachment.
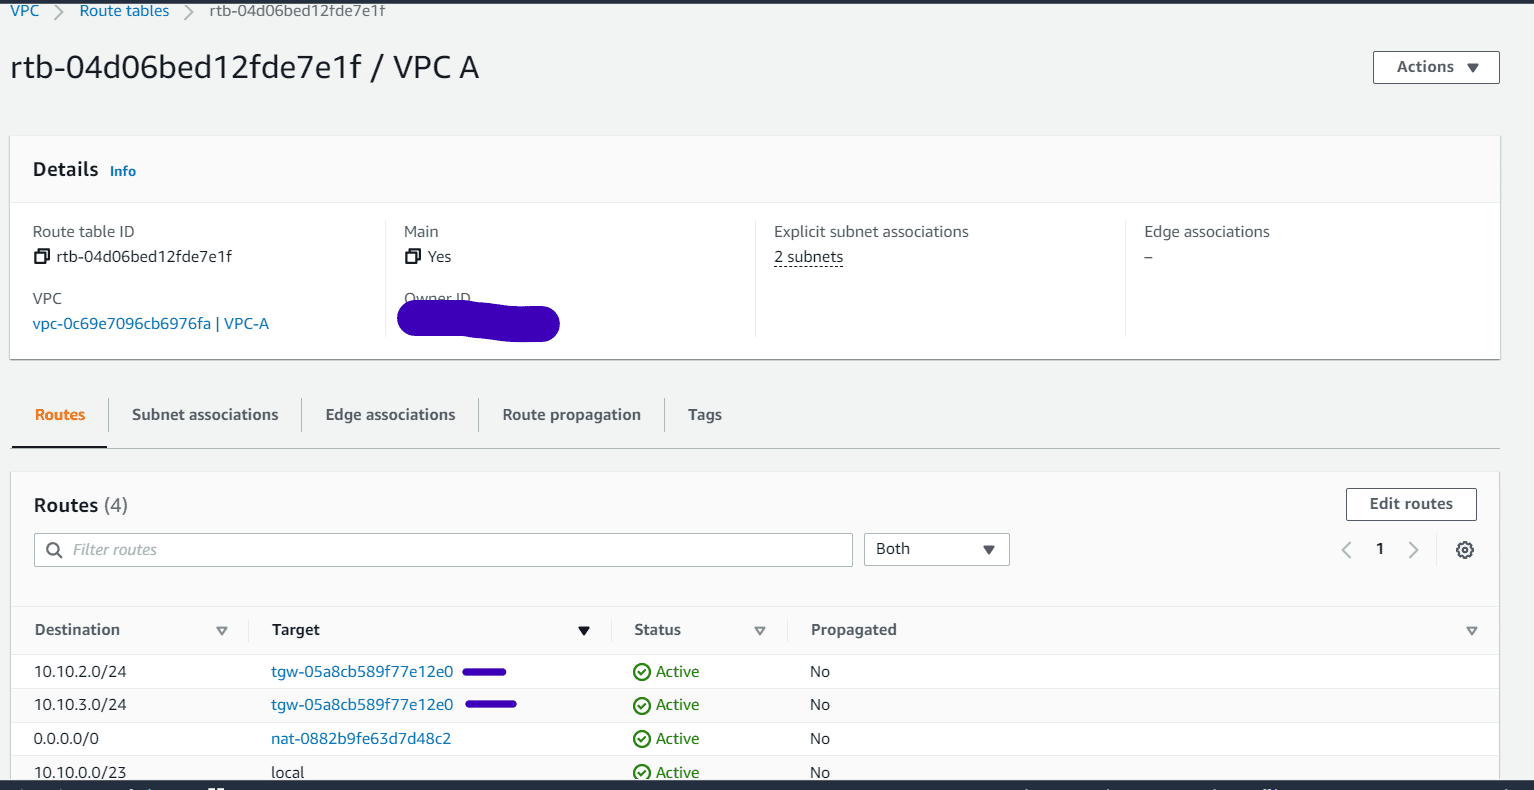
Follow the same method for VPC B and VPC C subnet route tables. Create the respective routes to reach each VPCs via transit gateway.
Verification
Now we have the full mesh transit gateway setup between 3 VPCs. Created application instances in Private subnets of each VPC.
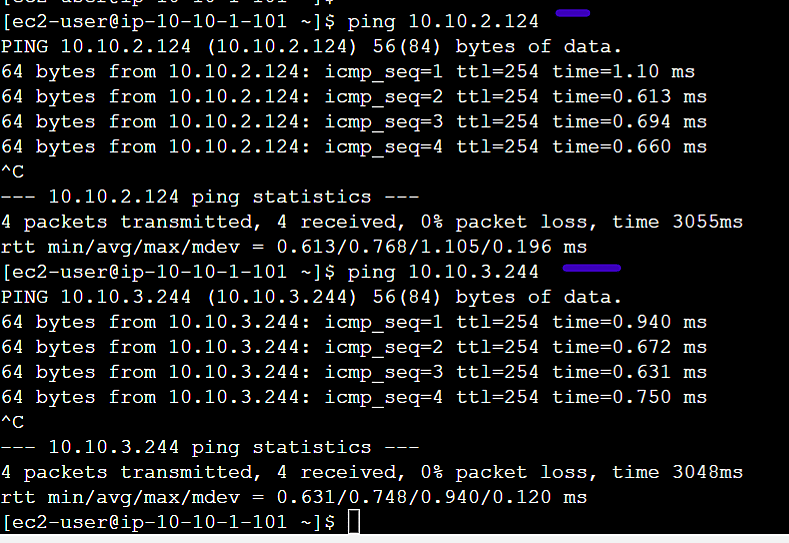
Login to the Application instance in VPC A. Try ping the Application instances of VPC B and VPC C. You will be able to ping them. (Make sure to allow inbound ICMP rule in security groups)
VPC A Application Instance IP: 10.10.1.101
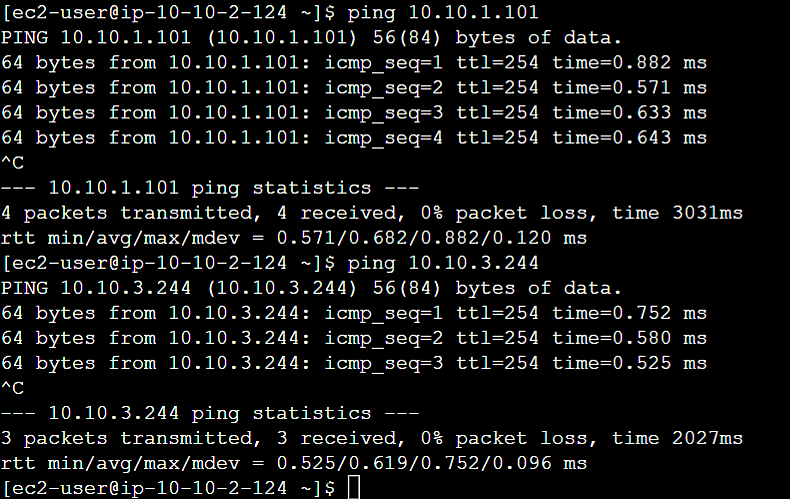
VPC B Application Instance IP: 10.10.2.124
VPC C Application Instance IP: 10.10.3.244
VPC A to VPC B and VPC C
VPC B to VPC A and VPC C
Conclusion
We saw it’s easy to deploy an AWS Transit gateway and to create a mesh topology across all VPCs. Transit gateway is really helpful when you have more than 10 VPCs, On-premises connections, Multiple regions and many more Networking appliances connections. It acts like hub for your Networking connection on AWS.
AWS for Beginners: How to Enable Multi-Attach for Amazon EBS Volumes: Part 17
AWS for Beginners: How to encrypt an unencrypted AWS EBS root volume: Part 18
AWS for Beginners – What is Application Load Balancer and How it Works: Part 19
AWS for Beginners: What is AWS Client VPN: Part 20
Follow our Twitter and Facebook feeds for new releases, updates, insightful posts and more.


Leave A Comment