
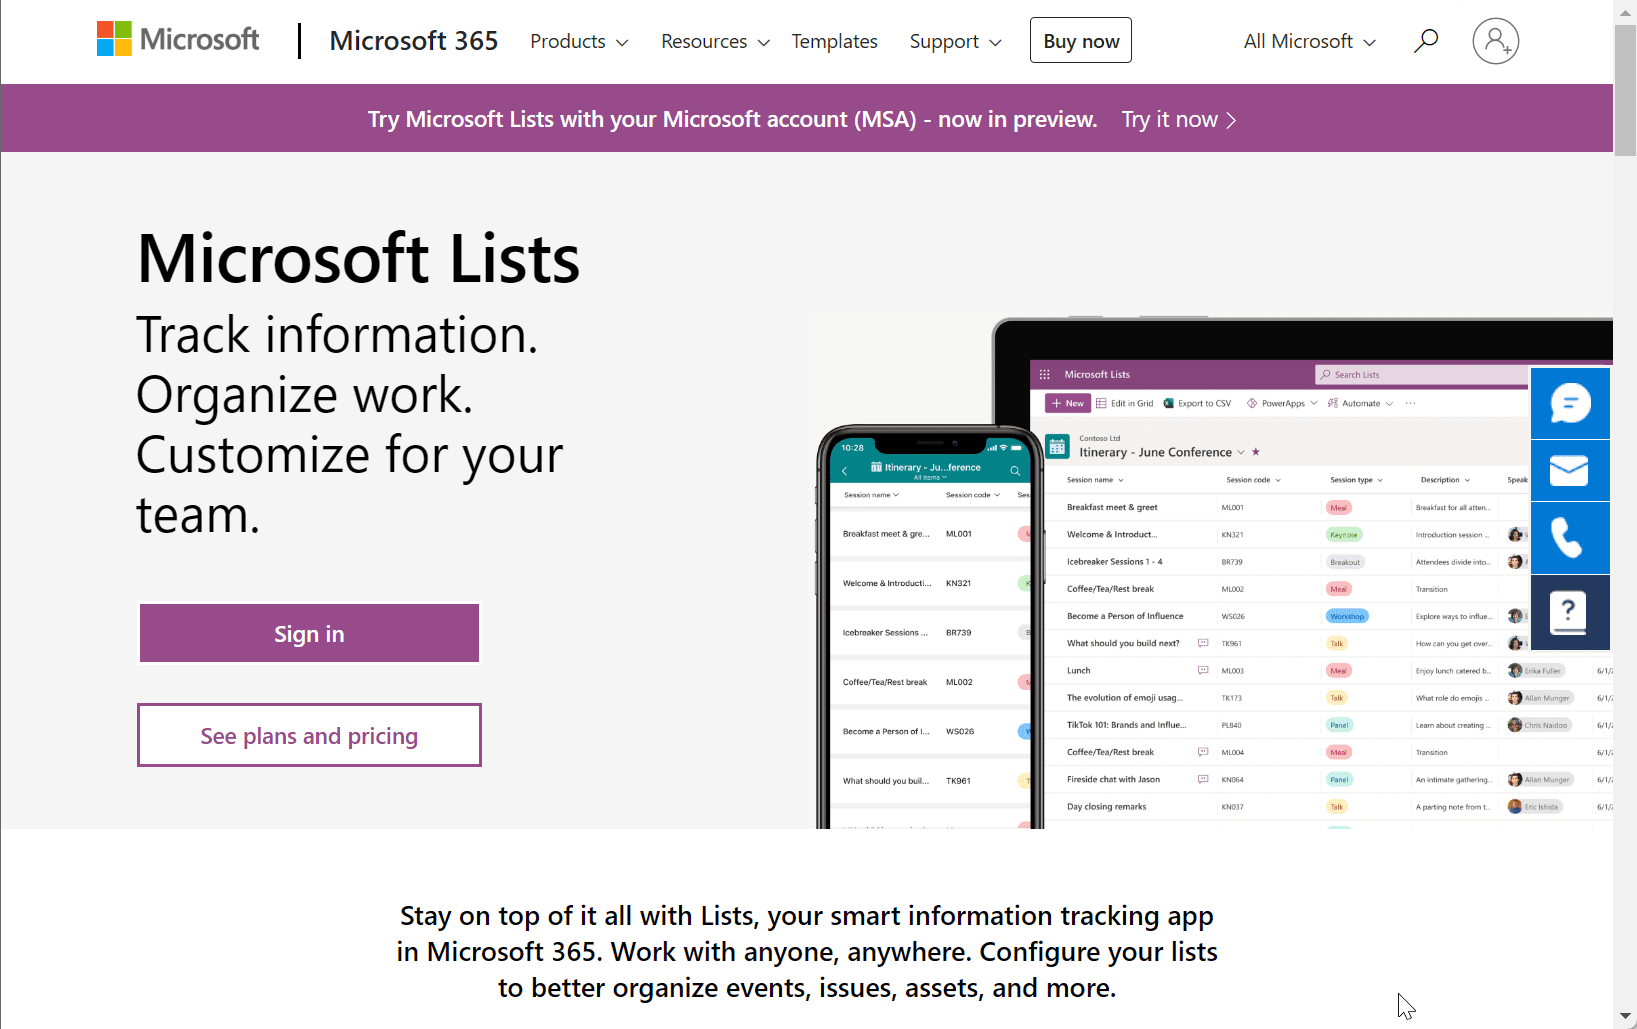
In looking at the available services in Microsoft 365, you’ve probably heard of Microsoft Lists. It enables teams to create, share, and manage data in a flexible and organized manner. This post will look at the features of Microsoft 365 Lists for beginners and see how you can get the most out of the solution.
What is Microsoft 365 Lists?
Microsoft 365 offers various productivity and collaboration tools designed to fulfill specific needs. Although tools like Microsoft Planner, To Do, and Excel share similarities with Microsoft Lists, Lists stands out for its unique capabilities, including the following:
- Flexibility and Customization – Microsoft Lists allows you to create highly customized lists with columns, data types, and formatting tailored to your requirements. These features set it apart from tools like Planner and To Do, which offer a more structured approach to task management
- Centralized Data Management – Unlike standalone tools like Excel, Microsoft Lists enables seamless integration with other Microsoft 365 apps, allowing for a more unified data management experience. By integrating Lists with Teams, Power Automate, and Power Apps, you can streamline workflows and enhance collaboration across your organization
- Scalability – Microsoft Lists can is highly scalable and able to house large amounts of data from your teams, from simple task tracking to more complex data management scenarios. While Planner and To Do are well-suited for personal or team-level task management, Lists can handle more extensive amounts of data, making it a versatile solution for even large organizations
- Advanced Views and Filtering – Microsoft Lists views can be filtered as needed, allowing you to display and organize your data in ways that best suit your needs. This feature surpasses the capabilities and filtering other Microsoft 365 tools provide, enabling teams to view the data they need efficiently
- Collaborative Features – Microsoft Lists is designed with collaboration, allowing multiple users to access, edit, and share lists in real time. While other Microsoft 365 tools offer varying levels of collaboration, Lists provides a platform for team-based data management
Understanding Microsoft Lists
Microsoft Lists enables you to create and manage lists that store important information. It also allows customization and collaboration of lists created, making it a robust tool for organizing, prioritizing, and tracking tasks, inventory, and events.
Microsoft Lists vs. SharePoint Lists
While SharePoint Lists has been around for quite some time, Microsoft Lists is a more modern solution that provides a seamless user experience across multiple devices and platforms. In addition, although Lists is built on top of SharePoint, it offers a more intuitive interface, making it simpler for teams to collaborate than with SharePoint.

Getting Started with Microsoft Lists
To begin using Microsoft Lists, follow these easy steps –
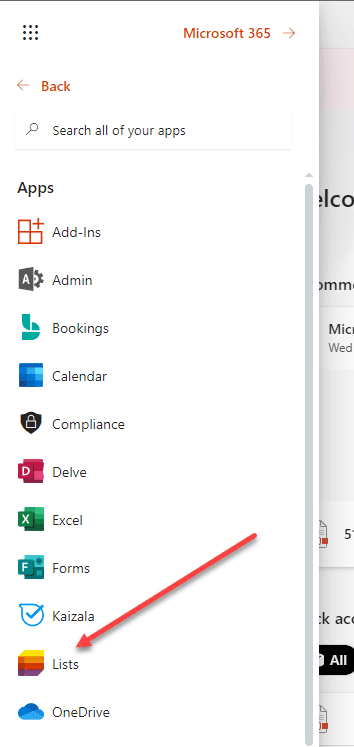
- Accessing Microsoft Lists – Navigate to Microsoft 365 and sign in with your credentials. On the Microsoft 365 dashboard, locate and click the Lists icon
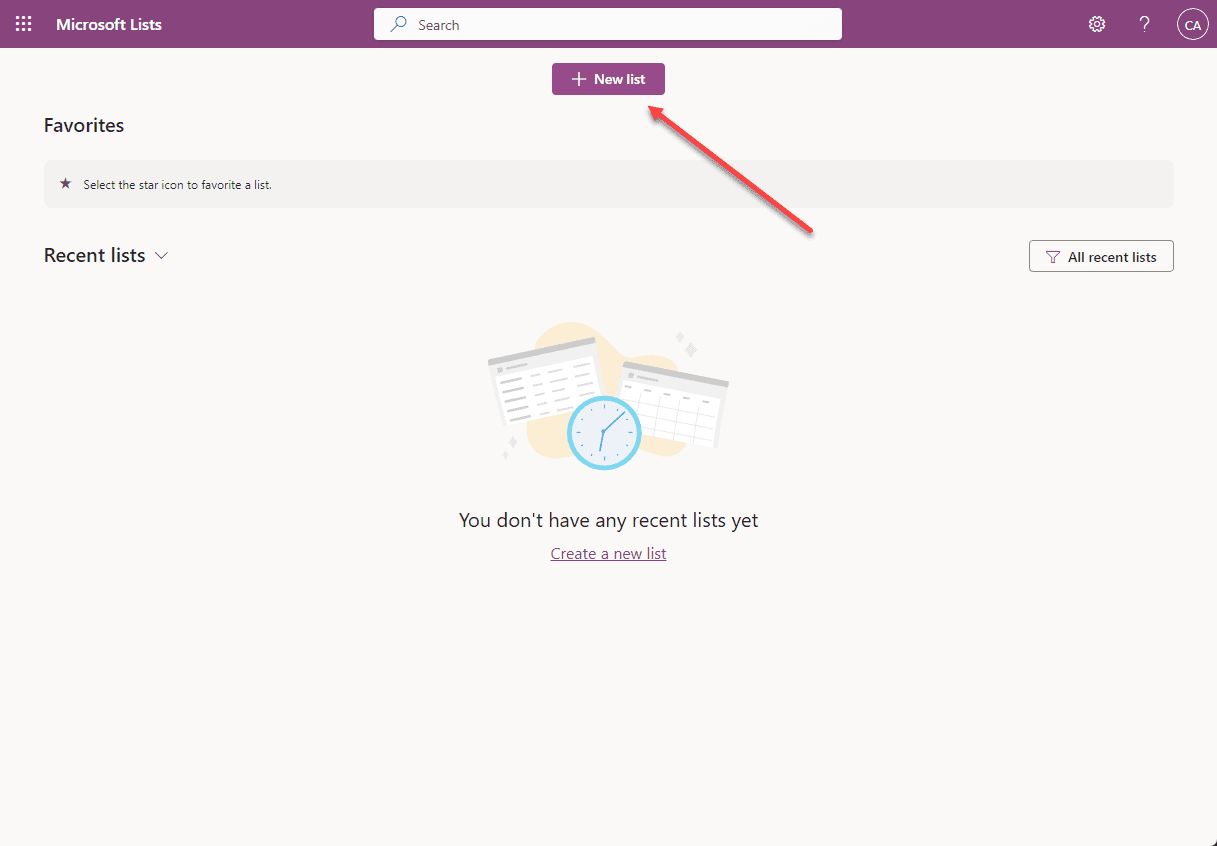
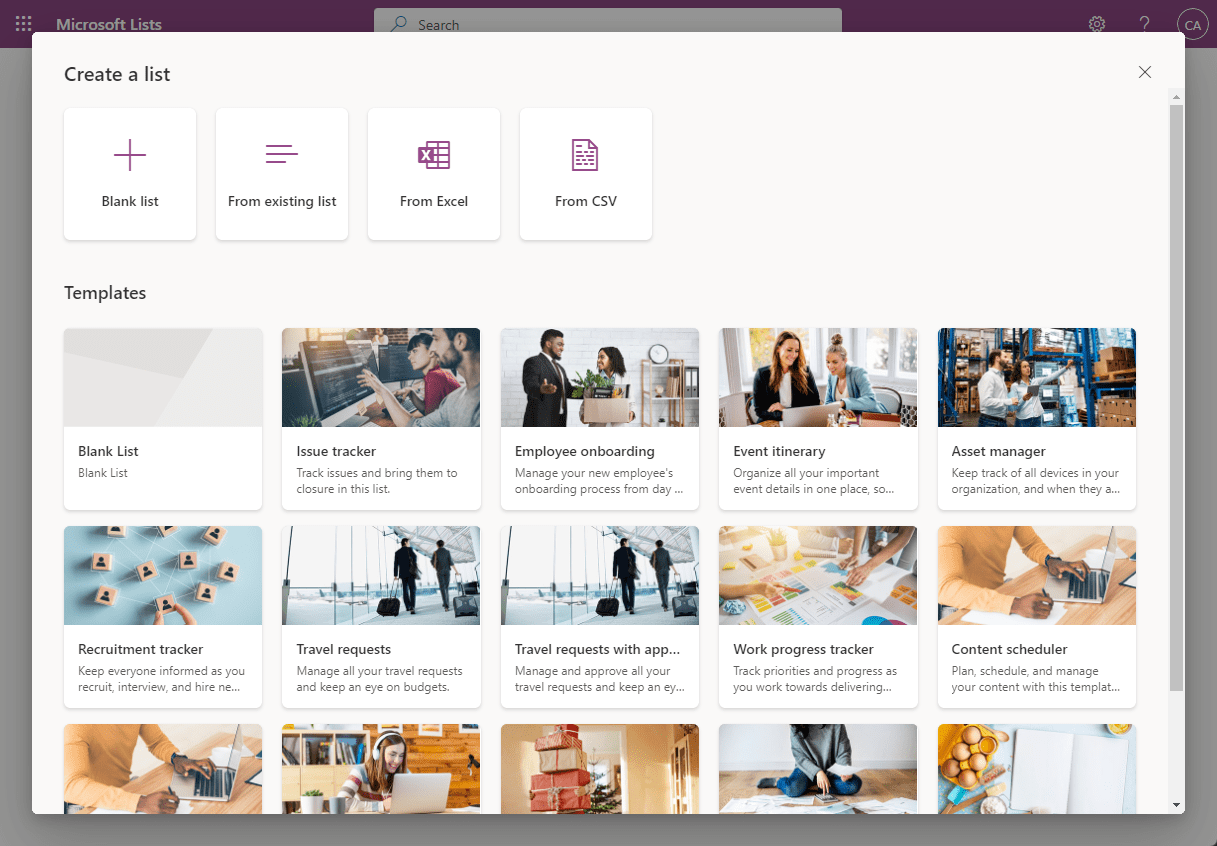
- Creating a new list – Once you’re on the Lists homepage, click the “New list” button. From here, you have four options to create your list:
- Blank list – Start from scratch and build a customized list tailored to your needs
- From Excel – Import data from an existing Excel file to create a new list
- From an existing list – Make a new one based on your organization’s previously created list
- From CSV – Make a new list based on a custom CSV file
- Templates – Choose from various pre-built templates designed for specific purposes, such as issue tracking or event planning
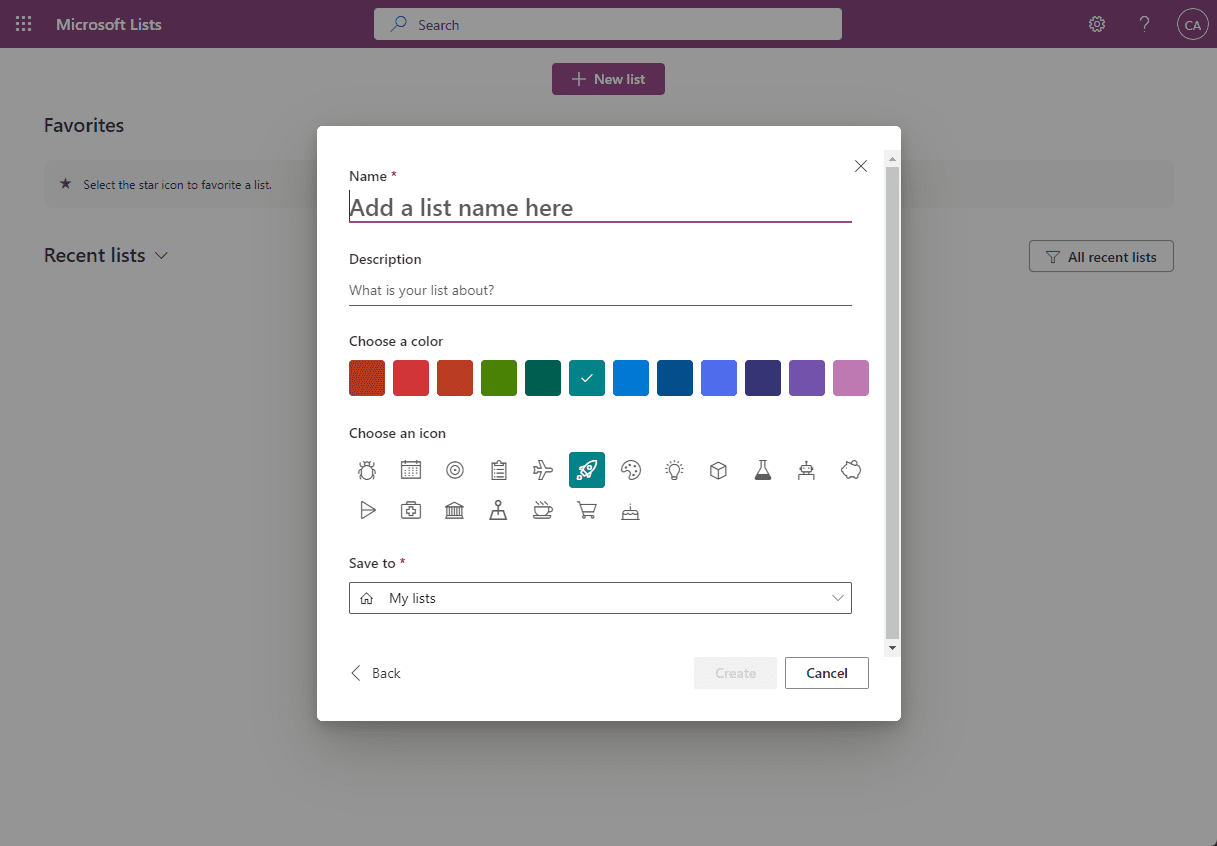
- Customizing your list – After selecting a creation method, you can personalize your list by adding columns, defining data types (e.g., text, number, date, choice), and applying formatting options
- Sharing your list – To collaborate with your team, click the “Share” button and invite individuals or groups by entering their email addresses. You can also set permissions (e.g., view-only or edit) for each person
- Using Views – Microsoft Lists offers various views that allow you to filter, sort, and group list data according to your preferences. You can create custom views or use the built-in views (e.g., Calendar, Gallery, Grid) for a more organized and efficient workflow
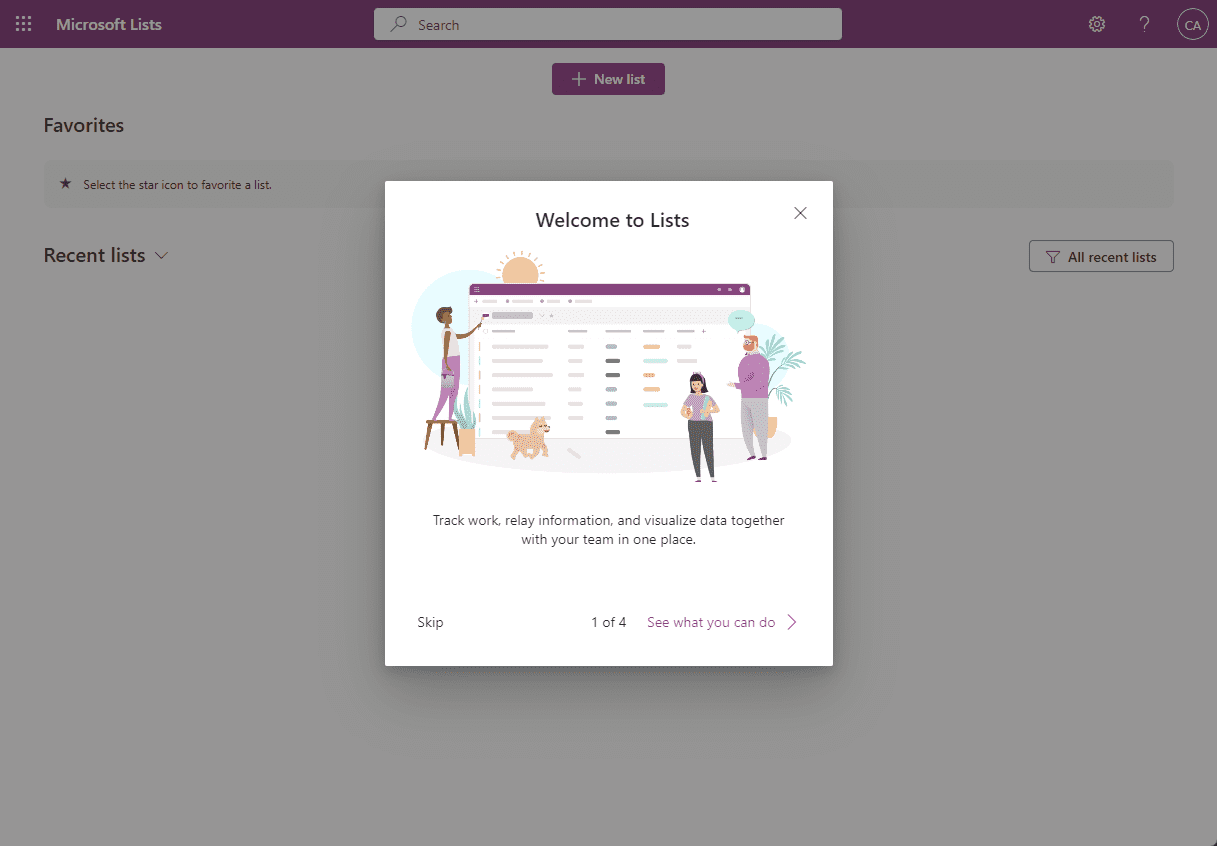
Once you launch Microsoft Lists, you will see the Welcome to lists slides.
As you can see below, when you create a new list, it will launch the Create a list dialog allowing you to choose the source of the new list.
Tips and Tricks for Microsoft Lists
Note some of the following useful tips and tricks that will help you get the most out of Microsoft Lists.
- Conditional formatting – You can apply conditional formatting rules to highlight specific list items based on criteria, such as priority, status, or due date. This feature makes it easier to identify critical tasks or issues that require immediate attention
- Integration with Power Automate allows you to streamline repetitive tasks by integrating Microsoft Lists with Power Automate. Create automated workflows that trigger actions, such as sending notifications or updating list items based on specific conditions
- Integration with Microsoft Teams enhances collaboration by incorporating Microsoft Lists directly into your Microsoft Teams workspace. Add a new tab for Lists, allowing team members to access, edit, and discuss list data without leaving the Teams environment
- Custom forms with Power Apps – You can utilize the power of Microsoft Power Apps to create custom forms for your lists. By designing tailored input forms, you can collect data more efficiently and improve the overall user experience
- Version history – It allows tracking changes made to list items using the version history feature. If necessary, you can view previous versions, compare changes, and restore list items to an earlier state
- Alerts and reminders – Keep your team informed and on track by setting up alerts and reminders for specific list items or events. This feature ensures that essential tasks or deadlines don’t go unnoticed
- Export to Excel – If you need to perform advanced data analysis or create custom reports, export your list data to an Excel file with just a few clicks. It allows you to leverage Excel’s robust data analysis tools while maintaining the flexibility and collaboration of Microsoft Lists
- Mobile access – Stay connected and productive by accessing Microsoft Lists through the dedicated mobile app. The app is available for iOS and Android devices, offering a seamless user experience and managing lists from anywhere
Wrapping up
Microsoft Lists is an excellent tool for managing and organizing data in the hybrid workplace. By understanding the basics and exploring advanced features, you can leverage Microsoft Lists to enhance productivity, streamline workflows, and promote seamless collaboration within your team. In addition, understanding the basics of Microsoft Lists allows you and your team to hit the ground running with the solution and provide quick time to value.
Read More:
Microsoft 365 for Beginners – Password hash Synchronization vs Pass-through Authentication – Part 33
Follow our Twitter and Facebook feeds for new releases, updates, insightful posts and more.

Leave A Comment