In the last four articles, we discussed WSUS fundamentals, how to install WSUS on your Windows Server 2022, how to perform an initial configuration, and how to create computer groups. Even when things are configured on WSUS, clients will not be able to download updates. The reason? They don’t know that WSUS is installed and how to find it.
Table of Contents
- Step 1: Create group policy (GPO)
- Step 2: Configure group policy
- How can you verify which targets the clients are using?
In this article, I will show you how to inform clients that the WSUS server is installed, how to locate it, and when to download and install updates. To achieve this, we will create group policies on the Domain Controller.
We will break it down into two steps. In the first step, we will create a GPO, and in the second step, we will configure and deploy it to your WSUS clients.
Step 1: Create group policy (GPO)
In the first step, we will create a new group policy dedicated to WSUS and configure it to ensure that your target machines know where to look for updates.
- Log in to your Domain Controller
- Open Server Manager, navigate to Tools and then select Group Policy Management.
- Expand your domain
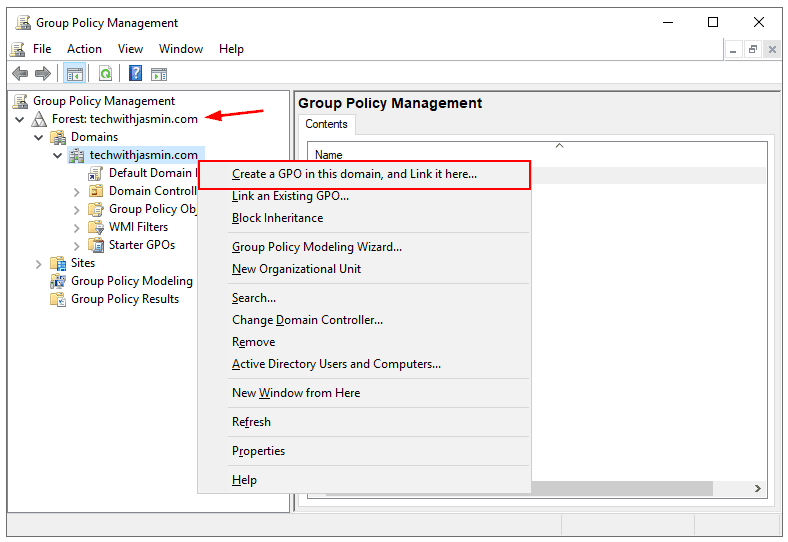
- In a previous article, we created a new group policy for client-side targeting. If you followed that procedure, you can continue from Step 2: Configure group policy. If you haven’t done so, please read on. Right-click on the domain, then select Create a GPO in this domain, and link it here.”
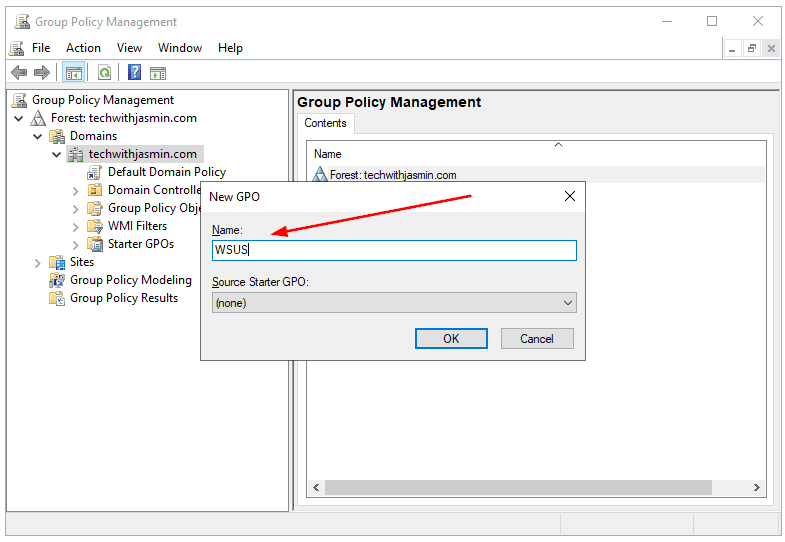
- Type the name of the GPO and click OK. In my case it is WSUS.
Step 2: Configure group policy
In the second step, we will configure two group policies. One is for informing clients about where to download updates, and the second is about when to automatically download and install them.
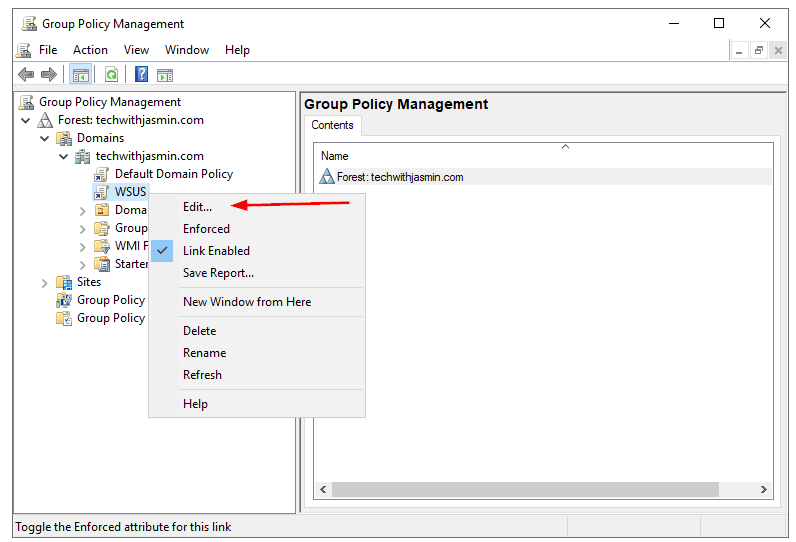
- Right click on the GPO you created and then click Edit…
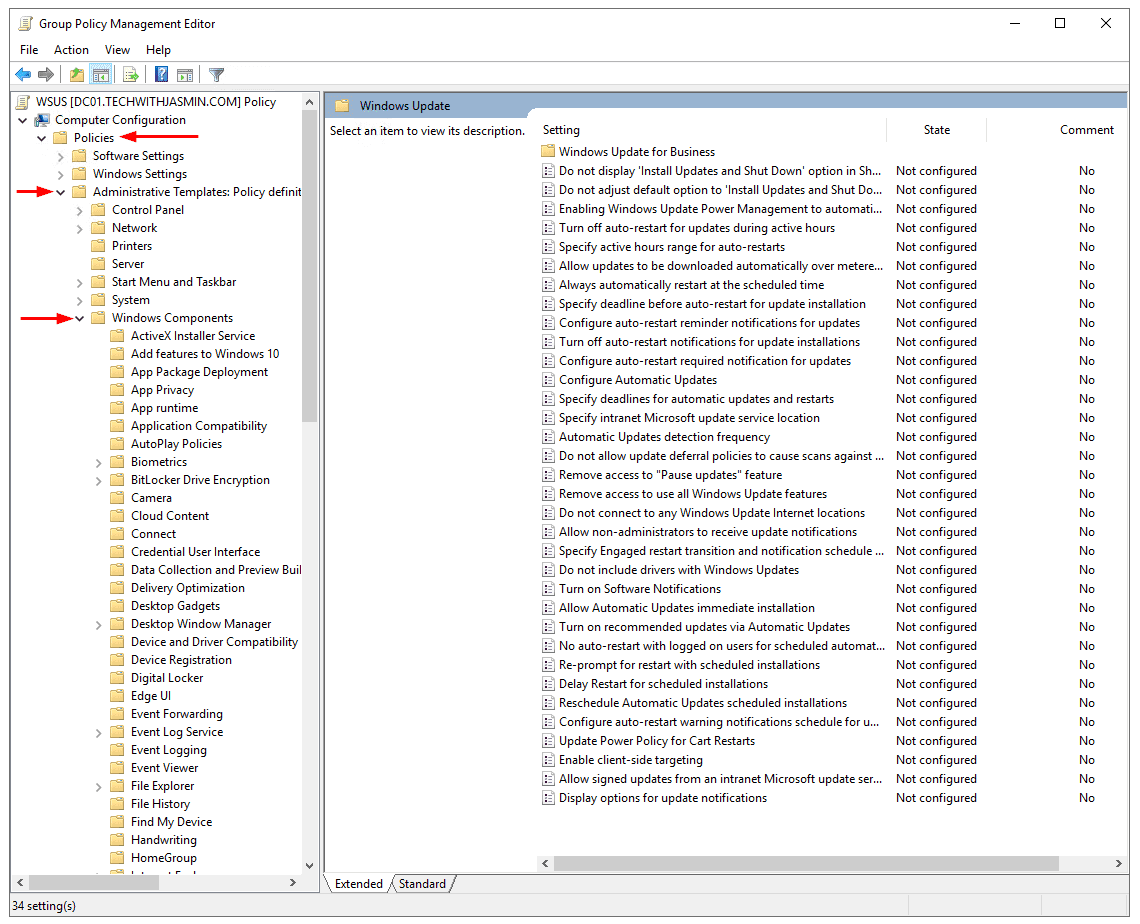
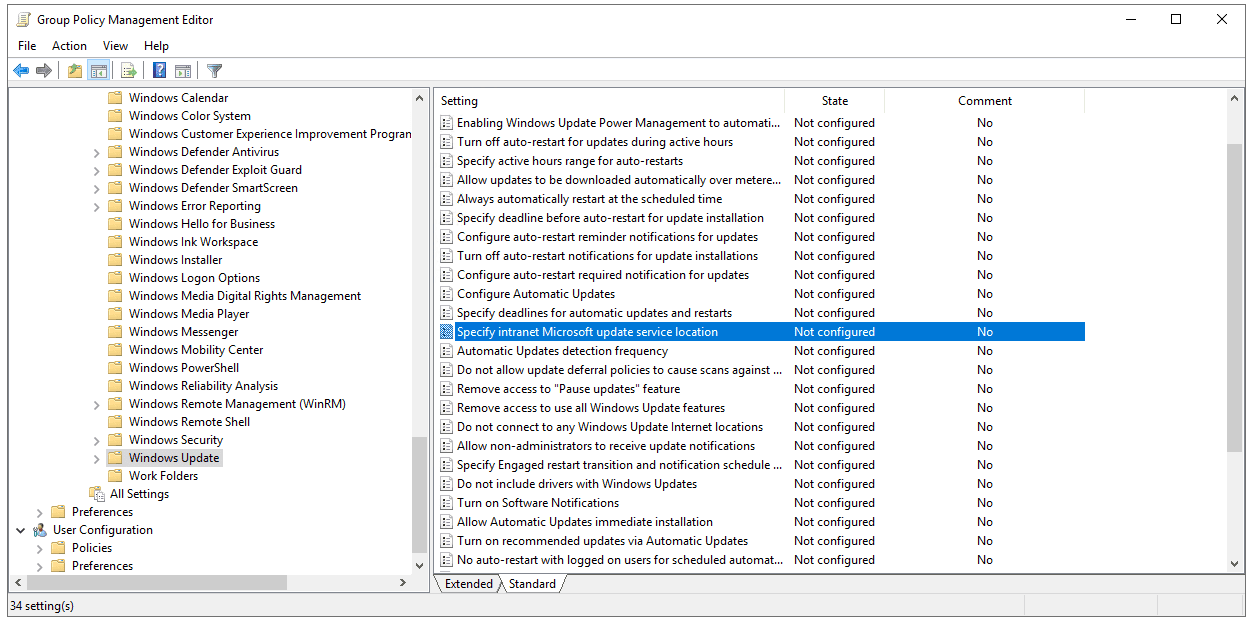
- Expand Computer Configuration > Policies > Administrative Templates > Policy > Windows Components > Windows Updates.
- Navigate to policy Specify intranet Microsoft update service location
- Right click on it and then click Edit.
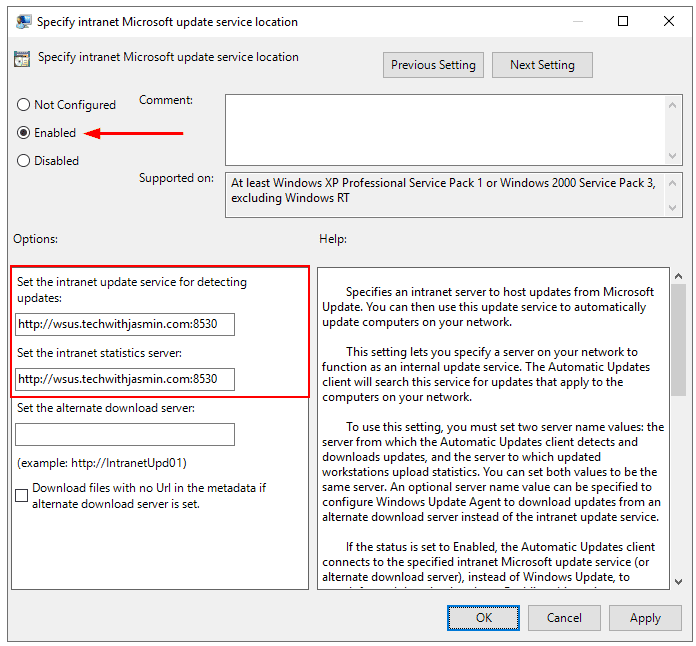
- Select Enable, and then under Set the Intranet update service for detecting updates and Set the intranet statistics server, input the FQDN of your WSUS server. In my case, it is wsus.techwithjasmin.com
- Click Apply and then OK
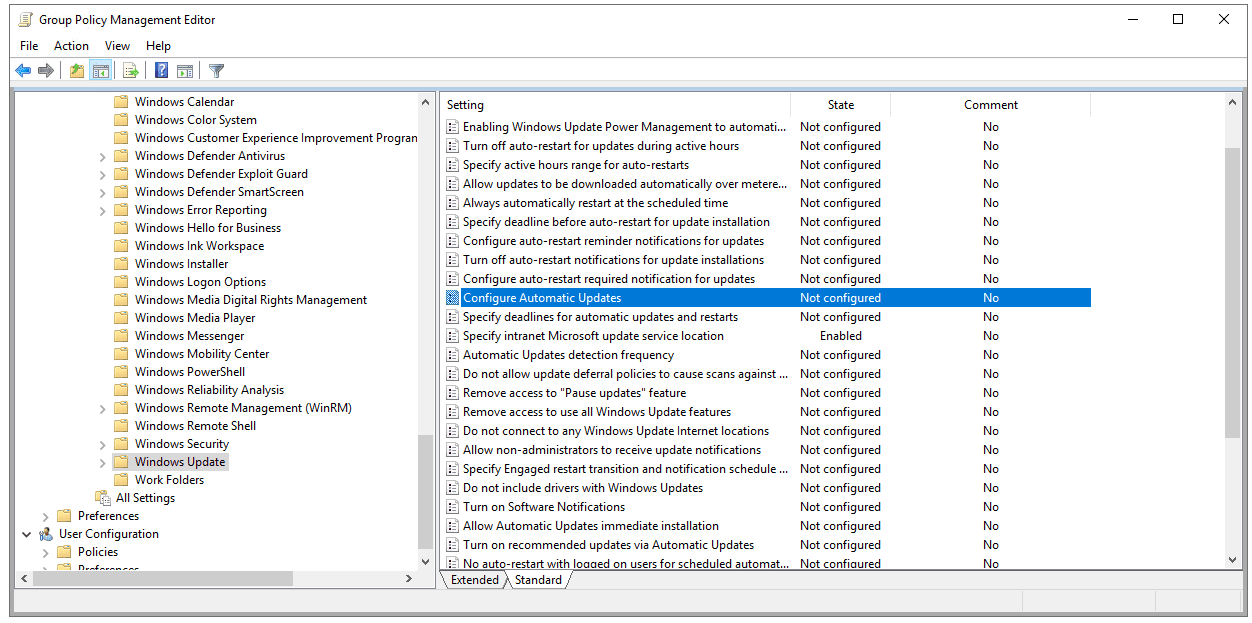
- Navigate to Configure Automatic Updates to configure how and when Windows will download updates
- Right click on it and then click Edit.
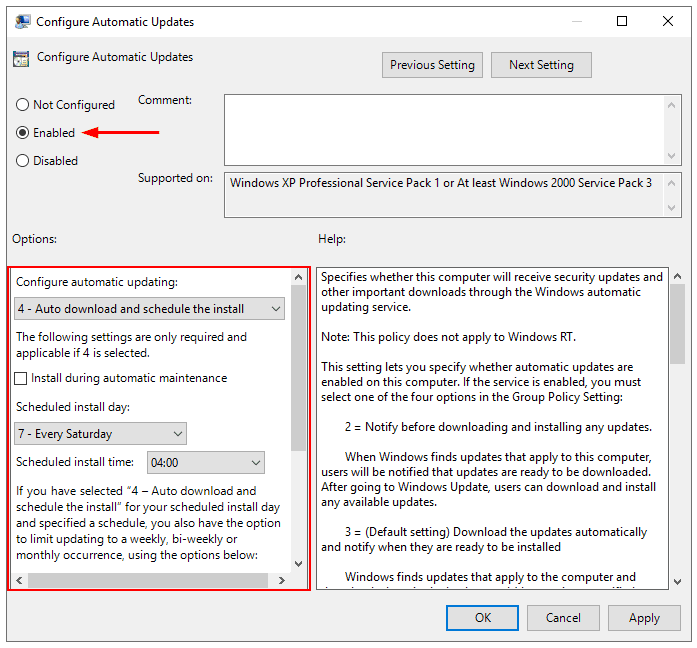
- Select Enable, and then under Configure automatic updating, choose option 4 – Auto download and schedule the install. Additionally, under Scheduled install day, select when you want to install updates. In my case, Windows will automatically download updates and install them every Saturday at 4 AM UTC
- Click Apply and then Ok
You have successfully configured two group policies to ensure the proper distribution, downloading, and installation of updates on clients. These changes will take effect on WSUS clients after the next sign-out/sign-in or reboot.
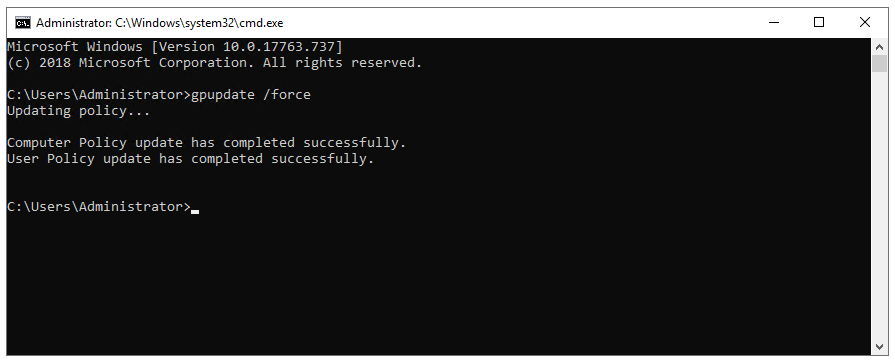
To force the update, you can go to the client machine and enter ‘gpupdate /force’ in the Command Prompt or PowerShell.
How can you verify which targets the clients are using?
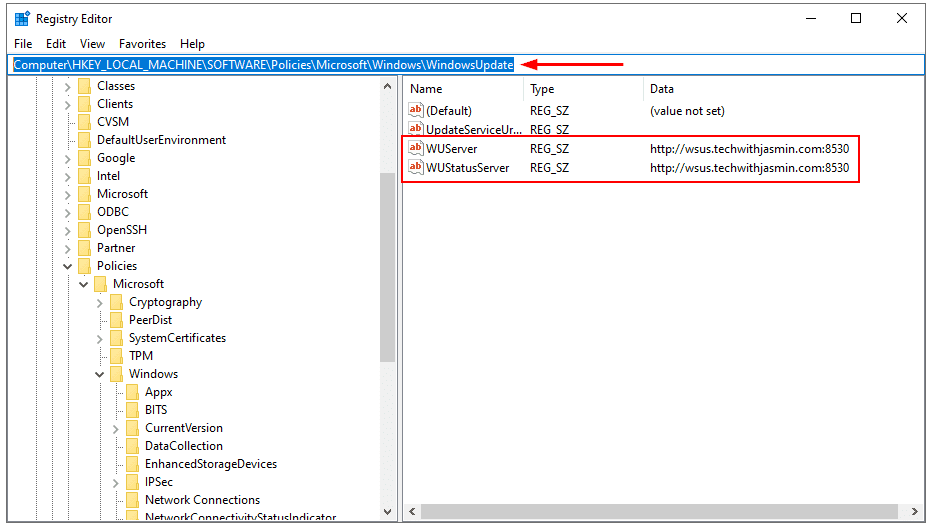
After publishing the group policies within your domain or organizational group, WSUS clients will apply the changes as needed. To confirm whether Windows clients have successfully applied the modifications and are now updating from the WSUS server instead of Microsoft, you should open the Registry on one of your clients and verify if the changes have taken effect.
- Open Registry Editor
- Navigate to HKEY_LOCAL_MACHINE\SOFTWARE\Policies\Microsoft\Windows\WindowsUpdate
- Locate the two registry keys: ‘WUServer’ and ‘WUStatusServer’. Both of these keys should indicate from where your clients are downloading updates
That’s all for today. In the next article, we will explore how to configure auto-approval rules in WSUS.
Read More:
WSUS : Get Started with Windows Server Update Services (WSUS) – Part 1
WSUS : Windows Server Update Services (WSUS) installation on Windows Server 2022 – Part 2
WSUS: Post-deployment WSUS configuration – Part 3
WSUS: Create Computer groups in WSUS – Part 4
Follow our Twitter and Facebook feeds for new releases, updates, insightful posts and more.


Leave A Comment