In the last two articles, we talked about WSUS fundamentals and how to install WSUS on your Windows Server 2022 or any earlier operating system. In this article, we will go through the initial setup of your WSUS server and explain some important things.
The prerequisite for this step is to have WSUS installed on your Windows Server.
How to do it
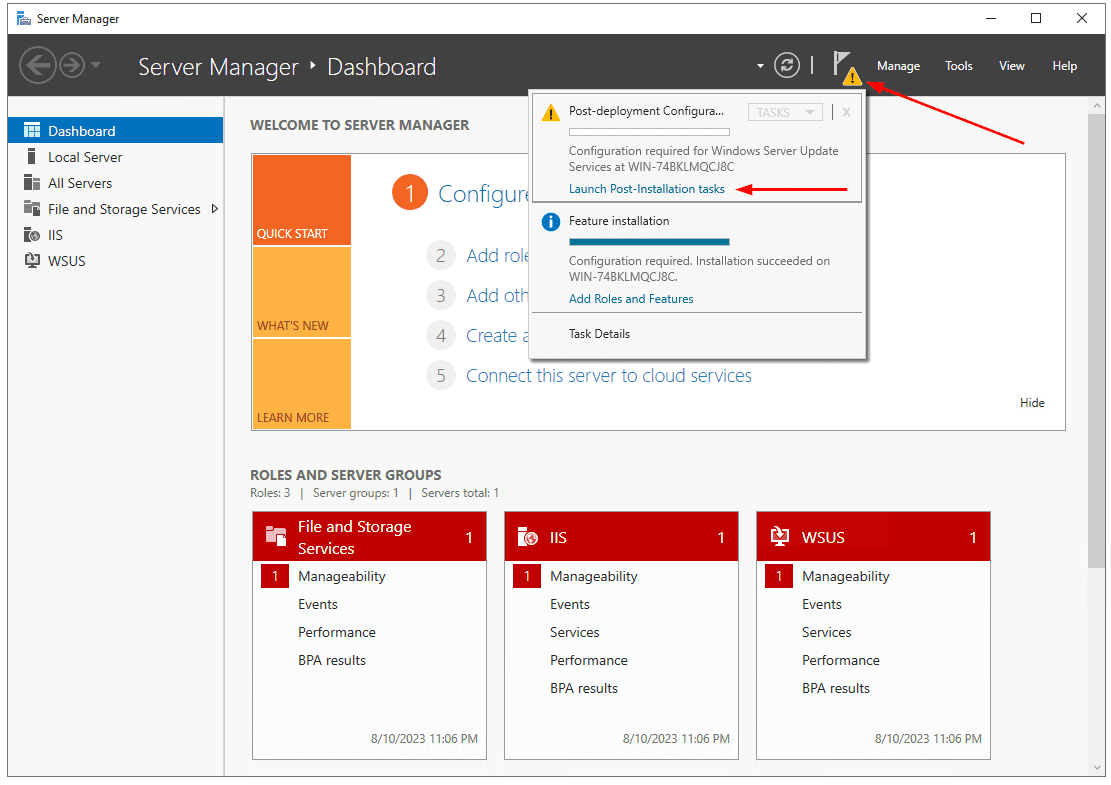
After the WSUS installation is complete, you’ll notice an exclamation symbol located below the flag. This symbol indicates that there are post-deployment activities that need to be completed. Here’s what you should do:
- Open Server Manager if you accidentally closed it
- Click on the flag located at the top-right corner of the window, and then select Launch Post-installation tasks
- Once you’ve completed the tasks, the exclamation symbol will disappear
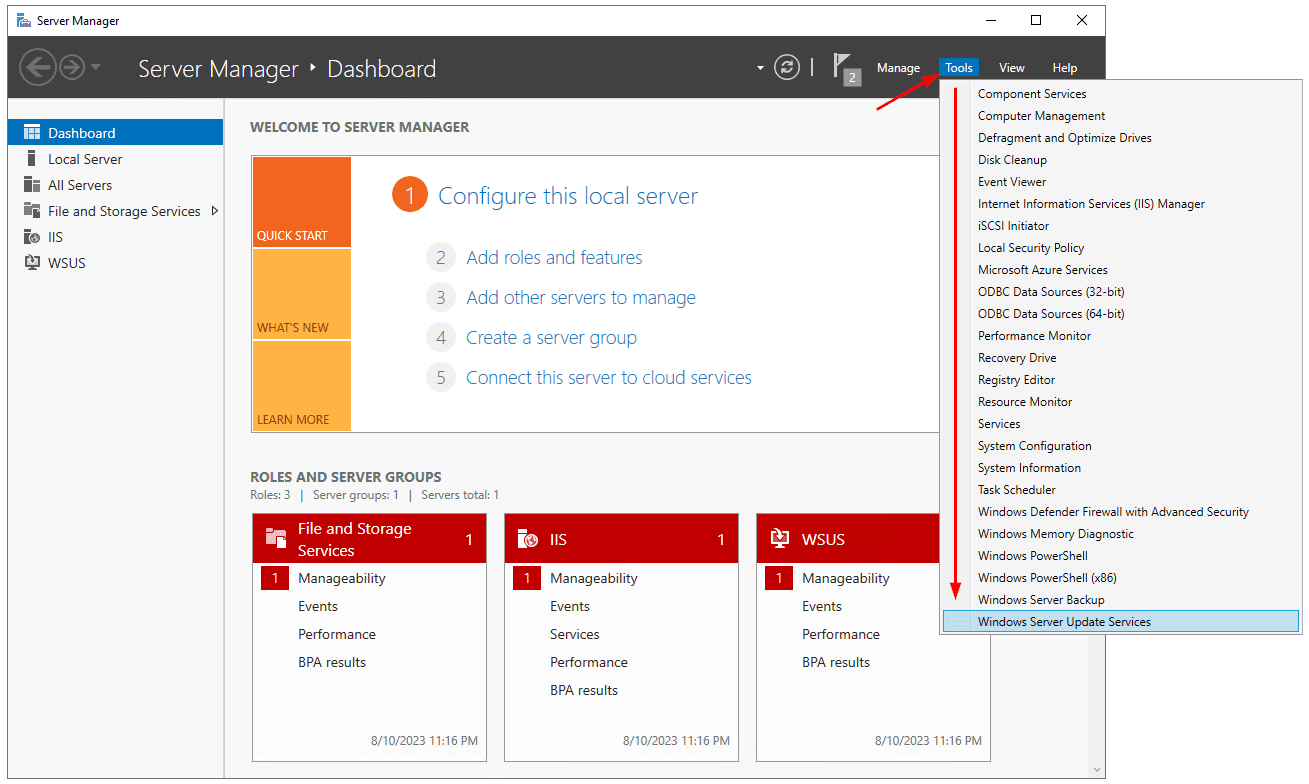
- Click on Tools and then Windows Server Update Services
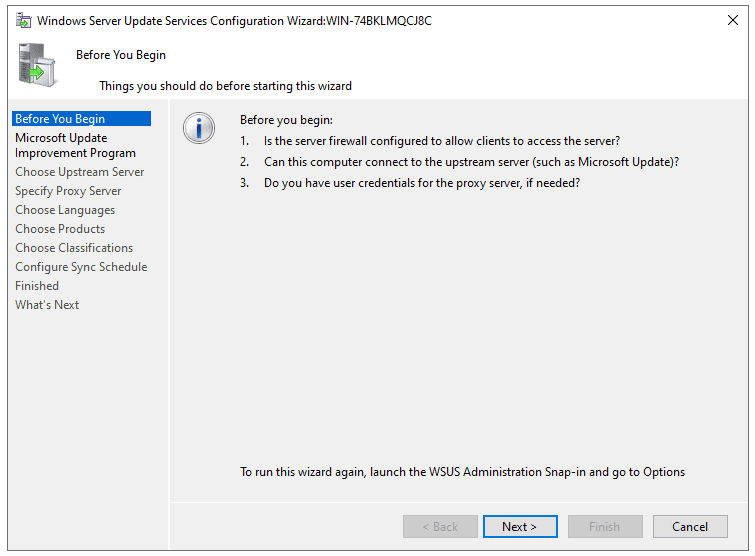
- Under Before you begin click Next
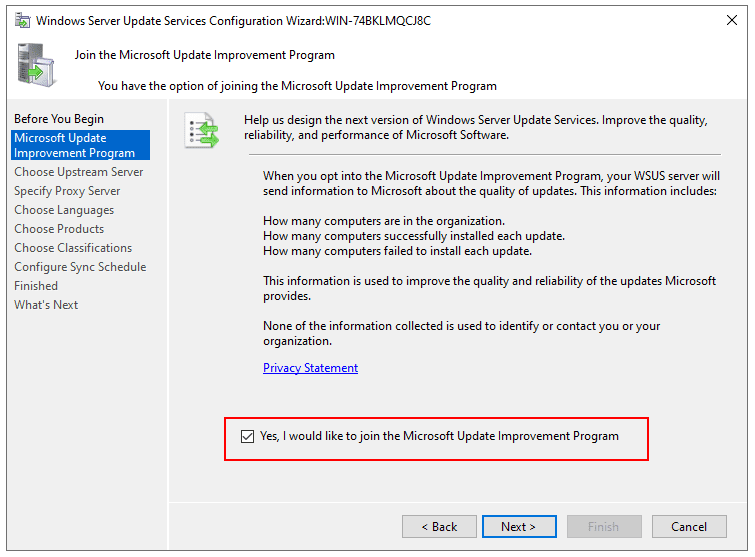
- Under Microsoft Update Improvement Program click Next. By default, WSUS will send information to Microsoft about the quality of updates. If you do not want to do it, you need to unselect Yes, I would like to join the Microsoft Update Improvement Program
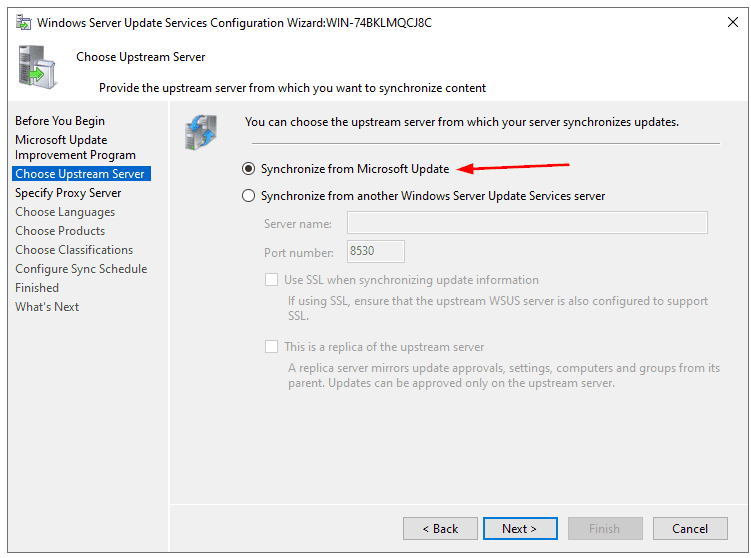
- Under Choose Upstream Server choose if you want to synchronize your WSUS server with Microsoft Update or another WSUS server. As this is only the first server in our infrastructure, we will choose to Synchronize from Microsoft Update and click Next. By synchronizing with the Microsoft Update server, WSUS will obtain a collection of available updates, and be able to distribute it to clients
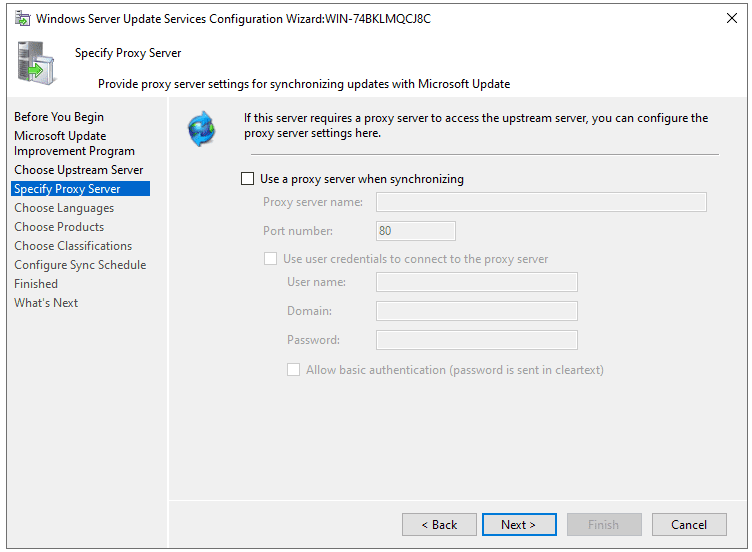
- Under Specify Proxy Server, you have the option to configure whether this server requires a proxy server to access the upstream server. Since we don’t use a proxy, simply click Next at this stage
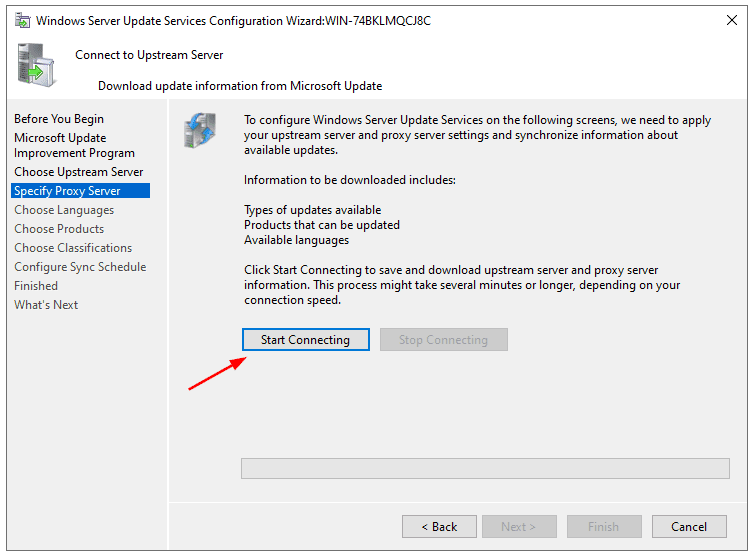
- Click Start Connecting to do a first sync of the WSUS server with Microsoft Update. This will download the types of updates available, products that can be updated, and available languages
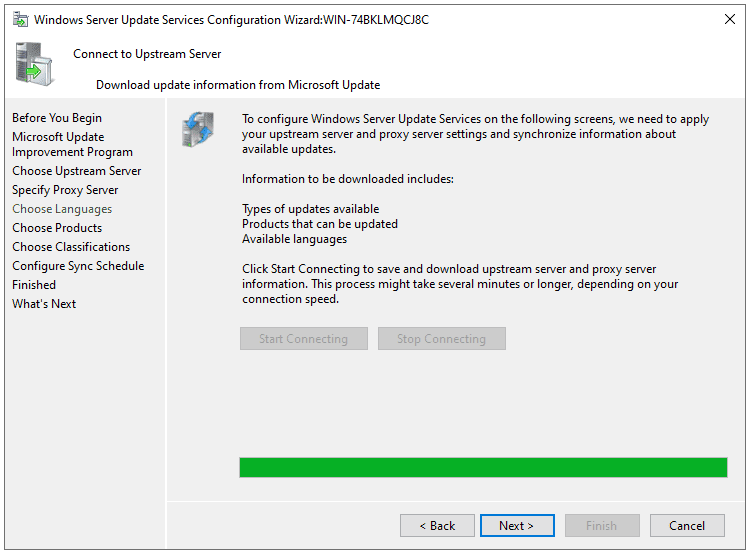
- Once synchronization is finished, click Next
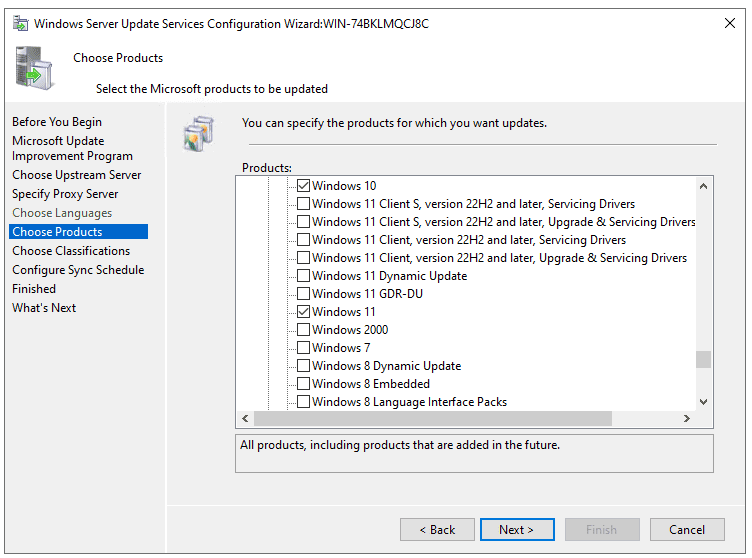
- Choose the products that are present on your network and require updates and then click Next. Do not select products that you don’t have. If you opt to store updates locally, the system will download all the selected updates, which will consume your disk space. I select Windows 10 and Windows 11 among other products
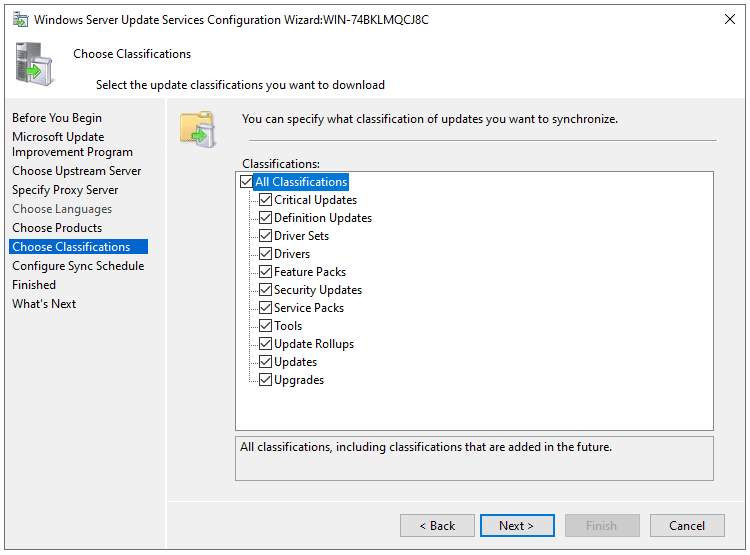
- Select the classification of updates you want to synchronize, and then click Next. In my case, I chose all classifications to provide my machines with a comprehensive update experience
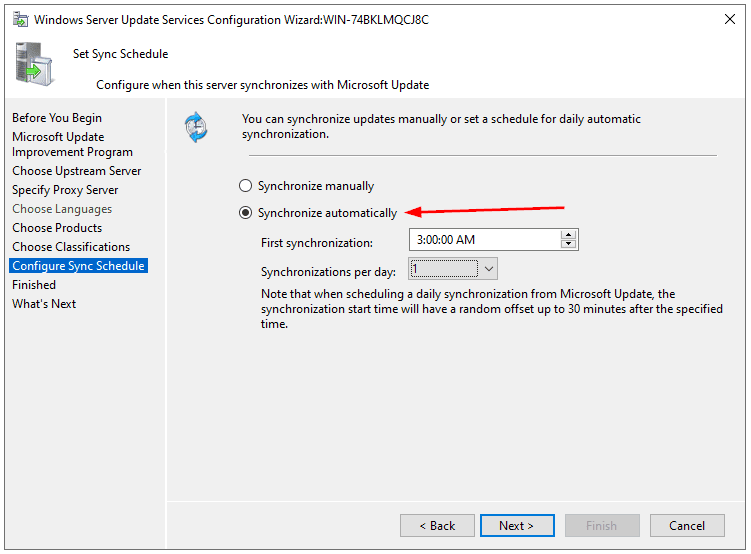
- In the Configure Sync Schedule section, choose Synchronize automatically, define the timing, and then click Next. This is considered a best practice, as it eliminates the need for manual daily updates. WSUS takes care of this for you
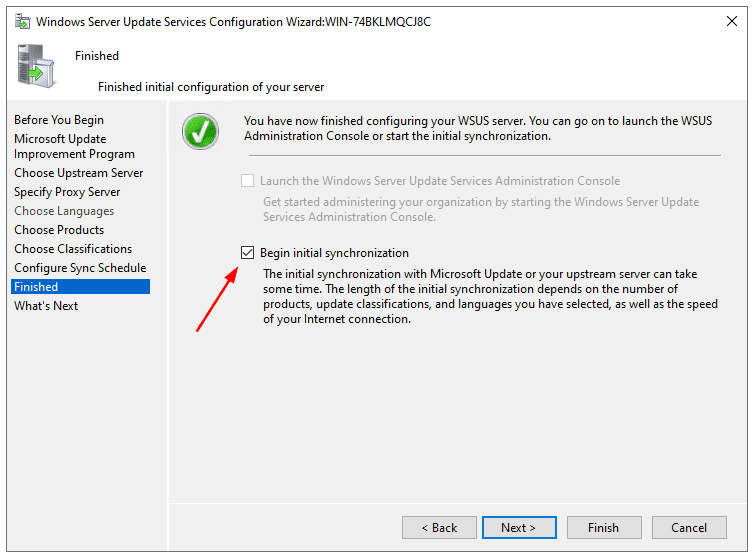
- Under Finished, select Begin initial synchronization and click Next
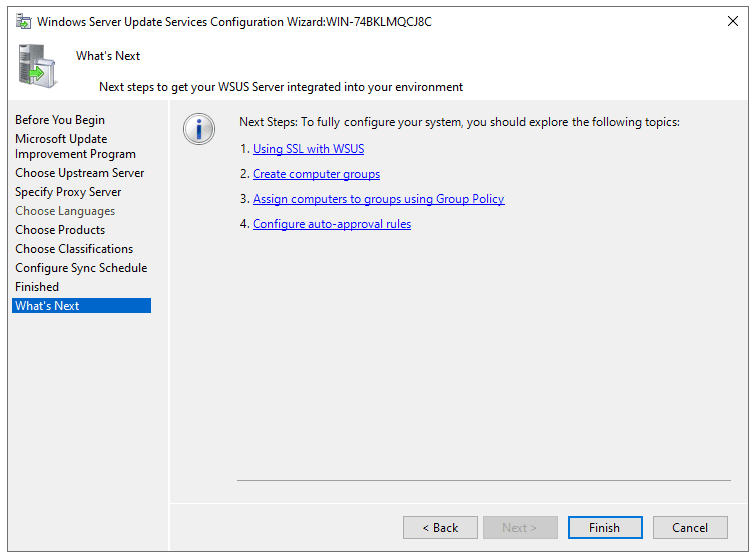
- Under What’s Next click Finish
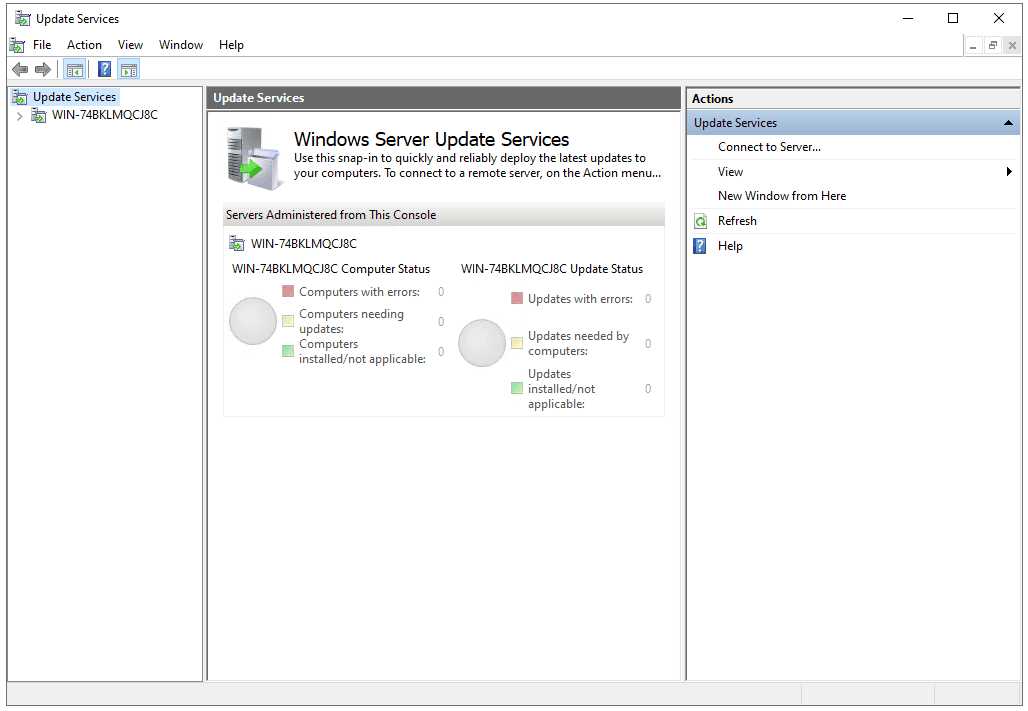
- Once finished, it will open the WSUS console
In the upcoming article, we will discuss further configurations for both the WSUS server and WSUS clients. Please continue to stay with us.
Read More:
WSUS : Windows Server Update Services (WSUS) installation on Windows Server 2022 – Part 2
WSUS : Get Started with Windows Server Update Services (WSUS) – Part 1
Follow our Twitter and Facebook feeds for new releases, updates, insightful posts and more.


Leave A Comment