Incremental Backup Scheduling
Incremental Backup Scheduling
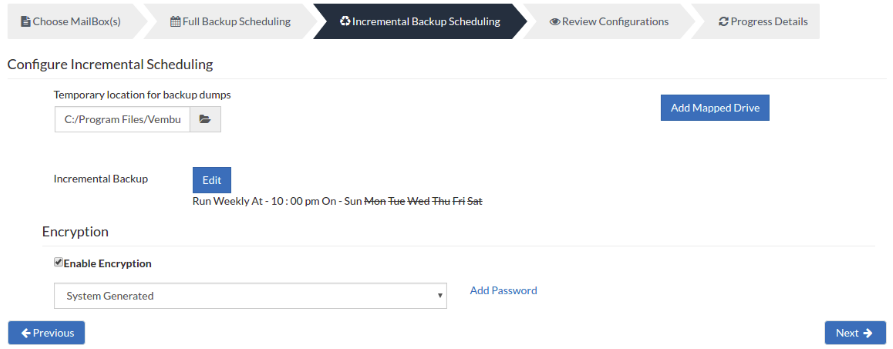
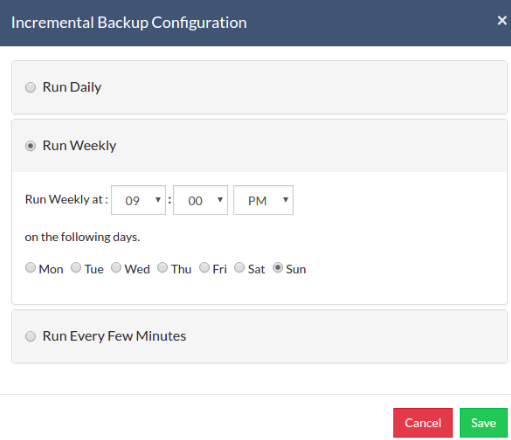
- NetworkBackup Client will do an Incremental Backup dump of the user's Mailbox with respect to the previous full or incremental backup, whenever the Incremental log backup is scheduled. You can configure your incremental backup by selecting the Edit option and configure your schedule from the options mentioned below.
Run Daily - Choose the time at which your Exchange Mailbox data must be backed up daily. This will execute the backup every day during the time configured.
Run Weekly - Select the time and the day of the week in which the backup must run. NetworkBackup Client will run the backup in the configured time period alone. You can select multiple days of the week if you wish to run the backup on multiple days of a week.
Run Every Few Minutes - Let's you decide the hour frequency at which the backup schedule should be triggered. Decide the days in which the hourly schedules must be carried out. Once done click Save to save the configured schedule.
|

|
Temporary location for backup dumps
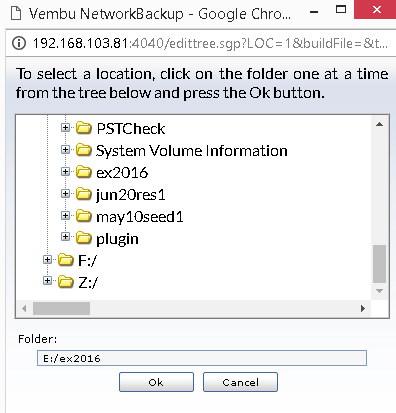
- Enter the location/directory path to which the Exchange Mailbox dumps have to be stored locally before uploading to the backup server. Please ensure that you have enough disk space in the configured temporary location (the location where the backup dump is saved)
- The location you have configured for the backup dumps will be mentioned in the Folder tab. Click OK to finalize your dump location.
|
Add Mapped Drive
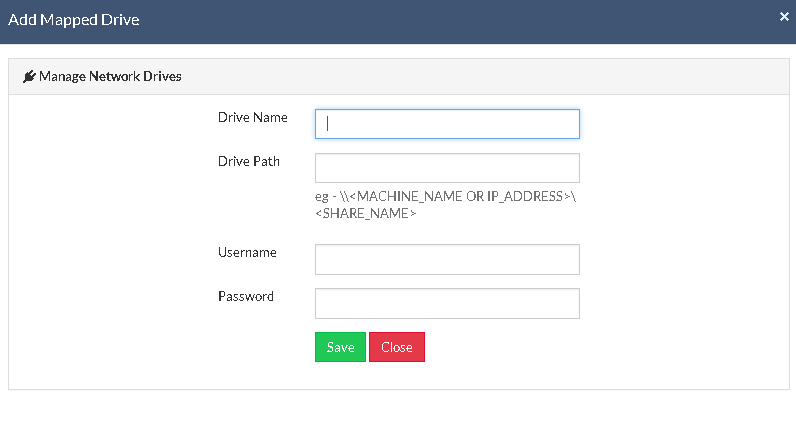
- There may be situations in which you may not have enough space to allocate for the dump process. In such cases, you can add a mapped drive by providing the drive name, drive path, username, and password. From there on the dumping process will happen to the configured drive only.
- The drive path must be in the following format: \\<MACHINE_NAME OR IP_ADDRESS>\<SHARE_NAME> make sure you give the correct details else you will get the status "Mapping the drive letter to the UNC path failed with the error: The network path was not found."
- Ensure you provide proper credentials, if not the message "Mapping the drive letter to the UNC path failed with the error: The specified network password is not correct" will appear. Click Save to complete the process.
|
Encryption Setting
Backups configured under NetworkBackup Client can be encrypted with a user-defined password which can be provided during backup configuration.
Steps to add Encryption Password
- In order to encrypt your backup, select Enable Encryption check-box. You can either add your own password or encrypt the backup with a System Generated Password.
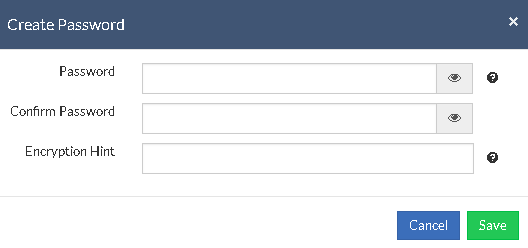
- To create a new password, click on Add Password. Provide the password of your choice along with a password hint and save it
- The newly created password will be available in the drop-down list. Choose the password and click Next. All the added passwords will be listed in the drop-down box. With the help of the encryption hint, you can easily identify the required password. Click Save once you have provided the required details.
|
|
- Once done configuring the Encryption Password, Click Save.