Step 6: Configure Network Mapping and Re-IP Mapping
Network Mapping
Network Mapping is the process of mapping or mirroring the source VM and Target VM. In your production or target environment, if you have configured different networks, the network mapping feature will be helpful.
- If you configure two different types of networks in two different places your RTO and Business Continuity will be affected. To overcome this situation, Network Mapping utilizes the Power Replication feature.
- You must select the source and target networks that are to be mapped. BDRSuite Backup Server cross-verifies the source VM with the replicated VM and checks if the network details are updated regularly. This signifies a nil failure rate.
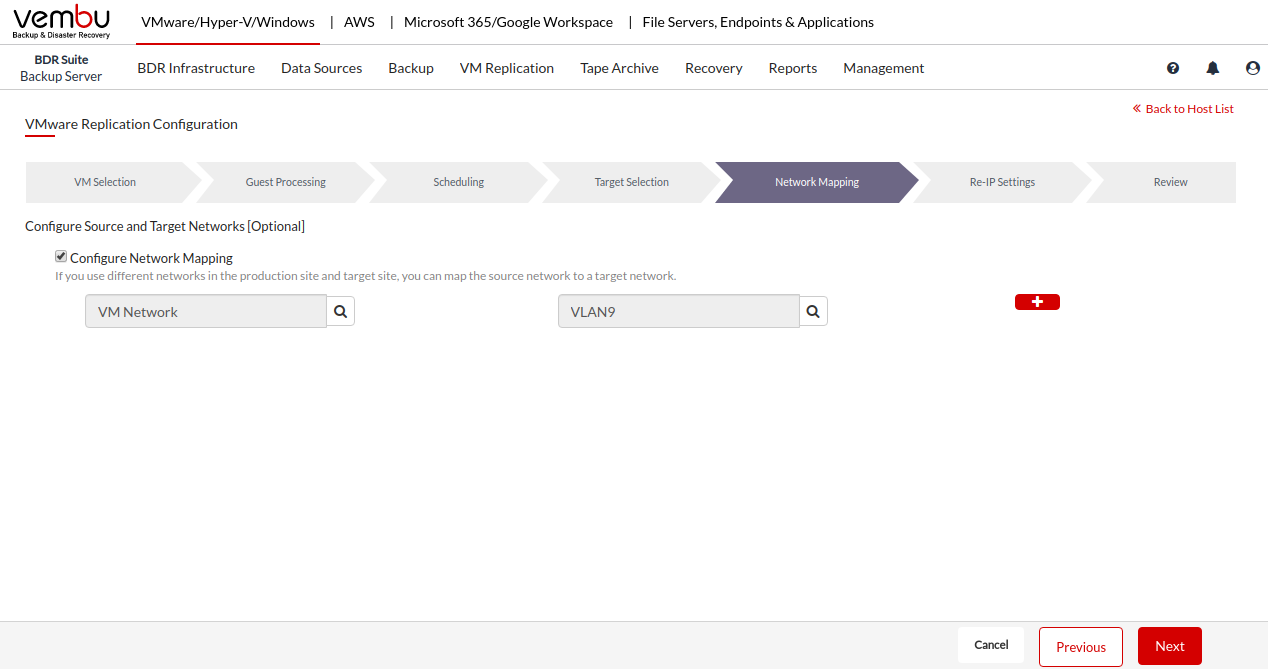
Steps to configure source and target networks
- Enable the Configure Networks check-box which is disabled by default
- Click the Search icon next to Source Network and select the network in which the source VM resides
- Click the Search icon next to Target Network and select the network to which the source VM has to be mapped
- Rules can be added in a similar manner for all the VMs configured for replication using the (+) icon present
- Once done, click Next to configure Re-IP mapping rules.
Note: By default, Network Mapping will be disabled.

Note: It is recommended to use the same network for the source and target hosts, as it saves time during replication and recovery.
There may be situations in which you may use different types of IP schemes in source and target environments. During the replication process, the configurations of the source VM will be updated in the target VM.
- While performing Failover to the replica machine, the IP you have configured in the source may not be available in the target location. Re-IP Mapping in this situation will provide you various combinations of mapping rules to configure your replica.
- When you perform the Failover process, the replica machine registry will be updated with the IP rule that you have configured.
Follow the below steps to add a rule
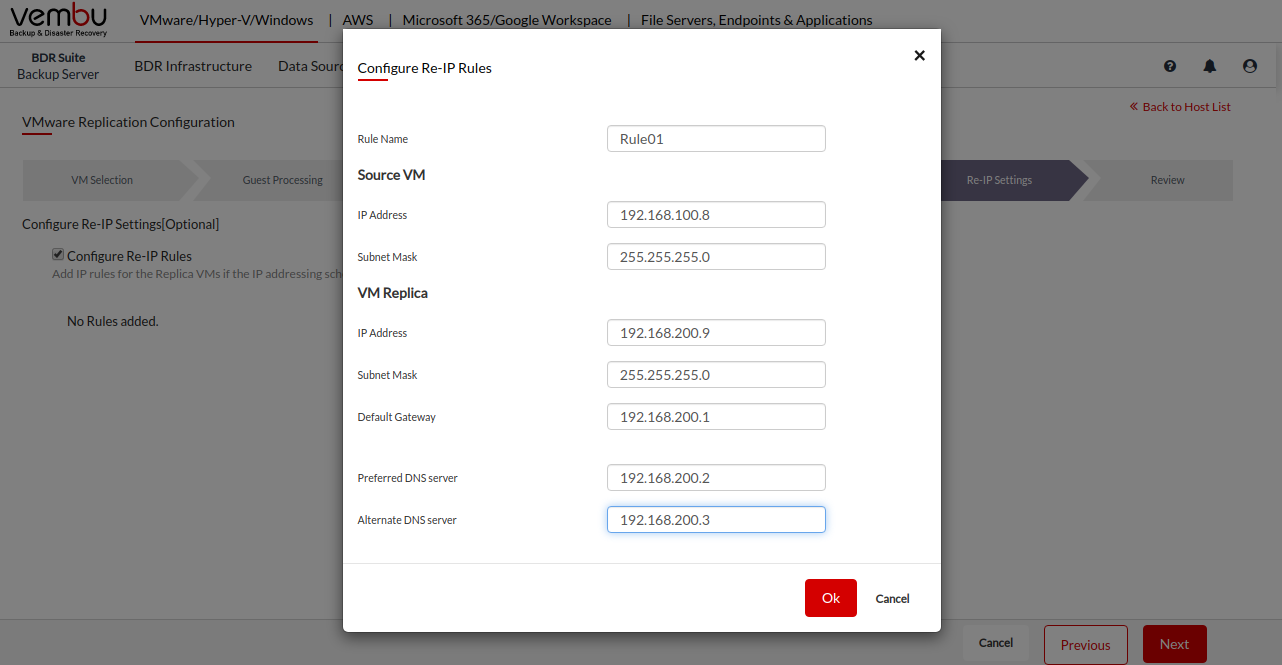
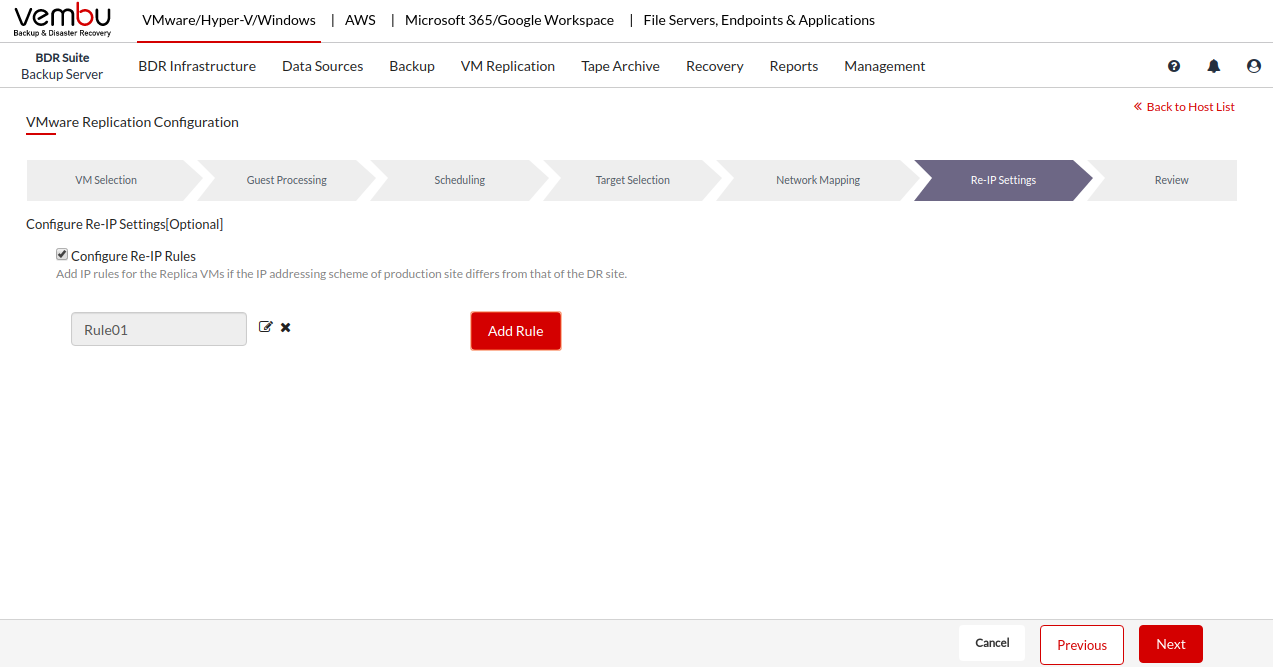
- Enable the Network Re-IP Mapping option. Click the Add Rule option which will open a pop-up window.
- Specify a Rule Name
- Enter the IP address and subnet mask of the source VM
- Enter the IP address, subnet mask, and default gateway of the target VM
- Specify the preferred and alternate DNS server
- Click Save to save the Re-IP Mapping rule.
- You can edit an already configured rule using the edit option. You can remove the added rule through the remove option.

Note:
Linux VMs and GPT formatted disk VMs are not supported for Network Mapping and Re-IP Mapping.
Re-IP Mapping will not work for Windows 7 Professional (32-bit) machine.
Source VM’s VMXNET3 ethernet adapter configuration will not be replicated to the replica VM. IPv6 configuration is not supported for IP Re-Mapping.

Note: Re-IP Mapping option is not supported for VM replication in Linux based backup Servers.
