Vembu OffsiteDR Server - Windows
Prerequisites:
Refer system requirements for Vembu OffsiteDR Here
Note: If you have installed Vembu BDR backup server in the machine in which Vembu OffsiteDR is going to be installed, you will get the error "Unable to proceed Vembu OffsiteDR installation. Seems Vembu BDR is already installed in this machine.
Procedure:
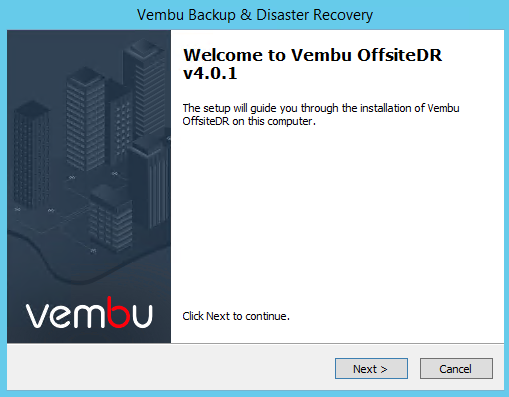
Step 1: Getting started with the installation
Download the latest version of Vembu OffsiteDR Server for Windows and run the installer with administrator privilege. Begin the installation process by selecting Next from the welcome page.
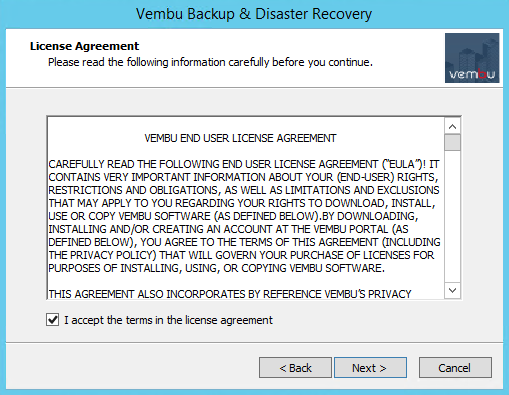
Step 2: License Agreement
- 'Vembu OffsiteDR License Agreement' is the next step in the installation process, read the License Agreement carefully as it contains important information about your Rights, Restrictions, Obligations, Limitations, and Exclusions. Choose 'I accept the terms in the license agreement' option, else you cannot proceed with the installation.
Step 3: Installation Directory Customization:
- The next step in the installation wizard will allow you to customize the installation location of Vembu OffsiteDR server. The installation location consists of many application files such as conf files, exe files, bin files, and apache files.
Note: The default installation path is C:\Program Files\Vembu\Vembu OffsiteDR
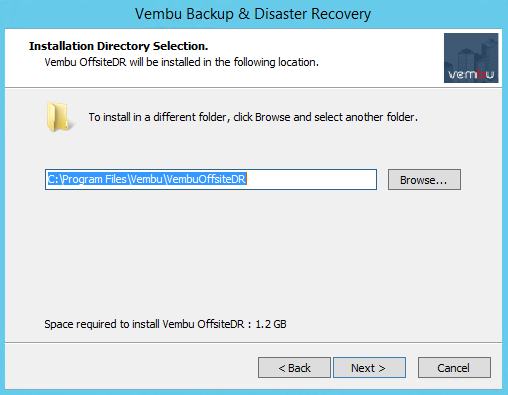
- Click the Browse option to select a different location for the Vembu OffsiteDR installation. Select the Make New Folder option if you want to create a new folder inside the installation location. The new folder by default will be created with the name VembuOffsiteDR. Once done selecting the installation location, click OK and select Next to proceed further with the installation.

Note: Make sure you have 1.2 GB free space for installing Vembu OffsiteDR server.
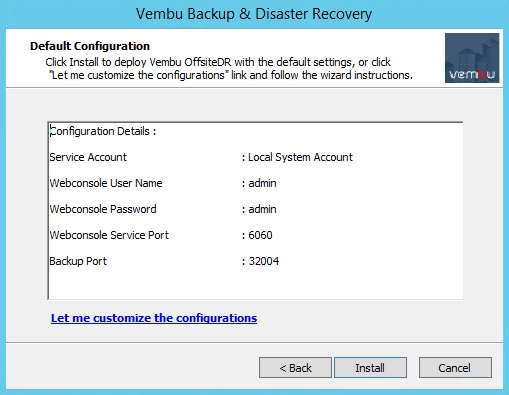
Step 4: Default or Custom Installation Settings
- This step involves the option of either proceeding with the default configuration settings or customize them as desired. You can customize all the options in this page. The options are briefly explained below:
- Service Account - If the account is a local or user account.
- Web Console User Name - user name used to access the web console. By default it is admin.
- Web Console Password - password for accessing the Vembu OffsiteDR web console. By default it is admin.
- Backup Port - Backup Port act as a common port for data transfer for backup schedules. By default, it is 32004
- Click Install to proceed installation with default chosen settings or click the 'Let me customize the configurations' option and opt to customize settings.
Step 5: Specify the Windows logon user account
- The next step is to specify the Windows logon user account under which Vembu OffsiteDR server should run. Select either Local System Account or User Account.
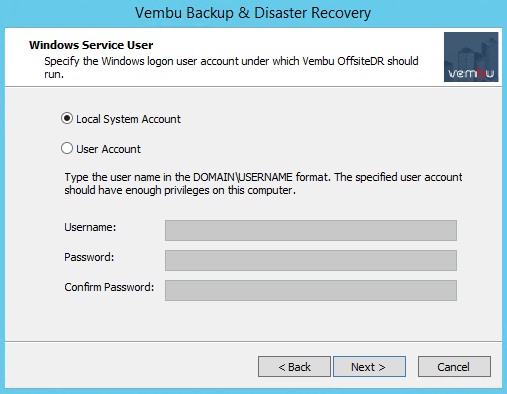
- If you select User Account provide the username and password for that account.
Note: The user name should be in the DOMAIN\USERNAME format. Make sure the specified user account has enough privileges.

- Click Next to proceed further with the installation process
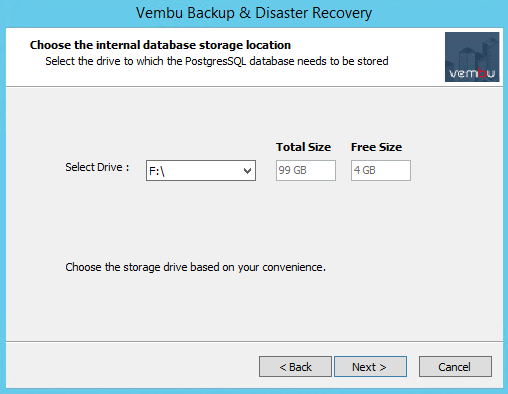
Step 6: Configure PostgreSQL Data Location
- The next step in the installation is to select the drive to which PostgreSQL database will be stored. Default drive selection will be based on the maximum space available, however you can select a drive as per your requirement. When you select a drive as the storage, its total size and free size will be displayed adjacently.
- When choosing your storage repository make sure at least 10GB storage space is available. We generally do not recommend you selecting C:/ drive as the storage repository since it is the OS drive and consists of important files. Click Next to proceed with the installation process.
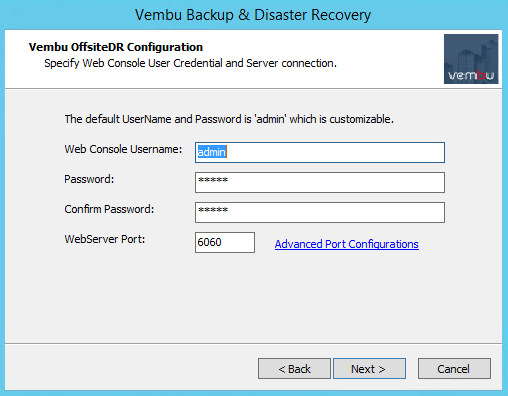
Step 7: Configure Web Server Port:
- The next step in the wizard will allow you to configure port and web console login configuration:
- WebServer port - This is the port that will be in use when you access the Vembu OffsiteDR web console. The default port number used to access the web GUI is 6060. This can be changed to any available port number but it is recommended not to change unless you are an advanced user.
You can configure a range of ports from the Advanced Port Configurations tab. The ports include:
- Backup Server Port
- UI Communication Port
- HTTPS Port
- User credentials for Web console (Default User Name: admin and Password: admin)
- Each port's necessity is mentioned in the question mark near the respective textbox.
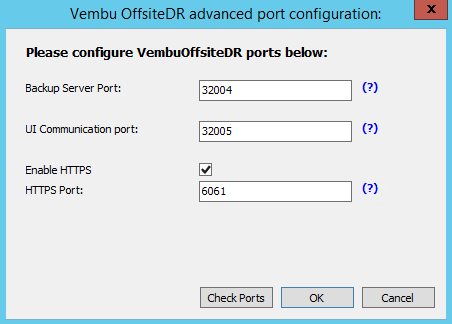
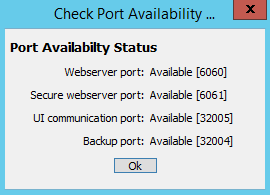
- You can enable the HTTPS port which is used for accessing the OffsiteDR Web Console in a secure manner. By default, the value is 6061. Selecting the Check Ports option will validate your entries provided and check if the ports are available. If the ports are not available, the comment 'not available' will be displayed. Click OK to close the tab and select Next to proceed with the installation process.
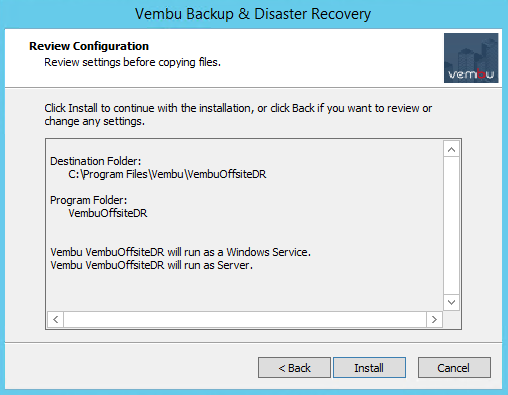
Step 8: Review Configuration
- Review the chosen configuration, and click Install. During installation, the following components are installed in your machine that is integral for the working of Vembu OffsiteDR server.
- PostgreSQL
- ODBC drivers (32-bit and 64-bit)
- Web Server
- Visual C++
- Verify the Destination folder location, Program folder location and if Vembu OffsiteDR will run as a service. Click Install option to begin the installation.
Step 9: Finish Setup Wizard
- The final step of the wizard after the installation will ask whether to:
- Start Vembu OffsiteDR application - Vembu OffsiteDR will be started immediately after this.
- Open the Vembu OffsiteDR Web Console - this will open the Vembu OffsiteDR web console.
- Choose appropriate option and click Finish to complete the installation process.
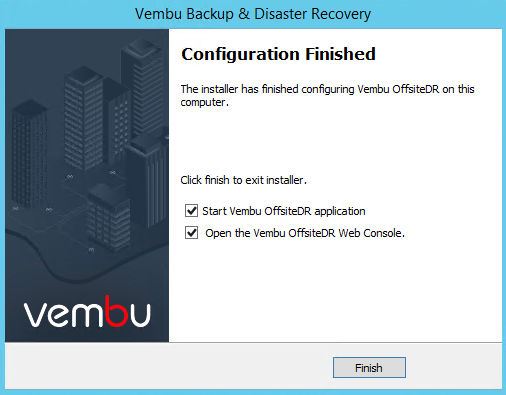
Note: Vembu OffsiteDR is installed as a service and can be found in Services.msc if you choose to start later.