Instant Boot VM
Instant Boot VM uses the stored backup image or replica to spin up a temporary instance of the VM. This temporary VM is launched on a separate host or environment like the VMware, Hyper-V or KVM. It enables users to access applications, services, and data within the VM, thereby ensuring business continuity while the primary VM is being recovered or repaired.
By utilizing the Instant Boot VM option, you can gain immediate access to your backup data in the form of a fully operational VM within a matter of minutes. This feature allows for minimal downtime and ensures uninterrupted business continuity by swiftly making VMs instantly accessible.

|
Note: The backed up VM Template cannot be restored as an Instant Boot VM. A VM Template supports the following types of restores;
|
You can choose to boot your backed-up VMware machine in any of the following hypervisors:
VMware (Available if the BDRSuite Backup Server is installed either on Windows or Linux OS)
Hyper-V(Available only if the BDRSuite Backup Server is installed on Windows Server OS)
KVM (Available only if the BDRSuite Backup Server is installed on Linux OS (Ubuntu)
Steps to perform Instant Boot VM
Step 1: Choose the VM/Host and the Restore Type
Select the VM/Host
Select the Instant Boot Recovery option and click Next.
Step 2: Choose a Restore Point
Select a restore point to restore the backup data. BDRSuite Backup Server retains the restore points as per the retention policy you have selected for the backup job.
Full backup and Incremental backup restore points are viewed in the dropdown box structure.
Each incremental restore point is a virtual full backup that makes full data recovery possible in each step. This makes the restoration process easier without having to recover a full backup and all the previous increments.
If the restore point is denoted with symbols (d), (w), (m), (+P) at the end, it indicates the following:
Daily Merge (d)
Weekly Merge (w)
Monthly Merge (m)
Persistent boot changes (+P)
Daily, Weekly, and Monthly merges take place based on the retention policies you have configured.
If you select Restore version time-stamp with (+P), then you have enabled the option to ’Include persistent boot changes during restore’ option that includes the changes you performed in the VM/Host during the instant boot restore process.
Step 3: Choose the Target Hypervisor
Choose a Target Hypervisor to instantly boot the backup data as a VM.
Select any one of the following hypervisor environments from the drop-down:
VMware
Hyper-V
KVM (Applicable for BDRSuite Backup Servers running on Linux)
Depending on the target hypervisor, the restore options vary.
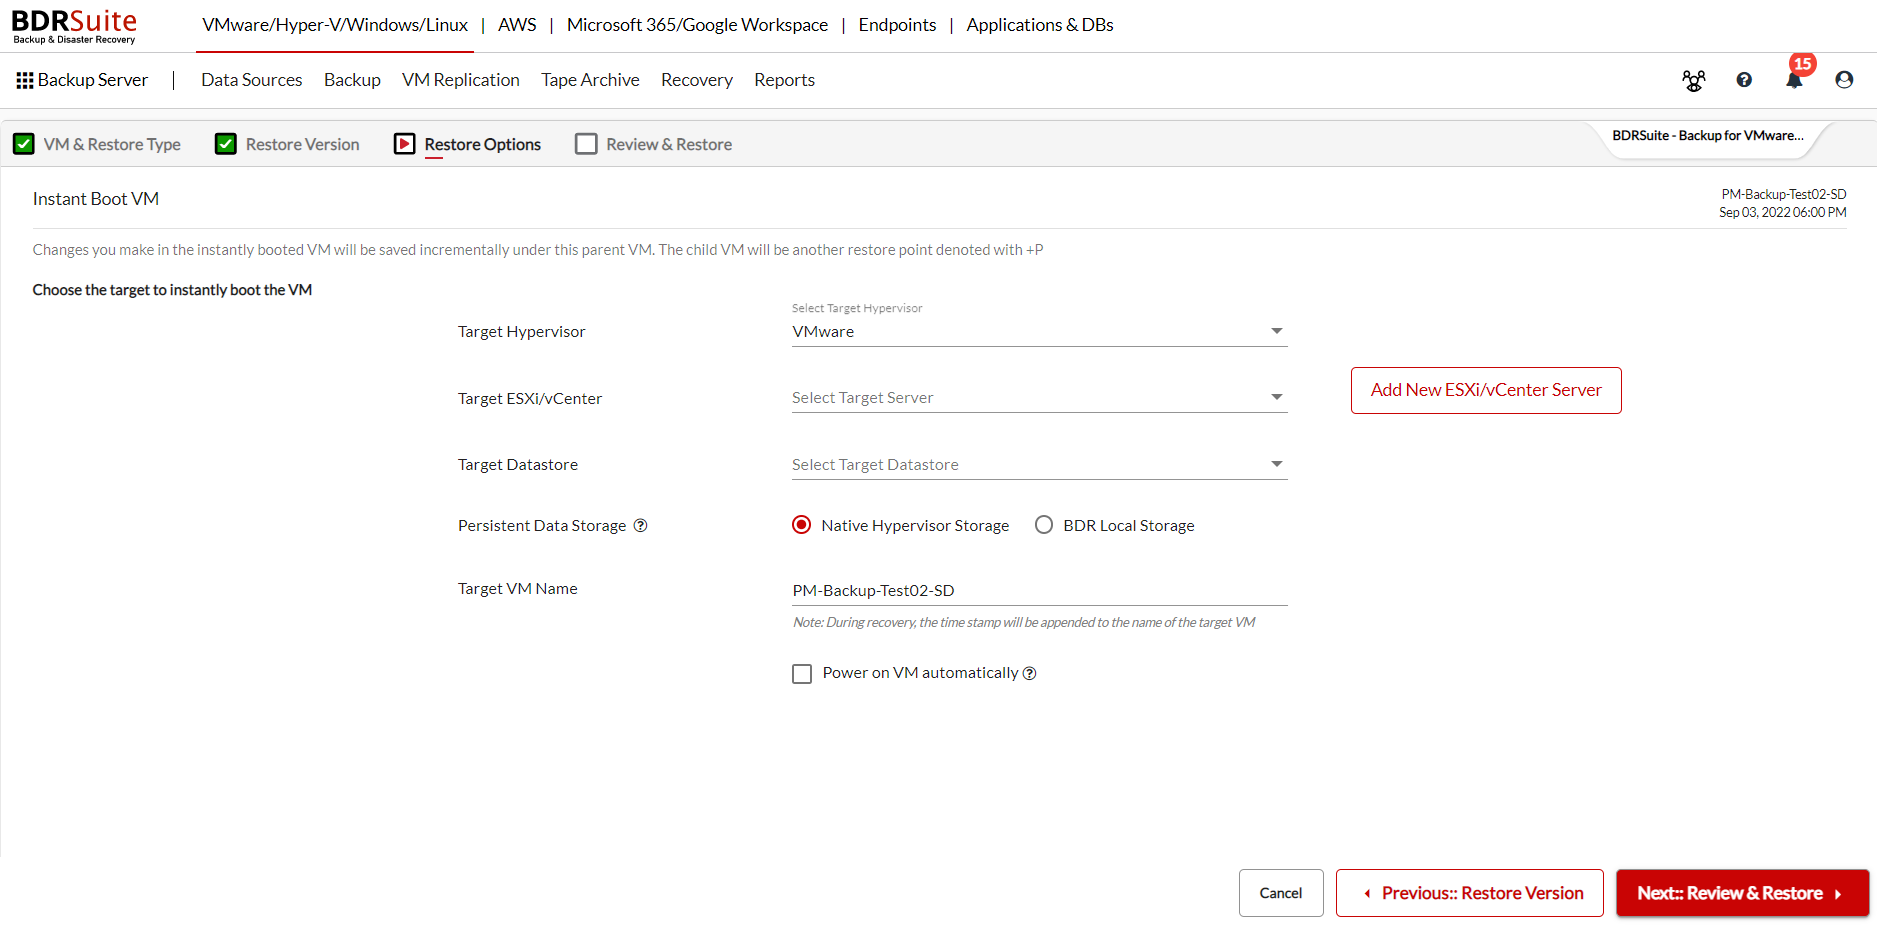
Restore to VMware Hypervisor
Select the Target ESXi/vCenter in which the booting must take place.
If the Target ESXi/vCenter is not displayed in the drop-down list, then click Add ESXi/vCenter Server option to add a new ESXi/vCenter Server.
In the Target Datastore field, the available datastore of the added ESXi/vCenter host will be listed. Using the drop-down list, select the target datastore to which the VM should be added.
Choose where you want to store the changes that you will make in the instantly booted VM using the Persistent Data Storage option. You can either store the data in the Native Hypervisor Storage to which the VM is restored or can be stored to the BDRSuite Local Storage of the BDRSuite Backup Server itself.
Provide a Target VM Name. This is the name with which your VM will be created in the datastore you have configured. Enter the unique VM name, that you can identify easily in the selected target host.
Enable the Power on VM automatically option to power ON the restored VM and click Next to proceed with the restore process.

Note:
|
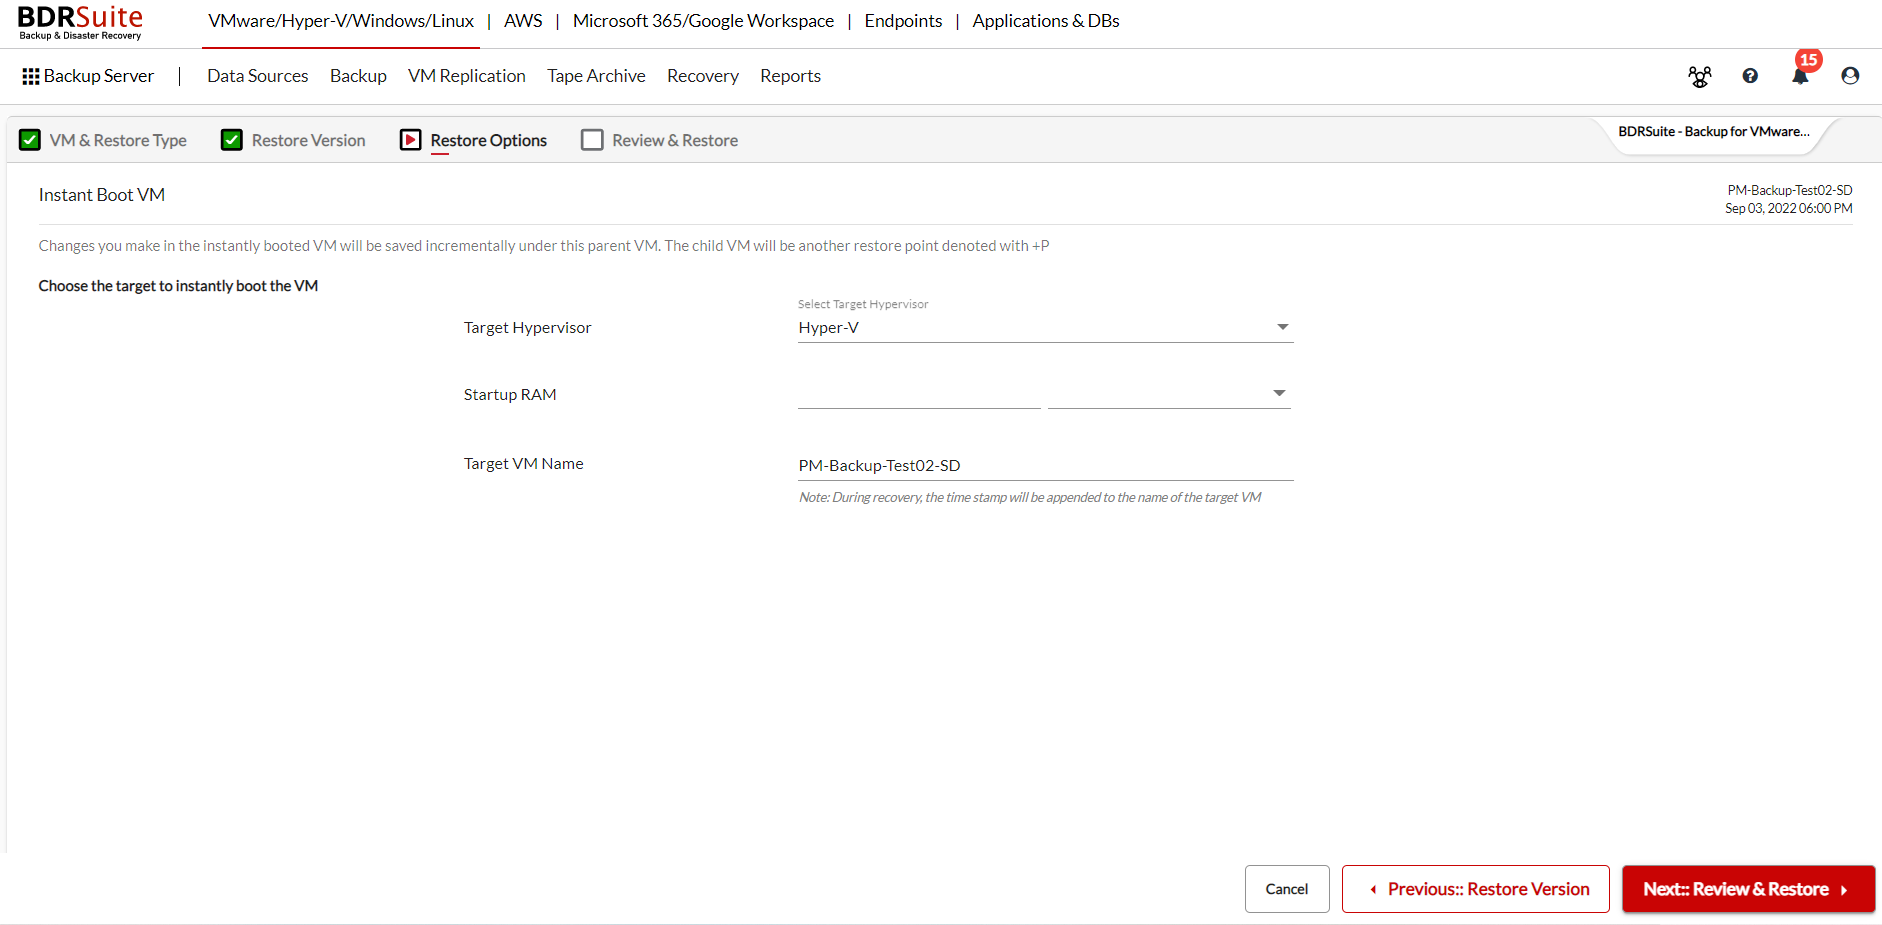
Restore to Hyper-V Hypervisor
You can choose the software as Hyper-V (If your BDRSuite Backup Server runs on Windows Server OS).
On selecting Hyper-V as your booting software, the Startup RAM size by default is 2 GB which can be modified based on your requirement.
Provide a Target VM Name for the machine that is to be restored.
Once done click Next to proceed with the restore process.

Note: If you assign a higher physical memory (RAM) than the free memory currently available on your server the Instant Boot VM recovery may fail. |
Restore to KVM Hypervisor
You can choose the software as KVM (If your BDRSuite Backup Server runs on Linux OS - Ubuntu).
On selecting KVM as your booting software, the Startup RAM size by default is 2 GB which can be modified based on your requirement.
Provide a Target VM Name for the machine that is to be restored.
Once done click Next to proceed with the restore process.
Note:
|
Step 4: Review & Restore
Review all the Instant Boot VM recovery configurations and click Restore to instantly boot the backup data as a VM on the selected hypervisor.
Note:
|
