Disk Mount
Disk Management Mount
- There may be situations in which you may want to access your backup data instantly, without having to restore the entire backup. The Disk Mount option will be helpful in such scenarios. You can auto attach your backup data to the disk management and find your backup data available in the VembuVirtualDrive in various file formats such as IMG, VHD, VHDX, and VMDK.
- When the backup data is attached to disk management, the files will be created virtually by mounting the backup data. This restore type will be helpful in times of disk corruption. The restored virtual disk can be attached to any VM later.
Procedure
Step 1: Choose the Recovery Type
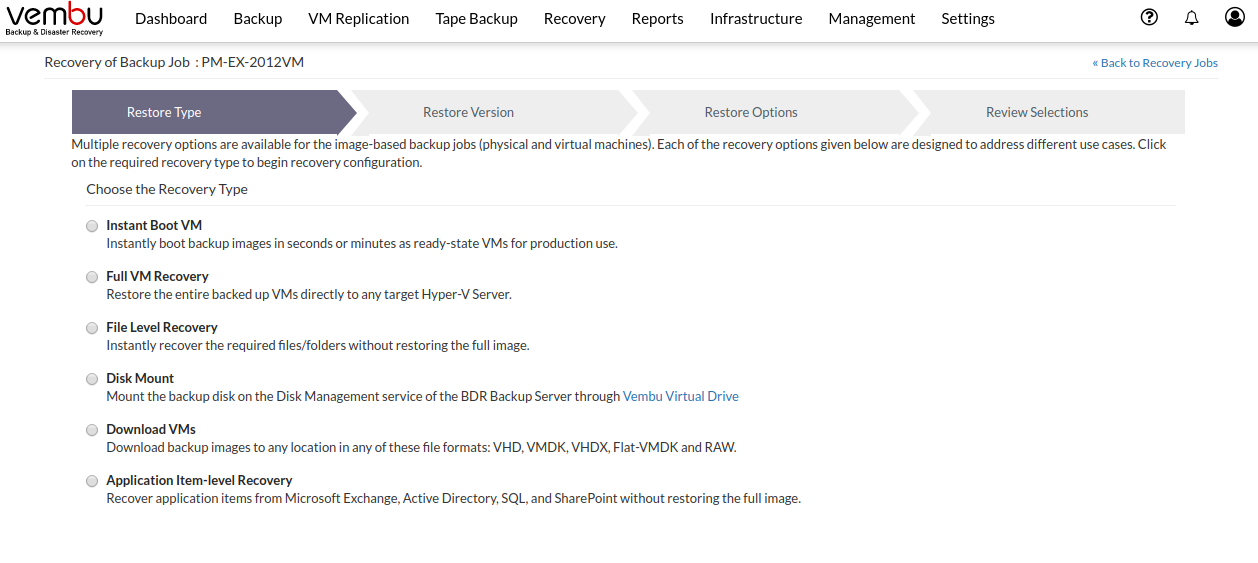
- Click the Recovery tab and select the restore icon near the Hyper-V backup that is to be restored. Select Disk Mount as the Restore type and click Next.

Step 2: Choose Restore Point
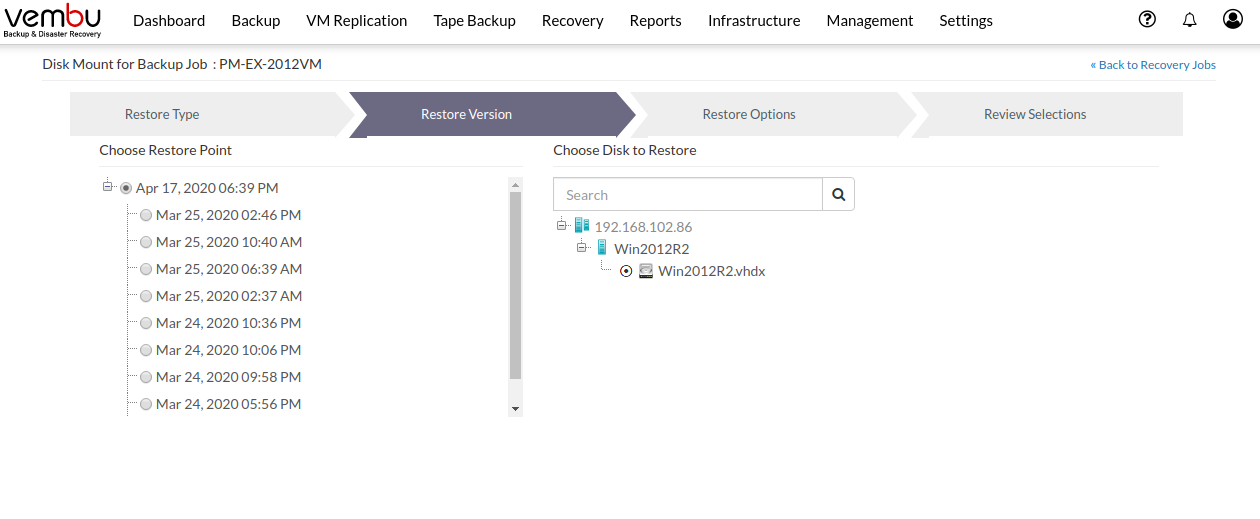
The restore version is created based on the period (i.e the date and time) when the backup process is configured, where the full backup and incremental backup time-stamp is viewed in form of the hierarchical tree structure. You can select the full backup time-stamp for restore as well as the individual incremental time-stamp version for the restore process. On selecting the full backup version, only the data of the full backup version is restored.
- The routine of the restore process is of selecting the time-stamp version they wish to restore and click Next to proceed.
- On selecting the restore point, its appropriate data to be restored is displayed
You can enable only one time-stamp for restore at a time |
Step 3: Choose Disk to Restore
In the restore data section, select the data you need to restore.
- In this section, you cannot select the entire VM for restore but you may have multiple disks in the virtual machine, so you can expand the VM node and select the particular disk file that you need to mount in disk management for restore.
- On selecting the restore data, you will be directed to review your restore configurations.

You cannot mount more than one disk simultaneously. Choosing multiple disks for mount process will pop-out an Error message “User allowed to restore only one disk at a time". If you choose multiple disks, previous selection should be ignored.” |
Step 4: Review Recovery Configuration
Once done configuring restore options, proceed to review configuration. The page lists the Selected Recovery Type, Selected Restore Point, and Selected Disks.

Once done reviewing all the selected settings for restore, Click ‘Mount Disk’ option to initiate the restore progress.

- Open Disk Management. You can find the restored disk attached, indicated in blue.

