File Level Recovery
File Level Recovery
- You might want to restore specific VM files instead of restoring the entire VM data. The source VM might consist of data that might be needed later. Some users do not prefer to restore the entire VM data as it occupies space and utilizes network bandwidth.
- To handle such scenarios Vembu offers File Level Recovery which allows you to restore files and folders of your choice from the backed up VM. Once you configure the restore location and trigger the restore process you can find your backup files in the specified location within minutes.
Procedure
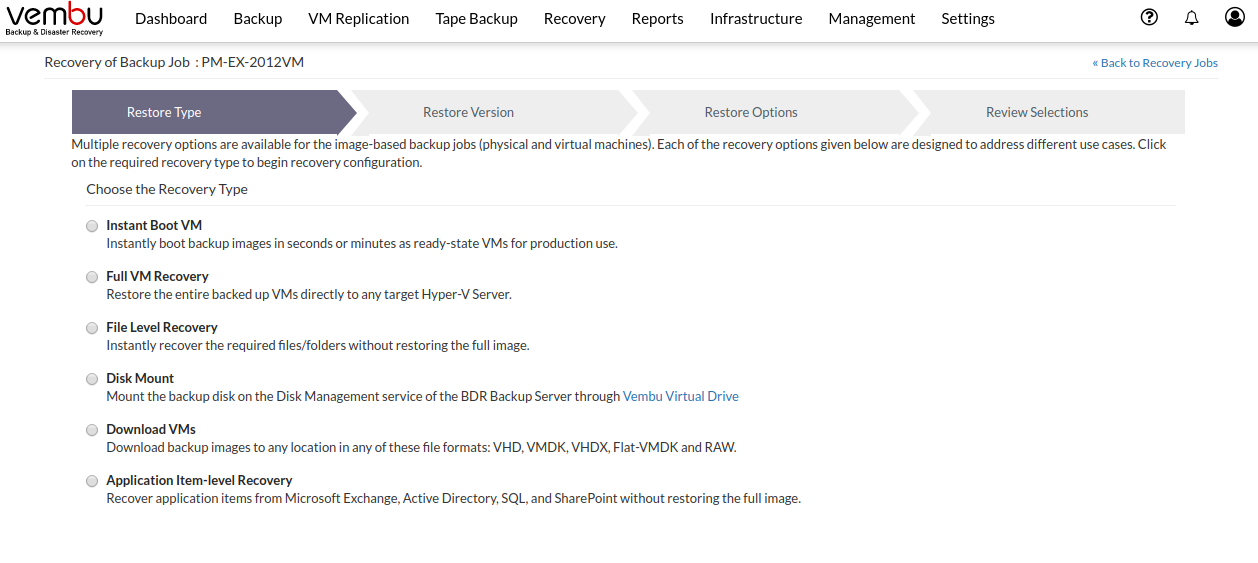
Step 1: Choose the Recovery Type
- Click the Recovery tab and select the restore icon near the Hyper-V backup that is to be restored. Select File Level Recovery as the Restore type and click Next to proceed with the restore process.

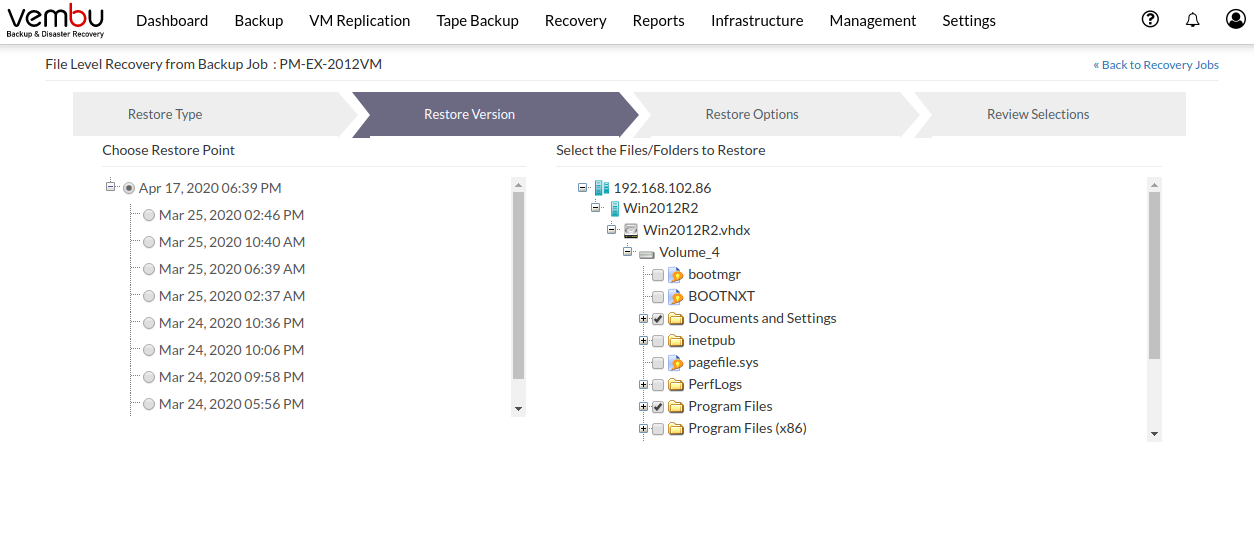
Step 2: Choose Restore Point
- The restore version is created based on the time period (i.e the date and time) when the backup process is configured, where the full backup and incremental backup time-stamp is viewed in form of the hierarchical tree structure. You can select the full backup time-stamp for restore as well as the individual incremental time-stamp version for the restore process. On selecting the full backup version, only the data of the full backup version is restored.
- The regular routine of the restore process is of selecting the time-stamp version they wish to restore and click Next to proceed.
- On selecting the restore point, its appropriate data to be restored is displayed
Step 3: Select the Files/Folders to Restore
- A tree listing backed up VMs along with its disks which on further expansion will list respective files and folders in it. Select specific files and folders you want to restore.
- Once done selecting files/folders, proceed to choose the restore location.
File-level recovery is supported only for Windows virtual machines with NTFS Filesystems |

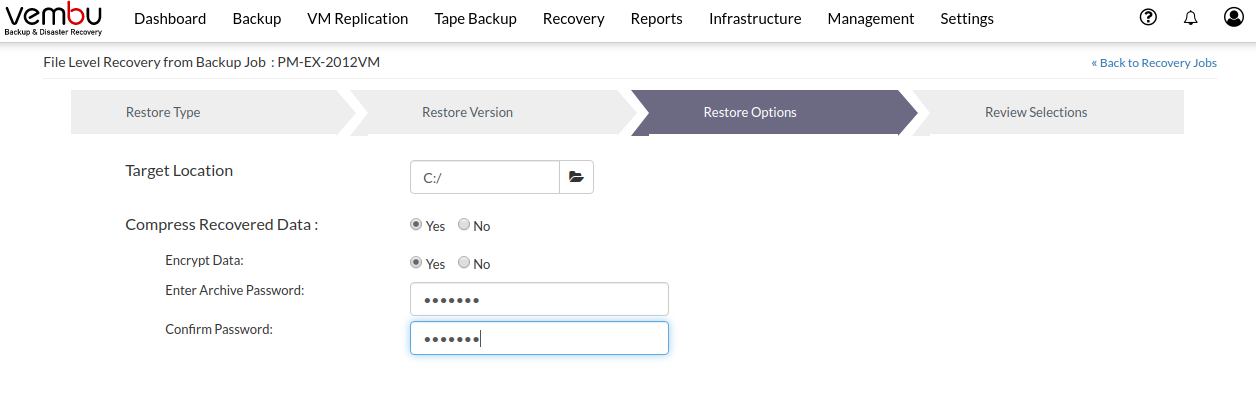
Step 4: Configure the Restore Options
|
Select Restore Location
The target restore location can either be a local drive on the backup server or any network shared drive that you have mapped with BDR Backup Server. The restore can be directed to the network shared location.
- Click the Browse icon in the right of the restore location and choose the stipulated drive to where the data has to be restored
You can restore the file as a compressed zip file - Choose Yes for the “Compress Recovered Data” option.
In addition, you can also enable encryption for the zip file by selecting Yes for the “Encrypt data” option and by providing a password for the zip file to secure from unauthorized access.

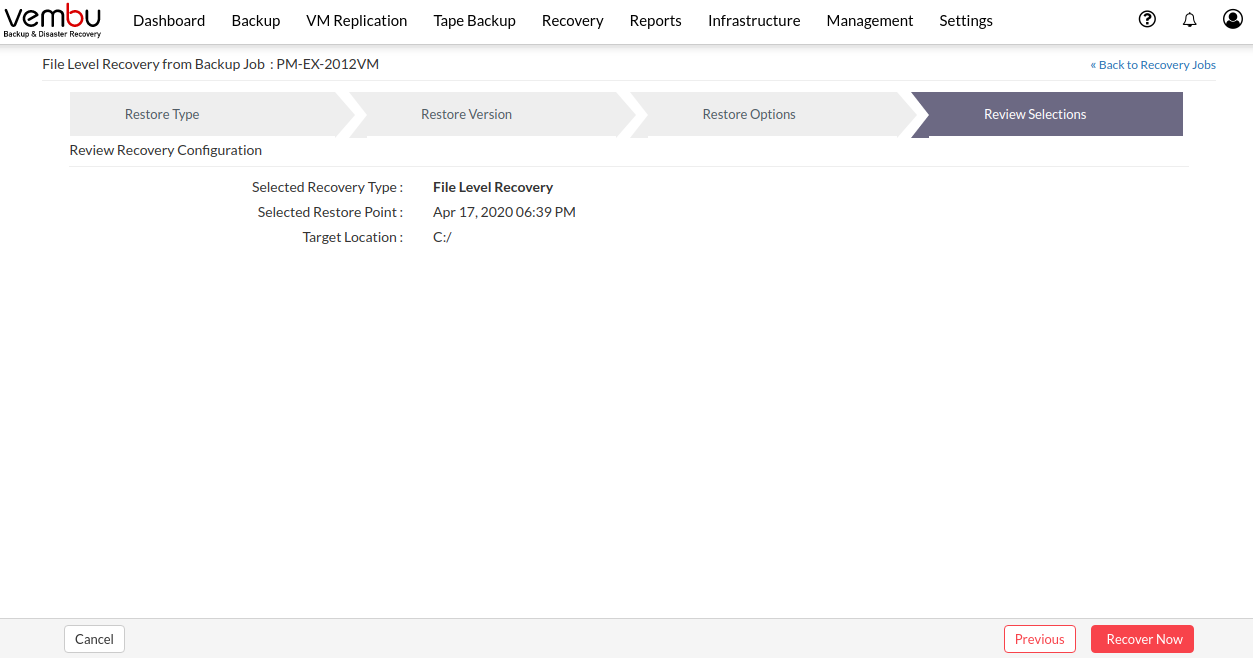
Step 5: Review Recovery Configuration
- Once done configuring the recovery job, the final step will be to review all your configurations before proceeding to trigger the restore. The page lists the Selected Recovery Type, Selected Restore Point, and Target Location

- Once done reviewing, Click Recover Now to proceed with the File Level Recovery.
- You will be redirected to the recovery page once the restore process is completed.
- You can view the status of the Restore from the 'Status' option. Once you click the inverted triangle, the below page will be displayed.
The following details will be available in the Restore Progress Page window
- Backup Schedule: The Backup schedule name mentioned by the user for indicating the backup during restore progress
- Client Name: The name of the client from which the backup process is initiated
- Total Files: The number of files present in the selected backup
- Transfer Rate: Speed of the restore process
- Bytes transferred: Rate at which the backup data is restored (Bytes, KB, MB, GB)
- Files Restored: Number of files restored during the process of recovery
- Time Left: Time remaining for the restore to complete
- Abort: You can abort your restore if not required from the 'Abort' (-) option available in that window. You will get a pop up as shown below. Click Ok to Abort your Restore
- Suspend: You can suspend your restore if not required from the Suspend option available in that window. You will get a pop up as shown below. Click Ok to Suspend your Restore

- You have the option of aborting the restore process. From the Recovery page click the Abort Server Side Restore option, this will open a pop-up window as displayed below. Click Yes to abort the restore.

- Or open the restore progress window and click the Abort (-) option which will open a pop-up window displayed below. Click OK to abort the restore process.

