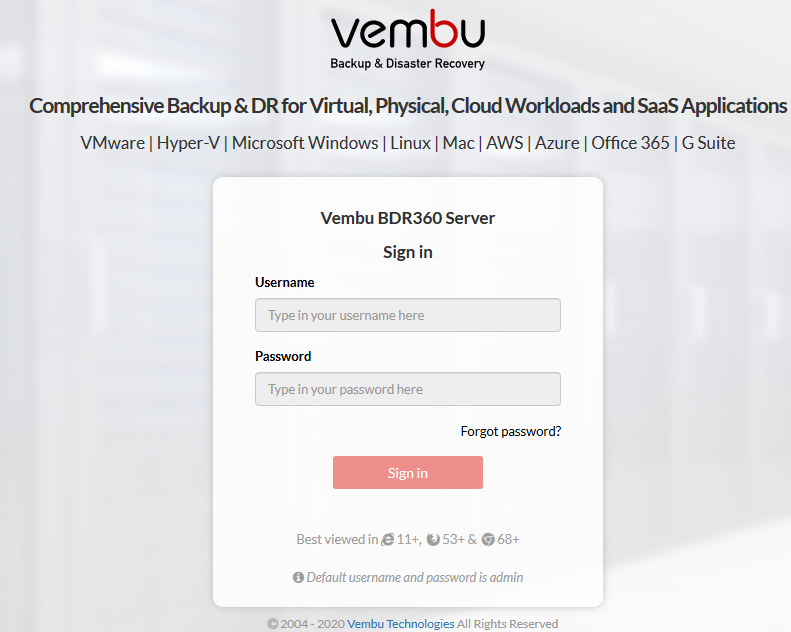
Login to Vembu BDR360 Server UI
Login to Vembu BDR360 Server UI
Once you have activated the BDR360 Server from the BDR Backup Server, you can log-in to the BDR360 Server from a web browser, by entering the IP Address of the machine on which the BDR360 Server is installed i.e. “localhost/#/login-light”.
Eg: 192.168.102.53/#/login-light
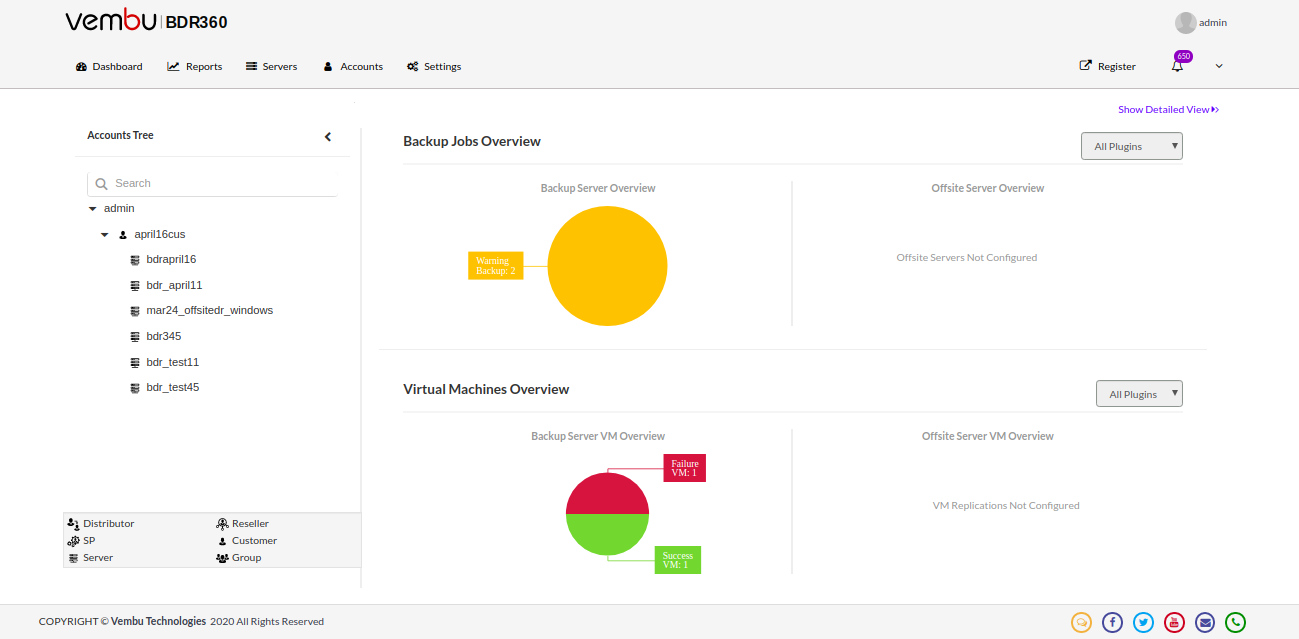
- Once you log in you will be navigated to the dashboard that gives you the backup details of the BDR Backup Server connected with the Vembu Portal account that is added.
- If you have not registered or activated the BDR360 feature then a landing page will be displayed asking you to register the BDR Backup Server/Offsite DR Server and activate the Vembu BDR360 service from the BDR360 page for respective servers.
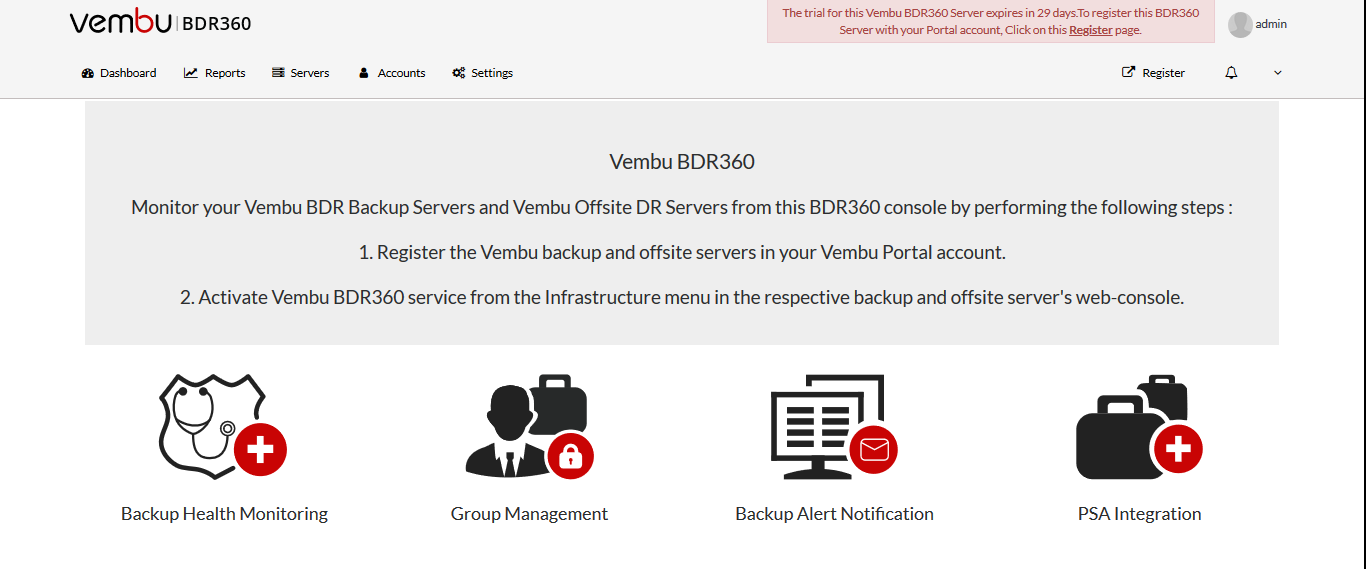
To add a Vembu Offsite DR Server to the BDR360 Server, log-in to the Vembu Offsite DR Server console > click on Infrastructure tab and click on BDR360 section and perform the same above mentioned steps for activating the BDR360 Server. |
Dashboard
After you login to the Vembu BDR360 Console you will be redirected to the dashboard, that lists you all the added accounts or entities.
- Select the Show Accounts Tree option to view more details on that particular account. If it is a distributor account, the tree hierarchy will be as follows: Distributor -> Reseller -> Service Provider -> Customer of that SP -> Server of that customer.
- It will list all the servers that are connected to this account. Select any specific server from the list, the details for the specific server selected can be viewed.
- From the Accounts Tree section, you can view the Backups Jobs Overview as well as the Virtual Machine Overview.
- Select the Show Detailed View option. This will display the following:
- Backup Name
- Plugin Type
- License Status
- Recent Schedule Details (Start Time, End Time, Status)
- Overall Schedules count
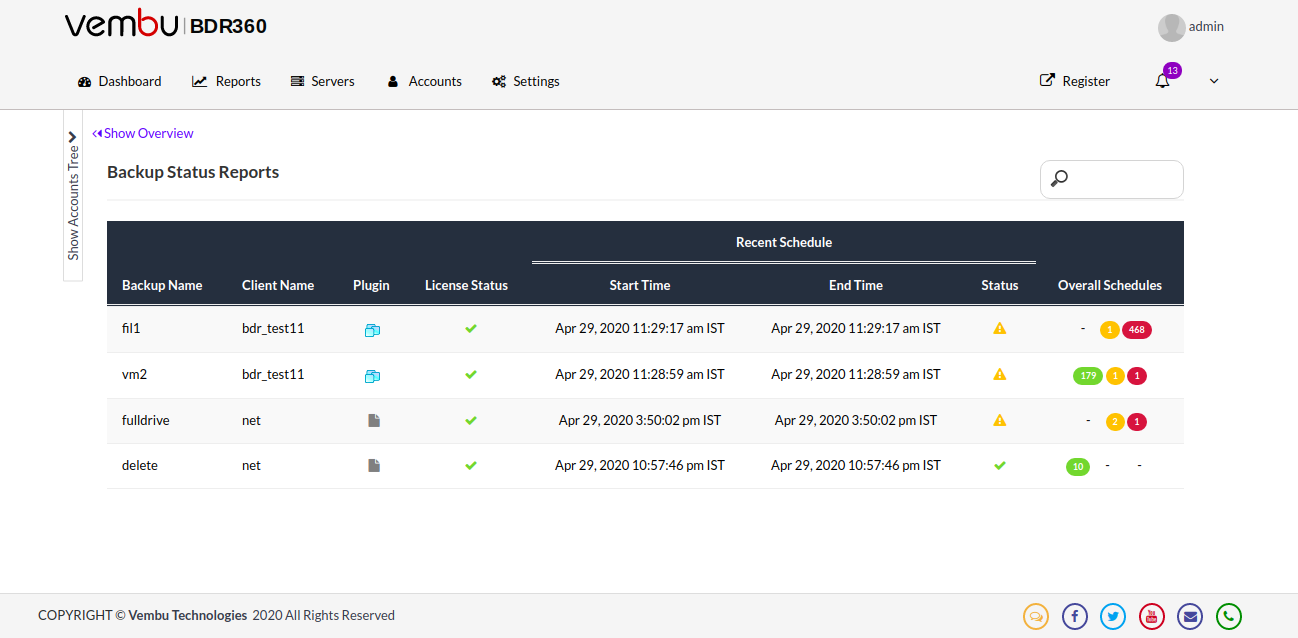
- The same report can be viewed from the dashboard. Select the Dashboard tab. The dashboard displays the backup jobs overview on a single screen along with the status of the backup. It is split into two portions:
- Backup Jobs Overview
- Virtual Machine Overview
- The Backup Jobs Overview is split into the following:
- Backup Server Overview - this displays all the backups that are configured from the BDR Backup Server. The count for the backups that are successful, Unlicensed, Failed, and with warnings can be viewed.
- Offsite Server Overview - this displays all the backups that are configured to the Offsite Server. The count for the backups that can be recoverable, non-recoverable, and unlicensed is displayed along with the backup count.
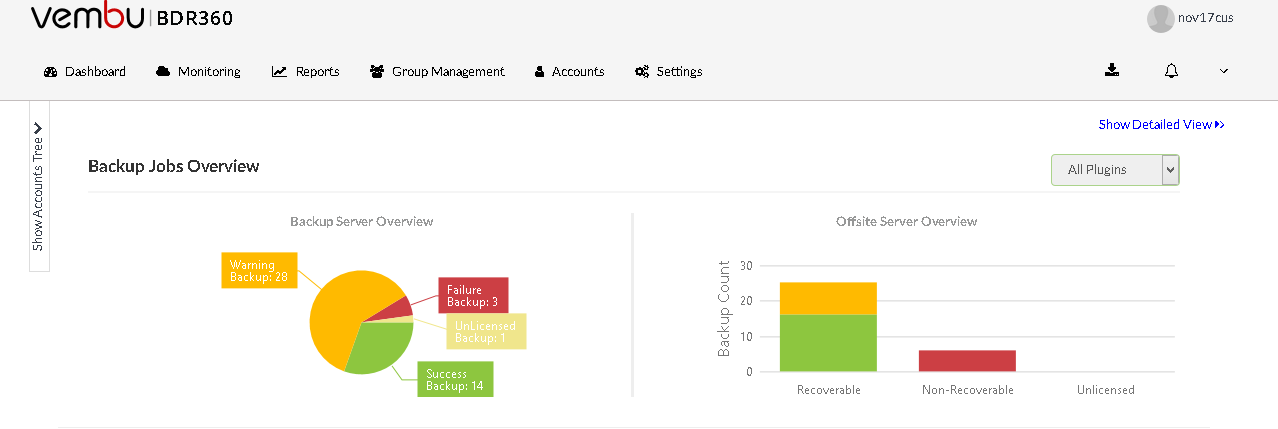
- Select the required plugin type from the All Plugins drop-down list. Select a particular plugin type.
For Example: Select the VMware plugin- this will list the backup count along with the success, failure, unlicensed, and warning count for all the VMware backups alone that are configured from that backup server. In the Offsite Server Overview, the number of VMware backups that can be recovered, that cannot be recovered, and the unlicensed backups count can be seen.
- Four plugin types are available:
- VMware
- Hyper-V
- Disk Image
- Other Plugins

- The Virtual Machine Overview is split into the following:
- Backup Server VM Overview - this overview is specific for virtual machine backup alone. The count for backups that are successful, failed, and unlicensed for the VMware and Hyper-V plugin can be viewed.
- Offsite Server VM Overview - this tab displays the count of the VMware and Hyper-V plugins that can be restored, non-recoverable, and unlicensed.

- From the All Plugins drop-down list select anyone:
- VMware
- Hyper-V
- If you need a more detailed view, select the Show Detailed View option. This will list the Backup Status Report and the Offsite Copy Reports.
- Backup Status Reports displays the status of all the backups that are configured from various backup servers along with the following details:
- Name of the backup server
- Type - reseller, service provider, customer
- Server Backup Count
- VMware Backup count
- Hyper-V Backup count
- Windows Image Backup count
- Other Backup counts
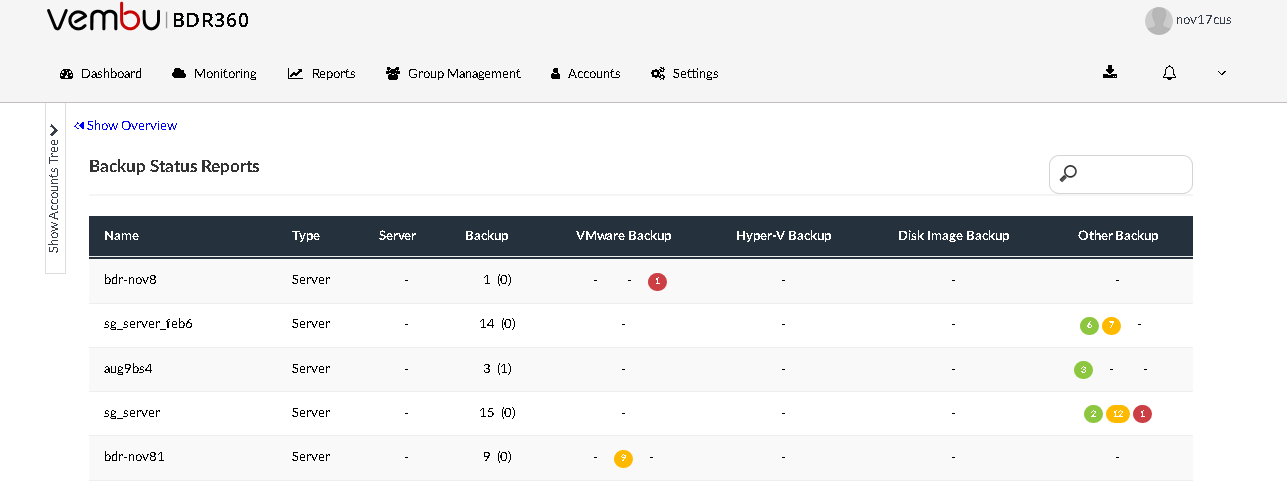
For Example- From the VMware backup list select the count. This will further expand and display further details on all the VMware backups configured from that particular server. This is similar to all other plugin types.
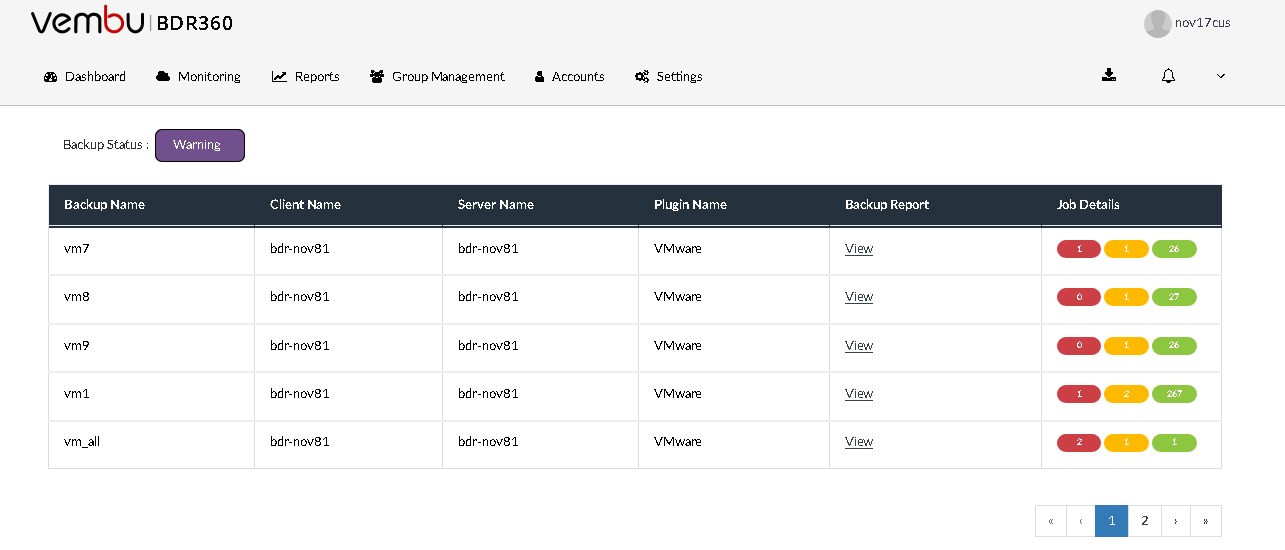
- The details such as:
- Backup Name
- Client Name
- Server Name
- Plugin Type
- Backup Report and
- Job Details count can be seen.
- Click the View option in the Backup Report tab to view the Backup List Reports. The backup status can be viewed based on whether the backups have completed - 8successfully, with a warning, or failed. From the Backup Status tab, select the required option.
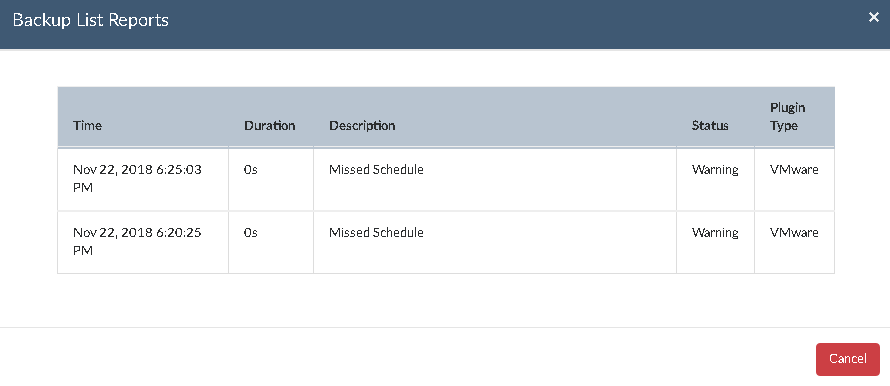
- In the Offsite Copy Reports section, the offsite copy status along with the following details can be viewed:
- Name of the backup server
- Type - reseller, service provider, customer
- Server Backup Count
- Replication
- VMware Backup count
- Hyper-V Backup count
- Windows Image Backup count
- Other Backup counts
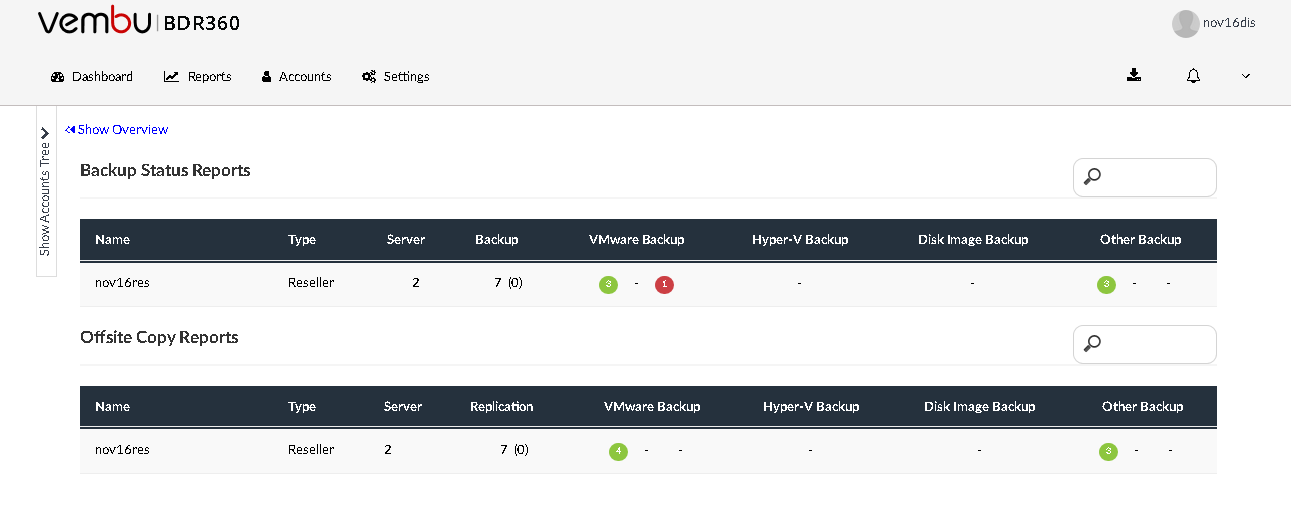
- For Example- From the VMware Backup list select the count. This will further expand and display further details on all the VMware backups configured from that particular server. This is similar to all other plugin types.
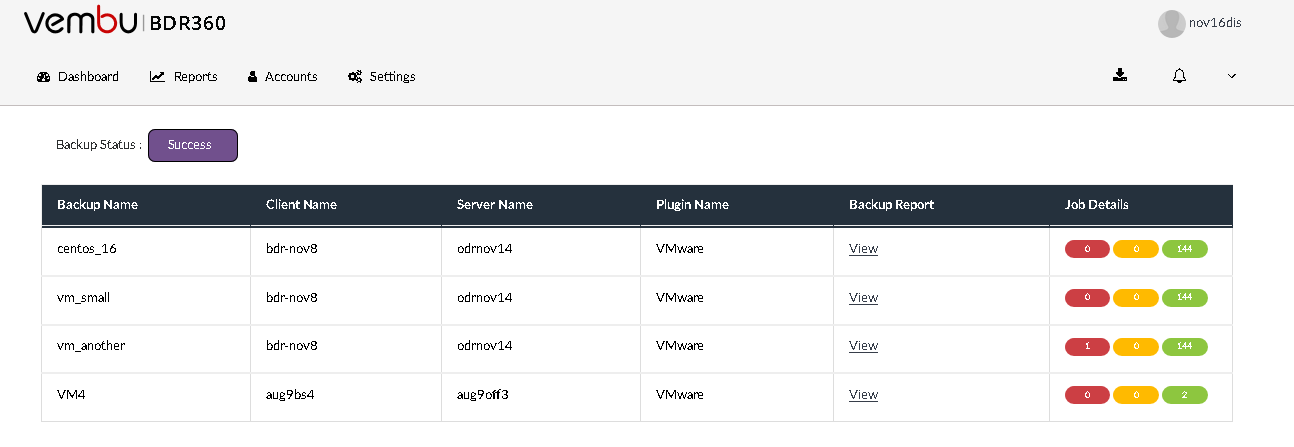
- The details such as Backup Name, Client Name, Server Name, Plugin Type, Backup Report, and Job Details count can be seen. Click the View option in the Backup Report tab to view the Backup List Reports.
- The time scheduled, duration, description of the replication, status, and plugin type will be displayed.
- The backup status can be viewed based on whether the replication has completed successfully, with a warning, or failed. From the Backup Status tab, select the required option.
Accounts
This section displays the account information as well as the server information of the customer, you can also add accounts through this section.
- Select the Accounts tab from the top pane of the Vembu BDR360 Server.
- The Accounts tab will have 3 following sections under it:
- Invite Account
- List Account
- Invitations Sent
- In this section, you can invite a new account to be monitored by your Vembu BDR360 Server.
- Inviting a new account to be monitored involves sending an activation link to the respective account through email. So configure your SMTP settings for your account first. To know more about configuring SMTP settings- check the E-mail Settings section in the same guide.
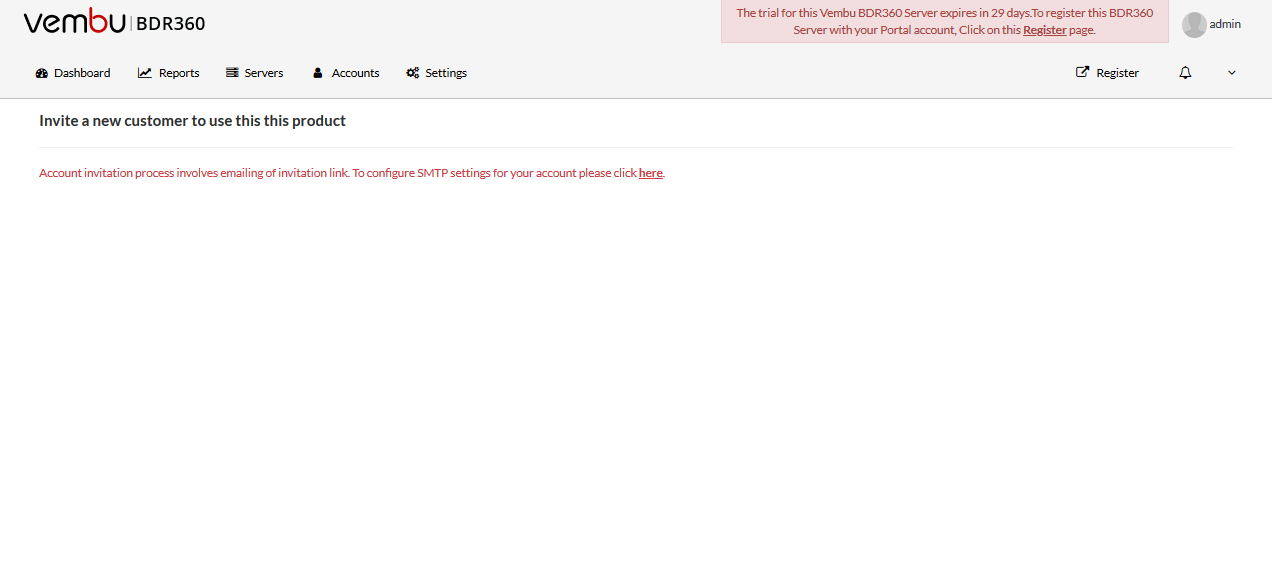
- Once configured the SMTP settings you can send an invite to the account you wish to add for monitoring through Vembu BDR360 Server.
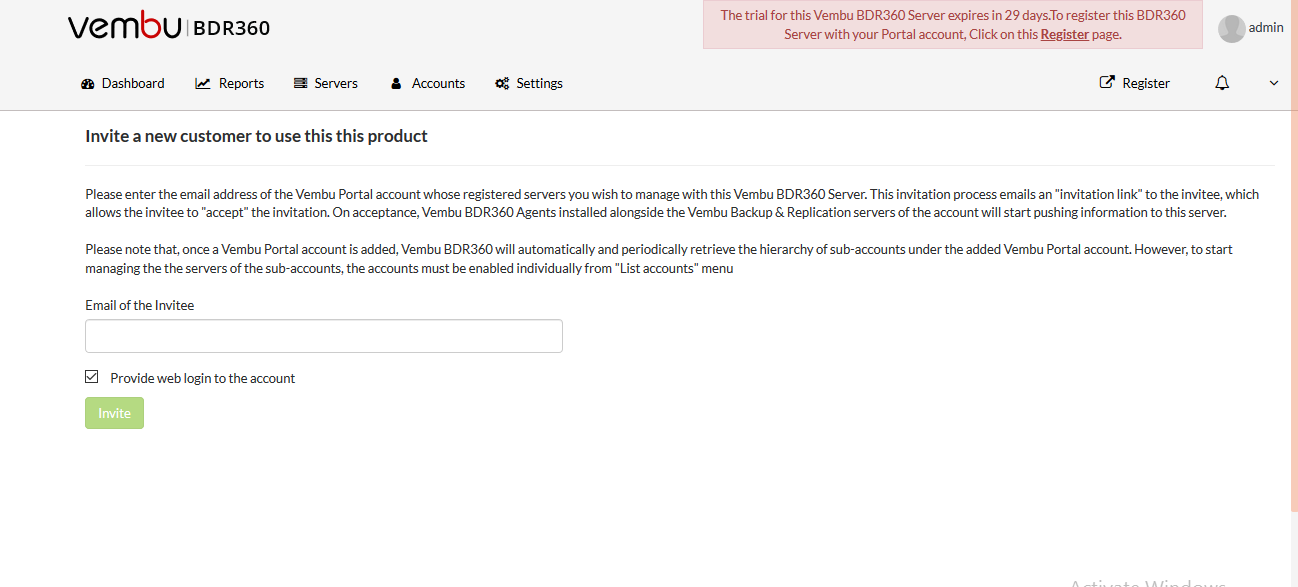
- After sending an email to the invitee, the invitee should click on the link to be monitored.
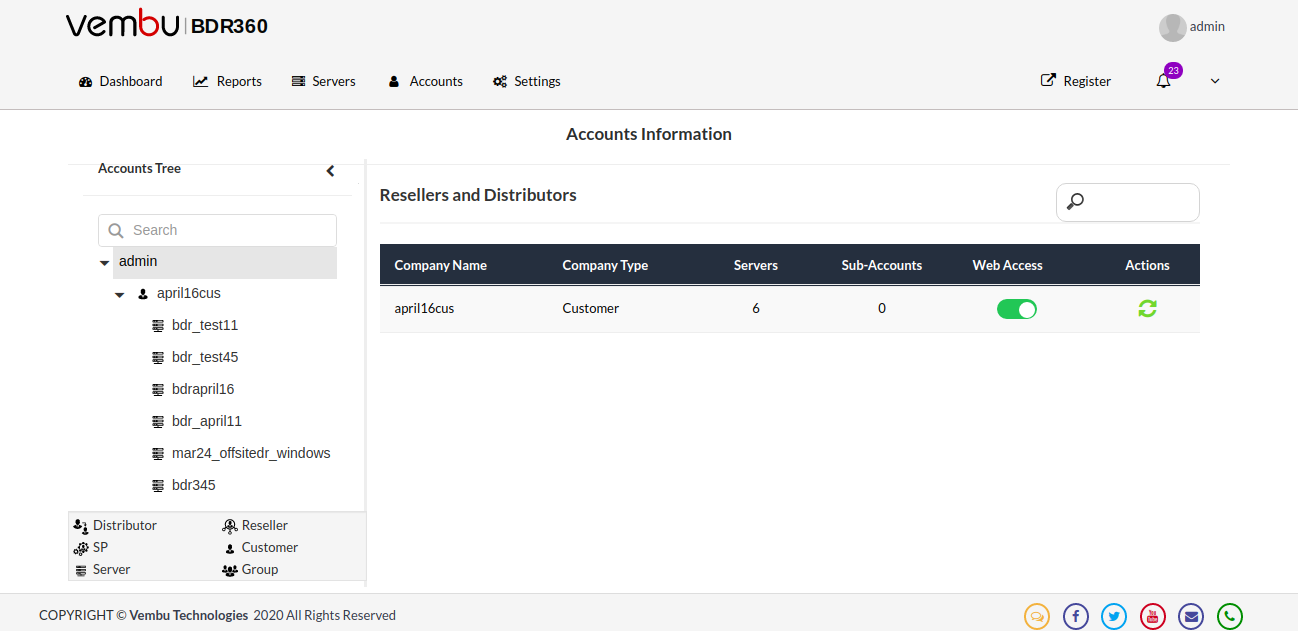
- List Accounts section displays the accounts that are added to the BDR360 Server and are monitored.
- You can view the hierarchy in the Accounts Tree pane on the left of the page. In case of a distributor the hierarchy is as follows:
Distributor -> Reseller -> the customers and the SP under that reseller, under the SP -> customers under the SP -> servers under the customers.
- Select the distributor icon. The resellers connected, account count, SP under that individual resellers will be displayed. Select the change Web Access option if you want to disable web access for that particular account. From the pop-up window, select OK.
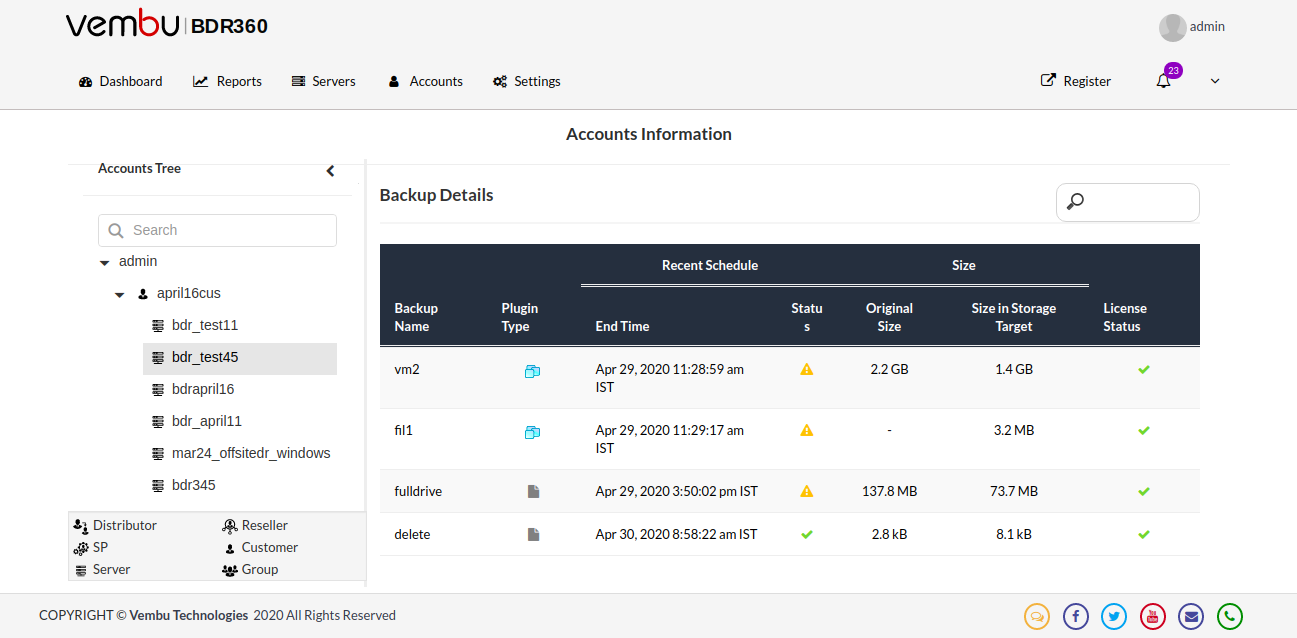
- Expand the list further and select the server under the Customer/Reseller account. The server details such as:
- Server Name
- Product Type
- Last Connected Time
- Backup Details and
- Vembu BDR360 status will be displayed.
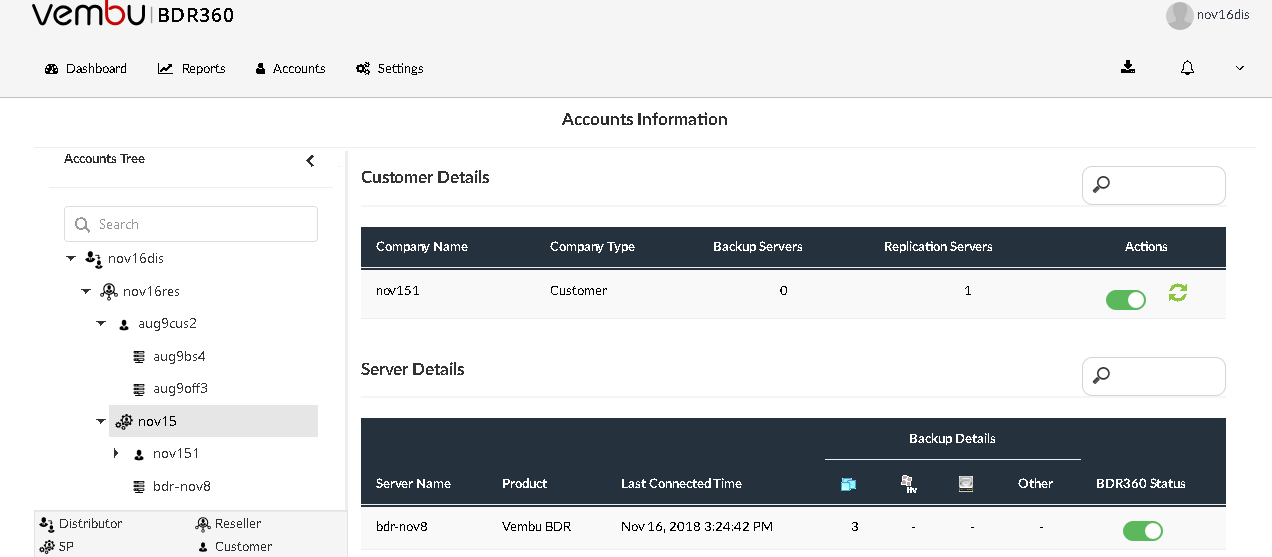
- Similarly, for a replication server under a customer, the details with regards to that account will be displayed.
- Replication Servers along with the server details such as:
- Server Name
- Product Type
- Last Connected Time
- Backup Details
- Vembu BDR360 status
- Select the change Web Access option to disable the web access for that account. Select the change Monitoring Status option if you want to disable the monitoring status for that particular server, click Yes from the pop-up window.
- This section gives you details on the invitations sent to the number of invitees along with the invitation sent time and the time when the invitee accepted the invitation; In this section, you can also check on the web access status of the BDR360 for the invitee.
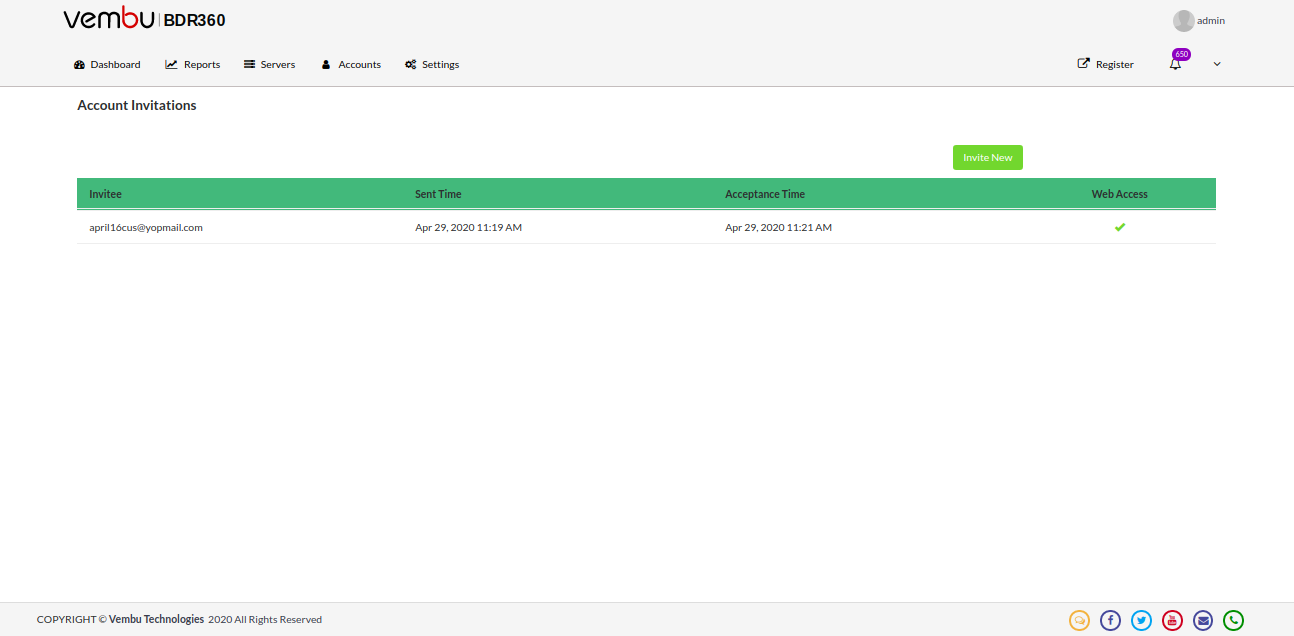
- If you wish to add a new account then click on the Invite New icon on the top of the tabular column and enter the email address of the invitee to whom an invitation mail will be sent.

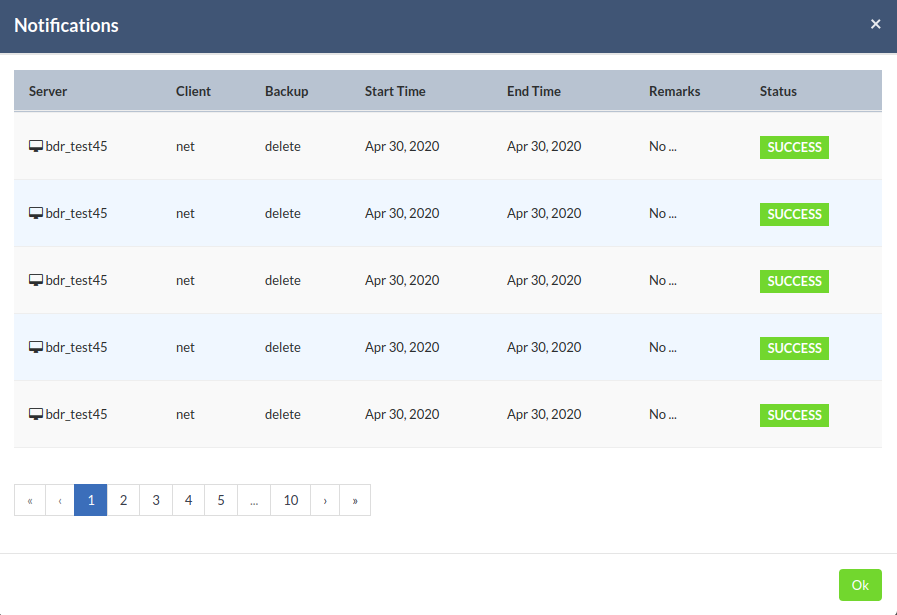
Notification
The Notification tab notifies you about any recent activities that have taken place related to the Backup Server or Offsite DR Server.
- Click the Bell icon on the top right side of the page.
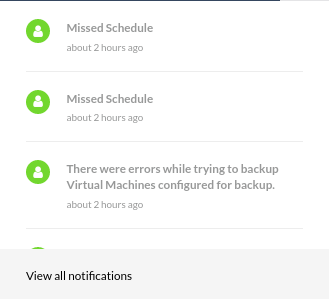
- Click the View all Notifications options to view the entire notification history.
