Disk/Partition Recovery
Disk/Partition Recovery
This feature is not applicable to Linux Server |

- Disk/Partition Recovery allows you to restore an individual disk/partition from the backed up physical machine. The disk/partition will be restored to the target machine and will be attached so that it can be accessed from that target machine.
- In some cases, you can attach the restored disk to your original physical machine in case of any disaster. Once the disks are attached to the target machine, you will be alerted to manually reboot the machine so that the configurations get updated.
Procedure
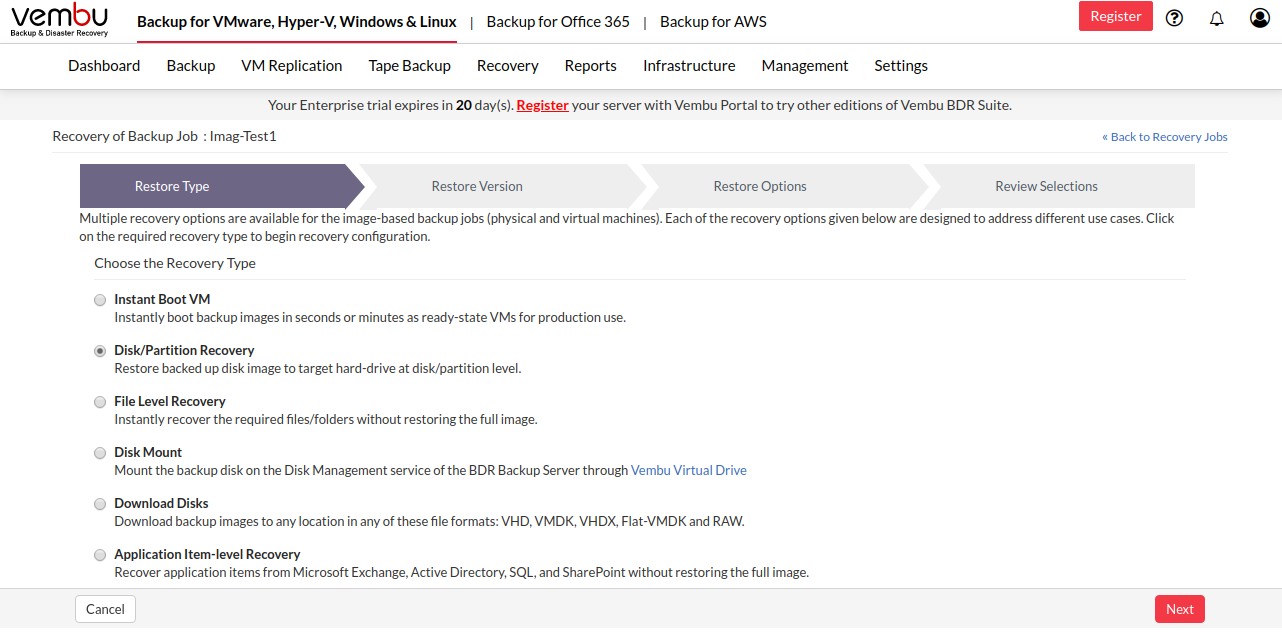
Step 1: Choose Restore Type
- Click the Recovery tab and select the restore icon near the Windows Image Backup that is to be restored. Select Disk/Partition Recovery as the Restore type and click Next to proceed with the restore process.
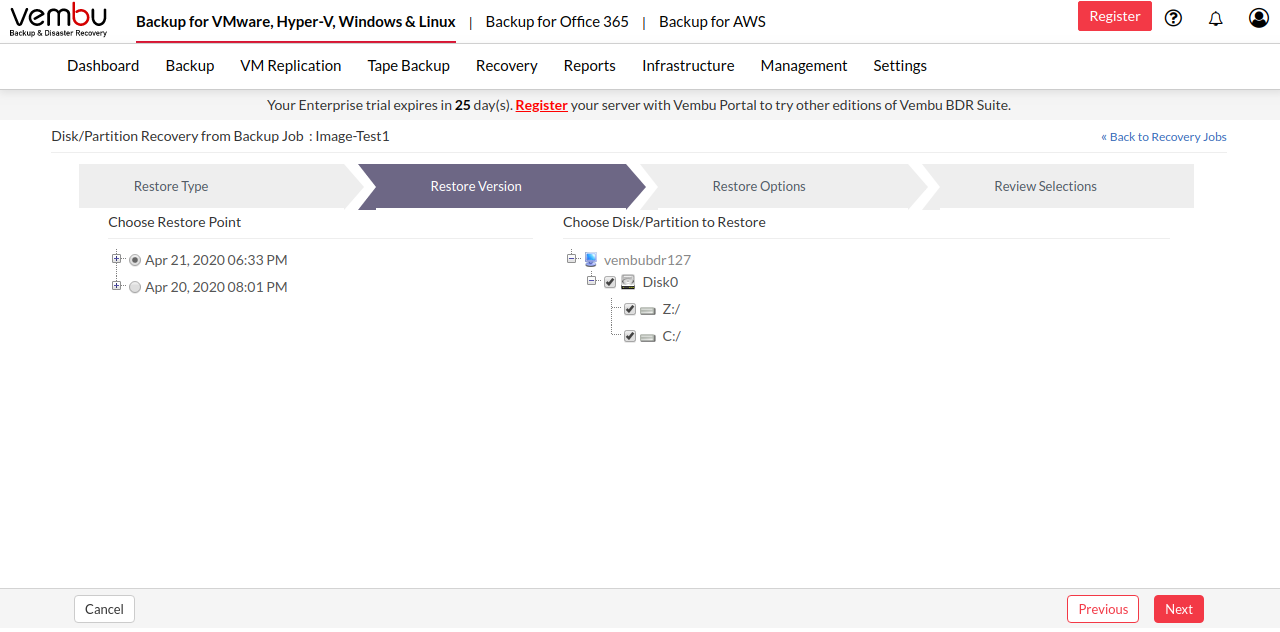
Step 2:Choose a Restore Point
- Select the restore version for the restore process. The restore version is created based on the end time of the backup (i.e the date and time when the backup process scheduled is completed), this is named as Recovery points. The full backup and incremental backup time-stamps are listed with the latest backup version as a parent node and old backup version further sub-nodes. You can fall back to the required time-stamp whenever needed to recover the backed up data.
- If you have configured Additional full backups, then separate restore version time-stamp is created for each full backups with another tree structure.
- If the restore time-stamp version is denoted with symbols (d), (w), (m), (+P) at the end, indicates that the Daily Merge (d), Weekly Merge (w), Monthly Merge (m), and Persistent boot changes (+P) process has taken place on the version. Here (d), (w), (m) restore version specifies the merge process has done on the recovery point and Persistent boot changes (+P) specifies the Quick VM Recovery process has been done for that version.
- If you select Restore version time-stamp with (+P), you have to enable Include persistent boot changes in restore option to include the changes done during the previous boot restore process. If you don't enable the check-box, then the changes will not be included in the selected recovery process.
- You can select the full backup time-stamp for restore as well as the individual incremental time-stamp version for the restore process. On selecting the full backup recovery point, only the data of the full backup version is restored.
You can enable only one time-stamp for restore at a time |
Step 3: Choose the Disk/Partition to Restore
- Select the backup data to be restored based on the requirement: at the disk level or at the partition level. Once you have selected the restore data, click Next to proceed with the restore process.
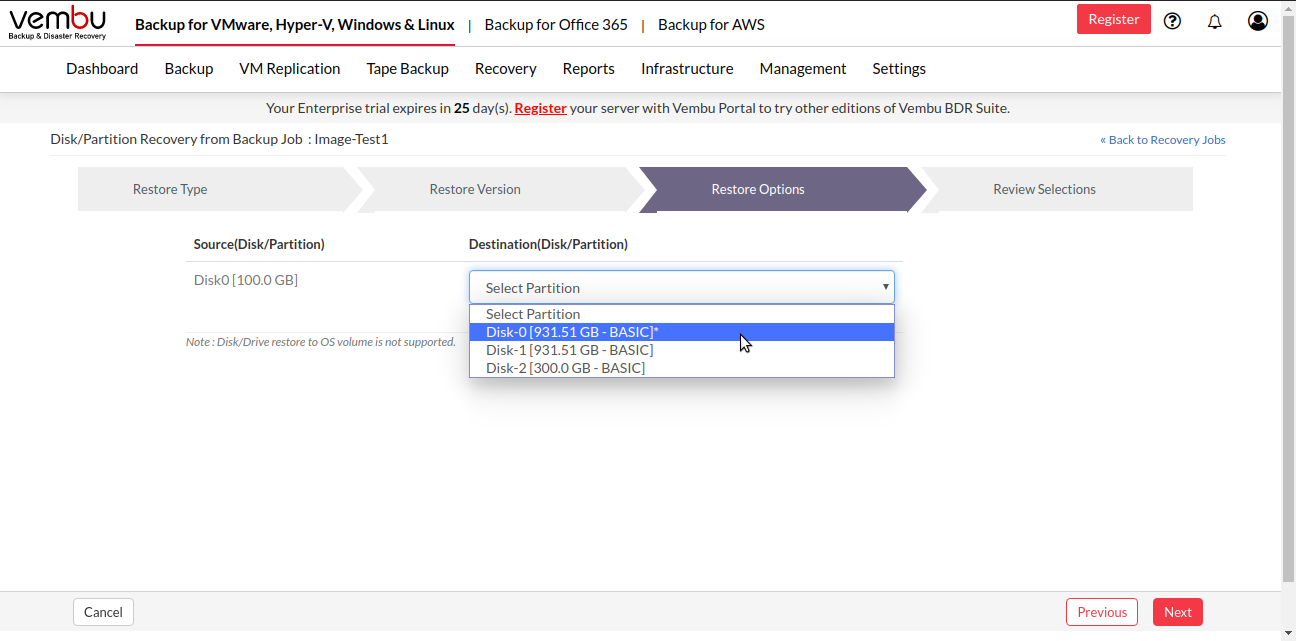
Step 4: Choose the Destination Disk/Partition
Disk Level Recovery
- If the data to be restored is selected at the disk level, you can choose from the list of disks available in the server machine.
- The destination disk chosen to perform restore will be displayed with its available storage space. The available space in the destination disk must be large enough to accommodate the backup data that is being recovered.
Disk/Drive restore to the OS volume is not supported |
Partition Level Recovery
- If the data to be restored is selected at the partition level, you can choose from the list of partitions available in the server machine. The chosen destination drive or volume will be displayed with its total space, available space and the type of drive.
- Once done configuring the restore options click Next to review your selections.
Step 5: Review Recovery Configuration
- Once done configuring restore options, proceed to review configuration. The page will list the
- Selected Restore type
- Selected restore version
- Selected disks/drives for restore
- List of source and target Disks/Drives selected
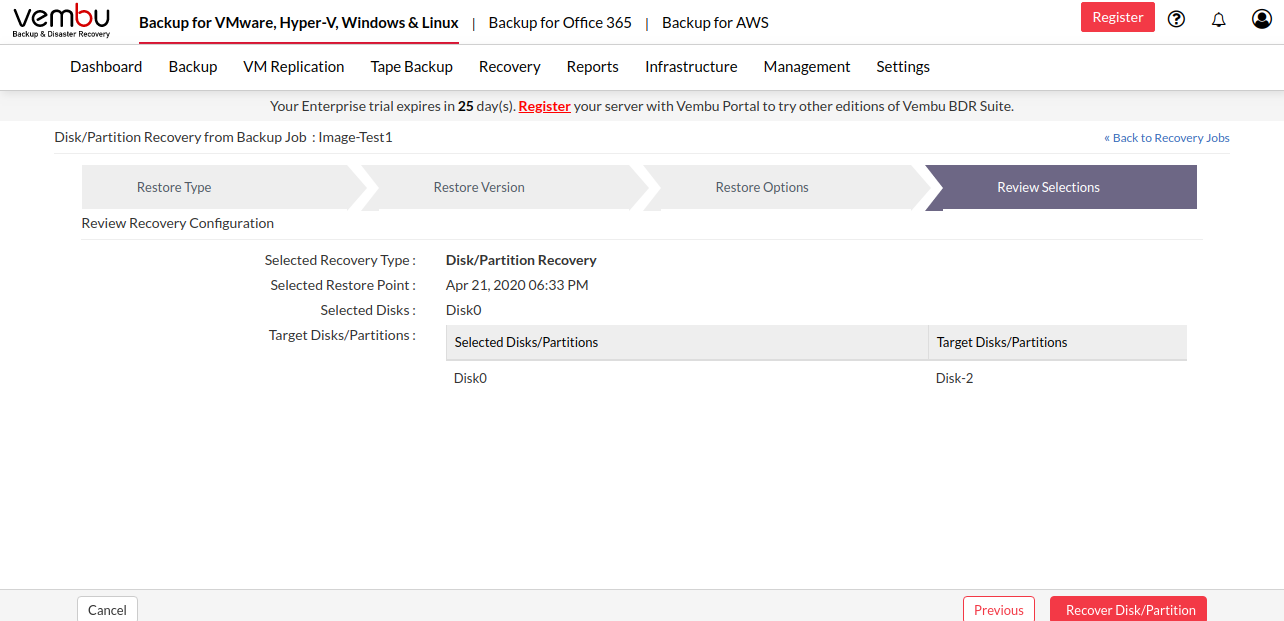
- Once you have reviewed your selections, click Restore Now to begin the restore. You will be redirected to the recovery page once the restore process is completed.
- You can view the status of the Restore from the Status option. Once you click the inverted arrow mark, the page that is displayed below will be available.

The following details will be available in the Restore Progress Page window
- Backup Schedule: The backup schedule name mentioned while creating a backup job.
- Client Name: The name of the client from which the backup process is initiated
- Total Files: The number of disk/Drives present in the selected backup
- Transfer Rate: Speed of the restore process
- Bytes transferred: Rate at which the backup data is restored (Bytes, KB, MB, GB)
- Files Restored: Number of Disk/Drives restored during the process of recovery
- Time Left: Time remaining for the restore to complete
- You have the option of aborting the restore process. From the Recovery page click the Abort Server Side Restore option, this will open a pop-up window as displayed below. Click Yes to abort the restore.

- Or open the restore progress window and click the Abort (-) option which will open a pop-up window displayed below. Click OK to abort the restore process.

To enhance your restore performance, close the progress window and open it only occasionally to check the restore progress. |
Tip: You must ensure the details about the target drive prior selection for Disk/Partition level Recovery
Limitations
- For Dynamic Volumes, Partition Recovery is not supported
- Ensure that the Target Dynamic volumes are compatible with source dynamic volumes during recovery ( For Example, source Dynamic mirror volumes can be restored only if the selected target volume is a Dynamic mirror)
- The destination drive or the target disk selected which is formatted to perform restore and cannot be recovered