Download Disks
Download Disks
With the Download Disks option, you can download your physical machine data as an image file and export it to a local destination. You can migrate your VM across hypervisors (V2V) by downloading the file-format required for the target hypervisor. Backup data can be downloaded in various virtual disk formats which are mentioned below :
- VHD
- VHDX
- VMDK
- Flat-VMDK
- RAW image file
Procedure
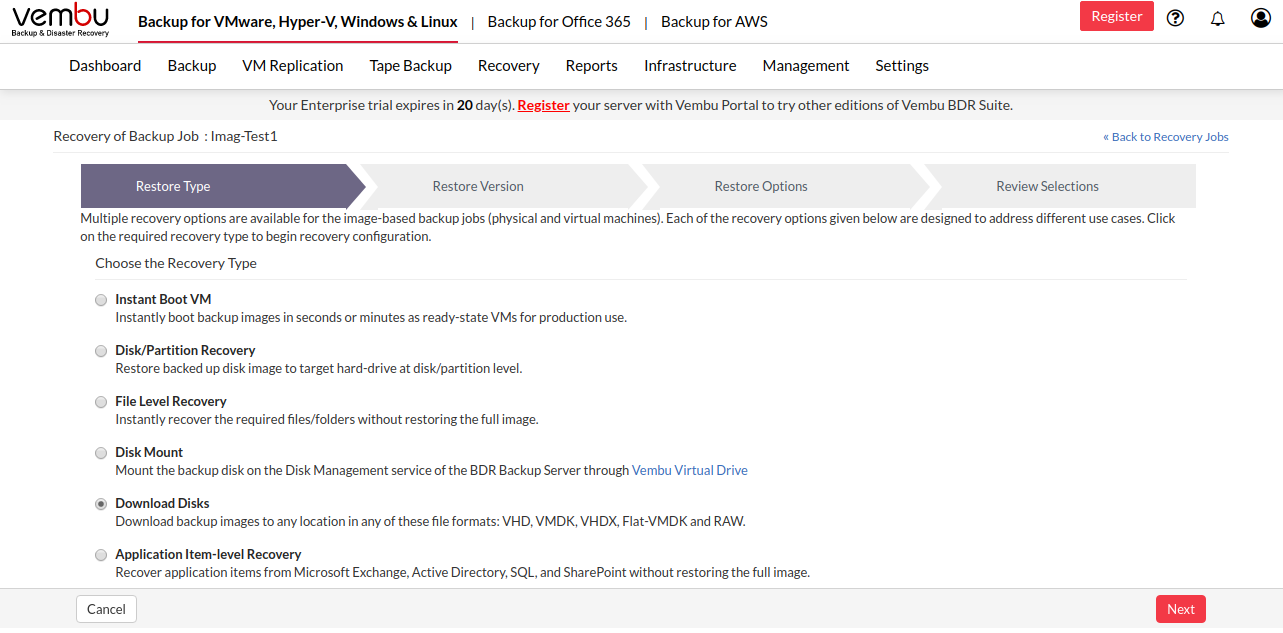
Step 1: Choose Restore Type
- Click the Recovery tab and select the restore icon near the Windows Image Backup that is to be restored. Select Download Disks as the Restore type and click Next to proceed with the restore process.
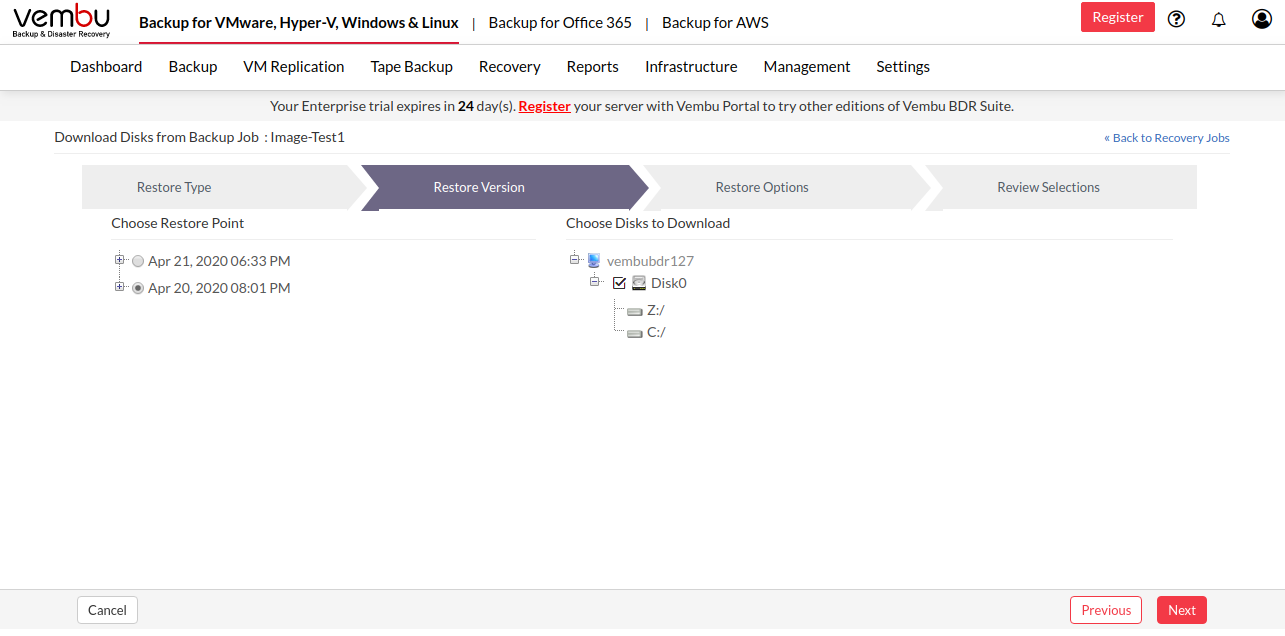
Step 2: Choose a Restore Point
- Select the restore version for the restore process. The restore version is created based on the end time of the backup (i.e the date and time when the backup process scheduled is completed), this is named Recovery points. The full backup and incremental backup time-stamps are listed with the latest backup version as a parent node and old backup version further sub-nodes. You can fall back to the required time-stamp whenever needed to recover the backed up data.
- If you have configured Additional full backups, then separate restore version time-stamp is created for each full backups with another tree structure.
- If the restore time-stamp version is denoted with symbols (d), (w), (m), (+P) at the end, indicates that the Daily Merge (d), Weekly Merge (w), Monthly Merge (m), and Persistent boot changes (+P) process has taken place on the version. Here (d), (w), (m) restore version specifies the merge process has done on the recovery point and Persistent boot changes (+P) specifies the Instant Boot VM process has been done for that version.
- If you select Restore version time-stamp with (+P), you have to enable Include persistent boot changes in restore option to include the changes done during the previous boot restore process. If you don't enable the check-box, then the changes will not be included in the selected recovery process.
- You can select the full backup time-stamp for restore as well as the individual incremental time-stamp version for the restore process. On selecting the full backup recovery point, only the data of the full backup version is restored.
- Once done selecting the time-stamp version, click Next to configure the Restore data.
You can select only one time-stamp for restore at a time |

Step 3: Choose Disks to Download
- The disks that are backed up will be listed in a structural order. If your backup has multiple disks under it, you can either select all the disks or select only the disks that you need to restore.
- You can view the individual volumes/drives under the disk by expanding the node. You are not allowed to select the volumes/drives under the disks for restore.
- Click Next to proceed with the restore process.
Step 4: Choose the Target Location and Format for Download
- The next step is to configure the restore location to which the files will be downloaded in the selected format. Make sure you have enough space in the restore location. The location can be a local drive or a network drive you have mapped using the BDR Backup Server.
- From the Virtual Disk Format drop-down list, select the format in which you want to download your backup data. Click Next to review your restore configurations.
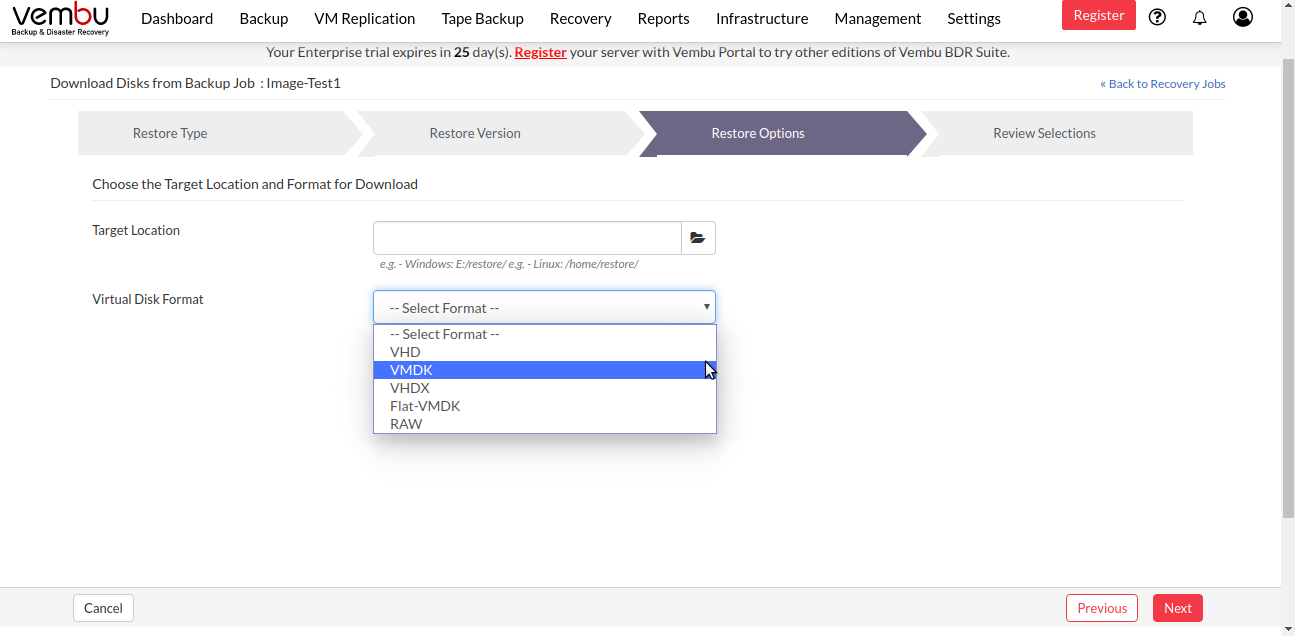
Flat VMDK restore is not supported for Generation 2 Guest OSes with more than 2TB disk |
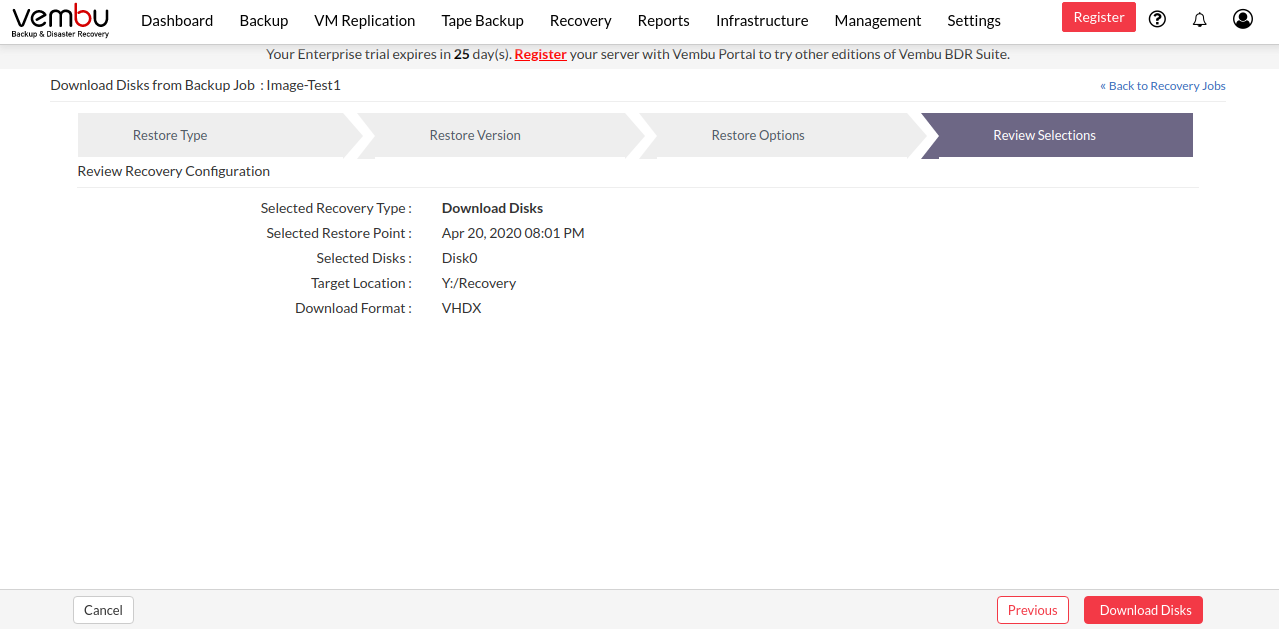
Step 5: Review Recovery Configuration
- The final step in this restore process is to review the configurations you have selected.
- Check the following:
- Restore type
- Restore version
- Selected VM Machine
- Target Location
- Restore Format
- Review all the configurations of Download Disks Recovery and click Download Disks to download the disks in the required file format in the targeted location.
- You will be redirected to the recovery page. In the Status tab, click the arrow mark which will open the restore progress window.
- The following details will be available in the restore progress page:
- Backup Schedule
- User Name
- Current File
- Total Files
- Transfer Rate
- Files Restored

- You have the option of aborting the restore process. From the Recovery page click the Abort Server Side Restore option, this will open a pop-up window as displayed below. Click Yes to abort the restore.

To enhance your restore performance, close the progress window and open it only occasionally to check the restore progress |
- Or open the restore progress window and click the Abort (-) option which will open a pop-up window displayed below. Click OK to abort the restore process.

You can download any other file format and use it to migrate your VMs to another hypervisor. This downloaded file can also be used for cross-platform migration |